
Operating Instructions
Page 3
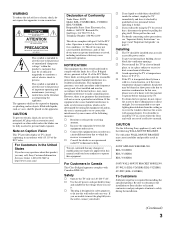
... operating it . s Avoid operating the TV at temperatures below 41°F (5°C). CAUTION Use the following Sony appliance(s) only with the following measures: s Reorient or relocate the receiving antenna. Sony Customer Information Services Center 1-800-222-7669 or http://www.sony.com/ Declaration of a reflective material. KDL-V26XBR1 KDL-V32XBR1 KDL-V40XBR1 SONY WALL-MOUNT BRACKET MODEL NO. Address...
... operating it . s Avoid operating the TV at temperatures below 41°F (5°C). CAUTION Use the following Sony appliance(s) only with the following measures: s Reorient or relocate the receiving antenna. Sony Customer Information Services Center 1-800-222-7669 or http://www.sony.com/ Declaration of a reflective material. KDL-V26XBR1 KDL-V32XBR1 KDL-V40XBR1 SONY WALL-MOUNT BRACKET MODEL NO. Address...
Operating Instructions
Page 5
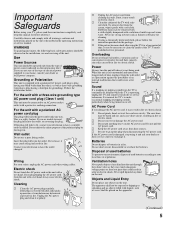
... cautions and instructions placed on the unit. If the plug is a safety feature. To remove dust from heat sources. s If using the TV for TV's to make occasional snapping or popping sounds, particularly when being used batteries according to your local laws or regulations. It is normal for a ...of time, it may deteriorate and result in electric shock. s Keep the AC power cord away from the screen, wipe it gently with a wet hand. Important Safeguards Before using it and ask your dealer or Sony service center to exchange it. s Do not pinch, bend, or twist the cord excessively.
... cautions and instructions placed on the unit. If the plug is a safety feature. To remove dust from heat sources. s If using the TV for TV's to make occasional snapping or popping sounds, particularly when being used batteries according to your local laws or regulations. It is normal for a ...of time, it may deteriorate and result in electric shock. s Keep the AC power cord away from the screen, wipe it gently with a wet hand. Important Safeguards Before using it and ask your dealer or Sony service center to exchange it. s Do not pinch, bend, or twist the cord excessively.
Operating Instructions
Page 6
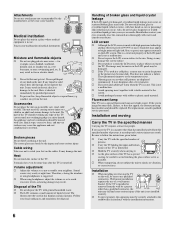
... . Heat Do not touch the surface of liquid crystal. s The LCD contains a small amount of the TV. LCD screen s Although the LCD screen is a safety hazard. s Do not expose the LCD screen surface to follow the instructions given below. s If the TV is not installed securely. Fluorescent lamp This TV uses a special fluorescent lamp as possible. Installation and moving Carry...
... . Heat Do not touch the surface of liquid crystal. s The LCD contains a small amount of the TV. LCD screen s Although the LCD screen is a safety hazard. s Do not expose the LCD screen surface to follow the instructions given below. s If the TV is not installed securely. Fluorescent lamp This TV uses a special fluorescent lamp as possible. Installation and moving Carry...

Operating Instructions
Page 7
.... s Never block the slots and openings by placing the unit on the wall, allow this TV near the seashore may heat up and cause damage to reduce the humidity and temperature of the screen height, and in a ship or vessel. Ship and vessel Do not install this unit outdoors. Bumping of the...
.... s Never block the slots and openings by placing the unit on the wall, allow this TV near the seashore may heat up and cause damage to reduce the humidity and temperature of the screen height, and in a ship or vessel. Ship and vessel Do not install this unit outdoors. Bumping of the...

Operating Instructions
Page 10
...Options 73 Accessing the Audio Settings 74 Selecting Audio Options 74 Selecting PC Audio Options 76 Accessing the Screen Settings 77 Selecting Screen Options 77 Selecting PC Screen Options 79 Accessing the Channel Settings 80 Selecting Channel Options 80 Accessing the Parental Lock Settings 82 ... 87 Selecting PC Setup Options 88 Accessing the Applications Settings 90 Selecting Applications Options 90 Other Information Overview 92 Contacting Sony 92 Troubleshooting 92 Remote Control 92 CableCARD Device 93 Video 93 Audio 94 Channels 95 USB 95 General 97 Specifications 98...
...Options 73 Accessing the Audio Settings 74 Selecting Audio Options 74 Selecting PC Audio Options 76 Accessing the Screen Settings 77 Selecting Screen Options 77 Selecting PC Screen Options 79 Accessing the Channel Settings 80 Selecting Channel Options 80 Accessing the Parental Lock Settings 82 ... 87 Selecting PC Setup Options 88 Accessing the Applications Settings 90 Selecting Applications Options 90 Other Information Overview 92 Contacting Sony 92 Troubleshooting 92 Remote Control 92 CableCARD Device 93 Video 93 Audio 94 Channels 95 USB 95 General 97 Specifications 98...
Operating Instructions
Page 11
...Sony LCD digital TV. See page 98 for the complete list of the features that allows you will enjoy with your new TV, the packing box contains a remote control, and two AA (R6) batteries. This engine features unique Sony technology, including: • The first step in wide screen (16:9) mode. s S-master Full Digital...deterioration caused by digital mapping processing. Some of packaging contents. s WEGA Engine: Delivers superb picture quality from younger viewers. (Continued) 11 The DRC Palette option lets you for models KDL-V26XBR1, KDL-V32XBR1 and KDL-V40XBR1. s ...
...Sony LCD digital TV. See page 98 for the complete list of the features that allows you will enjoy with your new TV, the packing box contains a remote control, and two AA (R6) batteries. This engine features unique Sony technology, including: • The first step in wide screen (16:9) mode. s S-master Full Digital...deterioration caused by digital mapping processing. Some of packaging contents. s WEGA Engine: Delivers superb picture quality from younger viewers. (Continued) 11 The DRC Palette option lets you for models KDL-V26XBR1, KDL-V32XBR1 and KDL-V40XBR1. s ...

Operating Instructions
Page 15
...the timers or Sleep is set by setting Power Management to On in red continuously, this LED will remain lit even if the TV is turned off. Receives IR signals from the remote control. Outputs audio signal. 15 The LED lights up in standby mode for... the sensor, as its function may indicate the TV needs servicing (see page 90. For details, see "Contacting Sony" on . Senses room light level and adjusts the screen brightness accordingly (for both TV and PC input. TV Controls and Connectors Front Panel Introducing the TV Introducing the TV 5 PIC OFF TIMER POWER/STANDBY 1 2 3...
...the timers or Sleep is set by setting Power Management to On in red continuously, this LED will remain lit even if the TV is turned off. Receives IR signals from the remote control. Outputs audio signal. 15 The LED lights up in standby mode for... the sensor, as its function may indicate the TV needs servicing (see page 90. For details, see "Contacting Sony" on . Senses room light level and adjusts the screen brightness accordingly (for both TV and PC input. TV Controls and Connectors Front Panel Introducing the TV Introducing the TV 5 PIC OFF TIMER POWER/STANDBY 1 2 3...

Operating Instructions
Page 16
... Connects to your DVD player 2 IN or digital TV receiver. buttons. 8 /TV/VIDEO Press to scan through the video equipment connected to the TV's video inputs. 9 WEGA GATE Press to exit WEGA GATE. On the WEGA GATE screen, these buttons serve as a reference when operating the TV. 16 Introducing the TV Side Panel Left side 1 2 3 4 R AUDIO L(MONO...
... Connects to your DVD player 2 IN or digital TV receiver. buttons. 8 /TV/VIDEO Press to scan through the video equipment connected to the TV's video inputs. 9 WEGA GATE Press to exit WEGA GATE. On the WEGA GATE screen, these buttons serve as a reference when operating the TV. 16 Introducing the TV Side Panel Left side 1 2 3 4 R AUDIO L(MONO...
Operating Instructions
Page 30
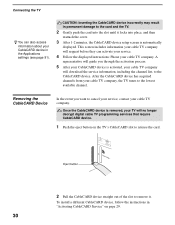
... the slot to the CableCARD device. This screen includes information your cable TV company will guide you want to cancel your service, contact your cable TV company. Once the CableCARD device is activated, your TV will download the service information, including the ...After 1-2 minutes, the CableCARD device setup screen is automatically displayed. Removing the CableCARD Device In the event you through the activation process. 5 After your CableCARD device is removed, your cable TV company will no longer decrypt digital cable TV programming services that require CableCARD device. ...
... the slot to the CableCARD device. This screen includes information your cable TV company will guide you want to cancel your service, contact your cable TV company. Once the CableCARD device is activated, your TV will download the service information, including the ...After 1-2 minutes, the CableCARD device setup screen is automatically displayed. Removing the CableCARD Device In the event you through the activation process. 5 After your CableCARD device is removed, your cable TV company will no longer decrypt digital cable TV programming services that require CableCARD device. ...

Operating Instructions
Page 31
...appears. You will automatically create a list of receivable channels for all receivable channels are being scanned. The Initial Setup screen appears when you choose to set up . The Initial Setup screen appears. 2 Press V or v to complete. The message "First please connect cable and/or antenna." Auto ...antenna or CABLE). Auto Program may take a while (20 to 50 minutes) to highlight the on the TV. Auto Program will appear each RF input to create a list of available analog and digital channels. appears. 3 Press V or v to highlight "Yes" then press . A progress bar is ...
...appears. You will automatically create a list of receivable channels for all receivable channels are being scanned. The Initial Setup screen appears when you choose to set up . The Initial Setup screen appears. 2 Press V or v to complete. The message "First please connect cable and/or antenna." Auto ...antenna or CABLE). Auto Program may take a while (20 to 50 minutes) to highlight the on the TV. Auto Program will appear each RF input to create a list of available analog and digital channels. appears. 3 Press V or v to highlight "Yes" then press . A progress bar is ...

Operating Instructions
Page 39
... unstable, use the supplied cable holder to video output connector of the computer. For some Apple Macintosh computers, it may be necessary to the TV, you can view and listen to the computer before connecting the HD15HD15 cable. To connect a PC (personal computer) If you can watch your...audio output jack If the audio cable is noisy, flickering or not clear, adjust the Phase and Pitch in the PC Screen settings on the TV. Connecting the TV Connecting the TV Personal Computer z When connecting to an Apple Macintosh computer, use the supplied HD15-HD15 cable to connect PC IN of ...
... unstable, use the supplied cable holder to video output connector of the computer. For some Apple Macintosh computers, it may be necessary to the TV, you can view and listen to the computer before connecting the HD15HD15 cable. To connect a PC (personal computer) If you can watch your...audio output jack If the audio cable is noisy, flickering or not clear, adjust the Phase and Pitch in the PC Screen settings on the TV. Connecting the TV Connecting the TV Personal Computer z When connecting to an Apple Macintosh computer, use the supplied HD15-HD15 cable to connect PC IN of ...

Operating Instructions
Page 43
... PAUSE: Press to display channel number, label, current time and other information. Press to select the function of connected components. TV/SAT: While in the Screen setting. Press to reduce the power consumption. Press to switch between the satellite receiver and antenna. The MTS setting can be ...51. By pressing this TOOLS function. (Non-operable button for details on page 74. Press again to access the following through the Multi-channel TV Sound (MTS) options: Stereo, Auto SAP (Second Audio Program), and Mono. x REC STOP: Press to restore the picture. Press to...
... PAUSE: Press to display channel number, label, current time and other information. Press to select the function of connected components. TV/SAT: While in the Screen setting. Press to reduce the power consumption. Press to switch between the satellite receiver and antenna. The MTS setting can be ...51. By pressing this TOOLS function. (Non-operable button for details on page 74. Press again to access the following through the Multi-channel TV Sound (MTS) options: Stereo, Auto SAP (Second Audio Program), and Mono. x REC STOP: Press to restore the picture. Press to...

Operating Instructions
Page 46
... Cable Box Some functions cannot be operated depending on the screen for your TV, first turn to operate the cable box SAT/CABLE (.../CABLE (FUNCTION) Turn on /off POWER Select a channel 0-9, ENT Change channels CH +/- Watching the TV Using Other Equipment with Your Remote Control To operate other connected equipment with the equipment. In that case... the necessary code. Press ... Display SAT Guide Display SAT Menu Move highlight (cursor) Select item Switch between the TV and satellite broadcasts Press ... M m X (press again to resume normal playback) M or m during playback Step...
... Cable Box Some functions cannot be operated depending on the screen for your TV, first turn to operate the cable box SAT/CABLE (.../CABLE (FUNCTION) Turn on /off POWER Select a channel 0-9, ENT Change channels CH +/- Watching the TV Using Other Equipment with Your Remote Control To operate other connected equipment with the equipment. In that case... the necessary code. Press ... Display SAT Guide Display SAT Menu Move highlight (cursor) Select item Switch between the TV and satellite broadcasts Press ... M m X (press again to resume normal playback) M or m during playback Step...
Operating Instructions
Page 50
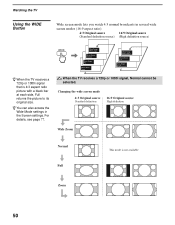
... a 720p or 1080i signal, Normal cannot be selected. Watching the TV Using the WIDE Button Wide screen mode lets you watch 4:3 normal broadcasts in the Screen settings. Changing the wide screen mode 4:3 Original source Standard definition 16:9 Original source High definition Wide Zoom Normal Full This... the picture to its original size. For details, see page 77. z You can also access the Wide Mode settings in several wide screen modes (16:9 aspect ratio). 4:3 Original source 16:9 Original source (Standard definition source) (High definition source) WIDE Wide Mode : Wide...
... a 720p or 1080i signal, Normal cannot be selected. Watching the TV Using the WIDE Button Wide screen mode lets you watch 4:3 normal broadcasts in the Screen settings. Changing the wide screen mode 4:3 Original source Standard definition 16:9 Original source High definition Wide Zoom Normal Full This... the picture to its original size. For details, see page 77. z You can also access the Wide Mode settings in several wide screen modes (16:9 aspect ratio). 4:3 Original source 16:9 Original source (Standard definition source) (High definition source) WIDE Wide Mode : Wide...

Operating Instructions
Page 52
SUR DISPLAY GUIDE TOOLS RETURN WEGA GATE PREV REPLAY ADVANCE NEXT PLAY VISUAL SEARCH PAUSE STOP VOL CH 1 Press WEGA GATE on the screen rather than a variety of remote control button presses. WEGA GATE Favorites C Cable Antenna External Inputs Photo Video Settings Press WEGA GATE to... item. 3 Press to select. 4 Press WEGA GATE to perform a variety of WEGA GATE WEGA GATE provides one button access for controlling your TV. When you press WEGA GATE , you to exit. 52 WEGA GATE control panel appears. Introducing WEGA GATE Overview of tasks intuitively with a control...
SUR DISPLAY GUIDE TOOLS RETURN WEGA GATE PREV REPLAY ADVANCE NEXT PLAY VISUAL SEARCH PAUSE STOP VOL CH 1 Press WEGA GATE on the screen rather than a variety of remote control button presses. WEGA GATE Favorites C Cable Antenna External Inputs Photo Video Settings Press WEGA GATE to... item. 3 Press to select. 4 Press WEGA GATE to perform a variety of WEGA GATE WEGA GATE provides one button access for controlling your TV. When you press WEGA GATE , you to exit. 52 WEGA GATE control panel appears. Introducing WEGA GATE Overview of tasks intuitively with a control...
Operating Instructions
Page 53
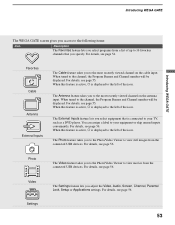
...left of the icon. For details, see page 55. For details, see page 56. Introducing WEGA GATE Introducing WEGA GATE The WEGA GATE screen gives you access to the following items: Icon Description The Favorites feature lets you select programs from the connected USB devices. When tuned to ...or skip unused inputs conveniently. Photo The Video feature takes you specify. For details, see page 56. The Photo feature takes you to your TV, such as a DVD player. You can assign a label to the most recently viewed channel on the cable input. Video Settings The Settings feature...
...left of the icon. For details, see page 55. For details, see page 56. Introducing WEGA GATE Introducing WEGA GATE The WEGA GATE screen gives you access to the following items: Icon Description The Favorites feature lets you select programs from the connected USB devices. When tuned to ...or skip unused inputs conveniently. Photo The Video feature takes you specify. For details, see page 56. The Photo feature takes you to your TV, such as a DVD player. You can assign a label to the most recently viewed channel on the cable input. Video Settings The Settings feature...

Operating Instructions
Page 56
..." on page 69. 56 External Inputs Exit Video 1 VHS Video 2 Video 3 Video 4 Video 5 Video 6 Video 7 Edit Video Labels 2 Press M/m to the settings screen where most of advanced settings and adjustments are performed. Input label assignment can assign a label or skip over unused inputs by going to Setup settings... the connected USB devices. For details, see page 85). 1 Select External Inputs from the WEGA GATE control panel and press . Make your TV. You can also be done by selecting Edit Video Labels. For details, see page 57. Using Settings in WEGA GATE The Settings feature lets...
..." on page 69. 56 External Inputs Exit Video 1 VHS Video 2 Video 3 Video 4 Video 5 Video 6 Video 7 Edit Video Labels 2 Press M/m to the settings screen where most of advanced settings and adjustments are performed. Input label assignment can assign a label or skip over unused inputs by going to Setup settings... the connected USB devices. For details, see page 85). 1 Select External Inputs from the WEGA GATE control panel and press . Make your TV. You can also be done by selecting Edit Video Labels. For details, see page 57. Using Settings in WEGA GATE The Settings feature lets...
Operating Instructions
Page 57
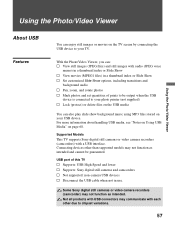
... movies on page 68. For more information about handling USB media, see "Notes on Using USB Media" on the TV screen by connecting the USB device to your TV. Not all products with audio (JPEG voice memo) in a thumbnail index or Slide Show s View movies (MPEG1 ...cannot be output when the USB device is connected to chipset variations. 57 Some Sony digital still cameras or video camera recorders (camcorder) may communicate with a USB interface. Supported Models This TV supports Sony digital still cameras or video camera recorders (camcorders) with each other than supported models...
... movies on page 68. For more information about handling USB media, see "Notes on Using USB Media" on the TV screen by connecting the USB device to your TV. Not all products with audio (JPEG voice memo) in a thumbnail index or Slide Show s View movies (MPEG1 ...cannot be output when the USB device is connected to chipset variations. 57 Some Sony digital still cameras or video camera recorders (camcorder) may communicate with a USB interface. Supported Models This TV supports Sony digital still cameras or video camera recorders (camcorders) with each other than supported models...

Operating Instructions
Page 58
..., connect the USB port on the left side panel of the TV to turn off the TV (power button on the large screen of the TV and output the sound to a media such as Memory Stick in your digital still camera. Left side of TV USB Cable Y To USB port (1080i/720p/480p/480i) VIDEO/HD.../DVD IN 2 R AUDIO L(MONO) VIDEO PR/CR PB/CB Sony digital still cameras or...
..., connect the USB port on the left side panel of the TV to turn off the TV (power button on the large screen of the TV and output the sound to a media such as Memory Stick in your digital still camera. Left side of TV USB Cable Y To USB port (1080i/720p/480p/480i) VIDEO/HD.../DVD IN 2 R AUDIO L(MONO) VIDEO PR/CR PB/CB Sony digital still cameras or...

Operating Instructions
Page 59
... view. For details, see "Connecting the USB Cable" on page 58. Using the Photo/Video Viewer Using the Photo/Video Viewer Index Turn on the TV and connect your USB device, see "Protect" on pages 62 and 65. To connect your USB device that contains the photo or movie files you... want to view full screen USB Media Exit About the Icons on the Thumbnail Images Indicates the thumbnail is a movie (MPEG1) file instead of a photo (JPEG) file.
... view. For details, see "Connecting the USB Cable" on page 58. Using the Photo/Video Viewer Using the Photo/Video Viewer Index Turn on the TV and connect your USB device, see "Protect" on pages 62 and 65. To connect your USB device that contains the photo or movie files you... want to view full screen USB Media Exit About the Icons on the Thumbnail Images Indicates the thumbnail is a movie (MPEG1) file instead of a photo (JPEG) file.


