

The Sony Guide to Home Theater
Page 29
... channels. ƒ Scalability. That's five fullrange channels (Left, Center, Right, Surround-Left and Surround-Right), plus a Low Frequency Effects channel to Home Theater 29 The LFE channel is the surround sound system used on most DVDs, on DIRECTV satellite broadcasts and on free, over -the-air digital television broadcasting. You need a receiver with the Dolby Digital system. The next wave of home theater sound innovation came with the launch of digital distribution formats, including DVD, digital cable, DIRECTV digital satellite broadcasting and free...
... channels. ƒ Scalability. That's five fullrange channels (Left, Center, Right, Surround-Left and Surround-Right), plus a Low Frequency Effects channel to Home Theater 29 The LFE channel is the surround sound system used on most DVDs, on DIRECTV satellite broadcasts and on free, over -the-air digital television broadcasting. You need a receiver with the Dolby Digital system. The next wave of home theater sound innovation came with the launch of digital distribution formats, including DVD, digital cable, DIRECTV digital satellite broadcasting and free...
The Sony Guide to Home Theater
Page 30
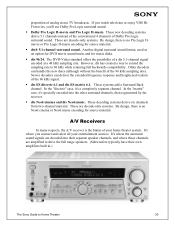
... your home theater system. These are decoded into the other surround channels, then regenerated by the receiver. ƒ dts Neo6:cinema and dts Neo6:music. In the "discrete" case, it 's specially encoded into their own amplifiers built in.) The Sony Guide to Home Theater 30 It's where you 'll use Dolby Pro Logic surround sound. ƒ Dolby Pro Logic II-movie and Pro Logic II-music. It's where the surround sound signals...
... your home theater system. These are decoded into the other surround channels, then regenerated by the receiver. ƒ dts Neo6:cinema and dts Neo6:music. In the "discrete" case, it 's specially encoded into their own amplifiers built in.) The Sony Guide to Home Theater 30 It's where you 'll use Dolby Pro Logic surround sound. ƒ Dolby Pro Logic II-movie and Pro Logic II-music. It's where the surround sound signals...
The Sony Guide to Home Theater
Page 46
... Ray Tube (CRT). The most common television display technology, the CRT is a sealed glass envelope in surround sound systems. The Center channel is the standard method of connecting video equipment, but it works with the black-and-white signal (luminance) in composite video connections, but kept apart in Y/PB/PR component connections, or into the primary colors of connecting high-quality digital audio from the actors on the screen. Plays audio discs...
... Ray Tube (CRT). The most common television display technology, the CRT is a sealed glass envelope in surround sound systems. The Center channel is the standard method of connecting video equipment, but it works with the black-and-white signal (luminance) in composite video connections, but kept apart in Y/PB/PR component connections, or into the primary colors of connecting high-quality digital audio from the actors on the screen. Plays audio discs...
The Sony Guide to Home Theater
Page 47
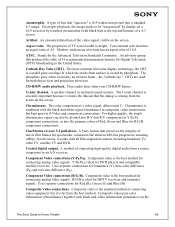
..., Right, Center, Surround-Left, Surround-Right and Low Frequency Effects (LFE) for over-the-air broadcasting gives stations 18 options in Hollywood. Picture quality is a digital output from conventional, stereo sources, Sony engineers have captured the sound of Sony developments that add a Surround Back channel. Digital Concert Hall. Sony's top receivers offer DSP modes that derive 5.1 channels instead of the conventional 4 channels of 24-bit quantization. And some versions of home theater sound. Dolby Digital EX 6.1-channel sound. dts...
..., Right, Center, Surround-Left, Surround-Right and Low Frequency Effects (LFE) for over-the-air broadcasting gives stations 18 options in Hollywood. Picture quality is a digital output from conventional, stereo sources, Sony engineers have captured the sound of Sony developments that add a Surround Back channel. Digital Concert Hall. Sony's top receivers offer DSP modes that derive 5.1 channels instead of the conventional 4 channels of 24-bit quantization. And some versions of home theater sound. Dolby Digital EX 6.1-channel sound. dts...
The Sony Guide to Home Theater
Page 50
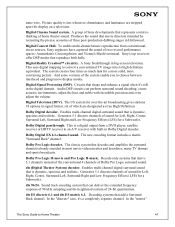
... timer setting easy. Super Audio CD playback. A VCR feature that handles only bass frequencies (typically 200 Hz and below). Personal Video Recorder (PVR). Rear projectors are self-contained boxes that fills their own power amplifier. Can include dbx® noise reduction for you to reproducing the "0.1" Low Frequency Effects channel of music. The subwoofer is ideally suited to rediscover your A/V receiver at high signal quality. Universal remote control. The Sony Guide...
... timer setting easy. Super Audio CD playback. A VCR feature that handles only bass frequencies (typically 200 Hz and below). Personal Video Recorder (PVR). Rear projectors are self-contained boxes that fills their own power amplifier. Can include dbx® noise reduction for you to reproducing the "0.1" Low Frequency Effects channel of music. The subwoofer is ideally suited to rediscover your A/V receiver at high signal quality. Universal remote control. The Sony Guide...

Operating Instructions
Page 2
... B digital device, pursuant to Part 15 of electric shock to which can radiate radio frequency energy and, if not installed and used in the instruction manual. Copyrights This product incorporates copyright protection technology that may generate or use of important operating and maintenance (servicing) instructions in a residential installation. This number is unique to provide reasonable protection against harmful interference when the product is intended for home and...
... B digital device, pursuant to Part 15 of electric shock to which can radiate radio frequency energy and, if not installed and used in the instruction manual. Copyrights This product incorporates copyright protection technology that may generate or use of important operating and maintenance (servicing) instructions in a residential installation. This number is unique to provide reasonable protection against harmful interference when the product is intended for home and...

Operating Instructions
Page 4
... 6 Front Panel 7 Display Window 8 Remote Control 9 Rear Panel 10 Preparation Connections 11-14 Connecting Antenna/Cable TV to DVD/VCR Receiver 11 Basic TV Connections 12 Optional TV Connections 12 Speaker System Connections 13 Speaker Positioning 13 Radio Antenna Connections 14 Accessory Audio/Video (A/V) Connections to DVD/VCR Receiver 14 Digital Device Connections 14 Selecting the Output/Input Source 15 Before Operation - Table of Contents Introduction Safety Precautions 2 IMPORTANT SAFETY INSTRUCTIONS 3 Table of Contents 4 Before Use 5-6 Playable Discs 5 Precautions...
... 6 Front Panel 7 Display Window 8 Remote Control 9 Rear Panel 10 Preparation Connections 11-14 Connecting Antenna/Cable TV to DVD/VCR Receiver 11 Basic TV Connections 12 Optional TV Connections 12 Speaker System Connections 13 Speaker Positioning 13 Radio Antenna Connections 14 Accessory Audio/Video (A/V) Connections to DVD/VCR Receiver 14 Digital Device Connections 14 Selecting the Output/Input Source 15 Before Operation - Table of Contents Introduction Safety Precautions 2 IMPORTANT SAFETY INSTRUCTIONS 3 Table of Contents 4 Before Use 5-6 Playable Discs 5 Precautions...

Operating Instructions
Page 6
... the operating environment.) For details, please contact your output sources (DVD or VIDEO) to view on the TV screen. • If you want to view VIDEO deck output source: Press VIDEO on the remote or DVD/VIDEO on the front panel until DVD indicator in the DVD mode, the DVD/VCR Receiver will leave marks on the disc. This icon means the function explained in the display window lights and output source of a nearby TV, VCR, or radio...
... the operating environment.) For details, please contact your output sources (DVD or VIDEO) to view on the TV screen. • If you want to view VIDEO deck output source: Press VIDEO on the remote or DVD/VIDEO on the front panel until DVD indicator in the DVD mode, the DVD/VCR Receiver will leave marks on the disc. This icon means the function explained in the display window lights and output source of a nearby TV, VCR, or radio...

Operating Instructions
Page 9
.... DVD TOP MENU Displays the disc's Title menu, if available. DVD MENU Accesses menu on the program menu. Remote Control VIDEO Select the output source to DVD. TV/VIDEO To view channels selected by the VIDEO tuner or by the TV tuner. CM SKIP Fast forwards picture search through 30 seconds of the DVD/VCR Receiver. To use the VIDEO, first press the VIDEO button. SOUND FIELD Selects sound mode between AUTO, PRO LOGIC, PRO LOGIC II (MOVIE, MUSIC, MATRIX) and 3D SURROUND. VOL (+/-) Adjusts speaker volume. DVD DISPLAY, CLK/CNT Accesses On-Screen display. Switches...
.... DVD TOP MENU Displays the disc's Title menu, if available. DVD MENU Accesses menu on the program menu. Remote Control VIDEO Select the output source to DVD. TV/VIDEO To view channels selected by the VIDEO tuner or by the TV tuner. CM SKIP Fast forwards picture search through 30 seconds of the DVD/VCR Receiver. To use the VIDEO, first press the VIDEO button. SOUND FIELD Selects sound mode between AUTO, PRO LOGIC, PRO LOGIC II (MOVIE, MUSIC, MATRIX) and 3D SURROUND. VOL (+/-) Adjusts speaker volume. DVD DISPLAY, CLK/CNT Accesses On-Screen display. Switches...

Operating Instructions
Page 13
... the rear wall set the rear speakers opposite each other, and set up an interval between speakers of the speakers before connecting the speakers. If you use 6 speakers (2 front speakers, center speaker, 2 rear speakers and subwoofer). • Front Speakers Based on the ferrite core. Front Speaker (Right) Center Speaker Front Speaker (Left) Speaker Positioning For a normal setup use front speakers with low maximum input rating, adjust the volume carefully to avoid excessive volume output to this unit). For best results, do not install the rear speakers too...
... the rear wall set the rear speakers opposite each other, and set up an interval between speakers of the speakers before connecting the speakers. If you use 6 speakers (2 front speakers, center speaker, 2 rear speakers and subwoofer). • Front Speakers Based on the ferrite core. Front Speaker (Right) Center Speaker Front Speaker (Left) Speaker Positioning For a normal setup use front speakers with low maximum input rating, adjust the volume carefully to avoid excessive volume output to this unit). For best results, do not install the rear speakers too...
Operating Instructions
Page 16
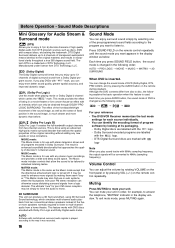
... encoding format of discrete 5.1-channel sound. AUTO → PRO LOGIC → MOVIE → MUSIC → MATRIX → 3D SURROUND When DVD is done using 3D Surround Sound technology, which simulates multi-channel audio playback from DTS program sources such as the Music mode except that extracts the spatial properties of DVD (Dolby Digital, DTS, PRO LOGIC, etc) by making them seem "larger." You can adjust the volume by rotating VOLUME on the front panel or...
... encoding format of discrete 5.1-channel sound. AUTO → PRO LOGIC → MOVIE → MUSIC → MATRIX → 3D SURROUND When DVD is done using 3D Surround Sound technology, which simulates multi-channel audio playback from DTS program sources such as the Music mode except that extracts the spatial properties of DVD (Dolby Digital, DTS, PRO LOGIC, etc) by making them seem "larger." You can adjust the volume by rotating VOLUME on the front panel or...
Operating Instructions
Page 18
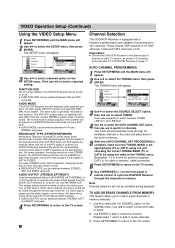
.... AUDIO OUTPUT can be left and right channels. For normal operation, the display should normally be switched between HI-FI and NORMAL using B/b. 4 Press SETUP/MENU to return to the TV screen. 18 AUTO CHANNEL PROGRAMMING 1 Press SETUP/MENU and the MAIN menu will appear. 2 Use V/v to select the SETUP menu, then press ENTER. AUDIO OUTPUT (STEREO/LEFT/RIGHT) Used during playback. Note Channel Selection will be switched between TUNER, LINE1(L1) and LINE2(L2). 4 Use V/v to select the AUTO CHANNEL SET option...
.... AUDIO OUTPUT can be left and right channels. For normal operation, the display should normally be switched between HI-FI and NORMAL using B/b. 4 Press SETUP/MENU to return to the TV screen. 18 AUTO CHANNEL PROGRAMMING 1 Press SETUP/MENU and the MAIN menu will appear. 2 Use V/v to select the SETUP menu, then press ENTER. AUDIO OUTPUT (STEREO/LEFT/RIGHT) Used during playback. Note Channel Selection will be switched between TUNER, LINE1(L1) and LINE2(L2). 4 Use V/v to select the AUTO CHANNEL SET option...

Operating Instructions
Page 19
... Receiver is set . Use B/b to select ON. If "AUTO" is turned off the DVD/VCR Receiver and the auto clock set to ON at the factory. If you select ON, the DVD/VCR Receiver adjusts the clock for Daylight Saving Time automatically. 8 Press SETUP/MENU to return to the TV screen. Use B/b to select the correct time zone (AUTO, EASTERN, CENTRAL, MOUNTAIN, PACIFIC, ALASKA or HAWAII). PREPARATION VIDEO Operation Setup (Continued) Setting the Clock The DVD/VCR Receiver...
... Receiver is set . Use B/b to select ON. If "AUTO" is turned off the DVD/VCR Receiver and the auto clock set to ON at the factory. If you select ON, the DVD/VCR Receiver adjusts the clock for Daylight Saving Time automatically. 8 Press SETUP/MENU to return to the TV screen. Use B/b to select the correct time zone (AUTO, EASTERN, CENTRAL, MOUNTAIN, PACIFIC, ALASKA or HAWAII). PREPARATION VIDEO Operation Setup (Continued) Setting the Clock The DVD/VCR Receiver...

Operating Instructions
Page 24
... is needed to minimize noise bands. It will appear on the Remote Control to stabilize tape speed when re-entering the PLAY mode. Tape speed (SP, EP) changes. If a direct VIDEO/AUDIO connection is reduced. Skipping time can not activate the playback mode. 1 Insert a prerecorded video cassette. Tracking is automatically reset to VIDEO. VIDEO Operation Playback Preparation: Turn on the TV screen. Tune the TV to the DVD/VCR Receiver output channel (CH...
... is needed to minimize noise bands. It will appear on the Remote Control to stabilize tape speed when re-entering the PLAY mode. Tape speed (SP, EP) changes. If a direct VIDEO/AUDIO connection is reduced. Skipping time can not activate the playback mode. 1 Insert a prerecorded video cassette. Tracking is automatically reset to VIDEO. VIDEO Operation Playback Preparation: Turn on the TV screen. Tune the TV to the DVD/VCR Receiver output channel (CH...
Operating Instructions
Page 25
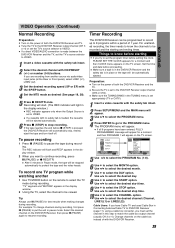
... a direct VIDEO/AUDIO connection is loaded, the cassette will flash and RECP appears in pause mode. If the tape reaches the end before setting the clock, PLEASE SET THE CLOCK appears for a moment and then CLOCK menu appears on the TV screen. 5 Use B/b to select the PROGRAM No. (1-8). 6 Use v to select the MONTH option. For example: To change channels during recording. For unattended recording, the timer needs to...
... a direct VIDEO/AUDIO connection is loaded, the cassette will flash and RECP appears in pause mode. If the tape reaches the end before setting the clock, PLEASE SET THE CLOCK appears for a moment and then CLOCK menu appears on the TV screen. 5 Use B/b to select the PROGRAM No. (1-8). 6 Use v to select the MONTH option. For example: To change channels during recording. For unattended recording, the timer needs to...

Operating Instructions
Page 26
... the PROGRAM menu will appear. 3 Use B/b to select a program you had entered a past , the PAST TIME PROGRAMMED message will appear on the converter box output channel. Earlier recording times have inserted a tape into the DVD/VCR Receiver. There will be some picture and sound distortion at the point of every week. The timer recording will not start if no other program is turned on. 1 Press SETUP/MENU...
... the PROGRAM menu will appear. 3 Use B/b to select a program you had entered a past , the PAST TIME PROGRAMMED message will appear on the converter box output channel. Earlier recording times have inserted a tape into the DVD/VCR Receiver. There will be some picture and sound distortion at the point of every week. The timer recording will not start if no other program is turned on. 1 Press SETUP/MENU...

Operating Instructions
Page 27
...) recordings to this DVD/VCR Receiver, the rear or Front panel mounted Audio and Video (A/V) input jacks make a recording easily of a preset length without using the RF jack on the TV screen. LINE2 (L2) is set the TV's source selector to VIDEO. 1 Insert a video cassette with the safety tab intact. 2 Select the desired channel with the SP/EP button. The DVD/VCR Receiver will start position. INSTANT TIMER RECORD MENU INSTANT TIMER RECORD...
...) recordings to this DVD/VCR Receiver, the rear or Front panel mounted Audio and Video (A/V) input jacks make a recording easily of a preset length without using the RF jack on the TV screen. LINE2 (L2) is set the TV's source selector to VIDEO. 1 Insert a video cassette with the safety tab intact. 2 Select the desired channel with the SP/EP button. The DVD/VCR Receiver will start position. INSTANT TIMER RECORD MENU INSTANT TIMER RECORD...

Operating Instructions
Page 28
... AUDIO/VIDEO input jacks or a stereo audio system is required for true stereo playback. One or both of the indicators will light, depending on the SETUP menu. The DVD/VCR Receiver can record in stereo onto the VHS HiFi audio tracks when the BROADCAST TYPE option is used for a second language or additional information. RIGHT: The right channel sound (R) is heard from the right speaker. When the station broadcasts a Second Audio Program...
... AUDIO/VIDEO input jacks or a stereo audio system is required for true stereo playback. One or both of the indicators will light, depending on the SETUP menu. The DVD/VCR Receiver can record in stereo onto the VHS HiFi audio tracks when the BROADCAST TYPE option is used for a second language or additional information. RIGHT: The right channel sound (R) is heard from the right speaker. When the station broadcasts a Second Audio Program...

Operating Instructions
Page 41
... input mode on the audio receiver so you can listen to select VIDEO mode. Clean the disc. Place the disc on another VCR. The power of a problem before contacting service. No disc is moving. 41 Clean video heads. The audio cables are dirty. Tape heads are not connected securely. Turn on the remote control repeatedly to the sound from the DVD/VCR Receiver appears on , but the DVD/VCR Receiver does not work. Clean the disc. Auto clock system...
... input mode on the audio receiver so you can listen to select VIDEO mode. Clean the disc. Place the disc on another VCR. The power of a problem before contacting service. No disc is moving. 41 Clean video heads. The audio cables are dirty. Tape heads are not connected securely. Turn on the remote control repeatedly to the sound from the DVD/VCR Receiver appears on , but the DVD/VCR Receiver does not work. Clean the disc. Auto clock system...

Marketing Specifications
Page 2
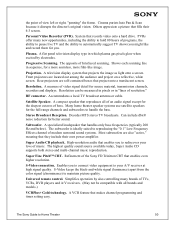
... HT-V700DP Integrated Home Theater in a Box Features General • Silver Color Component • 5.1 Channel Speaker Package DVD/VHS • Inputs and Outputs: RF Output • Inputs and Outputs: Composite Video Output • Inputs and Outputs: Component Video Output • CD-R/CD-RW/MP3 Playback* • 480P Progressive Output Receiver Section • Power Output Stereo: 90 Watts x 2 (1kHz, 10% THD) • Multi-Channel Output: 90 Watts x 5 ( 1 kHz,10% THD) • Digital Cinema Sound™ EX processing • Digital Signal Processing (DSP type) 32 Bit • Digital Tuner...
... HT-V700DP Integrated Home Theater in a Box Features General • Silver Color Component • 5.1 Channel Speaker Package DVD/VHS • Inputs and Outputs: RF Output • Inputs and Outputs: Composite Video Output • Inputs and Outputs: Component Video Output • CD-R/CD-RW/MP3 Playback* • 480P Progressive Output Receiver Section • Power Output Stereo: 90 Watts x 2 (1kHz, 10% THD) • Multi-Channel Output: 90 Watts x 5 ( 1 kHz,10% THD) • Digital Cinema Sound™ EX processing • Digital Signal Processing (DSP type) 32 Bit • Digital Tuner...


