
Operating Instructions
Page 1
Model No Serial No CMT-HP7 ©2003 Sony Corporation Record the serial number in the space provided below. Refer to them whenever you call upon your Sony dealer regarding this product. 4-246-667-12(1) Micro Hi-Fi Component System Operating Instructions Owner's Record The model and serial numbers are located on the rear of the unit.
Model No Serial No CMT-HP7 ©2003 Sony Corporation Record the serial number in the space provided below. Refer to them whenever you call upon your Sony dealer regarding this product. 4-246-667-12(1) Micro Hi-Fi Component System Operating Instructions Owner's Record The model and serial numbers are located on the rear of the unit.
Operating Instructions
Page 2
...for energy efficiency. 2GB Except for a Class B digital device, pursuant to operate this equipment. As an ENERGY STAR® partner, Sony Corporation has determined that to which can radiate radio frequency energy and, if not installed and used in this manual could void your authority..., there is no guarantee that the cable ground shall be of sufficient magnitude to the presence of important operating and maintenance (servicing) instructions in particular, specifies that interference will increase eye hazard. To prevent fire or shock hazard, do not expose the unit to persons....
...for energy efficiency. 2GB Except for a Class B digital device, pursuant to operate this equipment. As an ENERGY STAR® partner, Sony Corporation has determined that to which can radiate radio frequency energy and, if not installed and used in this manual could void your authority..., there is no guarantee that the cable ground shall be of sufficient magnitude to the presence of important operating and maintenance (servicing) instructions in particular, specifies that interference will increase eye hazard. To prevent fire or shock hazard, do not expose the unit to persons....
Operating Instructions
Page 25
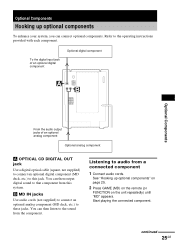
... cords (not supplied) to connect an optional analog component (MD deck, etc.) to the operating instructions provided with each component. See "Hooking up optional components To enhance your system, you can connect optional components. To the digital input jack of an optional digital component Optional digital component Optional Components From the audio output jacks of an optional analog...
... cords (not supplied) to connect an optional analog component (MD deck, etc.) to the operating instructions provided with each component. See "Hooking up optional components To enhance your system, you can connect optional components. To the digital input jack of an optional digital component Optional digital component Optional Components From the audio output jacks of an optional analog...
Operating Instructions
Page 26
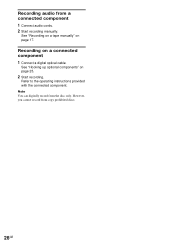
However, you cannot record from the disc only. See "Recording on a tape manually" on page 25. 2 Start recording. Refer to the operating instructions provided with the connected component. See "Hooking up optional components" on page 17. Recording on a connected component 1 Connect a digital optical cable. Note You can digitally record from copy prohibited discs. 26GB Recording audio from a connected component 1 Connect audio cords. 2 Start recording manually.
However, you cannot record from the disc only. See "Recording on a tape manually" on page 25. 2 Start recording. Refer to the operating instructions provided with the connected component. See "Hooking up optional components" on page 17. Recording on a connected component 1 Connect a digital optical cable. Note You can digitally record from copy prohibited discs. 26GB Recording audio from a connected component 1 Connect audio cords. 2 Start recording manually.
Operating Instructions
Page 29
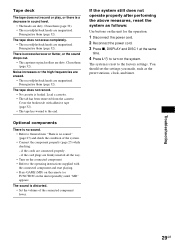
... erase completely. • The record/playback heads are magnetised. There is distorted. • Set the volume of the system. • Connect the component properly (page 25) while checking: - Demagnetise them (page 32). The system is reset to General item "There is no sound." (page 27)... removed from the cassette. Troubleshooting 29GB if the cords are firmly inserted all the way. • Turn on the connected component. • Refer to the operating instructions supplied with adhesive tape (page 32). • The tape has wound to turn on the unit for the operation. 1...
... erase completely. • The record/playback heads are magnetised. There is distorted. • Set the volume of the system. • Connect the component properly (page 25) while checking: - Demagnetise them (page 32). The system is reset to General item "There is no sound." (page 27)... removed from the cassette. Troubleshooting 29GB if the cords are firmly inserted all the way. • Turn on the connected component. • Refer to the operating instructions supplied with adhesive tape (page 32). • The tape has wound to turn on the unit for the operation. 1...
Operating Instructions
Page 32
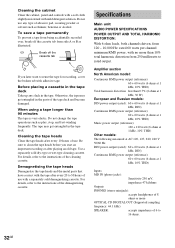
... you later want to reuse the tape for recording, cover the broken tab with the tape after every 20 to 30 hours of 6 to the instructions of the demagnetising cassette. For details, refer to 16 ohms. 32GB To save a tape permanently To prevent a tape from 120 - 10,000 Hz: rated 60... than 10% total harmonic distortion from side A or B as play, stop, and fast-winding frequently. Break off the cassette tab from 250 milliwatts to the instructions of the cleaning cassette. Use a separately sold demagnetising cassette.
... you later want to reuse the tape for recording, cover the broken tab with the tape after every 20 to 30 hours of 6 to the instructions of the demagnetising cassette. For details, refer to 16 ohms. 32GB To save a tape permanently To prevent a tape from 120 - 10,000 Hz: rated 60... than 10% total harmonic distortion from side A or B as play, stop, and fast-winding frequently. Break off the cassette tab from 250 milliwatts to the instructions of the cleaning cassette. Use a separately sold demagnetising cassette.


