
Operating Instructions
Page 3
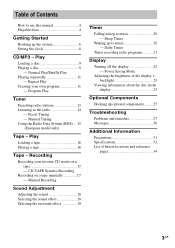
...sound 18 Selecting the sound effect 18 Selecting the surround effect 19 Timer Falling asleep to music 20 - Preset Tuning - Play Loading a tape 16 Playing a tape 16 Tape - Power Saving Mode Adjusting the brightness of the display's backlight 23 Viewing information about the disc in the display 23 Optional Components... radio stations 13 Listening to use this manual 4 Playable discs 4 Getting Started Hooking up optional components......... 25 Troubleshooting Problems and remedies 27 Messages 30 Additional Information Precautions 31 Specifications 32 List of button...
...sound 18 Selecting the sound effect 18 Selecting the surround effect 19 Timer Falling asleep to music 20 - Preset Tuning - Play Loading a tape 16 Playing a tape 16 Tape - Power Saving Mode Adjusting the brightness of the display's backlight 23 Viewing information about the disc in the display 23 Optional Components... radio stations 13 Listening to use this manual 4 Playable discs 4 Getting Started Hooking up optional components......... 25 Troubleshooting Problems and remedies 27 Messages 30 Additional Information Precautions 31 Specifications 32 List of button...
Operating Instructions
Page 10
... device, or the recording media used for the next MP3 audio track to start playback of discs recorded in complex configurations such as disabled playback, sound interruptions and noise. 10GB We recommend that you do not save unnecessary albums or tracks other types of tracks or unnecessary albums on a disc that...
... device, or the recording media used for the next MP3 audio track to start playback of discs recorded in complex configurations such as disabled playback, sound interruptions and noise. 10GB We recommend that you do not save unnecessary albums or tracks other types of tracks or unnecessary albums on a disc that...
Operating Instructions
Page 18
Each time you select an effect with surround effects. To cancel the sound effect Press PRESET EQ repeatedly until "FLAT" appears. See the chart "Sound effect options". Sound effect options "SURR" lights up . MUSIC EQ Effect ROCK POP JAZZ MOVIE EQ Effect MOVIE Standard music...sources Soundtracks and special listening situations 18GB The preset name appears in the display. Sound Adjustment Adjusting the sound You can reinforce the bass and create a more powerful sound. Selecting the sound effect Selecting the effect from the music menu Press PRESET EQ repeatedly to power ...
Each time you select an effect with surround effects. To cancel the sound effect Press PRESET EQ repeatedly until "FLAT" appears. See the chart "Sound effect options". Sound effect options "SURR" lights up . MUSIC EQ Effect ROCK POP JAZZ MOVIE EQ Effect MOVIE Standard music...sources Soundtracks and special listening situations 18GB The preset name appears in the display. Sound Adjustment Adjusting the sound You can reinforce the bass and create a more powerful sound. Selecting the sound effect Selecting the effect from the music menu Press PRESET EQ repeatedly to power ...
Operating Instructions
Page 19
Sound Adjustment Selecting the surround effect Press SURROUND on the remote. Each time you press the button, the display changes as follows: SURROUND ON* y SURROUND OFF * "SURR" lights up. 19GB
Sound Adjustment Selecting the surround effect Press SURROUND on the remote. Each time you press the button, the display changes as follows: SURROUND ON* y SURROUND OFF * "SURR" lights up. 19GB
Operating Instructions
Page 20
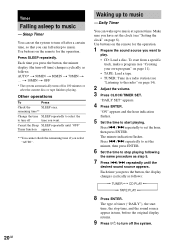
Use buttons on page 14). 2 Adjust the volume. 3 Press CLOCK/TIMER SET. Cancel the Sleep SLEEP repeatedly until the desired sound source appears. "DAILY SET" appears. 4 Press ENTER. The type of timer ("DAILY"), the start time, the stop playing following the same procedure as step 5. 7 Press .... Other operations To Press Check the SLEEP once. Use buttons on page 8). Each time you can set the system to stop time, and the sound source appear in turn, before the original display returns. 9 Press ?/1 to the radio" on the remote for the operation. 1 Prepare the...
Use buttons on page 14). 2 Adjust the volume. 3 Press CLOCK/TIMER SET. Cancel the Sleep SLEEP repeatedly until the desired sound source appears. "DAILY SET" appears. 4 Press ENTER. The type of timer ("DAILY"), the start time, the stop playing following the same procedure as step 5. 7 Press .... Other operations To Press Check the SLEEP once. Use buttons on page 8). Each time you can set the system to stop time, and the sound source appear in turn, before the original display returns. 9 Press ?/1 to the radio" on the remote for the operation. 1 Prepare the...
Operating Instructions
Page 21
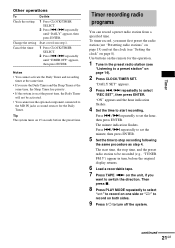
...(see "Presetting radio stations" on page 13) and set the clock (see "Listening to be activated. • You cannot use the optional component connected to set the hour, then press ENTER. Use buttons on page 8). The minute indication flashes. The start recording. Timer recording radio programs ...has priority. • If the system is on both sides. 9 Press ?/1 to start time, the stop recording following the same procedure as sound sources for the operation. 1 Tune in turn off the system. Timer Other operations To Check the setting Change the setting Cancel the timer Do...
...(see "Presetting radio stations" on page 13) and set the clock (see "Listening to be activated. • You cannot use the optional component connected to set the hour, then press ENTER. Use buttons on page 8). The minute indication flashes. The start recording. Timer recording radio programs ...has priority. • If the system is on both sides. 9 Press ?/1 to start time, the stop recording following the same procedure as sound sources for the operation. 1 Tune in turn off the system. Timer Other operations To Check the setting Change the setting Cancel the timer Do...
Operating Instructions
Page 25
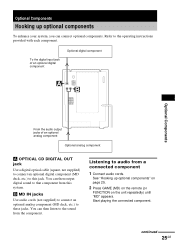
...) until "MD" appears. You can then output digital sound to the sound from the component. Listening to this system. Refer to these jacks. To the digital input jack of an optional digital component Optional digital component Optional Components From the audio output jacks of an optional analog component Optional analog component A OPTICAL CD DIGITAL OUT jack Use a digital...
...) until "MD" appears. You can then output digital sound to the sound from the component. Listening to this system. Refer to these jacks. To the digital input jack of an optional digital component Optional digital component Optional Components From the audio output jacks of an optional analog component Optional analog component A OPTICAL CD DIGITAL OUT jack Use a digital...
Operating Instructions
Page 27
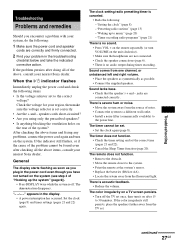
...the power cord again and turn it on a TV screen persists. • Turn off . Sound lacks bass. • Check that the speaker's + and - After checking the above , consult your nearest Sony dealer. speaker cords short-circuited? • Are you using only the prescribed speakers? •... (page 20) -"Timer recording radio programs" (page 21) There is off the TV set correctly. • Are the + and - Sound comes from the fluorescent light. Troubleshooting continued 27GB Troubleshooting Problems and remedies Should you encounter a problem with your system, do the following: 1 Make...
...the power cord again and turn it on a TV screen persists. • Turn off . Sound lacks bass. • Check that the speaker's + and - After checking the above , consult your nearest Sony dealer. speaker cords short-circuited? • Are you using only the prescribed speakers? •... (page 20) -"Timer recording radio programs" (page 21) There is off the TV set correctly. • Are the + and - Sound comes from the fluorescent light. Troubleshooting continued 27GB Troubleshooting Problems and remedies Should you encounter a problem with your system, do the following: 1 Make...
Operating Instructions
Page 28
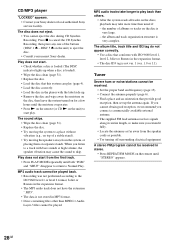
...Play does not start from the speaker cords as far away from the first track. • Press PLAY MODE repeatedly until "STEREO" appears. 28GB The sound skips. • Wipe the disc clean (page 31). • Replace the disc. • Try moving the speakers away from the system, or placing...on top of the buttons (DISC 1 Z - the number of albums or tracks on the discs, playback may cause the sound to eject the disc. • Consult your Sony dealer or local authorized Sony service facility. The album title, track title and ID3 tag do not appear correctly. • Use a disc that this ...
...Play does not start from the speaker cords as far away from the first track. • Press PLAY MODE repeatedly until "STEREO" appears. 28GB The sound skips. • Wipe the disc clean (page 31). • Replace the disc. • Try moving the speakers away from the system, or placing...on top of the buttons (DISC 1 Z - the number of albums or tracks on the discs, playback may cause the sound to eject the disc. • Consult your Sony dealer or local authorized Sony service facility. The album title, track title and ID3 tag do not appear correctly. • Use a disc that this ...
Operating Instructions
Page 29
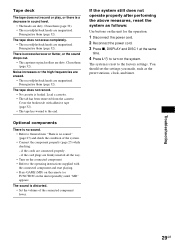
...rollers are magnetised. The system is reset to General item "There is no sound. • Refer to the factory settings. Optional components There is no sound." (page 27) and check the condition of the connected component lower. You should set the settings you made, such as follows: Use ...8226; Press GAME (MD) on the remote (or FUNCTION on the system. if the cords are magnetised. The sound is distorted. • Set the volume of the system. • Connect the component properly (page 25) while checking: - Troubleshooting 29GB Clean them (page 32). The tape does not record. ...
...rollers are magnetised. The system is reset to General item "There is no sound. • Refer to the factory settings. Optional components There is no sound." (page 27) and check the condition of the connected component lower. You should set the settings you made, such as follows: Use ...8226; Press GAME (MD) on the remote (or FUNCTION on the system. if the cords are magnetised. The sound is distorted. • Set the volume of the system. • Connect the component properly (page 25) while checking: - Troubleshooting 29GB Clean them (page 32). The tape does not record. ...

