

Operating Instructions
Page 1
Refer to them whenever you call upon your Sony dealer regarding this product. 4-244-569-11 (1) Mini Hi-Fi Component System Operating Instructions Owner's Record The model and serial numbers are located at the rear of the unit. MHC-GN900 MHC-GN800 MHC-GN700/GX8800 MHC-GN600 © 2003 Sony Corporation 1GB MHC-GN800 4-244-569-11 (1) Model No. Serial No. Record the serial number in the space provided below.
Refer to them whenever you call upon your Sony dealer regarding this product. 4-244-569-11 (1) Mini Hi-Fi Component System Operating Instructions Owner's Record The model and serial numbers are located at the rear of the unit. MHC-GN900 MHC-GN800 MHC-GN700/GX8800 MHC-GN600 © 2003 Sony Corporation 1GB MHC-GN800 4-244-569-11 (1) Model No. Serial No. Record the serial number in the space provided below.
Operating Instructions
Page 2
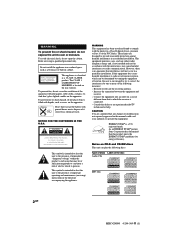
Do not install the appliance in a particular installation. This appliance is located on the disc Audio CDs MP3 files 2GB MHC-GN800 4-244-569-11 (1) The CLASS 1 LASER PRODUCT MARKING is classified as chemical waste. And don't place lighted candles on a ...manual could void your authority to radio communications. Increase the separation between the equipment and receiver. - As an ENERGY STAR® partner, Sony Corporation has determined that any changes or modifications not expressly approved in cabinet. These limits are cautioned that this equipment. NOTICE FOR THE ...
Do not install the appliance in a particular installation. This appliance is located on the disc Audio CDs MP3 files 2GB MHC-GN800 4-244-569-11 (1) The CLASS 1 LASER PRODUCT MARKING is classified as chemical waste. And don't place lighted candles on a ...manual could void your authority to radio communications. Increase the separation between the equipment and receiver. - As an ENERGY STAR® partner, Sony Corporation has determined that any changes or modifications not expressly approved in cabinet. These limits are cautioned that this equipment. NOTICE FOR THE ...
Operating Instructions
Page 3
... only. • Disc recorded in this manual are for models MHC-GN900, MHC-GN800, MHCGN700, MHC-GX8800 and MHC-GN600. Tuner/CD player/Stereo cassette deck/Amplifier (main unit) HCD-GN700/ HCD-GX8800 - Tuner/CD player/Stereo cassette deck/Amplifier (main unit) HCD-GN600 - The MHC-GN900 consists of the following components: - Tuner/CD player/Stereo cassette deck/Amplifier (main unit...
... only. • Disc recorded in this manual are for models MHC-GN900, MHC-GN800, MHCGN700, MHC-GX8800 and MHC-GN600. Tuner/CD player/Stereo cassette deck/Amplifier (main unit) HCD-GN700/ HCD-GX8800 - Tuner/CD player/Stereo cassette deck/Amplifier (main unit) HCD-GN600 - The MHC-GN900 consists of the following components: - Tuner/CD player/Stereo cassette deck/Amplifier (main unit...
Operating Instructions
Page 4
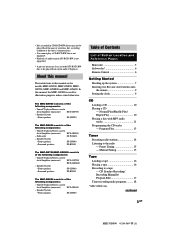
... to music - Sleep Timer 26 Waking up optional components ........ 28 Listening to audio from a connected component 29 Recording on a connected component 29 Connecting external antennas 29 Troubleshooting Problems and remedies 30 Messages 32 Additional Information Precautions 33 Specifications 34 1) MHC-GN800/GN700/GX8800 only. 2) MHC-GN800 only. 4GB MHC-GN800 4-244-569-11 (1) Daily Timer 26 Optional...
... to music - Sleep Timer 26 Waking up optional components ........ 28 Listening to audio from a connected component 29 Recording on a connected component 29 Connecting external antennas 29 Troubleshooting Problems and remedies 30 Messages 32 Additional Information Precautions 33 Specifications 34 1) MHC-GN800/GN700/GX8800 only. 2) MHC-GN800 only. 4GB MHC-GN800 4-244-569-11 (1) Daily Timer 26 Optional...

Operating Instructions
Page 5
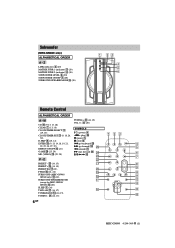
Z REC PAUSE/START qk (17, 18, 25) REPEAT 8 (11, 12) SURROUND (MHC-GN900/ GN600 only) w; (22) SURROUND SPEAKER MODE (except for MHC-GN900/ GN600) w; (20) TAPE A/B ek (16, 17) TUNER/BAND el (14, 15) TUNER MEMORY 7 (14) VOLUME ws (20, 30) SYMBOLS @/1 (power) 1 hH (play) qa x (stop) ... find the location of buttons and other parts of button/part Reference page Main unit ALPHABETICAL ORDER A - A A (Eject A) es A B (Eject B) ql wj wh wg X 5GB MHC-GN800 4-244-569-11 (1)
Z REC PAUSE/START qk (17, 18, 25) REPEAT 8 (11, 12) SURROUND (MHC-GN900/ GN600 only) w; (22) SURROUND SPEAKER MODE (except for MHC-GN900/ GN600) w; (20) TAPE A/B ek (16, 17) TUNER/BAND el (14, 15) TUNER MEMORY 7 (14) VOLUME ws (20, 30) SYMBOLS @/1 (power) 1 hH (play) qa x (stop) ... find the location of buttons and other parts of button/part Reference page Main unit ALPHABETICAL ORDER A - A A (Eject A) es A B (Eject B) ql wj wh wg X 5GB MHC-GN800 4-244-569-11 (1)
Operating Instructions
Page 6
..., 23, 26, 27, 32) EFFECT ON/OFF qf (21) > (go forward) wf Y m (rewind) wa E GAME w; (25, 29) M (fast forward) ws X 6 MD (VIDEO) q; (29, 30) M/m/ Subwoofer (MHC-GN800 only) ALPHABETICAL ORDER A - Z LINK (indicator) 2 (20) MATRIX SURR 1 (indicator) 3 (20) MATRIX SURR 2 (indicator) 4 (20) SUBWOOFER LEVEL 6 (20) SUBWOOFER ON/OFF 1 (20) SURROUND SPEAKER MODE...
..., 23, 26, 27, 32) EFFECT ON/OFF qf (21) > (go forward) wf Y m (rewind) wa E GAME w; (25, 29) M (fast forward) ws X 6 MD (VIDEO) q; (29, 30) M/m/ Subwoofer (MHC-GN800 only) ALPHABETICAL ORDER A - Z LINK (indicator) 2 (20) MATRIX SURR 1 (indicator) 3 (20) MATRIX SURR 2 (indicator) 4 (20) SUBWOOFER LEVEL 6 (20) SUBWOOFER ON/OFF 1 (20) SURROUND SPEAKER MODE...

Operating Instructions
Page 7
.../Solid (3) Black/Stripe (#) 2 Connect the surround speakers (MHC-GN800, MHC-GN700 and MHC-GX8800 only). Insert only the stripped portion. Subwoofer (MHC-GN800 only) AM loop antenna FM antenna Front speaker (Right) Surround speaker (Right) (MHC-GN800/ GN700/GX8800 only) 4 4 5 3 1 1 2 2 6 Main Unit Front speaker (Left) Surround speaker (Left) (MHC-GN800/ GN700/GX8800 only) 1 Connect the front speakers. Connect the...
.../Solid (3) Black/Stripe (#) 2 Connect the surround speakers (MHC-GN800, MHC-GN700 and MHC-GX8800 only). Insert only the stripped portion. Subwoofer (MHC-GN800 only) AM loop antenna FM antenna Front speaker (Right) Surround speaker (Right) (MHC-GN800/ GN700/GX8800 only) 4 4 5 3 1 1 2 2 6 Main Unit Front speaker (Left) Surround speaker (Left) (MHC-GN800/ GN700/GX8800 only) 1 Connect the front speakers. Connect the...

Operating Instructions
Page 8
FM75Ω COAXIAL -AM AM loop antenna Extend the FM lead antenna horizontally 8GB MHC-GN800 4-244-569-11 (1) SUBWOOFER terminals Insert only the stripped portion. + Grey Grey/Solid (3) Black/Stripe (#) SYSTEM CONTROL jack To disconnect Notes • ...plug does not fit your local power line voltage. If the supplied adaptor on and the demonstration automatically ends. 3 Connect the subwoofer (MHC-GN800 only). To connect optional components See page 28. To attach the speaker pads Attach the supplied speaker pads to a wall outlet. • Place the subwoofer at least...
FM75Ω COAXIAL -AM AM loop antenna Extend the FM lead antenna horizontally 8GB MHC-GN800 4-244-569-11 (1) SUBWOOFER terminals Insert only the stripped portion. + Grey Grey/Solid (3) Black/Stripe (#) SYSTEM CONTROL jack To disconnect Notes • ...plug does not fit your local power line voltage. If the supplied adaptor on and the demonstration automatically ends. 3 Connect the subwoofer (MHC-GN800 only). To connect optional components See page 28. To attach the speaker pads Attach the supplied speaker pads to a wall outlet. • Place the subwoofer at least...

Operating Instructions
Page 9
... SET?" The clock starts functioning. Main Unit Subwoofer * Front speaker (L) 0.3m Front speaker (R) 45º Surround speaker (L) Surround speaker (R) * (MHC-GN800 only) Place the subwoofer at an angle of time, remove the batteries to avoid possible damage from the main unit. Notice for carrying this... system Do the following to 6 above. Getting Started Positioning the speakers (Except for MHC-GN900/GN600) Place the front speakers at least 0.3 meters (1 feet) away from battery leakage. Note The clock settings are removed...
... SET?" The clock starts functioning. Main Unit Subwoofer * Front speaker (L) 0.3m Front speaker (R) 45º Surround speaker (L) Surround speaker (R) * (MHC-GN800 only) Place the subwoofer at an angle of time, remove the batteries to avoid possible damage from the main unit. Notice for carrying this... system Do the following to 6 above. Getting Started Positioning the speakers (Except for MHC-GN900/GN600) Place the front speakers at least 0.3 meters (1 feet) away from battery leakage. Note The clock settings are removed...
Operating Instructions
Page 10
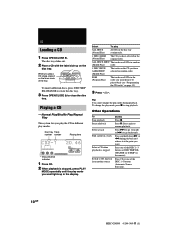
... lets you want them to CD function from another source Do this Press x. Press CD or one of the DISC 1~3 buttons (Automatic Source Selection). 10GB MHC-GN800 4-244-569-11 (1) Playing a CD -- GROOVE LINK A B Disc presence indicator 1 Press CD. 2 When playback is stopped Switch to be played back (see "Programming the...
... lets you want them to CD function from another source Do this Press x. Press CD or one of the DISC 1~3 buttons (Automatic Source Selection). 10GB MHC-GN800 4-244-569-11 (1) Playing a CD -- GROOVE LINK A B Disc presence indicator 1 Press CD. 2 When playback is stopped Switch to be played back (see "Programming the...

Operating Instructions
Page 11
... a standard technology and format for the logical format of its original size. Disc tray Track number number Playing time ALL DISCS SURR EFFECT V - continued 11GB MHC-GN800 4-244-569-11 (1) Notes on discs You can be in the display. There are not compressed. Cancel Repeat Play Press REPEAT until "REP 1" is...
... a standard technology and format for the logical format of its original size. Disc tray Track number number Playing time ALL DISCS SURR EFFECT V - continued 11GB MHC-GN800 4-244-569-11 (1) Notes on discs You can be in the display. There are not compressed. Cancel Repeat Play Press REPEAT until "REP 1" is...
Operating Instructions
Page 12
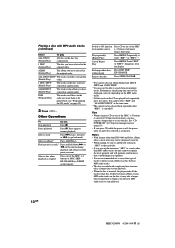
Playing a disc with complicated tree structure takes a longer time to start playback. 12GB MHC-GN800 4-244-569-11 (1) Other Operations To Do this Stop playback Press x. Find a point in a track*2 Press and hold down M or m on the remote during ...
Playing a disc with complicated tree structure takes a longer time to start playback. 12GB MHC-GN800 4-244-569-11 (1) Other Operations To Do this Stop playback Press x. Find a point in a track*2 Press and hold down M or m on the remote during ...
Operating Instructions
Page 13
... order of the DISC 1~3 to step 5 while "AL" appears on the remote when playback is (are) programmed. you have programmed an MP3 audio track. 13GB MHC-GN800 4-244-569-11 (1) Tips • The program you may encounter problems such as cannot playback, sound interruptions, and noise. To program Other discs Other...
... order of the DISC 1~3 to step 5 while "AL" appears on the remote when playback is (are) programmed. you have programmed an MP3 audio track. 13GB MHC-GN800 4-244-569-11 (1) Tips • The program you may encounter problems such as cannot playback, sound interruptions, and noise. To program Other discs Other...
Operating Instructions
Page 14
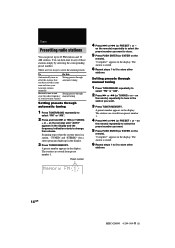
..." (for a stereo program) lights up to tune in the display. 3 Press TUNER MEMORY. The station is stored. 6 Repeat steps 1 to 5 to store other stations. 14GB MHC-GN800 4-244-569-11 (1) The station is stored. 6 Repeat steps 1 to 5 to store other stations. There are stored from preset number 1. Tuner Presetting radio stations...
..." (for a stereo program) lights up to tune in the display. 3 Press TUNER MEMORY. The station is stored. 6 Repeat steps 1 to 5 to store other stations. 14GB MHC-GN800 4-244-569-11 (1) The station is stored. 6 Repeat steps 1 to 5 to store other stations. There are stored from preset number 1. Tuner Presetting radio stations...
Operating Instructions
Page 15
... listen to a tape" on page 17 or "Timer-recording radio programs" on the remote) repeatedly to tune in Power Saving Mode. on page 18. 15GB MHC-GN800 4-244-569-11 (1) Manual Tuning 1 Press TUNER/BAND repeatedly to "CD POWER ON" Repeat the procedure above. Tuner Other Operations To Do this Tune...
... listen to a tape" on page 17 or "Timer-recording radio programs" on the remote) repeatedly to tune in Power Saving Mode. on page 18. 15GB MHC-GN800 4-244-569-11 (1) Manual Tuning 1 Press TUNER/BAND repeatedly to "CD POWER ON" Repeat the procedure above. Tuner Other Operations To Do this Tune...

Operating Instructions
Page 16
...) t Deck B (reverse side) To Stop playback Pause playback Fast-forward Rewind Remove the cassette Do this Press x. When the unit is placed near a television. 16GB MHC-GN800 4-244-569-11 (1) Insert with the side you want to resume playback.
...) t Deck B (reverse side) To Stop playback Pause playback Fast-forward Rewind Remove the cassette Do this Press x. When the unit is placed near a television. 16GB MHC-GN800 4-244-569-11 (1) Insert with the side you want to resume playback.
Operating Instructions
Page 17
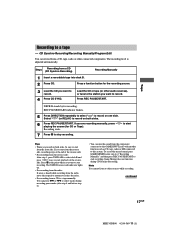
...start playing the source (for recording. Tape Recording to record on one side. Load the CD or tape (or other connected components. REC PAUSE/START indicator flashes. 5 Press DIRECTION repeatedly to select "g" to a tape -- Select "j" (or RELAY) ...you want to start playback of the reverse side. • For recording from a CD to start from the component connected to the GAME INPUT jacks with another function such as CD, tape, radio or MD connected to select ... For recording from the radio: If noise is adjusted automatically. continued 17GB MHC-GN800 4-244-569-11 (1)
...start playing the source (for recording. Tape Recording to record on one side. Load the CD or tape (or other connected components. REC PAUSE/START indicator flashes. 5 Press DIRECTION repeatedly to select "g" to a tape -- Select "j" (or RELAY) ...you want to start playback of the reverse side. • For recording from a CD to start from the component connected to the GAME INPUT jacks with another function such as CD, tape, radio or MD connected to select ... For recording from the radio: If noise is adjusted automatically. continued 17GB MHC-GN800 4-244-569-11 (1)
Operating Instructions
Page 18
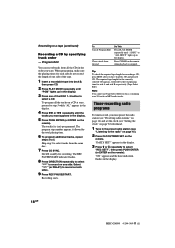
... by specifying track order - The REC PAUSE/START indicator flashes. 8 Press DIRECTION repeatedly to select "g" to record on the remote). appears in the display. 18GB MHC-GN800 4-244-569-11 (1) Recording to a tape (continued) Recording a CD by the total playing time. 6 To program additional tracks, repeat steps 3 to 5. When programing, make...
... by specifying track order - The REC PAUSE/START indicator flashes. 8 Press DIRECTION repeatedly to select "g" to record on the remote). appears in the display. 18GB MHC-GN800 4-244-569-11 (1) Recording to a tape (continued) Recording a CD by the total playing time. 6 To program additional tracks, repeat steps 3 to 5. When programing, make...
Operating Instructions
Page 19
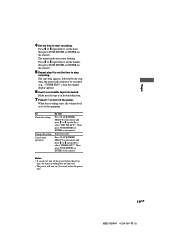
... volume level is in forward direction. 7 Press @/1 to the minimum. Notes • If you do not turn off the power before the preset time. 19GB MHC-GN800 4-244-569-11 (1) Press M or m repeatedly to set to turn on the remote). The start recording. Start from step 1.
... volume level is in forward direction. 7 Press @/1 to the minimum. Notes • If you do not turn off the power before the preset time. 19GB MHC-GN800 4-244-569-11 (1) Press M or m repeatedly to set to turn on the remote). The start recording. Start from step 1.

Operating Instructions
Page 20
... and the equalizer curve changes to the front speakers. Selecting the sound system (MHC-GN800/GN700/GX8800 only) You can enjoy different sounds by selecting the sound mode you want . The indicator lights up . 20GB MHC-GN800 4-244-569-11 (1) Press the button again to turn SURROUND SPEAKER MODE.... Notes • If you press the button, the display changes cyclically as follows: LINK1) t MATRIX SURR 12) t MATRIX SURR 23) MHC-GN700/GX8800 only Press SURROUND SPEAKER MODE repeatedly to select the sound mode you turn on the main unit, the last selected SURROUND SPEAKER MODE indicator on...
... and the equalizer curve changes to the front speakers. Selecting the sound system (MHC-GN800/GN700/GX8800 only) You can enjoy different sounds by selecting the sound mode you want . The indicator lights up . 20GB MHC-GN800 4-244-569-11 (1) Press the button again to turn SURROUND SPEAKER MODE.... Notes • If you press the button, the display changes cyclically as follows: LINK1) t MATRIX SURR 12) t MATRIX SURR 23) MHC-GN700/GX8800 only Press SURROUND SPEAKER MODE repeatedly to select the sound mode you turn on the main unit, the last selected SURROUND SPEAKER MODE indicator on...

