Operating Instructions (DVP-NC675P CD/DVD Player)
Page 6
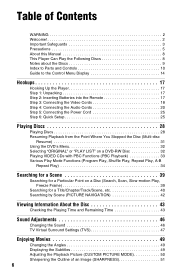
... Play the Following Discs 8 Notes about the Discs 9 Index to Parts and Controls 10 Guide to the Control Menu Display 14 Hookups 17 Hooking Up the Player 17 Step 1: Unpacking 17 Step 2: Inserting Batteries into the Remote 17 Step 3: Connecting the Video Cords 18 Step 4: Connecting the Audio ...Discs 28 Resuming Playback from the Point Where You Stopped the Disc (Multi-disc Resume 31 Using the DVD's Menu 32 Selecting "ORIGINAL" or "PLAY LIST" on a DVD-RW Disc 32 Playing VIDEO CDs with PBC Functions (PBC Playback 33 Various Play Mode Functions (Program Play, Shuffle Play, Repeat Play,...
... Play the Following Discs 8 Notes about the Discs 9 Index to Parts and Controls 10 Guide to the Control Menu Display 14 Hookups 17 Hooking Up the Player 17 Step 1: Unpacking 17 Step 2: Inserting Batteries into the Remote 17 Step 3: Connecting the Video Cords 18 Step 4: Connecting the Audio ...Discs 28 Resuming Playback from the Point Where You Stopped the Disc (Multi-disc Resume 31 Using the DVD's Menu 32 Selecting "ORIGINAL" or "PLAY LIST" on a DVD-RW Disc 32 Playing VIDEO CDs with PBC Functions (PBC Playback 33 Various Play Mode Functions (Program Play, Shuffle Play, Repeat Play,...

Operating Instructions (DVP-NC675P CD/DVD Player)
Page 17
... to prevent unwanted noise. • Refer to the instructions supplied with the components to be connected. • You cannot connect this player to direct light from battery leakage and corrosion. ,continued 17 Notes • Do not leave the remote in an extremely hot or humid ... extended period of time, remove the batteries to disconnect the power of the player. When using the supplied remote. Insert two Size AA (R6) batteries by matching the 3 and # ends on the player. Hookups Hookups Hooking Up the Player Follow Steps 1 to 6 to the markings inside the compartment.
... to prevent unwanted noise. • Refer to the instructions supplied with the components to be connected. • You cannot connect this player to direct light from battery leakage and corrosion. ,continued 17 Notes • Do not leave the remote in an extremely hot or humid ... extended period of time, remove the batteries to disconnect the power of the player. When using the supplied remote. Insert two Size AA (R6) batteries by matching the 3 and # ends on the player. Hookups Hookups Hooking Up the Player Follow Steps 1 to 6 to the markings inside the compartment.

Operating Instructions (DVP-NC675P CD/DVD Player)
Page 19
You will enjoy standard quality images. In the case of some discs may not fit your TV screen. If your Sony TV set's compatibility with this if you are connecting to a TV only.) B If you are connecting to an S VIDEO input jack Connect an S ... and set NORMAL/PROGRESSIVE switch to PROGRESSIVE (page 67). Notes • Connect the player directly to page 66. VCR CD/DVD player TV Connect directly • Consumers should note that you switches the connection to the standard definition output. Hookups A If you are connecting to a video input jack Connect the yellow plug of...
You will enjoy standard quality images. In the case of some discs may not fit your TV screen. If your Sony TV set's compatibility with this if you are connecting to a TV only.) B If you are connecting to an S VIDEO input jack Connect an S ... and set NORMAL/PROGRESSIVE switch to PROGRESSIVE (page 67). Notes • Connect the player directly to page 66. VCR CD/DVD player TV Connect directly • Consumers should note that you switches the connection to the standard definition output. Hookups A If you are connecting to a video input jack Connect the yellow plug of...

Operating Instructions (DVP-NC675P CD/DVD Player)
Page 21
.... CD/DVD player PCM/DTS/ DOLBY DIGITAL COMPONENT VIDEO OUT Y PB PR LINE OUT VIDEO NORMAL PROGRESSIVE OPTICAL COAXIAL DIGITAL OUT R-AUDIO-L LINE OUT S VIDEO OUT (yellow)* (white) (yellow)* TV (white) R-AUDIO-L LINE OUT (red) to LINE OUT L/R (AUDIO) Audio/video (red) cord (supplied) to the TV's audio input jack. ,continued 21 Hookups A Connecting...
.... CD/DVD player PCM/DTS/ DOLBY DIGITAL COMPONENT VIDEO OUT Y PB PR LINE OUT VIDEO NORMAL PROGRESSIVE OPTICAL COAXIAL DIGITAL OUT R-AUDIO-L LINE OUT S VIDEO OUT (yellow)* (white) (yellow)* TV (white) R-AUDIO-L LINE OUT (red) to LINE OUT L/R (AUDIO) Audio/video (red) cord (supplied) to the TV's audio input jack. ,continued 21 Hookups A Connecting...

Operating Instructions (DVP-NC675P CD/DVD Player)
Page 23
... input jacks only, use C-2 . CD/DVD player PCM/DTS/ DOLBY DIGITAL COMPONENT VIDEO OUT Y PB PR LINE OUT VIDEO NORMAL PROGRESSIVE OPTICAL COAXIAL DIGITAL OUT R-AUDIO-L LINE OUT S VIDEO OUT PCM/DTS/ DOLBY DIGITAL Optical digital cord (not supplied) Remove jack cap before connecting. Rear (mono) ,continued 23 Hookups C Connecting to an AV amplifier...
... input jacks only, use C-2 . CD/DVD player PCM/DTS/ DOLBY DIGITAL COMPONENT VIDEO OUT Y PB PR LINE OUT VIDEO NORMAL PROGRESSIVE OPTICAL COAXIAL DIGITAL OUT R-AUDIO-L LINE OUT S VIDEO OUT PCM/DTS/ DOLBY DIGITAL Optical digital cord (not supplied) Remove jack cap before connecting. Rear (mono) ,continued 23 Hookups C Connecting to an AV amplifier...

Operating Instructions (DVP-NC675P CD/DVD Player)
Page 25
... the language used in the Control Menu to run Quick Setup (page 65). 4 Press ENTER without inserting a disc. Hookups Step 5: Connecting the Power Cord Plug the player and TV power cords into an AC outlet. "Press [ENTER] to run QUICK SETUP." SCREEN SETUP TV TYPE: 4:3...SCAN BLACK LEVEL: 16:9 BLACK LEVEL (COMPONENT OUT): OFF MODE (PROGRESSIVE): AUTO 7 Press X/x to select the setting that the signal from the player appears on -screen display appears. 5 Press X/x to make the minimum number of basic adjustments for selecting the aspect ratio of the screen. If...
... the language used in the Control Menu to run Quick Setup (page 65). 4 Press ENTER without inserting a disc. Hookups Step 5: Connecting the Power Cord Plug the player and TV power cords into an AC outlet. "Press [ENTER] to run QUICK SETUP." SCREEN SETUP TV TYPE: 4:3...SCAN BLACK LEVEL: 16:9 BLACK LEVEL (COMPONENT OUT): OFF MODE (PROGRESSIVE): AUTO 7 Press X/x to select the setting that the signal from the player appears on -screen display appears. 5 Press X/x to make the minimum number of basic adjustments for selecting the aspect ratio of the screen. If...

Operating Instructions (DVP-NC675P CD/DVD Player)
Page 27
Hookups Enjoying the surround sound effects To enjoy the surround sound effects of these is turned down, set ...D • Set "DOWNMIX" to "DOLBY SURROUND" (page 69). • Set "DIGITAL OUT" to 24) A • No additional settings are needed. Each of this player or your amplifier (receiver), set "AUDIO ATT" to "ON" (page 68). B-1 C-1 • Set "DOWNMIX" to "DOLBY SURROUND" (page 69). • If the ... when you selected on pages 22 to page 64 for the audio connection you first connect the player. Audio Connection (pages 21 to "ON" (page 69). 27 Refer to 24 ( B through D ).
Hookups Enjoying the surround sound effects To enjoy the surround sound effects of these is turned down, set ...D • Set "DOWNMIX" to "DOLBY SURROUND" (page 69). • Set "DIGITAL OUT" to 24) A • No additional settings are needed. Each of this player or your amplifier (receiver), set "AUDIO ATT" to "ON" (page 68). B-1 C-1 • Set "DOWNMIX" to "DOLBY SURROUND" (page 69). • If the ... when you selected on pages 22 to page 64 for the audio connection you first connect the player. Audio Connection (pages 21 to "ON" (page 69). 27 Refer to 24 ( B through D ).

