Operating Instructions
Page 25
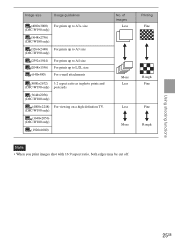
...Fine Rough Note • When you print images shot with 16:9 aspect ratio, both edges may be cut off. Using shooting functions 25GB Image size Usage guidelines (4000×3000) For prints up to A3+ size (DSC-W190 only) (3648×2736) (DSC-W180 only) (3264×2448) For prints up ...up to A4 size For prints up to L/2L size For e-mail attachments (4000×2672) 3:2 aspect ratio as in photo prints and (DSC-W190 only) postcards (3648×2056) (DSC-W180 only) (4000×2248) For viewing on a high-definition TV. (DSC-W190 only) (3648×2056) (DSC-W180 only) (1920×1080) No.
...Fine Rough Note • When you print images shot with 16:9 aspect ratio, both edges may be cut off. Using shooting functions 25GB Image size Usage guidelines (4000×3000) For prints up to A3+ size (DSC-W190 only) (3648×2736) (DSC-W180 only) (3264×2448) For prints up ...up to A4 size For prints up to L/2L size For e-mail attachments (4000×2672) 3:2 aspect ratio as in photo prints and (DSC-W190 only) postcards (3648×2056) (DSC-W180 only) (4000×2248) For viewing on a high-definition TV. (DSC-W190 only) (3648×2056) (DSC-W180 only) (1920×1080) No.
Operating Instructions
Page 35
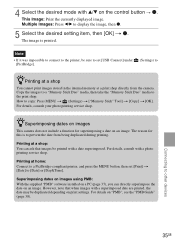
...Date] or [Day&Time]. For details, consult with v/V on the control button t z. The reason for superimposing a date on images This camera does not include a function for this is printed. zSuperimposing dates on an image. Multiple Images: Press b/B to other devices 35GB However, note...the supplied "PMB" software installed on "PMB", see the "PMB Guide" (page 38). For details, consult your photo printing service shop. 4 Select the desired mode with a photo printing service shop. Connecting to display the image, then z. 5 Select the desired setting item, then [OK] ...
...Date] or [Day&Time]. For details, consult with v/V on the control button t z. The reason for superimposing a date on images This camera does not include a function for this is printed. zSuperimposing dates on an image. Multiple Images: Press b/B to other devices 35GB However, note...the supplied "PMB" software installed on "PMB", see the "PMB Guide" (page 38). For details, consult your photo printing service shop. 4 Select the desired mode with a photo printing service shop. Connecting to display the image, then z. 5 Select the desired setting item, then [OK] ...


