Handbook (Primary Manual)
Page 1
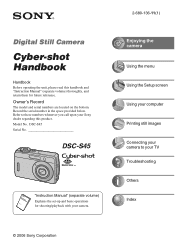
... DSC-S45 InDsigtirtaulcSttiilol CnaMmearanual "Instruction Manual" (separate volume) Explains the set-up and basic operations for future reference. Record the serial number in the space provided below. Owner's Record The model and serial numbers are located on the bottom. Refer to your Sony dealer regarding this handbook and "Instruction Manual" (separate volume) thoroughly, and retain them for shooting/playback with your camera. 2-680-136-11(1) Enjoying the camera Using the menu Using the Setup screen Using your computer Printing still images Connecting...
... DSC-S45 InDsigtirtaulcSttiilol CnaMmearanual "Instruction Manual" (separate volume) Explains the set-up and basic operations for future reference. Record the serial number in the space provided below. Owner's Record The model and serial numbers are located on the bottom. Refer to your Sony dealer regarding this handbook and "Instruction Manual" (separate volume) thoroughly, and retain them for shooting/playback with your camera. 2-680-136-11(1) Enjoying the camera Using the menu Using the Setup screen Using your computer Printing still images Connecting...
Handbook (Primary Manual)
Page 3
... recording medium used . • For details on "Memory Stick Duo", see page 83. Internal memory and "Memory Stick Duo" back up • Do not turn off the camera or remove the battery pack or "Memory Stick Duo" while the access lamp is manufactured using extremely high-precision technology so over 99.4% of your eyes. Notes on the LCD screen and lens • The LCD screen is lighted, as the internal memory data...
... recording medium used . • For details on "Memory Stick Duo", see page 83. Internal memory and "Memory Stick Duo" back up • Do not turn off the camera or remove the battery pack or "Memory Stick Duo" while the access lamp is manufactured using extremely high-precision technology so over 99.4% of your eyes. Notes on the LCD screen and lens • The LCD screen is lighted, as the internal memory data...
Handbook (Primary Manual)
Page 7
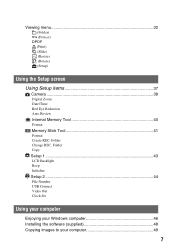
Viewing menu 32 (Folder) - (Protect) DPOF (Print) (Slide) (Resize) (Rotate) (Setup) Using the Setup screen Using Setup items 37 Camera 38 Digital Zoom Date/Time Red Eye Reduction Auto Review Internal Memory Tool 40 Format Memory Stick Tool 41 Format Create REC. Folder Copy Setup 1 43 1 LCD Backlight Beep Initialize Setup 2 44 2 File Number USB Connect Video Out Clock Set Using your computer Enjoying your Windows computer 46 Installing the software (supplied 48 Copying images to your computer 49 7 Folder Change REC.
Viewing menu 32 (Folder) - (Protect) DPOF (Print) (Slide) (Resize) (Rotate) (Setup) Using the Setup screen Using Setup items 37 Camera 38 Digital Zoom Date/Time Red Eye Reduction Auto Review Internal Memory Tool 40 Format Memory Stick Tool 41 Format Create REC. Folder Copy Setup 1 43 1 LCD Backlight Beep Initialize Setup 2 44 2 File Number USB Connect Video Out Clock Set Using your computer Enjoying your Windows computer 46 Installing the software (supplied 48 Copying images to your computer 49 7 Folder Change REC.
Handbook (Primary Manual)
Page 8
Viewing image files stored on a computer with your camera (using a "Memory Stick Duo 55 Using the "Cyber-shot Viewer" (supplied 56 Using your Macintosh computer 60 Printing still images How to print still images 62 Printing images directly using a PictBridge compliant printer 63 Printing at a shop 66 Connecting your camera to your TV Viewing images on a TV screen 68 Troubleshooting Troubleshooting 70 Warning messages 81 Others On the "Memory Stick 83 On the batteries 85 Precautions 87 Index...88 8
Viewing image files stored on a computer with your camera (using a "Memory Stick Duo 55 Using the "Cyber-shot Viewer" (supplied 56 Using your Macintosh computer 60 Printing still images How to print still images 62 Printing images directly using a PictBridge compliant printer 63 Printing at a shop 66 Connecting your camera to your TV Viewing images on a TV screen 68 Troubleshooting Troubleshooting 70 Warning messages 81 Others On the "Memory Stick 83 On the batteries 85 Precautions 87 Index...88 8

Handbook (Primary Manual)
Page 44
... the USA, Japan). view images on the operation t page 37 The default settings are marked with a number higher than the last assigned number, a number one higher than the largest number is assigned.) Reset Starts from 0001 each time the folder is changed. (When the recording folder contains a file, a number one higher than the largest number is assigned.) USB Connect Selects the USB mode to a computer or a PictBridge compliant printer using the USB cable. Normal Connects the camera to ! Different...
... the USA, Japan). view images on the operation t page 37 The default settings are marked with a number higher than the last assigned number, a number one higher than the largest number is assigned.) Reset Starts from 0001 each time the folder is changed. (When the recording folder contains a file, a number one higher than the largest number is assigned.) USB Connect Selects the USB mode to a computer or a PictBridge compliant printer using the USB cable. Normal Connects the camera to ! Different...
Handbook (Primary Manual)
Page 47
... using the Cyber-shot Viewer OS (pre-installed): Microsoft Windows 2000 Professional, Windows Millennium Edition, Windows XP Home Edition or Windows XP Professional Sound card: 16-bit stereo sound card with DirectX technology. DirectX must be installed for use. This section describes the [Normal] mode as standard Recommended environment for using a USB hub. • The [Normal] (default setting) mode is for a USB connection when connectiong a computer. Notes on connecting your camera to a computer • Operations...
... using the Cyber-shot Viewer OS (pre-installed): Microsoft Windows 2000 Professional, Windows Millennium Edition, Windows XP Home Edition or Windows XP Professional Sound card: 16-bit stereo sound card with DirectX technology. DirectX must be installed for use. This section describes the [Normal] mode as standard Recommended environment for using a USB hub. • The [Normal] (default setting) mode is for a USB connection when connectiong a computer. Notes on connecting your camera to a computer • Operations...
Handbook (Primary Manual)
Page 48
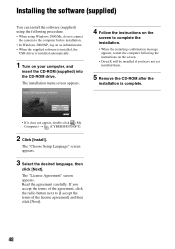
... installed them. 5 Remove the CD-ROM after the installation is installed automatically. 1 Turn on as Administrator. • When the supplied software is installed, the USB driver is complete. • If it does not appear, double-click (My Computer) t (CYBERSHOTSOFT). 2 Click [Install]. The "License Agreement" screen appears. The "Choose Setup Language" screen appears. 3 Select the desired language, then click [Next]. The installation menu screen appears. 4 Follow the instructions on the screen...
... installed them. 5 Remove the CD-ROM after the installation is installed automatically. 1 Turn on as Administrator. • When the supplied software is installed, the USB driver is complete. • If it does not appear, double-click (My Computer) t (CYBERSHOTSOFT). 2 Click [Install]. The "License Agreement" screen appears. The "Choose Setup Language" screen appears. 3 Select the desired language, then click [Next]. The installation menu screen appears. 4 Follow the instructions on the screen...
Handbook (Primary Manual)
Page 55
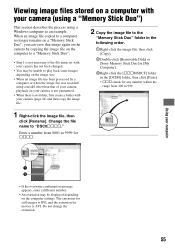
... recorded using a Windows computer as an example. When an image file copied to a computer no folder, first create a folder with your camera is not guaranteed. • When there is AVI. Enter a number from 100 to 9999 for movies is no longer remains on a "Memory Stick Duo", you can view that of your camera, playback on your camera has not been changed. • You may be unable to play...
... recorded using a Windows computer as an example. When an image file copied to a computer no folder, first create a folder with your camera is not guaranteed. • When there is AVI. Enter a number from 100 to 9999 for movies is no longer remains on a "Memory Stick Duo", you can view that of your camera, playback on your camera has not been changed. • You may be unable to play...
Handbook (Primary Manual)
Page 56
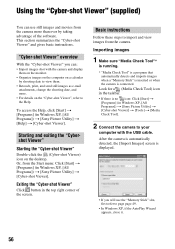
... the software. To access the Help, click [Start] t [Programs] (in Windows XP, [All Programs]) t [Sony Picture Utility] t [Cyber-shot Viewer]. After the camera is automatically detected, the [Import Images] screen is connected. Or, from the camera more . • For details on the desktop. This section summarizes the "Cyber-shot Viewer" and gives basic instructions. "Cyber-shot Viewer" overview With the "Cyber-shot Viewer" you will use still images and movies from the Start menu: Click [Start] t [Programs] (in Windows...
... the software. To access the Help, click [Start] t [Programs] (in Windows XP, [All Programs]) t [Sony Picture Utility] t [Cyber-shot Viewer]. After the camera is automatically detected, the [Import Images] screen is connected. Or, from the camera more . • For details on the desktop. This section summarizes the "Cyber-shot Viewer" and gives basic instructions. "Cyber-shot Viewer" overview With the "Cyber-shot Viewer" you will use still images and movies from the Start menu: Click [Start] t [Programs] (in Windows...
Handbook (Primary Manual)
Page 63
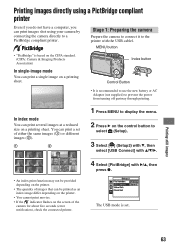
... USB cablel. Index button Control Button • It is set of either the same images (1) or different images (2). 1 2 1 Press MENU to display the menu. 2 Press B on the control button to prevent the power from turning off partway through printing. Printing still images 63 Stage 1: Preparing the camera Prepare the camera to connect it to a PictBridge compliant printer. MENU button • "PictBridge" is based on the CIPA standard. (CIPA: Camera & Imaging Products Association) In single-image mode You can print images shot using...
... USB cablel. Index button Control Button • It is set of either the same images (1) or different images (2). 1 2 1 Press MENU to display the menu. 2 Press B on the control button to prevent the power from turning off partway through printing. Printing still images 63 Stage 1: Preparing the camera Prepare the camera to connect it to a PictBridge compliant printer. MENU button • "PictBridge" is based on the CIPA standard. (CIPA: Camera & Imaging Products Association) In single-image mode You can print images shot using...
Handbook (Primary Manual)
Page 72
Record in the image. The image size is not a malfunction. 72 This is set to [5M] or [3:2]. - Smart zoom does not function. • Set [Digital Zoom] to [Smart] (page 38). • This function cannot be used when: - Shooting movies. Fuzzy specks appear in images shot using the flash. • Dust in the air reflected the flash light and appeared in the close -up (Macro) recording mode. Zoom does not work . • The flash is set to (No flash). •...
Record in the image. The image size is not a malfunction. 72 This is set to [5M] or [3:2]. - Smart zoom does not function. • Set [Digital Zoom] to [Smart] (page 38). • This function cannot be used when: - Shooting movies. Fuzzy specks appear in images shot using the flash. • Dust in the air reflected the flash light and appeared in the close -up (Macro) recording mode. Zoom does not work . • The flash is set to (No flash). •...
Handbook (Primary Manual)
Page 74
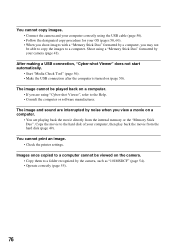
Install charged batteries or replace with the following items. Your camera cannot play back images. • Set the mode dial to (page 24). • The folder/file name has been changed on your computer. • When an image file has been processed by a computer or when the image file was recorded using a model other than that of your camera, playback on the TV screen. • Check [Video Out] to see if the video output signal...
Install charged batteries or replace with the following items. Your camera cannot play back images. • Set the mode dial to (page 24). • The folder/file name has been changed on your computer. • When an image file has been processed by a computer or when the image file was recorded using a model other than that of your camera, playback on the TV screen. • Check [Video Out] to see if the video output signal...

Handbook (Primary Manual)
Page 75
.... • Connect the camera directly to your camera. • Turn on the camera. • When the battery level is low, install the charged batteries, replace the batteries with the camera. • Check "Recommended computer environment" on page 47 for windows and page 60 for Macintosh. Make sure that you cannot restore it again firmly. We recommend that "USB Mode Normal" is compatible with new ones, or use the AC...
.... • Connect the camera directly to your camera. • Turn on the camera. • When the battery level is low, install the charged batteries, replace the batteries with the camera. • Check "Recommended computer environment" on page 47 for windows and page 60 for Macintosh. Make sure that you cannot restore it again firmly. We recommend that "USB Mode Normal" is compatible with new ones, or use the AC...
Handbook (Primary Manual)
Page 76
Images once copied to the Help. • Consult the computer or software manufacturer. After making a USB connection, "Cyber-shot Viewer" does not start automatically. • Start "Media Check Tool" (page 56). • Make the USB connection after the computer is turned on the camera. • Copy them to a folder recognized by noise when you view a movie on a computer. • If you are using "Cyber-shot Viewer", refer to a computer cannot be viewed on (page 50...
Images once copied to the Help. • Consult the computer or software manufacturer. After making a USB connection, "Cyber-shot Viewer" does not start automatically. • Start "Media Check Tool" (page 56). • Make the USB connection after the computer is turned on the camera. • Copy them to a folder recognized by noise when you view a movie on a computer. • If you are using "Cyber-shot Viewer", refer to a computer cannot be viewed on (page 50...
Handbook (Primary Manual)
Page 79
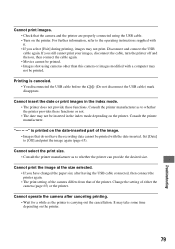
... USB cable again. Cannot select the print size. • Consult the printer manufacturer as to the operating instructions supplied with the date inserted. It may take some time depending on the printer. Cannot print images. • Check that the camera and the printer are properly connected using cameras other than this camera or images modified with a computer may not be inserted in the index mode. • The printer does not provide these functions...
... USB cable again. Cannot select the print size. • Consult the printer manufacturer as to the operating instructions supplied with the date inserted. It may take some time depending on the printer. Cannot print images. • Check that the camera and the printer are properly connected using cameras other than this camera or images modified with a computer may not be inserted in the index mode. • The printer does not provide these functions...
Handbook (Primary Manual)
Page 81
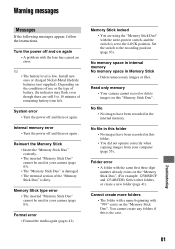
... used in Memory Stick • Delete unnecessary images or files. Memory Stick locked • You are still 5 to 10 minutes of battery, the indicator may flash even though there are using the "Memory Stick Duo" with the lens has caused an error. No memory space in internal memory No memory space in your computer (page 55). Read only memory • Your camera cannot record or delete images on again. Set the switch to the LOCK position. Turn the power...
... used in Memory Stick • Delete unnecessary images or files. Memory Stick locked • You are still 5 to 10 minutes of battery, the indicator may flash even though there are using the "Memory Stick Duo" with the lens has caused an error. No memory space in internal memory No memory space in your computer (page 55). Read only memory • Your camera cannot record or delete images on again. Set the switch to the LOCK position. Turn the power...
Handbook (Primary Manual)
Page 88
... File Number 44 File storage destination ........ 54 Fine 29 Fluorescent 29 Focus 9 Folder 32 Changing 42 Creating 41 Format 41 I Identifying parts 14 Image file storage destinations and file names 54 Image quality 12, 29 Image size 12 Incandescent 29 Index mode 63 Index screen 33 Indicator see "Screen" M Macintosh computer Recommended environment 60 "Memory Stick Duo 83 Format 41 Number of images/ recording time 21 Write-protect switch...... 83 Memory Stick Tool 41 Menu 26 Items 27 Shooting 28 Viewing...
... File Number 44 File storage destination ........ 54 Fine 29 Fluorescent 29 Focus 9 Folder 32 Changing 42 Creating 41 Format 41 I Identifying parts 14 Image file storage destinations and file names 54 Image quality 12, 29 Image size 12 Incandescent 29 Index mode 63 Index screen 33 Indicator see "Screen" M Macintosh computer Recommended environment 60 "Memory Stick Duo 83 Format 41 Number of images/ recording time 21 Write-protect switch...... 83 Memory Stick Tool 41 Menu 26 Items 27 Shooting 28 Viewing...
Handbook (Primary Manual)
Page 89
... 66 Printing directly 63 Program auto shooting..........24 Protect 33 R REC Mode 30 Red Eye Reduction 39 Resize 35 Rotate 36 Setup 1 43 Setup 2 44 Sharpness 31 Shooting menu 28 Shooting movies 24 Single-image mode 63 Slide 34 Smart zoom 38 Software 48 Spot metering 28 Spot metering cross hairs ..... 28 Standard 29 T Tripod receptacle 14 Troubleshooting 70 TV 68 U Underexposure 10 USB cable 19 USB Connect 44 V Video Out 44 Viewing Movie 56 Still image 56 S Viewing menu...
... 66 Printing directly 63 Program auto shooting..........24 Protect 33 R REC Mode 30 Red Eye Reduction 39 Resize 35 Rotate 36 Setup 1 43 Setup 2 44 Sharpness 31 Shooting menu 28 Shooting movies 24 Single-image mode 63 Slide 34 Smart zoom 38 Software 48 Spot metering 28 Spot metering cross hairs ..... 28 Standard 29 T Tripod receptacle 14 Troubleshooting 70 TV 68 U Underexposure 10 USB cable 19 USB Connect 44 V Video Out 44 Viewing Movie 56 Still image 56 S Viewing menu...
Instruction Manual (Set up and basic operation)
Page 1
... (1) Digital Still Camera Instruction Manual Before operating the unit, please read this manual and "Cyber-shot Handbook" (PDF) on commercial norms, and do not apply to all the way in accordance with the instructions, may cause harmful interference to radio communications. DSC-S45 Serial No. DSC-S45 Refer to "Cyber-shot Handbook" (PDF) on this manual) (1) Notes before purchasing. For Windows users, place the supplied CD-ROM in "Handbook" on the screen. For Macintosh users, copy "Handbook.pdf" stored...
... (1) Digital Still Camera Instruction Manual Before operating the unit, please read this manual and "Cyber-shot Handbook" (PDF) on commercial norms, and do not apply to all the way in accordance with the instructions, may cause harmful interference to radio communications. DSC-S45 Serial No. DSC-S45 Refer to "Cyber-shot Handbook" (PDF) on this manual) (1) Notes before purchasing. For Windows users, place the supplied CD-ROM in "Handbook" on the screen. For Macintosh users, copy "Handbook.pdf" stored...
Instruction Manual (Set up and basic operation)
Page 2
... output during movie playback on ) The shutter speed slows down . Printed on the screen When shooting still images (Auto adjustment mode) When shooting movies (Factory setting) STBY 320 101 00:00:00 [00:00:30] 1 Display z STBY REC SL 2 Display Indication Battery remaining AE/AF lock Recording mode Standby/Recording a movie Flash mode Flash charging Indication Macro 3 Display 5M 3:2 3M 1M VGA 3 2 0 FINE 101 00:00:00 [00:00:30] 30 10 2 Indication Image size Image quality Recording folder • This does not appear when using the zoom Press T (telephoto...
... output during movie playback on ) The shutter speed slows down . Printed on the screen When shooting still images (Auto adjustment mode) When shooting movies (Factory setting) STBY 320 101 00:00:00 [00:00:30] 1 Display z STBY REC SL 2 Display Indication Battery remaining AE/AF lock Recording mode Standby/Recording a movie Flash mode Flash charging Indication Macro 3 Display 5M 3:2 3M 1M VGA 3 2 0 FINE 101 00:00:00 [00:00:30] 30 10 2 Indication Image size Image quality Recording folder • This does not appear when using the zoom Press T (telephoto...


