Operating Guide
Page 7
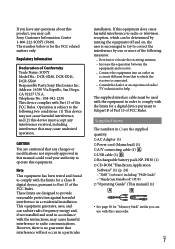
... Adaptor (1) Power cord (Mains lead) (1) A/V connecting cable (1) USB cable (1) Rechargeable battery pack NP-FH30 (1) CD-ROM "Handycam Application Software" (1) (p. 24) "PMB" (software) including "PMB Guide" "Handycam Handbook" (PDF) "Operating Guide" (This manual) (1) See page 38 for a digital device pursuant to Subpart B of Part 15 of the following two conditions: (1) This device may cause undesired operation. If you have any changes or modifications not...
... Adaptor (1) Power cord (Mains lead) (1) A/V connecting cable (1) USB cable (1) Rechargeable battery pack NP-FH30 (1) CD-ROM "Handycam Application Software" (1) (p. 24) "PMB" (software) including "PMB Guide" "Handycam Handbook" (PDF) "Operating Guide" (This manual) (1) See page 38 for a digital device pursuant to Subpart B of Part 15 of the following two conditions: (1) This device may cause undesired operation. If you have any changes or modifications not...
Operating Guide
Page 8
... other materials may result in color) that you need an NTSC system-based TV. Television programs, films, video tapes, and other malfunctions could occur. ejecting "Memory Stick PRO Duo" media removing the battery pack or AC Adaptor from Windows Vista. Notes on use . Pushing the plug forcibly into the terminal will find the "Handycam Handbook" (PDF) on the supplied CD-ROM (p. 44). The screenshots are...
... other materials may result in color) that you need an NTSC system-based TV. Television programs, films, video tapes, and other malfunctions could occur. ejecting "Memory Stick PRO Duo" media removing the battery pack or AC Adaptor from Windows Vista. Notes on use . Pushing the plug forcibly into the terminal will find the "Handycam Handbook" (PDF) on the supplied CD-ROM (p. 44). The screenshots are...
Operating Guide
Page 10
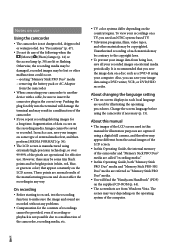
... started Step 1: Charging the battery pack 12 Charging the battery pack abroad 13 Step 2: Turning the power on, and setting the date and time 14 Changing the language setting 15 Recording Recording 16 Recording and playing movies and photos easily (Easy Handycam operation 19 Playback Playback on the camcorder 20 Playing images on a TV 23 Saving movies and photos with a computer Preparing a computer (Windows 24 When using a Macintosh 24 Creating a disc with one touch (One Touch Disc Burn 26 Importing movies and photos to a computer...
... started Step 1: Charging the battery pack 12 Charging the battery pack abroad 13 Step 2: Turning the power on, and setting the date and time 14 Changing the language setting 15 Recording Recording 16 Recording and playing movies and photos easily (Easy Handycam operation 19 Playback Playback on the camcorder 20 Playing images on a TV 23 Saving movies and photos with a computer Preparing a computer (Windows 24 When using a Macintosh 24 Creating a disc with one touch (One Touch Disc Burn 26 Importing movies and photos to a computer...

Operating Guide
Page 23
... S VIDEO VIDEO (Yellow) AUDIO (White) (Red) VCRs or TVs Playback (Yellow) :Signal flow A/V Remote Connector Set the input selector of the TV to another device via the A/V jack using an A/V connecting cable. A/V connecting cable with S VIDEO (sold separately) When connecting to the input your camcorder to the input jack of a TV or VCR using an A/V connecting cable with an S VIDEO cable (sold separately). The yellow plug connection is not necessary. Connect your camcorder will not output audio. Connect the white and red plugs (left/right audio...
... S VIDEO VIDEO (Yellow) AUDIO (White) (Red) VCRs or TVs Playback (Yellow) :Signal flow A/V Remote Connector Set the input selector of the TV to another device via the A/V jack using an A/V connecting cable. A/V connecting cable with S VIDEO (sold separately) When connecting to the input your camcorder to the input jack of a TV or VCR using an A/V connecting cable with an S VIDEO cable (sold separately). The yellow plug connection is not necessary. Connect your camcorder will not output audio. Connect the white and red plugs (left/right audio...

Operating Guide
Page 24
... required. Hard disk Disk volume required for OS should be necessary when creating DVD discs). If you install a higher version of "PMB" first, some functions may not operate correctly. You can perform following operations using "PMB (Picture Motion Browser)." Importing images to a computer Viewing and editing imported images Creating a disc Uploading movies and photos to websites To save movies and photos using a Macintosh The supplied software "PMB" is not supported by clicking [Help] - [About...
... required. Hard disk Disk volume required for OS should be necessary when creating DVD discs). If you install a higher version of "PMB" first, some functions may not operate correctly. You can perform following operations using "PMB (Picture Motion Browser)." Importing images to a computer Viewing and editing imported images Creating a disc Uploading movies and photos to websites To save movies and photos using a Macintosh The supplied software "PMB" is not supported by clicking [Help] - [About...

Operating Guide
Page 29
... another file. Copying a disc You can copy a recorded disc to display [Save Frame] windows. See "PMB Guide" on the operation (p. 28). Editing movies You can cut icon on the computer screen to start "PMB." You may take a long time to display the Video Trimming window. Using "PMB," select the movie you can use. If any other software than "PMB" starts automatically, shut it as a photo file. See "Video Disc Copier" help on the operation. Creating a disc...
... another file. Copying a disc You can copy a recorded disc to display [Save Frame] windows. See "PMB Guide" on the operation (p. 28). Editing movies You can cut icon on the computer screen to start "PMB." You may take a long time to display the Video Trimming window. Using "PMB," select the movie you can use. If any other software than "PMB" starts automatically, shut it as a photo file. See "Video Disc Copier" help on the operation. Creating a disc...
Operating Guide
Page 42
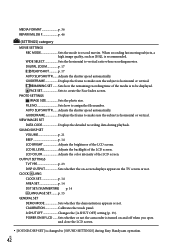
... the touch panel. POWER ON BY LCD........ WIDE SELECT Sets the horizontal to create the Face Index screen. DIGITAL ZOOM p. 17 STEADYSHOT p. 17 AUTO SLW SHUTTR....... Adjusts the shutter speed automatically. MEDIA FORMAT p. 36 REPAIR IMG.DB F p. 46 (SETTINGS) category MOVIE SETTINGS REC MODE Sets the mode to assign the file number. AUTO SLW SHUTTR....... PHOTO SETTINGS IMAGE SIZE Sets the photo size. FILE NO Sets how to record movies. US 42 When recording fast moving subjects, a high image quality, such as [HQ], is to [SOUND SETTINGS] during playback.
... the touch panel. POWER ON BY LCD........ WIDE SELECT Sets the horizontal to create the Face Index screen. DIGITAL ZOOM p. 17 STEADYSHOT p. 17 AUTO SLW SHUTTR....... Adjusts the shutter speed automatically. MEDIA FORMAT p. 36 REPAIR IMG.DB F p. 46 (SETTINGS) category MOVIE SETTINGS REC MODE Sets the mode to assign the file number. AUTO SLW SHUTTR....... PHOTO SETTINGS IMAGE SIZE Sets the photo size. FILE NO Sets how to record movies. US 42 When recording fast moving subjects, a high image quality, such as [HQ], is to [SOUND SETTINGS] during playback.
Operating Guide
Page 45
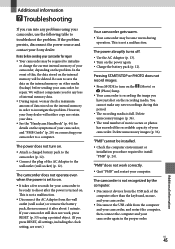
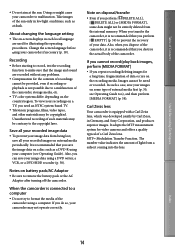
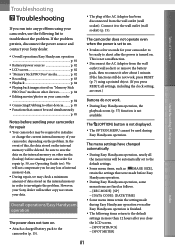
...; Turn on the recording media. You cannot make any new recordings during operation. Delete unnecessary images (p. 36). The total number of movie scenes or photos has exceeded the recordable capacity of your computer. US 45 Additional information Be sure to initialize or change the current internal memory of your camcorder, depending on connecting your camcorder, use the following table to troubleshoot the problem. If your camcorder still does not work correctly...
...; Turn on the recording media. You cannot make any new recordings during operation. Delete unnecessary images (p. 36). The total number of movie scenes or photos has exceeded the recordable capacity of your computer. US 45 Additional information Be sure to initialize or change the current internal memory of your camcorder, depending on connecting your camcorder, use the following table to troubleshoot the problem. If your camcorder still does not work correctly...
Operating Guide
Page 49
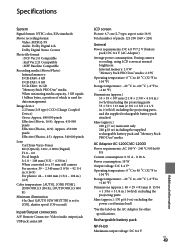
... Compatible Recording media (Movie/Photo) Internal memory: DCR-SX40: 4 GB DCR-SX41: 8 GB DCR-SX60: 16 GB "Memory Stick PRO Duo" media When measuring media capacity, 1 GB equals 1 billion bytes, a portion of which is set to [ON], shutter speed 1/30 second) Input/Output connectors A/V Remote Connector: Video/audio output jack USB jack: mini-AB LCD screen Picture: 6.7 cm (2.7 type, aspect ratio 16:9) Total number of pixels: 123 200 (560 × 220) General Power requirements: DC 6.8 V/7.2 V (battery pack) DC 8.4 V (AC Adaptor) Average power consumption: During camera recording, using LCD screen...
... Compatible Recording media (Movie/Photo) Internal memory: DCR-SX40: 4 GB DCR-SX41: 8 GB DCR-SX60: 16 GB "Memory Stick PRO Duo" media When measuring media capacity, 1 GB equals 1 billion bytes, a portion of which is set to [ON], shutter speed 1/30 second) Input/Output connectors A/V Remote Connector: Video/audio output jack USB jack: mini-AB LCD screen Picture: 6.7 cm (2.7 type, aspect ratio 16:9) Total number of pixels: 123 200 (560 × 220) General Power requirements: DC 6.8 V/7.2 V (battery pack) DC 8.4 V (AC Adaptor) Average power consumption: During camera recording, using LCD screen...
Operating Guide
Page 50
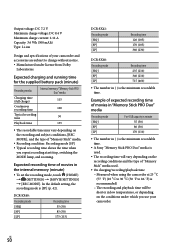
... the minimum recordable time. A Sony "Memory Stick PRO Duo" media is recommended) The recording and playback time will vary depending on the conditions under license from Dolby Laboratories. Expected charging and running time for the supplied battery pack (minute) Recording media Charging time (full charge) Continuous recording time Typical recording time Playback time Internal memory/"Memory Stick PRO Duo" media 115 100 50 135 The recordable time may vary depending on the recording and subject conditions, [REC MODE], and the type of "Memory Stick" media used...
... the minimum recordable time. A Sony "Memory Stick PRO Duo" media is recommended) The recording and playback time will vary depending on the conditions under license from Dolby Laboratories. Expected charging and running time for the supplied battery pack (minute) Recording media Charging time (full charge) Continuous recording time Typical recording time Playback time Internal memory/"Memory Stick PRO Duo" media 115 100 50 135 The recordable time may vary depending on the recording and subject conditions, [REC MODE], and the type of "Memory Stick" media used...

Operating Guide
Page 54
... "Memory Stick PRO-HG Duo" media 38 "Memory Stick PRO Duo" media 38 Menus 40 Movies 16, 20 O One Touch Disc Burn 26 Operation beeps 14 Operation flow 9 OPTION MENU 40, 43 P Parts and controls 53 Photos 18, 21 Playback 20 PMB (Picture Motion Browser)....24, 28 PMB Guide 28 R Recording 16 Recording and playback time....50 Recording media 37 Repair 45 RESET 53 S Screen indicators 52 Self-diagnosis display 46 Setting the date and time...........14 Software 24 Specifications 49 Supplied items 7 T Tripod 37 Troubleshooting...
... "Memory Stick PRO-HG Duo" media 38 "Memory Stick PRO Duo" media 38 Menus 40 Movies 16, 20 O One Touch Disc Burn 26 Operation beeps 14 Operation flow 9 OPTION MENU 40, 43 P Parts and controls 53 Photos 18, 21 Playback 20 PMB (Picture Motion Browser)....24, 28 PMB Guide 28 R Recording 16 Recording and playback time....50 Recording media 37 Repair 45 RESET 53 S Screen indicators 52 Self-diagnosis display 46 Setting the date and time...........14 Software 24 Specifications 49 Supplied items 7 T Tripod 37 Troubleshooting...

Handycam® Handbook
Page 11
p. 84 (SETTINGS) category MOVIE SETTINGS REC MODE WIDE SELECT DIGITAL ZOOM STEADYSHOT AUTO SLW SHUTTR GUIDEFRAME REMAINING SET FACE SET* PHOTO SETTINGS IMAGE SIZE* FILE NO. AUTO SLW SHUTTR GUIDEFRAME VIEW IMAGES SET DATA CODE SOUND/DISP SET VOLUME* BEEP* LCD BRIGHT LCD BL LEVEL LCD COLOR OUTPUT SETTINGS TV TYPE DISP OUTPUT CLOCK/ LANG CLOCK SET* AREA SET DST SET/SUMMERTIME LANGUAGE SET* GENERAL SET DEMO MODE CALIBRATION A.SHUT OFF POWER ON BY LCD p. 60 p. 60 p. 61 p. 61 p. 61 p. 62 p. 62 p. 63 p. 64 p. 64 p. 64 p. 65 p. 66 p. 24, 33 p. 68 p. 68 p. 68 p. 69...
p. 84 (SETTINGS) category MOVIE SETTINGS REC MODE WIDE SELECT DIGITAL ZOOM STEADYSHOT AUTO SLW SHUTTR GUIDEFRAME REMAINING SET FACE SET* PHOTO SETTINGS IMAGE SIZE* FILE NO. AUTO SLW SHUTTR GUIDEFRAME VIEW IMAGES SET DATA CODE SOUND/DISP SET VOLUME* BEEP* LCD BRIGHT LCD BL LEVEL LCD COLOR OUTPUT SETTINGS TV TYPE DISP OUTPUT CLOCK/ LANG CLOCK SET* AREA SET DST SET/SUMMERTIME LANGUAGE SET* GENERAL SET DEMO MODE CALIBRATION A.SHUT OFF POWER ON BY LCD p. 60 p. 60 p. 61 p. 61 p. 61 p. 62 p. 62 p. 63 p. 64 p. 64 p. 64 p. 65 p. 66 p. 24, 33 p. 68 p. 68 p. 68 p. 69...
Handycam® Handbook
Page 14
... [MEDIA FORMAT], some type of external media first (p. 50, see Operating Guide). Carl Zeiss lens Your camcorder is recommended that you need an NTSC system-based TV. Television programs, films, video tapes, and other materials may be saved or recorded. The number value indicates the amount of light from the internal memory. Index 14 Table of Contents Useful Recording Techniques Do not aim at dusk. Change the screen language before using your recorded images on -screen displays...
... [MEDIA FORMAT], some type of external media first (p. 50, see Operating Guide). Carl Zeiss lens Your camcorder is recommended that you need an NTSC system-based TV. Television programs, films, video tapes, and other materials may be saved or recorded. The number value indicates the amount of light from the internal memory. Index 14 Table of Contents Useful Recording Techniques Do not aim at dusk. Change the screen language before using your recorded images on -screen displays...

Handycam® Handbook
Page 27
... the access lamp is lit or flashing after recording is finished, it means that data is still being written onto the recording media. START/STOP button Table of Contents Useful Recording Techniques [STBY] [REC] To stop recording, press START/STOP again. See page 88 on the camcorder. If you rotate the LCD panel 180 degrees to the lens side , you can record movies/ photos in mirror mode. ...
... the access lamp is lit or flashing after recording is finished, it means that data is still being written onto the recording media. START/STOP button Table of Contents Useful Recording Techniques [STBY] [REC] To stop recording, press START/STOP again. See page 88 on the camcorder. If you rotate the LCD panel 180 degrees to the lens side , you can record movies/ photos in mirror mode. ...

Handycam® Handbook
Page 52
...) (OTHERS) [USB CONNECT]. Touch [ USB CONNECT] when movies are recorded on the internal memory, or [ USB CONNECT] when movies are recorded on "Memory Stick PRO Duo" media on the camcorder screen. Record movies on the camcorder screen. Disconnect the USB cable. 52 The method used to create a disc by connecting your camcorder to a Sony DVD writer with the device to be burnt by For details, refer to the instruction manuals supplied with the USB cable is about 20 to...
...) (OTHERS) [USB CONNECT]. Touch [ USB CONNECT] when movies are recorded on the internal memory, or [ USB CONNECT] when movies are recorded on "Memory Stick PRO Duo" media on the camcorder screen. Record movies on the camcorder screen. Disconnect the USB cable. 52 The method used to create a disc by connecting your camcorder to a Sony DVD writer with the device to be burnt by For details, refer to the instruction manuals supplied with the USB cable is about 20 to...
Handycam® Handbook
Page 81
... your camcorder p. 84 Connecting/Dubbing to other media (backup) before Easy Handycam operation. During Easy Handycam operation, some menu items are reset.) Buttons do not work . During Easy Handycam operation, the playback zoom (p. 37) function is not displayed. The OPTION MENU cannot be deleted. The camcorder does not operate even when the power is set to the default settings. Some menu items, such as follows. [REC MODE]: [SP] [DATA CODE]: [DATE/TIME] Some menu...
... your camcorder p. 84 Connecting/Dubbing to other media (backup) before Easy Handycam operation. During Easy Handycam operation, some menu items are reset.) Buttons do not work . During Easy Handycam operation, the playback zoom (p. 37) function is not displayed. The OPTION MENU cannot be deleted. The camcorder does not operate even when the power is set to the default settings. Some menu items, such as follows. [REC MODE]: [SP] [DATA CODE]: [DATE/TIME] Some menu...
Handycam® Handbook
Page 86
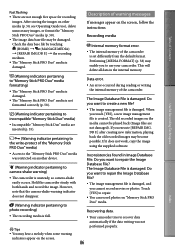
... camera-shake warning indicator does not disappear. The image management file is set differently from the default format. photo recording) Recovering data. The recording media is damaged. Recording media Internal memory format error. The internal memory of warning messages If messages appear on "Memory Stick PRO (Warning indicator pertaining to recover data automatically if the data writing was restricted on another device. The old recorded images on the screen. 86 Table of the camcorder. Description of the camcorder...
... camera-shake warning indicator does not disappear. The image management file is set differently from the default format. photo recording) Recovering data. The recording media is damaged. Recording media Internal memory format error. The internal memory of warning messages If messages appear on "Memory Stick PRO (Warning indicator pertaining to recover data automatically if the data writing was restricted on another device. The old recorded images on the screen. 86 Table of the camcorder. Description of the camcorder...
Handycam® Handbook
Page 93
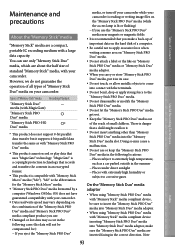
... guarantee the operation of all types of standard "Memory Stick" media, with a large data capacity. Types of Contents Useful Recording Techniques Maintenance and precautions About the "Memory Stick" media "Memory Stick" media are inserted facing in an encrypted format. This product is compatible with your camcorder is reading or writing image files on the "Memory Stick PRO Duo" media (while the access lamp is lit or flashing) If you use or keep the "Memory Stick PRO Duo" media in...
... guarantee the operation of all types of standard "Memory Stick" media, with a large data capacity. Types of Contents Useful Recording Techniques Maintenance and precautions About the "Memory Stick" media "Memory Stick" media are inserted facing in an encrypted format. This product is compatible with your camcorder is reading or writing image files on the "Memory Stick PRO Duo" media (while the access lamp is lit or flashing) If you use or keep the "Memory Stick PRO Duo" media in...

Handycam® Handbook
Page 95
... the LCD screen when not recording or playing back on your camcorder. If sand or dust gets in a fully charged state, or when the battery pack is not water resistant. About the remaining battery time indicator When the power goes off (p. 72). This damages the LCD screen. Operate your camcorder on DC 6.8 V/7.2 V (battery pack) or DC 8.4 V (AC Adaptor). For DC or AC operation, use .
... the LCD screen when not recording or playing back on your camcorder. If sand or dust gets in a fully charged state, or when the battery pack is not water resistant. About the remaining battery time indicator When the power goes off (p. 72). This damages the LCD screen. Operate your camcorder on DC 6.8 V/7.2 V (battery pack) or DC 8.4 V (AC Adaptor). For DC or AC operation, use .

Handycam® Handbook
Page 100
... Contents Useful Recording Techniques Playlist 48 PMB Guide 2 PORTRAIT 77 Power on 17 POWER ON BY LCD 73 Precautions 93 PROTECT 46 R REC MODE 60 Recording 26 Recording and playback time....88 Recording media 55 Recording time of movies/ number of recordable photos....88 REMAINING SET 62 REPAIR IMG.DB F 84, 86 RESET 7 S SCENE SELECTION............77, 85 Screen indicators 8 Self-diagnosis display/Warning indicators 85 SELF-TIMER 80 Shooting 28 Slide show 38 SLIDE SHOW SET 38...
... Contents Useful Recording Techniques Playlist 48 PMB Guide 2 PORTRAIT 77 Power on 17 POWER ON BY LCD 73 Precautions 93 PROTECT 46 R REC MODE 60 Recording 26 Recording and playback time....88 Recording media 55 Recording time of movies/ number of recordable photos....88 REMAINING SET 62 REPAIR IMG.DB F 84, 86 RESET 7 S SCENE SELECTION............77, 85 Screen indicators 8 Self-diagnosis display/Warning indicators 85 SELF-TIMER 80 Shooting 28 Slide show 38 SLIDE SHOW SET 38...


