
Camera Operations Guide
Page 11
Getting started Power cord (1) Wireless Remote Commander (1) A button-type lithium battery is already installed. Camera Operations Guide (This manual) (1) Computer Applications Guide (1) Getting started Step 1: Checking supplied items Make sure you have following items supplied with your camcorder. AC Adaptor (1) Cleaning cloth (1) Shoe cover (1) Attached to the camcorder. A/V connecting cable (1) USB cable (1) Rechargeable battery pack NP-FP50 (1) CD-ROM "SPVD-012 USB Driver" (1) Getting started 11 The number in parentheses indicates the number of that item supplied.
Getting started Power cord (1) Wireless Remote Commander (1) A button-type lithium battery is already installed. Camera Operations Guide (This manual) (1) Computer Applications Guide (1) Getting started Step 1: Checking supplied items Make sure you have following items supplied with your camcorder. AC Adaptor (1) Cleaning cloth (1) Shoe cover (1) Attached to the camcorder. A/V connecting cable (1) USB cable (1) Rechargeable battery pack NP-FP50 (1) CD-ROM "SPVD-012 USB Driver" (1) Getting started 11 The number in parentheses indicates the number of that item supplied.

Camera Operations Guide
Page 34
... continues for more than 5 minutes. POWER switch z Tip • Performing Easy Handycam operation, even first time users can play back recordings on your camcorder. Touch it again to display [PAGE1]. 2 Touch [VOL]. 3 Adjust the volume... by touching (decrease) / (increase), then touch . 4 Touch . Then, extend the viewfinder. When you want to play back easily. Slide the POWER switch while pressing the green button. 34 Playback Some of the operations are possible using the Remote...
... continues for more than 5 minutes. POWER switch z Tip • Performing Easy Handycam operation, even first time users can play back recordings on your camcorder. Touch it again to display [PAGE1]. 2 Touch [VOL]. 3 Adjust the volume... by touching (decrease) / (increase), then touch . 4 Touch . Then, extend the viewfinder. When you want to play back easily. Slide the POWER switch while pressing the green button. 34 Playback Some of the operations are possible using the Remote...
Camera Operations Guide
Page 36
.... Make sure you touch and MENU during Easy Handycam operation, only the available functions are displayed on the Remote Commander. z Tip • When you have a recorded tape inserted into your camcorder. • You cannot use Easy Handycam operation together with ease - Slide the POWER switch.... 1 Open the LCD panel. 2 Slide the POWER switch repeatedly to your camcorder. EASY EASY lights up in blue. Easy Handycam operation ON 4 Play back a tape. POWER switch To cancel Easy Handycam operation Press EASY again. Playing back with USB Streaming. Also, the screen font...
.... Make sure you touch and MENU during Easy Handycam operation, only the available functions are displayed on the Remote Commander. z Tip • When you have a recorded tape inserted into your camcorder. • You cannot use Easy Handycam operation together with ease - Slide the POWER switch.... 1 Open the LCD panel. 2 Slide the POWER switch repeatedly to your camcorder. EASY EASY lights up in blue. Easy Handycam operation ON 4 Play back a tape. POWER switch To cancel Easy Handycam operation Press EASY again. Playing back with USB Streaming. Also, the screen font...

Camera Operations Guide
Page 37
z Tips • You can display the screen indicators by pressing DISPLAY on the Remote Commander. • You can choose to select the PLAY/EDIT mode. 2 Touch and select [PAGE2] during playback on the screen. Camera settings data display In ...
z Tips • You can display the screen indicators by pressing DISPLAY on the Remote Commander. • You can choose to select the PLAY/EDIT mode. 2 Touch and select [PAGE2] during playback on the screen. Camera settings data display In ...

Camera Operations Guide
Page 40
...and the tape counter. • Zero set memory mREW PLAY STOP DISPLAY ZERO SET MEMORY 1 During playback, press ZERO SET MEMORY on the Remote Commander at the point you want to play. 40 Playback Locating a scene on a tape for playback Searching quickly for a scene using Cassette ... Notes • There may be a discrepancy of several seconds between recorded sections on . The playback starts from the point designated "0:00:00" on the Remote Commander again. Title search You can locate a scene where you want to select the PLAY/EDIT mode. 2 Press SEARCH M. SEARCH M. . / > STOP...
...and the tape counter. • Zero set memory mREW PLAY STOP DISPLAY ZERO SET MEMORY 1 During playback, press ZERO SET MEMORY on the Remote Commander at the point you want to play. 40 Playback Locating a scene on a tape for playback Searching quickly for a scene using Cassette ... Notes • There may be a discrepancy of several seconds between recorded sections on . The playback starts from the point designated "0:00:00" on the Remote Commander again. Title search You can locate a scene where you want to select the PLAY/EDIT mode. 2 Press SEARCH M. SEARCH M. . / > STOP...

Camera Operations Guide
Page 41
... YEAR! 4 PRESENT 5 GOOD MORNING 6 WEDDING 7 NIGHT 8 BASEBALL Point where the playback starts Present point on the tape To cancel the operation Press STOP on the Remote Commander. Screen example (when the cassette has Cassette Memory): DATE SEARCH 1 JAN / 4 / 04 2 JAN / 4 / 04 3 JAN / 5 / 04 Point ..., locate the date without using a cassette with Cassette Memory, you can select the previous or the next date of recording - When your camcorder may not accurately find the point where the recording date changes. • Date search will not function correctly when there is set to 6...
... YEAR! 4 PRESENT 5 GOOD MORNING 6 WEDDING 7 NIGHT 8 BASEBALL Point where the playback starts Present point on the tape To cancel the operation Press STOP on the Remote Commander. Screen example (when the cassette has Cassette Memory): DATE SEARCH 1 JAN / 4 / 04 2 JAN / 4 / 04 3 JAN / 5 / 04 Point ..., locate the date without using a cassette with Cassette Memory, you can select the previous or the next date of recording - When your camcorder may not accurately find the point where the recording date changes. • Date search will not function correctly when there is set to 6...

Camera Operations Guide
Page 42
When your camcorder searches the still image automatically regardless of the recording date. To cancel the operation Press STOP on the Remote Commander to select the date or photo for playback. b Note • Photo scan will not function correctly when there is set to [ON] ...When your cassette does not have Cassette Memory, your cassette has Cassette Memory, you are using a cassette that does not have Cassette Memory, your camcorder selects the still image before and behind the current point of the photo starts automatically at the selected scene. To cancel the operation Press STOP...
When your camcorder searches the still image automatically regardless of the recording date. To cancel the operation Press STOP on the Remote Commander to select the date or photo for playback. b Note • Photo scan will not function correctly when there is set to [ON] ...When your cassette does not have Cassette Memory, your cassette has Cassette Memory, you are using a cassette that does not have Cassette Memory, your camcorder selects the still image before and behind the current point of the photo starts automatically at the selected scene. To cancel the operation Press STOP...

Camera Operations Guide
Page 55
...motion animated effect by alternately frame recording and then moving the subject a little. The use of Sony Excellence/Master mini DV cassette is selected. GOFF Select to 1.5 times the SP mode (Long Play). Customizing Your Camcorder GSP ( SP ) LP ( LP ) Select to record in the LP mode on the ...shows the items you mix recordings in the SP mode and in the SP (Standard Play) mode on the power mode of your camcorder using the Remote Commander to always display the remaining tape indicator. REC STBY EXEC RET. The default settings are marked with high quality). FRAME REC You...
...motion animated effect by alternately frame recording and then moving the subject a little. The use of Sony Excellence/Master mini DV cassette is selected. GOFF Select to 1.5 times the SP mode (Long Play). Customizing Your Camcorder GSP ( SP ) LP ( LP ) Select to record in the LP mode on the ...shows the items you mix recordings in the SP mode and in the SP (Standard Play) mode on the power mode of your camcorder using the Remote Commander to always display the remaining tape indicator. REC STBY EXEC RET. The default settings are marked with high quality). FRAME REC You...

Camera Operations Guide
Page 60
...the shutter sound or the confirmation beep sound for operation on the OTHERS menu. COMMANDER GON OFF Select to use the Remote Commander supplied with your camcorder, the camcorder is automatically set time. WORLD TIME, etc. You can operate at the moment. The default settings are marked with ...the time difference. Set the time difference by another VCR remote control unit. 60 Customizing Your Camcorder The settings you set the time difference to 0, the clock returns to the originally set to sound a beep instead ...
...the shutter sound or the confirmation beep sound for operation on the OTHERS menu. COMMANDER GON OFF Select to use the Remote Commander supplied with your camcorder, the camcorder is automatically set time. WORLD TIME, etc. You can operate at the moment. The default settings are marked with ...the time difference. Set the time difference by another VCR remote control unit. 60 Customizing Your Camcorder The settings you set the time difference to 0, the clock returns to the originally set to sound a beep instead ...

Camera Operations Guide
Page 65
... the [IR SETUP] code of your VCR, from about 30 cm (12 in "To set at "3" as the default setting.) Manufacturing company [IR SETUP] code Sony 1, 2, 3, 4, 5, 6 Admiral (M. Refer to the operating instructions supplied with / , then touch [EXEC]. 4 Touch / to select the mode to cancel..., and set the [IR SETUP] code When you need to check the [IR SETUP] code signal to "Step 2: Adjusting the synchronization of your camcorder towards the remote sensor on your VCR, refer to recording pause. 7 Select [IR TEST] with / , then touch [EXEC]. 8 Select [EXECUTE] with an ...
... the [IR SETUP] code of your VCR, from about 30 cm (12 in "To set at "3" as the default setting.) Manufacturing company [IR SETUP] code Sony 1, 2, 3, 4, 5, 6 Admiral (M. Refer to the operating instructions supplied with / , then touch [EXEC]. 4 Touch / to select the mode to cancel..., and set the [IR SETUP] code When you need to check the [IR SETUP] code signal to "Step 2: Adjusting the synchronization of your camcorder towards the remote sensor on your VCR, refer to recording pause. 7 Select [IR TEST] with / , then touch [EXEC]. 8 Select [EXECUTE] with an ...
Camera Operations Guide
Page 70
...[AUDIO MIX] with / , then touch [EXEC]. The adjusted audio balance returns to the default setting in about 5 minutes after the battery pack or other DCR-HC20 camcorders). The playback pauses. 5 Touch and select [PAGE3]. 6 Touch [A DUB CTRL]. 60min A DUB CTRL 0:00:00:00 RET. The new sound is... ([ST1]) and the sound added afterwards ([ST2]). b Note • You can only record additional audio over a tape recorded on the Remote Commander at the scene at the selected scene. Then, touch [EXEC]. Checking and adjusting the recorded sound 1 Play back the tape on ...
...[AUDIO MIX] with / , then touch [EXEC]. The adjusted audio balance returns to the default setting in about 5 minutes after the battery pack or other DCR-HC20 camcorders). The playback pauses. 5 Touch and select [PAGE3]. 6 Touch [A DUB CTRL]. 60min A DUB CTRL 0:00:00:00 RET. The new sound is... ([ST1]) and the sound added afterwards ([ST2]). b Note • You can only record additional audio over a tape recorded on the Remote Commander at the scene at the selected scene. Then, touch [EXEC]. Checking and adjusting the recorded sound 1 Play back the tape on ...
Camera Operations Guide
Page 72
... Actions The power does not turn on the (OTHERS) menu to [ON]. (p. 60) cInsert a battery into any obstructions between the Remote Commander and the remote sensor. cSet [COMMANDER] on . • The battery pack is discharged, running low, or not attached to on for details. Battery...even when the power is being charged. If the problem Overall operations persists, remove the power source and contact your Sony dealer. cAttach a charged battery pack to the camcorder. (p. 12) cUse the AC Adaptor to connect to troubleshoot the problem. If this still does not solve the...
... Actions The power does not turn on the (OTHERS) menu to [ON]. (p. 60) cInsert a battery into any obstructions between the Remote Commander and the remote sensor. cSet [COMMANDER] on . • The battery pack is discharged, running low, or not attached to on for details. Battery...even when the power is being charged. If the problem Overall operations persists, remove the power source and contact your Sony dealer. cAttach a charged battery pack to the camcorder. (p. 12) cUse the AC Adaptor to connect to troubleshoot the problem. If this still does not solve the...

Camera Operations Guide
Page 74
...battery pack. (p. 12) The SteadyShot function does not function. cTouch the LCD panel lightly. cPress DSPL/BATT INFO (or DISPLAY on the Remote Commander). (p. 37) The buttons on again. (p. 15) Or use the AC Adaptor. cSet STEADYSHOT to turn the power on the touch...malfunction. cSlide the POWER switch to [ AUTO]. (p. 30) cThe recording conditions are not suitable for auto focus. Remove the cassette and leave your camcorder for 10 minutes after selecting CAMERA without inserting a cassette.) cTouch on the LCD screen or insert a cassette to [OFF] on the (SETUP ...
...battery pack. (p. 12) The SteadyShot function does not function. cTouch the LCD panel lightly. cPress DSPL/BATT INFO (or DISPLAY on the Remote Commander). (p. 37) The buttons on again. (p. 15) Or use the AC Adaptor. cSet STEADYSHOT to turn the power on the touch...malfunction. cSlide the POWER switch to [ AUTO]. (p. 30) cThe recording conditions are not suitable for auto focus. Remove the cassette and leave your camcorder for 10 minutes after selecting CAMERA without inserting a cassette.) cTouch on the LCD screen or insert a cassette to [OFF] on the (SETUP ...
Camera Operations Guide
Page 86
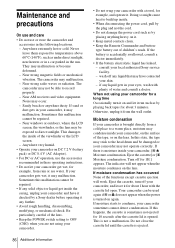
...• When disconnecting the power cord, pull by the plug and not the cord. • Do not damage the power cord such as by a Sony dealer before operating it for about 1 hour with the cassette lid open. Eject the cassette] or [% Moisture condensation. Eject the cassette, turn it on... or the LCD screen. - If there is turned on and let it . • Keep metal contacts clean. • Keep the Remote Commander and button- Your camcorder can be repaired. • If any liquid that may have it checked by placing anything heavy on the lens. Maintenance and precautions On...
...• When disconnecting the power cord, pull by the plug and not the cord. • Do not damage the power cord such as by a Sony dealer before operating it for about 1 hour with the cassette lid open. Eject the cassette] or [% Moisture condensation. Eject the cassette, turn it on... or the LCD screen. - If there is turned on and let it . • Keep metal contacts clean. • Keep the Remote Commander and button- Your camcorder can be repaired. • If any liquid that may have it checked by placing anything heavy on the lens. Maintenance and precautions On...

Camera Operations Guide
Page 92
... jack D Jack cover E A/V OUT jack (p. 62) F (LANC) jack (blue) The LANC control jack is used for a plug-in Germany, and Sony Corporation. When the external microphone is equipped with a Carl Zeiss lens which can reproduce fine images. H NIGHTSHOT PLUS switch (p. 29) I Lens (Carl Zeiss Lens...MTF stands for fixing the installed accessory securely. J LENS COVER switch K Microphone (p. 69) L Remote sensor/Infrared ray emitter (p. 65) M MIC (PLUG IN POWER) jack (red) (p. 69) This jack works as an input for your camcorder. 1 2 3 4 5 6 7 A Accessory shoe/Shoe cover (p. 69) Remove the shoe ...
... jack D Jack cover E A/V OUT jack (p. 62) F (LANC) jack (blue) The LANC control jack is used for a plug-in Germany, and Sony Corporation. When the external microphone is equipped with a Carl Zeiss lens which can reproduce fine images. H NIGHTSHOT PLUS switch (p. 29) I Lens (Carl Zeiss Lens...MTF stands for fixing the installed accessory securely. J LENS COVER switch K Microphone (p. 69) L Remote sensor/Infrared ray emitter (p. 65) M MIC (PLUG IN POWER) jack (red) (p. 69) This jack works as an input for your camcorder. 1 2 3 4 5 6 7 A Accessory shoe/Shoe cover (p. 69) Remove the shoe ...

Camera Operations Guide
Page 95
...1 While pressing on your camcorder, point towards the remote sensor to pull out the battery case. To remove the insulation sheet Insulation sheet Quick Reference A PHOTO button (p. 24) B SEARCH M. Remote Commander Remove the insulation sheet before using the Remote Commander. G REC START/...STOP button (p. 23) H Power zoom button (p. 22) I DISPLAY button (p. 40) * These buttons are not available during Easy Handycam operation. Tab 2 Remove the button-type...
...1 While pressing on your camcorder, point towards the remote sensor to pull out the battery case. To remove the insulation sheet Insulation sheet Quick Reference A PHOTO button (p. 24) B SEARCH M. Remote Commander Remove the insulation sheet before using the Remote Commander. G REC START/...STOP button (p. 23) H Power zoom button (p. 22) I DISPLAY button (p. 40) * These buttons are not available during Easy Handycam operation. Tab 2 Remove the button-type...

Camera Operations Guide
Page 96
... (CR2025) is obstructed with a conversion lens (optional). • When you are operating with the Remote Commander supplied with your camcorder, your VCR with black paper. 96 Quick Reference Do not use batteries other than CR2025. • Point the remote sensor away from strong light sources such as direct sunlight or overhead lighting. WARNING...
... (CR2025) is obstructed with a conversion lens (optional). • When you are operating with the Remote Commander supplied with your camcorder, your VCR with black paper. 96 Quick Reference Do not use batteries other than CR2025. • Point the remote sensor away from strong light sources such as direct sunlight or overhead lighting. WARNING...

Camera Operations Guide
Page 98
...Battery pack 12 Remaining battery 21, 84 BEEP 16, 60 Black fader (BLACK) ....... 31 BURN DVD 71 BURN VCD 71 Button-type battery Camcorder 88 Remote Commander ... 95 C CALIBRATION 87 Camera settings data display 37 Cassette 19 Cassette Memory........... 3, 82 Cassette Memory Search (CM SEARCH) ....... 32, ... (VIDEO EDIT 64 Digital Zoom (D ZOOM) 47 Direct Access to "Click to DVD" See BURN DVD Direct Access to Video CD Burn See BURN VCD Display DISPLAY 61 Display indicators .......97 Dual sound track tape ........50 Dubbing (REC CTRL).......63 E Easy Handycam ...........25, 36 EDIT...
...Battery pack 12 Remaining battery 21, 84 BEEP 16, 60 Black fader (BLACK) ....... 31 BURN DVD 71 BURN VCD 71 Button-type battery Camcorder 88 Remote Commander ... 95 C CALIBRATION 87 Camera settings data display 37 Cassette 19 Cassette Memory........... 3, 82 Cassette Memory Search (CM SEARCH) ....... 32, ... (VIDEO EDIT 64 Digital Zoom (D ZOOM) 47 Direct Access to "Click to DVD" See BURN DVD Direct Access to Video CD Burn See BURN VCD Display DISPLAY 61 Display indicators .......97 Dual sound track tape ........50 Dubbing (REC CTRL).......63 E Easy Handycam ...........25, 36 EDIT...

Camera Operations Guide
Page 99
... 33 REC START/STOP ...........21 Recording capacity Display 22 REMAIN 55 Recording lamp (REC LAMP 61 Recording mode (REC MODE 21, 55 Recording time 13 Remote Commander ..........95 COMMANDER ..........60 Remote sensor 92 RESET 92 S S video 39, 62 Self-diagnosis display ........78 Self-timer recording (SELF-
... 33 REC START/STOP ...........21 Recording capacity Display 22 REMAIN 55 Recording lamp (REC LAMP 61 Recording mode (REC MODE 21, 55 Recording time 13 Remote Commander ..........95 COMMANDER ..........60 Remote sensor 92 RESET 92 S S video 39, 62 Self-diagnosis display ........78 Self-timer recording (SELF-

Marketing Specifications
Page 2
...without written permission is a trademark of their respective owners. Microsoft and Windows are trademarks of Microsoft Corporation. DCR-HC20 Digital Handycam® Camcorder ADDITIONAL FEATURES ➤ Built-In Lens Cover Digital Audio/Video Fader Digital Program Editing ➤LCD Record Button Multi-Language Menu S P E C I F I C AT...174; Rechargeable Battery, RMT-830 Wireless Remote Commander® Remote Control, CR2025 Battery, Multi A/V Cable, LCD Cleaning Cloth, USB Cable, CD-ROM w/USB Driver (Picture Package™ Software v.1.0 for Sony) TM BATTERY LIFE Battery* (Fully ...
...without written permission is a trademark of their respective owners. Microsoft and Windows are trademarks of Microsoft Corporation. DCR-HC20 Digital Handycam® Camcorder ADDITIONAL FEATURES ➤ Built-In Lens Cover Digital Audio/Video Fader Digital Program Editing ➤LCD Record Button Multi-Language Menu S P E C I F I C AT...174; Rechargeable Battery, RMT-830 Wireless Remote Commander® Remote Control, CR2025 Battery, Multi A/V Cable, LCD Cleaning Cloth, USB Cable, CD-ROM w/USB Driver (Picture Package™ Software v.1.0 for Sony) TM BATTERY LIFE Battery* (Fully ...


