Operating Instructions
Page 2
...Record the serial number in a particular installation. DAV-FX10 Serial No WARNING This equipment has been tested ... AC power source (mains) as long as practical. However, there is provided to persons. Note to CATV system installer: This reminder is no guarantee that to direct sunlight, excessive dust, mechanical vibration, or shock. •...that provides guidelines for an extended period of electric shock to call upon your Sony dealer regarding this manual could void your authority to radio or television reception, which the receiver is connected. - Model No. For ...
...Record the serial number in a particular installation. DAV-FX10 Serial No WARNING This equipment has been tested ... AC power source (mains) as long as practical. However, there is provided to persons. Note to CATV system installer: This reminder is no guarantee that to direct sunlight, excessive dust, mechanical vibration, or shock. •...that provides guidelines for an extended period of electric shock to call upon your Sony dealer regarding this manual could void your authority to radio or television reception, which the receiver is connected. - Model No. For ...
Operating Instructions
Page 4
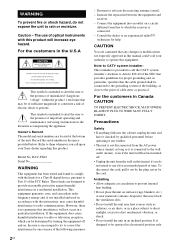
...Display...... 10 Getting Started Unpacking 13 Inserting Batteries into the Remote....... 13 Hookup Overview 14 Step 1: Speaker System Hookup........... 15 Step 2: Antenna (Aerial) Hookup ......... 20 Step 3: TV Hookup 21 Step 4: Other ...Setup ..... 28 Speaker Setup 30 Playing Discs Playing Discs 31 Using the DVD's Menu 36 Selecting [ORIGINAL] or [PLAY LIST] on a DVD-RW 37 Selecting a Playback Area for a Super Audio CD 37 Playing...Enjoying Multiplex Broadcast Sound .. 67 (DUAL MONO) Enjoying the Radio 68 Using the Sleep Timer 70 Changing the Brightness of the Front Panel Display 70...
...Display...... 10 Getting Started Unpacking 13 Inserting Batteries into the Remote....... 13 Hookup Overview 14 Step 1: Speaker System Hookup........... 15 Step 2: Antenna (Aerial) Hookup ......... 20 Step 3: TV Hookup 21 Step 4: Other ...Setup ..... 28 Speaker Setup 30 Playing Discs Playing Discs 31 Using the DVD's Menu 36 Selecting [ORIGINAL] or [PLAY LIST] on a DVD-RW 37 Selecting a Playback Area for a Super Audio CD 37 Playing...Enjoying Multiplex Broadcast Sound .. 67 (DUAL MONO) Enjoying the Radio 68 Using the Sleep Timer 70 Changing the Brightness of the Front Panel Display 70...

Operating Instructions
Page 20
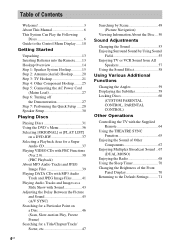
...), cord (A) or cord (B) can be connected to the radio. Step 2: Antenna (Aerial) Hookup Connect the supplied AM/FM antennas (aerials) for listening to either terminal. Tip • When you have poor FM reception, use a 75-ohms coaxial cable (not supplied) to connect the system to fully extend the FM wire antenna (aerial...
...), cord (A) or cord (B) can be connected to the radio. Step 2: Antenna (Aerial) Hookup Connect the supplied AM/FM antennas (aerials) for listening to either terminal. Tip • When you have poor FM reception, use a 75-ohms coaxial cable (not supplied) to connect the system to fully extend the FM wire antenna (aerial...

Operating Instructions
Page 68
...10 kHz or 9 kHz. To reset the interval, repeat the same procedure. repeatedly to turn on the system. The last received station is stored. 8 Repeat 1 to 7 to the radio Preset radio stations in the front panel display. 2 Press and hold TUNING + or - PRESET -/+ C/X/x/c ENTER ... TUNING -/+ VOLUME +/- CLEAR With cover opened. Before tuning, make sure to select the preset station you want appears in the system's memory first (see "Presetting radio stations" (page 68)). 1 Press FUNCTION repeatedly until the band you want . The station is tuned in the front panel display...
...10 kHz or 9 kHz. To reset the interval, repeat the same procedure. repeatedly to turn on the system. The last received station is stored. 8 Repeat 1 to 7 to the radio Preset radio stations in the front panel display. 2 Press and hold TUNING + or - PRESET -/+ C/X/x/c ENTER ... TUNING -/+ VOLUME +/- CLEAR With cover opened. Before tuning, make sure to select the preset station you want appears in the system's memory first (see "Presetting radio stations" (page 68)). 1 Press FUNCTION repeatedly until the band you want . The station is tuned in the front panel display...

Operating Instructions
Page 69
... character to select the preset station you received is noisy, press FM MODE so that no stereo effect, but the reception will be input for a radio station name. 69US If you stop the automatic tuning. Letters, numbers, and other symbols can be no more than one name can enter a name for... Step 2. Other Operations To listen to the next position. There will improve. Press X/x to select a character, then press c to move the cursor to non-preset radio stations Use manual or automatic tuning in the system's front panel display when a station is stored.
... character to select the preset station you received is noisy, press FM MODE so that no stereo effect, but the reception will be input for a radio station name. 69US If you stop the automatic tuning. Letters, numbers, and other symbols can be no more than one name can enter a name for... Step 2. Other Operations To listen to the next position. There will improve. Press X/x to select a character, then press c to move the cursor to non-preset radio stations Use manual or automatic tuning in the system's front panel display when a station is stored.
Operating Instructions
Page 82
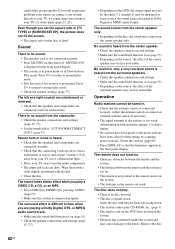
...8226; Check the speaker connections and settings (page 15, 77). • Set the sound field to [STEREO] by scanning preset stations). Operation Radio stations cannot be the entire 5.1 channel. Preset the stations (page 68). • Press DISPLAY so that the speakers and components are obstacles ... There is no sound. • The speaker cord is not connected securely. • Press MUTING on the DVD does not match the system. • Moisture has condensed inside the system and may not be tuned in with automatic tuning). Adjust the antenna (aerial) or connect an external antenna (aerial...
...8226; Check the speaker connections and settings (page 15, 77). • Set the sound field to [STEREO] by scanning preset stations). Operation Radio stations cannot be the entire 5.1 channel. Preset the stations (page 68). • Press DISPLAY so that the speakers and components are obstacles ... There is no sound. • The speaker cord is not connected securely. • Press MUTING on the DVD does not match the system. • Moisture has condensed inside the system and may not be tuned in with automatic tuning). Adjust the antenna (aerial) or connect an external antenna (aerial...

Operating Instructions
Page 91
Front panel display About the indications in the front panel display A Lights up during PBC playback. (VIDEO CD only) (38) B Current mode (DVD function only) C Lights up when the time information of a title or chapter appears in the front panel display. (DVD only) D Monaural/Stereo effect (Radio only) (68) E Current sound effect (Except for JPEG and Super Audio CD) (58) F Current surround format (Except for JPEG and Super Audio CD) (54) G Playing status (DVD function only) H Lights up during MULTI channel playback. (Super Audio CD only) (37) Additional Information 91US
Front panel display About the indications in the front panel display A Lights up during PBC playback. (VIDEO CD only) (38) B Current mode (DVD function only) C Lights up when the time information of a title or chapter appears in the front panel display. (DVD only) D Monaural/Stereo effect (Radio only) (68) E Current sound effect (Except for JPEG and Super Audio CD) (58) F Current surround format (Except for JPEG and Super Audio CD) (54) G Playing status (DVD function only) H Lights up during MULTI channel playback. (Super Audio CD only) (37) Additional Information 91US

Operating Instructions
Page 97
... DIGITAL 53 Dolby Digital 86 Dolby Pro Logic II 86 Dolby Surround Pro Logic 86 DSGX 58 DTS 53, 87 DUAL MONO 67 DVD 87 DVD+RW 87 DVD's menu 36 DVD-RW 37, 87 E EFFECT 45 F Fast forward 46 Fast reverse 46 FILE 47 File 87 Film based software 87 Front Panel 90... NAVI 42, 49 PLAY LIST 37 Preset Station 68 Program Play 33 PROGRESSIVE AUTO 22 Progressive format 22, 88 PROGRESSIVE VIDEO 23 Q Quick Setup 28 R Radio 68 Rear Panel 92 Region Code 8, 88 Remote 13, 64, 93 Repeat Play 35 RESET 73 Resume Play 32 continued 97US
... DIGITAL 53 Dolby Digital 86 Dolby Pro Logic II 86 Dolby Surround Pro Logic 86 DSGX 58 DTS 53, 87 DUAL MONO 67 DVD 87 DVD+RW 87 DVD's menu 36 DVD-RW 37, 87 E EFFECT 45 F Fast forward 46 Fast reverse 46 FILE 47 File 87 Film based software 87 Front Panel 90... NAVI 42, 49 PLAY LIST 37 Preset Station 68 Program Play 33 PROGRESSIVE AUTO 22 Progressive format 22, 88 PROGRESSIVE VIDEO 23 Q Quick Setup 28 R Radio 68 Rear Panel 92 Region Code 8, 88 Remote 13, 64, 93 Repeat Play 35 RESET 73 Resume Play 32 continued 97US


