Operating Instructions
Page 4
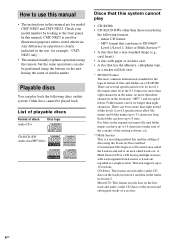
... 8.3 format (no more than eight nested folder levels. There are for example, "CMTNEZ5 only". • This manual mainly explains operations using the remote, but the same operations can have up to Lead-out regarded as a single session. In Level 1, file names must be played back. Folder ... the following discs on the tracks in the text, for model CMT-NEZ5 and CMT-NEZ3. For Joliet in this system cannot play back the following formats: - Mixed CD: This format records data on the first track and audio (audio CD data) on the second and subsequent tracks of data using ...
... 8.3 format (no more than eight nested folder levels. There are for example, "CMTNEZ5 only". • This manual mainly explains operations using the remote, but the same operations can have up to Lead-out regarded as a single session. In Level 1, file names must be played back. Folder ... the following discs on the tracks in the text, for model CMT-NEZ5 and CMT-NEZ3. For Joliet in this system cannot play back the following formats: - Mixed CD: This format records data on the first track and audio (audio CD data) on the second and subsequent tracks of data using ...

Operating Instructions
Page 18
... system turns on until the desired sound source appears. or > repeatedly until "OFF" appears, then press ENTER. or > repeatedly until "PLAY" appears, then press ENTER. or > repeatedly to stop time and the sound source appear in the preset radio station (see "Setting the clock" on the remote ...SELECT. 2 Press . "ON TIME" appears and the hour indication flashes. 5 Set the time to AUDIO IN jack as the sound source for the operation. 1 Prepare the sound source you use the optional component connected to start playing. Press . Each time you have set the minute, then press ENTER. 6...
... system turns on until the desired sound source appears. or > repeatedly until "OFF" appears, then press ENTER. or > repeatedly until "PLAY" appears, then press ENTER. or > repeatedly to stop time and the sound source appear in the preset radio station (see "Setting the clock" on the remote ...SELECT. 2 Press . "ON TIME" appears and the hour indication flashes. 5 Set the time to AUDIO IN jack as the sound source for the operation. 1 Prepare the sound source you use the optional component connected to start playing. Press . Each time you have set the minute, then press ENTER. 6...
Operating Instructions
Page 22
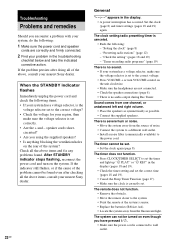
...the power cord is connected to the system. • Point the remote at the system's sensor. • Replace the batteries (R6/size AA). • Locate the system away from the fluorescent light. If... recording radio programs" (page 19) There is no audio output during Rec Timer. There is severe hum or noise. • Move the system away from one channel, or unbalanced left and right ...the voltage selector is set . If the problem persists after checking all the above , consult your nearest Sony dealer. "Check the setting" (pages 18 and 19) - "Presetting radio stations" (page 12)...
...the power cord is connected to the system. • Point the remote at the system's sensor. • Replace the batteries (R6/size AA). • Locate the system away from the fluorescent light. If... recording radio programs" (page 19) There is no audio output during Rec Timer. There is severe hum or noise. • Move the system away from one channel, or unbalanced left and right ...the voltage selector is set . If the problem persists after checking all the above , consult your nearest Sony dealer. "Check the setting" (pages 18 and 19) - "Presetting radio stations" (page 12)...


