Operating Instructions
Page 2
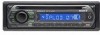
.... - This equipment generates, uses, and can be determined by one or more of the following measures: - Consult the dealer or an experienced radio/TV technician for a Class B digital device, pursuant to operate this product will shut off completely and automatically in the set the Auto Off function...set the Auto Off function, press and hold (OFF) until the display disappears each time you turn the ignition off , which can radiate radio frequency energy and, if not installed and used in a residential installation. CAUTION The use of the FCC Rules. However, there is no ACC...
.... - This equipment generates, uses, and can be determined by one or more of the following measures: - Consult the dealer or an experienced radio/TV technician for a Class B digital device, pursuant to operate this product will shut off completely and automatically in the set the Auto Off function...set the Auto Off function, press and hold (OFF) until the display disappears each time you turn the ignition off , which can radiate radio frequency energy and, if not installed and used in a residential installation. CAUTION The use of the FCC Rules. However, there is no ACC...
Operating Instructions
Page 3
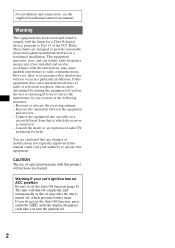
... - Table of Contents Welcome 4 Getting Started Setting the clock 4 Detaching the front panel 4 Attaching the front panel 5 Location of controls and basic operations Main unit 6 Radio Storing and receiving stations 7 Storing automatically - BTM 7 Storing manually 7 Receiving the stored stations 7 Tuning automatically 7 Other functions Changing the sound settings 8 Adjusting the balance and...
... - Table of Contents Welcome 4 Getting Started Setting the clock 4 Detaching the front panel 4 Attaching the front panel 5 Location of controls and basic operations Main unit 6 Radio Storing and receiving stations 7 Storing automatically - BTM 7 Storing manually 7 Receiving the stored stations 7 Tuning automatically 7 Other functions Changing the sound settings 8 Adjusting the balance and...
Operating Instructions
Page 4
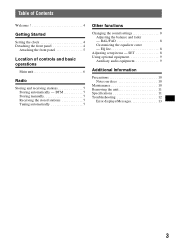
...). Avoid leaving it off towards you for purchasing this unit to heat/high temperature or moisture. EQ lite: You can play CD-DA (also containing CD TEXT*) and CD-R/CD-RW for a few seconds. Getting Started Setting the clock The clock uses a 12-hour digital indication. 1 Press and hold...panel to prevent theft. The alarm will sound for audio use. • Radio reception - Notes • Do not drop or put excessive pressure on the front of the unit allows connection of this Sony Compact Disc Player. The setup display appears. 2 Press the select button repeatedly until "CLOCK-...
...). Avoid leaving it off towards you for purchasing this unit to heat/high temperature or moisture. EQ lite: You can play CD-DA (also containing CD TEXT*) and CD-R/CD-RW for a few seconds. Getting Started Setting the clock The clock uses a 12-hour digital indication. 1 Press and hold...panel to prevent theft. The alarm will sound for audio use. • Radio reception - Notes • Do not drop or put excessive pressure on the front of the unit allows connection of this Sony Compact Disc Player. The setup display appears. 2 Press the select button repeatedly until "CLOCK-...
Operating Instructions
Page 6
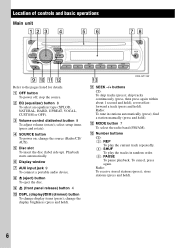
... CUSTOM or OFF). change display items (press); Playback starts automatically. H Z (eject) button To eject the disc. qd CDX-GT11W K SEEK -/+ buttons CD: To skip tracks (press); Radio: To tune in random order. (6): PAUSE To pause playback. Location of controls and basic operations Main unit 12 3 4 56... To insert the disc (label side up). I (front panel release) button 4 J DSPL (display)/DIM (dimmer) button To change the source (Radio/CD/ AUX). reverse/fastforward a track (press and hold ); C Volume control dial/select button 8 To adjust volume (rotate); select setup items (press and...
... CUSTOM or OFF). change display items (press); Playback starts automatically. H Z (eject) button To eject the disc. qd CDX-GT11W K SEEK -/+ buttons CD: To skip tracks (press); Radio: To tune in random order. (6): PAUSE To pause playback. Location of controls and basic operations Main unit 12 3 4 56... To insert the disc (label side up). I (front panel release) button 4 J DSPL (display)/DIM (dimmer) button To change the source (Radio/CD/ AUX). reverse/fastforward a track (press and hold ); C Volume control dial/select button 8 To adjust volume (rotate); select setup items (press and...
Operating Instructions
Page 7
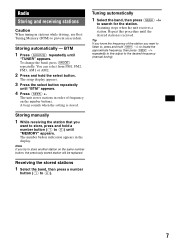
Radio Storing and receiving stations Caution When tuning in stations while driving, use Best Tuning Memory (BTM) to (6)) until "MEMORY" appears. You can select from FM1, ...
Radio Storing and receiving stations Caution When tuning in stations while driving, use Best Tuning Memory (BTM) to (6)) until "MEMORY" appears. You can select from FM1, ...
Operating Instructions
Page 13
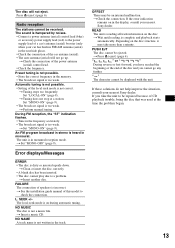
...go up. Error displays/Messages ERROR • The disc is in the display, consult your nearest Sony dealer. t Insert another disc. If the error indication remains on during automatic tuning. If these... The unit is complete and playback starts automatically. t Press Z (eject) (page 6). Radio reception The stations cannot be an internal malfunction. The sound is too weak. t Wait ...car antenna (aerial). • The auto antenna (aerial) will not eject. t Insert a music CD. NO NAME A track name is not correct. Automatic tuning is not possible. • Setting ...
...go up. Error displays/Messages ERROR • The disc is in the display, consult your nearest Sony dealer. t Insert another disc. If the error indication remains on during automatic tuning. If these... The unit is complete and playback starts automatically. t Press Z (eject) (page 6). Radio reception The stations cannot be an internal malfunction. The sound is too weak. t Wait ...car antenna (aerial). • The auto antenna (aerial) will not eject. t Insert a music CD. NO NAME A track name is not correct. Automatic tuning is not possible. • Setting ...


