Operating Instructions
Page 2
...least 20 cm and more of the following two conditions; (1) this device must not be unplugged from children. b This equipment has been tested and found to comply with this unit so that to which can be colocated or operating in order to eyes, do not place objects filled... on the apparatus. • Install this product will not occur in the literature accompanying the appliance. As the laser beam used in this Blu-ray Disc/DVD player is subject to persons. 2 This symbol is no guarantee that may not cause interference, and (2) this device may cause undesired operation of ...
...least 20 cm and more of the following two conditions; (1) this device must not be unplugged from children. b This equipment has been tested and found to comply with this unit so that to which can be colocated or operating in order to eyes, do not place objects filled... on the apparatus. • Install this product will not occur in the literature accompanying the appliance. As the laser beam used in this Blu-ray Disc/DVD player is subject to persons. 2 This symbol is no guarantee that may not cause interference, and (2) this device may cause undesired operation of ...

Operating Instructions
Page 30
...press ENTER. Example: when the video output resolution is set to 1080i 6 Select the cable type used to connect the player and your TV. For the test screen, see page 51. The test screen appears for about the video output resolution, see "When you select "HDMI" in step 6 1 Select a ...your TV, and press ENTER. b When connecting the HDMI OUT jack and other video output jacks at the same time, select "Component Video." The test screen appears for confirmation. 3 Select "OK" or "Cancel," and press ENTER. Current video output resolution setting b If no picture appears, press RETURN...
...press ENTER. Example: when the video output resolution is set to 1080i 6 Select the cable type used to connect the player and your TV. For the test screen, see page 51. The test screen appears for about the video output resolution, see "When you select "HDMI" in step 6 1 Select a ...your TV, and press ENTER. b When connecting the HDMI OUT jack and other video output jacks at the same time, select "Component Video." The test screen appears for confirmation. 3 Select "OK" or "Cancel," and press ENTER. Current video output resolution setting b If no picture appears, press RETURN...
Operating Instructions
Page 50
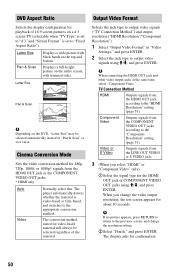
...the DVD, "Letter Box" may be selected regardless of "Pan & Scan" or vice versa. The display asks for about 30 seconds. The player automatically detects whether the material is set to "4:3" and "Screen Format" is video-based or film-based, and switches to the "Component Resolution..." in "Video Settings," and press ENTER. 2 Select the jack type to the previous screen, and change the video output resolution, the test screen appears for confirmation. 50 Component Video Outputs signals from the HDMI OUT jack according to "Fixed Aspect Ratio"). DVD Aspect Ratio Selects the...
...the DVD, "Letter Box" may be selected regardless of "Pan & Scan" or vice versa. The display asks for about 30 seconds. The player automatically detects whether the material is set to "4:3" and "Screen Format" is video-based or film-based, and switches to the "Component Resolution..." in "Video Settings," and press ENTER. 2 Select the jack type to the previous screen, and change the video output resolution, the test screen appears for confirmation. 50 Component Video Outputs signals from the HDMI OUT jack according to "Fixed Aspect Ratio"). DVD Aspect Ratio Selects the...

Operating Instructions
Page 53
... this position. Speaker Settings To obtain the best possible surround sound, set the speakers you do not connect surround speakers. ,continued 53 Then use the test tone to adjust the volume and the balance of the speakers. • Front Large Normally select this when the speaker cannot reproduce adequate low frequencies...
... this position. Speaker Settings To obtain the best possible surround sound, set the speakers you do not connect surround speakers. ,continued 53 Then use the test tone to adjust the volume and the balance of the speakers. • Front Large Normally select this when the speaker cannot reproduce adequate low frequencies...

Operating Instructions
Page 55
... increments (0 to 5 feet (or 1.6 meters), "Subwoofer" can be set between 0 and 7 feet (or 0 meter and 2.2 meters). You will hear the test tone from each speaker in "Audio Settings," and press ENTER. 2 Select "Test Tone" using M/m, and press ENTER. 3 Select "On" using For example, if "Front" is set to 15.6 meters, 0.2 meter increments)).
... increments (0 to 5 feet (or 1.6 meters), "Subwoofer" can be set between 0 and 7 feet (or 0 meter and 2.2 meters). You will hear the test tone from each speaker in "Audio Settings," and press ENTER. 2 Select "Test Tone" using M/m, and press ENTER. 3 Select "On" using For example, if "Front" is set to 15.6 meters, 0.2 meter increments)).