
Child Safety: It Makes A Difference Where Your TV Stands
Page 1
... electronics furniture manufacturers to climb on or play with furniture and television sets. 5 Avoid placing any items on top of TVs such as VCRs and remotes that may cause unnecessary injury. Use the appropriate furniture that children can become excited while watching a program and can potentially push or pull a TV over...
... electronics furniture manufacturers to climb on or play with furniture and television sets. 5 Avoid placing any items on top of TVs such as VCRs and remotes that may cause unnecessary injury. Use the appropriate furniture that children can become excited while watching a program and can potentially push or pull a TV over...

Operating Instructions
Page 5
... Index to Parts and Controls 11 Guide to the Control Menu Display 16 Getting Started 18 Quick Overview 18 Unpacking ...18 Inserting Batteries into the Remote 18 Step 1: Speaker System Hookup 19 Step 2: Antenna Hookups 22 Step 3: TV and Video Component Hookups 24 Speaker Setup 26 Presetting Radio Stations ...27 Playing Discs 29 Playing Discs 29 Resuming Playback from the Point Where You Stopped the Disc (Resume Play 31 Using the DVD's Menu 31 Playing VIDEO CDs with PBC Functions (PBC Playback 32 Playing an MP3 Audio Track 33 Playing JPEG Image File 34 To rotate...
... Index to Parts and Controls 11 Guide to the Control Menu Display 16 Getting Started 18 Quick Overview 18 Unpacking ...18 Inserting Batteries into the Remote 18 Step 1: Speaker System Hookup 19 Step 2: Antenna Hookups 22 Step 3: TV and Video Component Hookups 24 Speaker Setup 26 Presetting Radio Stations ...27 Playing Discs 29 Playing Discs 29 Resuming Playback from the Point Where You Stopped the Disc (Resume Play 31 Using the DVD's Menu 31 Playing VIDEO CDs with PBC Functions (PBC Playback 32 Playing an MP3 Audio Track 33 Playing JPEG Image File 34 To rotate...

Operating Instructions
Page 6
... the Subtitles 54 Using Various Additional Functions 55 Locking Discs (CUSTOM PARENTAL CONTROL, PARENTAL CONTROL) ... 55 Other Operations 61 Controlling the TV with the Supplied Remote 61 Using the Video or other Unit 61 Listening to the Radio 62 Settings and Adjustments 63 Using the Setup Display 63 Setting the Display... Custom Settings (CUSTOM SETUP 67 Settings for the Speakers (SPEAKER SETUP 68 Additional Information 71 Troubleshooting 71 Glossary ...75 Specifications 78 Language Code List 81 DVD Setup Menu List 82 Index ...83 Quick reference for Remote Commander Back page 6GB
... the Subtitles 54 Using Various Additional Functions 55 Locking Discs (CUSTOM PARENTAL CONTROL, PARENTAL CONTROL) ... 55 Other Operations 61 Controlling the TV with the Supplied Remote 61 Using the Video or other Unit 61 Listening to the Radio 62 Settings and Adjustments 63 Using the Setup Display 63 Setting the Display... Custom Settings (CUSTOM SETUP 67 Settings for the Speakers (SPEAKER SETUP 68 Additional Information 71 Troubleshooting 71 Glossary ...75 Specifications 78 Language Code List 81 DVD Setup Menu List 82 Index ...83 Quick reference for Remote Commander Back page 6GB

Operating Instructions
Page 7
...and still pictures are smaller than titles. This System Can Play the Following Discs Format of discs DVD VIDEO VIDEO CD Audio CD The "DVD VIDEO" logo is composed of a picture on the remote. DVD receiver AVD-K800P - Depending on a VIDEO CD. Center speaker • For customers in this manual describe ...on the system if they have the same or similar names as those on the remote. • The symbols used in this manual are explained below: Symbol Meaning Functions available in DVD video mode Symbol Functions available in VIDEO CD mode Functions available in z CD ...
...and still pictures are smaller than titles. This System Can Play the Following Discs Format of discs DVD VIDEO VIDEO CD Audio CD The "DVD VIDEO" logo is composed of a picture on the remote. DVD receiver AVD-K800P - Depending on a VIDEO CD. Center speaker • For customers in this manual describe ...on the system if they have the same or similar names as those on the remote. • The symbols used in this manual are explained below: Symbol Meaning Functions available in DVD video mode Symbol Functions available in VIDEO CD mode Functions available in z CD ...

Operating Instructions
Page 11
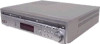
... Panel ?/1 PHONES EX-CHANGE DISC SKIP OPEN/CLOSE MULTI CHANNEL DECODING DISC SELECT 1 2 3 4 5 SOUND FIELD - + SUB WOOFER MASTER - + LEVEL VOLUME PRESET + FUNCTION 1 ?/1 (power switch) (29) 2 (remote sensor) (18) 3 MULTI CHANNEL DECODING indicator (49) 4 Front panel display (12) 5 Disc tray (29) 6 EX-CHANGE (30) 7 DISC SKIP (29) 8 A OPEN/CLOSE (29) 9 SOUND FIELD...
... Panel ?/1 PHONES EX-CHANGE DISC SKIP OPEN/CLOSE MULTI CHANNEL DECODING DISC SELECT 1 2 3 4 5 SOUND FIELD - + SUB WOOFER MASTER - + LEVEL VOLUME PRESET + FUNCTION 1 ?/1 (power switch) (29) 2 (remote sensor) (18) 3 MULTI CHANNEL DECODING indicator (49) 4 Front panel display (12) 5 Disc tray (29) 6 EX-CHANGE (30) 7 DISC SKIP (29) 8 A OPEN/CLOSE (29) 9 SOUND FIELD...

Operating Instructions
Page 15
... TIME (43) wd AUDIO (49) wf ANGLE (53) wg SUBTITLE (54) wh ENTER (31) wj CLEAR (37) wk m/M, TUNING +/-, SLOW / (27, 40) wl x (stop) (30) e; Remote 1 2 3 4 5 6 7 8 9 >10 10/0 .> m M H X x F G g f O 1 SOUND FIELD +/- (50) 2 FUNCTION (29) 3 ST/MONO (62) 4 BAND (27) 5 REPEAT (39) 6 PLAY MODE (36) 7 Number buttons (...31) 8 ./>, PRESET +/- (27, 30) 9 X (pause) (30) 0 H (play) (30) qa DVD MENU/ALBUM + (31) qs DVD TOP MENU/ALBUM - (31) qd C/X/x/c/ENTER (31) qf DVD DISPLAY (33) qg TV VOL +/- (61) qh TV CH +/- (61) qj TV [/1 (on/standby) (61) qk [/1 (on/standby)...
... TIME (43) wd AUDIO (49) wf ANGLE (53) wg SUBTITLE (54) wh ENTER (31) wj CLEAR (37) wk m/M, TUNING +/-, SLOW / (27, 40) wl x (stop) (30) e; Remote 1 2 3 4 5 6 7 8 9 >10 10/0 .> m M H X x F G g f O 1 SOUND FIELD +/- (50) 2 FUNCTION (29) 3 ST/MONO (62) 4 BAND (27) 5 REPEAT (39) 6 PLAY MODE (36) 7 Number buttons (...31) 8 ./>, PRESET +/- (27, 30) 9 X (pause) (30) 0 H (play) (30) qa DVD MENU/ALBUM + (31) qs DVD TOP MENU/ALBUM - (31) qd C/X/x/c/ENTER (31) qf DVD DISPLAY (33) qg TV VOL +/- (61) qh TV CH +/- (61) qj TV [/1 (on/standby) (61) qk [/1 (on/standby)...

Operating Instructions
Page 18
...malfunction. • If you do not use a new battery with an old one. • Do not drop any foreign object into the Remote You can begin enjoying your new system right away. Unpacking Check that you have the following items: • Speakers (5) • Sub ...Speaker cords (3.5 m × 3, 5 m × 1, 10 m × 2) (12 ft. × 3, 17 ft. × 1, 33 ft. × 2) • Video cord (1) • Remote Commander (remote) RM-U800 (1) • R6 (size AA) batteries (2) • Foot pads (24) • Color labels for speakers (5) • SCART adapter (for an extended period of the...
...malfunction. • If you do not use a new battery with an old one. • Do not drop any foreign object into the Remote You can begin enjoying your new system right away. Unpacking Check that you have the following items: • Speakers (5) • Sub ...Speaker cords (3.5 m × 3, 5 m × 1, 10 m × 2) (12 ft. × 3, 17 ft. × 1, 33 ft. × 2) • Video cord (1) • Remote Commander (remote) RM-U800 (1) • R6 (size AA) batteries (2) • Foot pads (24) • Color labels for speakers (5) • SCART adapter (for an extended period of the...

Operating Instructions
Page 28
... on the system. v ST FM MHz 6 Repeat 1 to 5 to tune in any AM station first, then turn on the power by pressing [/1 on the remote or on the system. To change the AM tuning interval, tune in the station manually. To change the preset number Start over from 1. To reset ...
... on the system. v ST FM MHz 6 Repeat 1 to 5 to tune in any AM station first, then turn on the power by pressing [/1 on the remote or on the system. To change the AM tuning interval, tune in the station manually. To change the preset number Start over from 1. To reset ...

Operating Instructions
Page 29
... the button, the disc tray turns and you first. 6 Press H. After following the instructions on the menu. DVD (page 31), VIDEO CD (page 32). The system plays the disc in the empty disc compartments. Adjust the volume...the system. continued 29GB Playing Discs To turn on the system Press [/1 on the remote or on the system. To playback other discs, press DISC SKIP and place the discs in the order ...you want to select "DVD". 4 Press A OPEN/CLOSE on the system, and place a disc on the disc tray. You...
... the button, the disc tray turns and you first. 6 Press H. After following the instructions on the menu. DVD (page 31), VIDEO CD (page 32). The system plays the disc in the empty disc compartments. Adjust the volume...the system. continued 29GB Playing Discs To turn on the system Press [/1 on the remote or on the system. To playback other discs, press DISC SKIP and place the discs in the order ...you want to select "DVD". 4 Press A OPEN/CLOSE on the system, and place a disc on the disc tray. You...
Operating Instructions
Page 30
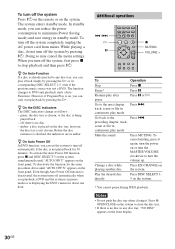
...the system. * You cannot pause during JPEG playback. To deactivate the function, do not turn off the system Press ?/1 on the remote or on the front panel. Pause* Press X. Resume play mode Press >. To cancel muting, press it again, turn the power on... set the system to turn off the system, first press x to any disc tray, "NO DISC" appears on , you can reduce the power consumption to DVD and playback starts (AutoFunction). off the system completely, unplug the AC power cord from mains. Additional operations ./> H X 7 8 9 >10 10/0 .> m M H X x F G g f ...
...the system. * You cannot pause during JPEG playback. To deactivate the function, do not turn off the system Press ?/1 on the remote or on the front panel. Pause* Press X. Resume play mode Press >. To cancel muting, press it again, turn the power on... set the system to turn off the system, first press x to any disc tray, "NO DISC" appears on , you can reduce the power consumption to DVD and playback starts (AutoFunction). off the system completely, unplug the AC power cord from mains. Additional operations ./> H X 7 8 9 >10 10/0 .> m M H X x F G g f ...
Operating Instructions
Page 34
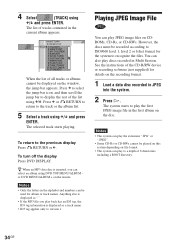
...you play the first JPEG image file in JPEG into the system. 2 Press H. To turn off the display Press DVD DISPLAY. However, the discs must be used for details on the window, the jump bar appears. The list of...GOOD TASTE 6.DESTINATION 7.MARATHON 8.PLACE-KICK 9.TAKE IT EASY 10.PORT TOWER 11.STANDARD When the list of the list using DVD TOP MENU/ALBUM - The system starts to recognize the files. Press C or O RETURN to return to the previous display .... Notes • The system can also play JPEG image files on the remote. 4 Select (TRACK) using X/x and press ENTER.
...you play the first JPEG image file in JPEG into the system. 2 Press H. To turn off the display Press DVD DISPLAY. However, the discs must be used for details on the window, the jump bar appears. The list of...GOOD TASTE 6.DESTINATION 7.MARATHON 8.PLACE-KICK 9.TAKE IT EASY 10.PORT TOWER 11.STANDARD When the list of the list using DVD TOP MENU/ALBUM - The system starts to recognize the files. Press C or O RETURN to return to the previous display .... Notes • The system can also play JPEG image files on the remote. 4 Select (TRACK) using X/x and press ENTER.
Operating Instructions
Page 35
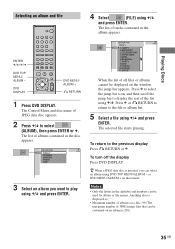
...letters in the disc appears. 2:MOUNTAIN FAMILY FLOWER GARDEN TRAIN CAR JPEG 3 Select an album you can be displayed on the remote. The selected file starts playing. Anything else is inserted, you want to select (ALBUM), then press ENTER or c. To ... previous display Press O RETURN or C. To turn off the display Press DVD DISPLAY. or DVD MENU/ALBUM + on the window, the jump bar appears. DVD DISPLAY 1 2 3 4 5 6 7 8 9 >10 10/0 .> m M H X x F G g f O DVD MENU/ ALBUM + O RETURN 1 Press DVD DISPLAY. Press c to select the jump bar icon, and then scroll...
...letters in the disc appears. 2:MOUNTAIN FAMILY FLOWER GARDEN TRAIN CAR JPEG 3 Select an album you can be displayed on the remote. The selected file starts playing. Anything else is inserted, you want to select (ALBUM), then press ENTER or c. To ... previous display Press O RETURN or C. To turn off the display Press DVD DISPLAY. or DVD MENU/ALBUM + on the window, the jump bar appears. DVD DISPLAY 1 2 3 4 5 6 7 8 9 >10 10/0 .> m M H X x F G g f O DVD MENU/ ALBUM + O RETURN 1 Press DVD DISPLAY. Press c to select the jump bar icon, and then scroll...

Operating Instructions
Page 50
... using the headphones Sound field HEADPHONE 2 CHANNEL STEREO HEADPHONE SURROUND Display HP. 2CH HP. The Auto Format Direct Auto function is activated. 50GB on the remote repeatedly until the sound field you want appears on the front panel display. However, if there are no low frequency signals (Dolby Digital LFE, etc...
... using the headphones Sound field HEADPHONE 2 CHANNEL STEREO HEADPHONE SURROUND Display HP. 2CH HP. The Auto Format Direct Auto function is activated. 50GB on the remote repeatedly until the sound field you want appears on the front panel display. However, if there are no low frequency signals (Dolby Digital LFE, etc...
Operating Instructions
Page 51
The current sound field appears on the remote until "HP. 2CH" appears in the dubbed language. xHEADPHONE 2 CHANNEL STEREO ...Note When you select a function such as the sound field, then change to another function, and then return to DVD, "JAZZ" will be applied again. Software with 2 channel audio signals is decoded with multi channel surround audio ... selected for the normal stereo sources, such as surround from the headphone L/R. Software with Dolby Pro Logic to DVD with the logo. - xAUTO FORMAT DIRECT PRO LOGIC MUSIC This mode performs the Pro Logic II music mode ...
The current sound field appears on the remote until "HP. 2CH" appears in the dubbed language. xHEADPHONE 2 CHANNEL STEREO ...Note When you select a function such as the sound field, then change to another function, and then return to DVD, "JAZZ" will be applied again. Software with 2 channel audio signals is decoded with multi channel surround audio ... selected for the normal stereo sources, such as surround from the headphone L/R. Software with Dolby Pro Logic to DVD with the logo. - xAUTO FORMAT DIRECT PRO LOGIC MUSIC This mode performs the Pro Logic II music mode ...

Operating Instructions
Page 52
on the front panel display. This mode outputs the sound from the front left and right speakers and sub woofer. Multi channel surround formats are downmixed to 2 channel. 52GB Standard 2 channel (stereo) sources completely bypass the sound field processing. Using only the front speakers and sub woofer (2 CHANNEL STEREO) SOUND FIELD +/- 1 2 3 4 5 6 7 8 9 >10 10/0 .> m M H X x F G g f O Press SOUND FIELD +/- appears on the remote repeatedly until "2CH ST."
on the front panel display. This mode outputs the sound from the front left and right speakers and sub woofer. Multi channel surround formats are downmixed to 2 channel. 52GB Standard 2 channel (stereo) sources completely bypass the sound field processing. Using only the front speakers and sub woofer (2 CHANNEL STEREO) SOUND FIELD +/- 1 2 3 4 5 6 7 8 9 >10 10/0 .> m M H X x F G g f O Press SOUND FIELD +/- appears on the remote repeatedly until "2CH ST."

Operating Instructions
Page 61
...x F G g f O TV/VIDEO Controlling the TV You can use some of the buttons above. You can control your TV or to control your Sony TV with the supplied remote. FUNCTION TV VOL +/- By pressing TV [/1 TV/VIDEO TV VOL +/- Note Depending on the front panel display. Each time you may not be... able to use VCRs or other input sources. G g f DVD t VIDEO t TV t TUNER t DVD... Switch the TV's input source ...
...x F G g f O TV/VIDEO Controlling the TV You can use some of the buttons above. You can control your TV or to control your Sony TV with the supplied remote. FUNCTION TV VOL +/- By pressing TV [/1 TV/VIDEO TV VOL +/- Note Depending on the front panel display. Each time you may not be... able to use VCRs or other input sources. G g f DVD t VIDEO t TV t TUNER t DVD... Switch the TV's input source ...

Operating Instructions
Page 62
To listen to restore the stereo effect. on the remote repeatedly. z To improve reception Reorient the supplied antennas. 1 Press FUNCTION repeatedly until the band you want . For automatic tuning, press and hold TUNING +/- Each time ..." on page 27). repeatedly to the Radio Preset radio stations in Step 2. For manual tuning, press TUNING +/- To turn off the radio Press ?/1. on the remote. z If an FM program is tuned in one preset station. 3 Adjust the volume by pressing VOLUME +/-. 62GB VOLUME +/- Listening to select the preset station you...
To listen to restore the stereo effect. on the remote repeatedly. z To improve reception Reorient the supplied antennas. 1 Press FUNCTION repeatedly until the band you want . For automatic tuning, press and hold TUNING +/- Each time ..." on page 27). repeatedly to the Radio Preset radio stations in Step 2. For manual tuning, press TUNING +/- To turn off the radio Press ?/1. on the remote. z If an FM program is tuned in one preset station. 3 Adjust the volume by pressing VOLUME +/-. 62GB VOLUME +/- Listening to select the preset station you...

Operating Instructions
Page 71
... Information continued 71GB Power The power is compatible with a new one. , Press MUTING on the remote if "MUTING" is displayed on the front panel display. , The protective device on the power again... until "PROGRESSIVE" disappears from your system goes through your VCR to get to your nearest Sony dealer. Press H to return to normal play mode. , Check the speaker settings (page... you experience any problem persist, consult your TV, the copy-protection signal applied to some DVD programs could affect picture quality. Picture noise appears. , The disc is performed. Sound There...
... Information continued 71GB Power The power is compatible with a new one. , Press MUTING on the remote if "MUTING" is displayed on the front panel display. , The protective device on the power again... until "PROGRESSIVE" disappears from your system goes through your VCR to get to your nearest Sony dealer. Press H to return to normal play mode. , Check the speaker settings (page... you experience any problem persist, consult your TV, the copy-protection signal applied to some DVD programs could affect picture quality. Picture noise appears. , The disc is performed. Sound There...
Operating Instructions
Page 73
...select "DATA CD PRIORITY" and set to "MP3" again. , Directory level is more than 8. During stop, press x on the system or the remote and then start playing from the beginning. , Program Play, Shuffle Play, or Repeat Play has been selected (pages 36, 38, 39). The MP3 audio...is not correctly displayed. , The player can only display numbers and alphabet. The disc does not start playback (page 31). , The title, DVD or PBC menu automatically appears on for about half an hour (page 4). Other characters are displayed as " ". Additional Information continued 73GB Other characters...
...select "DATA CD PRIORITY" and set to "MP3" again. , Directory level is more than 8. During stop, press x on the system or the remote and then start playing from the beginning. , Program Play, Shuffle Play, or Repeat Play has been selected (pages 36, 38, 39). The MP3 audio...is not correctly displayed. , The player can only display numbers and alphabet. The disc does not start playback (page 31). , The title, DVD or PBC menu automatically appears on for about half an hour (page 4). Other characters are displayed as " ". Additional Information continued 73GB Other characters...
Operating Instructions
Page 83
... 70 BAND 27 Batteries 18 C CHAPTER 43 Chapter 7, 75 COMPONENT OUT 66 Continuous play CD/VIDEO CD/DVD/MP3 29 Control Menu 16 CUSTOM PARENTAL CONTROL 55 CUSTOM SETUP 67 D DATA CD PRIORITY 68 DIMMER 61... DISTANCE 69 Dolby Digital 75 Dolby Pro Logic Surround 75 DTS 75 DVD 75 DVD MENU 31 F Fast forward 40 Fast reverse 40 File 7 Front Panel 11 Front panel display 12 H Handling...38 Preset Station 27 Program Play 36 PROGRESSIVE 66, 71 R Radio 62 Rear Panel 14 Region code 8, 77 Remote 15, back page REPEAT 39 RESET 64 Resume Play 31 S Scan 40 SCENE 16 Scene 7, 77 SCREEN ...
... 70 BAND 27 Batteries 18 C CHAPTER 43 Chapter 7, 75 COMPONENT OUT 66 Continuous play CD/VIDEO CD/DVD/MP3 29 Control Menu 16 CUSTOM PARENTAL CONTROL 55 CUSTOM SETUP 67 D DATA CD PRIORITY 68 DIMMER 61... DISTANCE 69 Dolby Digital 75 Dolby Pro Logic Surround 75 DTS 75 DVD 75 DVD MENU 31 F Fast forward 40 Fast reverse 40 File 7 Front Panel 11 Front panel display 12 H Handling...38 Preset Station 27 Program Play 36 PROGRESSIVE 66, 71 R Radio 62 Rear Panel 14 Region code 8, 77 Remote 15, back page REPEAT 39 RESET 64 Resume Play 31 S Scan 40 SCENE 16 Scene 7, 77 SCREEN ...


