User Guide
Page 2
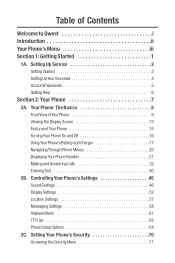
... Menu 71 Table of Your Phone 15 Turning Your Phone On and Off 16 Using Your Phone's Battery and Charger 17 Navigating Through Phone Menus 20 Displaying Your Phone Number 21 Making and Answering Calls 22 Entering Text 40 2B. Controlling Your Phone's Settings 45 Sound Settings 46... Settings 57 Messaging Settings 58 Airplane Mode 61 TTY Use 62 Phone Setup Options 64 2C. Your Phone: The Basics 8 Front View of Your Phone 9 Viewing the Display Screen 13 Features of Contents Welcome to Qwest i Introduction ii Your Phone's Menu iii Section 1: Getting Started 1 1A. Setting Up...
... Menu 71 Table of Your Phone 15 Turning Your Phone On and Off 16 Using Your Phone's Battery and Charger 17 Navigating Through Phone Menus 20 Displaying Your Phone Number 21 Making and Answering Calls 22 Entering Text 40 2B. Controlling Your Phone's Settings 45 Sound Settings 46... Settings 57 Messaging Settings 58 Airplane Mode 61 TTY Use 62 Phone Setup Options 64 2C. Your Phone: The Basics 8 Front View of Your Phone 9 Viewing the Display Screen 13 Features of Contents Welcome to Qwest i Introduction ii Your Phone's Menu iii Section 1: Getting Started 1 1A. Setting Up...
User Guide
Page 3
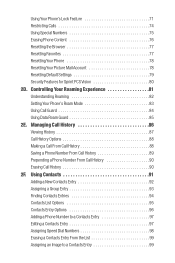
... Resetting Default Settings 79 Security Features for Sprint PCS Vision 80 2D. Controlling Your Roaming Experience 81 Understanding Roaming 82 Setting Your Phone's Roam Mode 83 Using Call Guard 84 Using Data Roam Guard 85 2E. Managing Call History 86 Viewing History 87 Call History... Adding a New Contacts Entry 92 Assigning a Group Entry 93 Finding Contacts Entries 94 Contacts List Options 95 Contacts Entry Options 96 Adding a Phone Number to a Contacts Entry 97 Editing a Contacts Entry 97 Assigning Speed Dial Numbers 98 Erasing a Contacts Entry From the List 99 Assigning ...
... Resetting Default Settings 79 Security Features for Sprint PCS Vision 80 2D. Controlling Your Roaming Experience 81 Understanding Roaming 82 Setting Your Phone's Roam Mode 83 Using Call Guard 84 Using Data Roam Guard 85 2E. Managing Call History 86 Viewing History 87 Call History... Adding a New Contacts Entry 92 Assigning a Group Entry 93 Finding Contacts Entries 94 Contacts List Options 95 Contacts Entry Options 96 Adding a Phone Number to a Contacts Entry 97 Editing a Contacts Entry 97 Assigning Speed Dial Numbers 98 Erasing a Contacts Entry From the List 99 Assigning ...

User Guide
Page 4
...147 Pairing Bluetooth Devices 148 Using the Trusted Devices Options 149 Sending Data via Bluetooth 149 Section 3: Qwest Service Features 151 3A. Using Your Phone's Built-in Camera 123 Taking Pictures 124 Using the Settings & Info Menu 130 Storing Pictures 132 Sending Sprint PCS Picture Mail 135 Managing Sprint... PCS Picture Mail 137 2J. Using Your Phone's Voice Services 115 Using Voice-Activated Dialing 116 Managing Voice Memos 118 Setting Up Screen Call 120 2I. Using the...
...147 Pairing Bluetooth Devices 148 Using the Trusted Devices Options 149 Sending Data via Bluetooth 149 Section 3: Qwest Service Features 151 3A. Using Your Phone's Built-in Camera 123 Taking Pictures 124 Using the Settings & Info Menu 130 Storing Pictures 132 Sending Sprint PCS Picture Mail 135 Managing Sprint... PCS Picture Mail 137 2J. Using Your Phone's Voice Services 115 Using Voice-Activated Dialing 116 Managing Voice Memos 118 Setting Up Screen Call 120 2I. Using the...
User Guide
Page 5
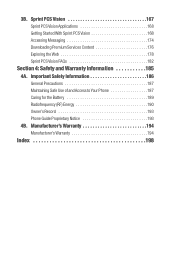
Sprint PCS Vision 167 Sprint PCS Vision Applications 168 Getting Started With Sprint PCS Vision 168 Accessing Messaging 174 Downloading Premium Services Content 176 Exploring the Web 178 Sprint PCS Vision FAQs 182 Section 4: Safety and Warranty Information 185 4A. 3B. Important Safety Information 186 General Precautions 187 Maintaining Safe Use of and Access to Your Phone 187 Caring for the Battery 189 Radiofrequency (RF) Energy 190 Owner's Record 193 Phone Guide Proprietary Notice 193 4B. Manufacturer's Warranty 194 Manufacturer's Warranty 194 Index 198
Sprint PCS Vision 167 Sprint PCS Vision Applications 168 Getting Started With Sprint PCS Vision 168 Accessing Messaging 174 Downloading Premium Services Content 176 Exploring the Web 178 Sprint PCS Vision FAQs 182 Section 4: Safety and Warranty Information 185 4A. 3B. Important Safety Information 186 General Precautions 187 Maintaining Safe Use of and Access to Your Phone 187 Caring for the Battery 189 Radiofrequency (RF) Energy 190 Owner's Record 193 Phone Guide Proprietary Notice 193 4B. Manufacturer's Warranty 194 Manufacturer's Warranty 194 Index 198

User Guide
Page 7
Welcome and thank you with wireless service and your new phone. Welcome to -follow instructions. from setting up your account passwords and voicemail to using the most advanced features of your new phone through simple, easy-to Qwest® This guide will familiarize you for choosing Qwest®. i It's all right here -
Welcome and thank you with wireless service and your new phone. Welcome to -follow instructions. from setting up your account passwords and voicemail to using the most advanced features of your new phone through simple, easy-to Qwest® This guide will familiarize you for choosing Qwest®. i It's all right here -

User Guide
Page 8
... in no time. However, if you'd like to get the most of your new phone and service.The Table of Contents and Index will help you quickly locate specific information.... refer to the Important Safety Information section on page 186 to wireless service and all the features of your phone if you read and follow the Important Safety Information in this guide, you'll find tips that highlight special...Contents and go directly to help you make the most out of your new phone. Introduction This Phone Guide introduces you to learn about information that will also help you safely use your...
... in no time. However, if you'd like to get the most of your new phone and service.The Table of Contents and Index will help you quickly locate specific information.... refer to the Important Safety Information section on page 186 to wireless service and all the features of your phone if you read and follow the Important Safety Information in this guide, you'll find tips that highlight special...Contents and go directly to help you make the most out of your new phone. Introduction This Phone Guide introduces you to learn about information that will also help you safely use your...
User Guide
Page 9
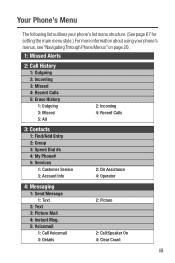
... menu structure. (See page 67 for setting the main menu style.) For more information about using your phone's menus, see "Navigating Through Phone Menus" on page 20. 1: Missed Alerts 2: Call History 1: Outgoing 2: Incoming 3: Missed 4: Recent Calls 5:... Erase History 1: Outgoing 3: Missed 5: All 2: Incoming 4: Recent Calls 3: Contacts 1: Find/Add Entry 2: Group 3: Speed Dial #s 4: My Phone# 5: Services 1: Customer Service 3: Account Info 2: Dir Assistance 4: Operator 4: Messaging 1: Send Message 1: Text 2: Text 3: Picture Mail 4: Instant Msg. 5: Voicemail 1: Call...
... menu structure. (See page 67 for setting the main menu style.) For more information about using your phone's menus, see "Navigating Through Phone Menus" on page 20. 1: Missed Alerts 2: Call History 1: Outgoing 2: Incoming 3: Missed 4: Recent Calls 5:... Erase History 1: Outgoing 3: Missed 5: All 2: Incoming 4: Recent Calls 3: Contacts 1: Find/Add Entry 2: Group 3: Speed Dial #s 4: My Phone# 5: Services 1: Customer Service 3: Account Info 2: Dir Assistance 4: Operator 4: Messaging 1: Send Message 1: Text 2: Text 3: Picture Mail 4: Instant Msg. 5: Voicemail 1: Call...
User Guide
Page 10
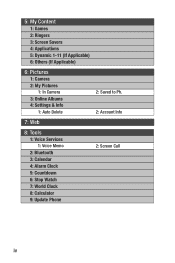
5: My Content 1: Games 2: Ringers 3: Screen Savers 4: Applications 5: Dynamic 1-11 (If Applicable) 6: Others (If Applicable) 6: Pictures 1: Camera 2: My Pictures 1: In Camera 3: Online Albums 4: Settings & Info 1: Auto Delete 2: Saved to Ph. 2: Account Info 7: Web 8: Tools 1: Voice Services 1: Voice Memo 2: Bluetooth 3: Calendar 4: Alarm Clock 5: Countdown 6: Stop Watch 7: World Clock 8: Calculator 9: Update Phone 2: Screen Call iv
5: My Content 1: Games 2: Ringers 3: Screen Savers 4: Applications 5: Dynamic 1-11 (If Applicable) 6: Others (If Applicable) 6: Pictures 1: Camera 2: My Pictures 1: In Camera 3: Online Albums 4: Settings & Info 1: Auto Delete 2: Saved to Ph. 2: Account Info 7: Web 8: Tools 1: Voice Services 1: Voice Memo 2: Bluetooth 3: Calendar 4: Alarm Clock 5: Countdown 6: Stop Watch 7: World Clock 8: Calculator 9: Update Phone 2: Screen Call iv
User Guide
Page 12
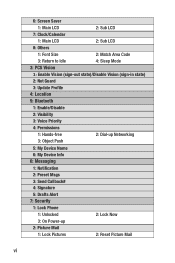
... 4: Permissions 1: Hands-free 2: Dial-up Networking 3: Object Push 5: My Device Name 6: My Device Info 6: Messaging 1: Notification 2: Preset Msgs 3: Send Callback# 4: Signature 5: Drafts Alert 7: Security 1: Lock Phone 1: Unlocked 2: Lock Now 3: On Power-up 2: Picture Mail 1: Lock Pictures 2: Reset Picture Mail vi
... 4: Permissions 1: Hands-free 2: Dial-up Networking 3: Object Push 5: My Device Name 6: My Device Info 6: Messaging 1: Notification 2: Preset Msgs 3: Send Callback# 4: Signature 5: Drafts Alert 7: Security 1: Lock Phone 1: Unlocked 2: Lock Now 3: On Power-up 2: Picture Mail 1: Lock Pictures 2: Reset Picture Mail vi
User Guide
Page 13
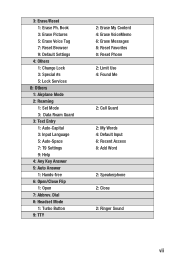
Dial 8: Headset Mode 1: Turbo Button 9: TTY 2: Erase My Content 4: Erase VoiceMemo 6: Erase Messages 8: Reset Favorites 0: Reset Phone 2: Limit Use 4: Found Me 2: Call Guard 2: My Words 4: Default Input 6: Recent Access 8: Add Word 2: Speakerphone 2: Close 2: Ringer Sound vii Book 3: Erase Pictures 5: Erase Voice Tag 7: ...
Dial 8: Headset Mode 1: Turbo Button 9: TTY 2: Erase My Content 4: Erase VoiceMemo 6: Erase Messages 8: Reset Favorites 0: Reset Phone 2: Limit Use 4: Found Me 2: Call Guard 2: My Words 4: Default Input 6: Recent Access 8: Add Word 2: Speakerphone 2: Close 2: Ringer Sound vii Book 3: Erase Pictures 5: Erase Voice Tag 7: ...
User Guide
Page 16
This section walks you through the necessary steps to unlock your phone, set up service on your wireless service. 2 Section 1A: Setting Up Service Setting Up Service Section 1A In This Section ࡗ Getting Started (page 3) ࡗ Setting Up Your Voicemail (page 4) ࡗ Account Passwords (page 5) ࡗ Getting Help (page 6) Setting up your voicemail, establish passwords, and contact Qwest for assistance with your new phone is quick and easy.
This section walks you through the necessary steps to unlock your phone, set up service on your wireless service. 2 Section 1A: Setting Up Service Setting Up Service Section 1A In This Section ࡗ Getting Started (page 3) ࡗ Setting Up Your Voicemail (page 4) ࡗ Account Passwords (page 5) ࡗ Getting Help (page 6) Setting up your voicemail, establish passwords, and contact Qwest for assistance with your new phone is quick and easy.

User Guide
Page 17
...below the softkey text that appears at 1-888-879-0611. Softkey actions change according to turn the phone on. 2. If neither of these easy steps: 1. Press Unlock (left and bottom right of your phone's display screen. Press to the screen you're viewing and will not appear if there is ...not visible as you type.) Tip: If you can't recall your lock code, try using the last four digits of your wireless phone number or try 0000. Enter your phone, follow these work, call Qwest Wireless® Repair at the bottom left softkey). Setting Up Service Getting Started Unlocking Your...
...below the softkey text that appears at 1-888-879-0611. Softkey actions change according to turn the phone on. 2. If neither of these easy steps: 1. Press Unlock (left and bottom right of your phone's display screen. Press to the screen you're viewing and will not appear if there is ...not visible as you type.) Tip: If you can't recall your lock code, try using the last four digits of your wireless phone number or try 0000. Enter your phone, follow these work, call Qwest Wireless® Repair at the bottom left softkey). Setting Up Service Getting Started Unlocking Your...
User Guide
Page 18
... and holding , bypassing the need for you to enter your passcode) Voicemail Passcode If you are automatically transferred to your voicemail, even if your phone is activated. For more information about unauthorized access to your voicemail account, it is recommended that you will want to set up your voicemail and... personal greeting as soon as your phone is in use or turned off.Therefore, you enable your voicemail passcode. Setting Up Your Voicemail All unanswered calls to your...
... and holding , bypassing the need for you to enter your passcode) Voicemail Passcode If you are automatically transferred to your voicemail, even if your phone is activated. For more information about unauthorized access to your voicemail account, it is recommended that you will want to set up your voicemail and... personal greeting as soon as your phone is in use or turned off.Therefore, you enable your voicemail passcode. Setting Up Your Voicemail All unanswered calls to your...

User Guide
Page 20
... listings.There is a per-call Directory Assistance: ᮣ Press GHI . Getting Help Visit www.qwestwireless.com You can reach Qwest online or by phone: ⅷ Sign on to your phone. ⅷ And more information or to see the latest in products and services, visit us toll-free at www.qwestwireless.com. 6 Section...
... listings.There is a per-call Directory Assistance: ᮣ Press GHI . Getting Help Visit www.qwestwireless.com You can reach Qwest online or by phone: ⅷ Sign on to your phone. ⅷ And more information or to see the latest in products and services, visit us toll-free at www.qwestwireless.com. 6 Section...
User Guide
Page 22
... important to you through the basic functions and calling features of Your Phone (page 15) ࡗ Turning Your Phone On and Off (page 16) ࡗ Using Your Phone's Battery and Charger (page 17) ࡗ Navigating Through Phone Menus (page 20) ࡗ Displaying Your Phone Number (page 21) ࡗ Making and Answering Calls (page 22) ࡗ...
... important to you through the basic functions and calling features of Your Phone (page 15) ࡗ Turning Your Phone On and Off (page 16) ࡗ Using Your Phone's Battery and Charger (page 17) ࡗ Navigating Through Phone Menus (page 20) ࡗ Displaying Your Phone Number (page 21) ࡗ Making and Answering Calls (page 22) ࡗ...
User Guide
Page 23
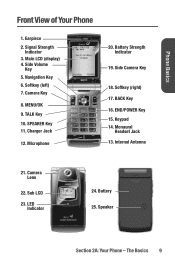
Phone Basics Front View of Your Phone 1. Side Volume Key 5. Charger Jack 12. Side Camera Key 18. Sub LCD 23. Navigation Key 6. Softkey (right) 17. The Basics 9 Camera Key 8. TALK Key 10. Camera Lens 22. LED Indicator 24. Main LCD (display) 4. Battery Strength Indicator 19. BACK Key 16. Battery 25. SPEAKER Key 11. Monaural Headset Jack 13. Keypad 14. Softkey (left) 7. END/POWER Key 15. MENU/OK 9. Speaker Section 2A: Your Phone - Microphone 20. Signal Strength Indicator 3. Earpiece 2. Internal Antenna 21.
Phone Basics Front View of Your Phone 1. Side Volume Key 5. Charger Jack 12. Side Camera Key 18. Sub LCD 23. Navigation Key 6. Softkey (right) 17. The Basics 9 Camera Key 8. TALK Key 10. Camera Lens 22. LED Indicator 24. Main LCD (display) 4. Battery Strength Indicator 19. BACK Key 16. Battery 25. SPEAKER Key 11. Monaural Headset Jack 13. Keypad 14. Softkey (left) 7. END/POWER Key 15. MENU/OK 9. Speaker Section 2A: Your Phone - Microphone 20. Signal Strength Indicator 3. Earpiece 2. Internal Antenna 21.
User Guide
Page 24
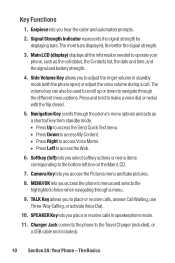
... signal strength. 3. Side Volume Key allows you place or receive calls in standby mode (with the flip closed. 5. SPEAKER Key lets you to operate your phone, such as a shortcut key from standby mode. Ⅲ Press Up to access the Send Quick Text menu. Ⅲ Press Down to access My Content....(left line on the Main LCD. 7. MENU/OK lets you select softkey actions or menu items corresponding to make a voice dial or redial with the phone open) or adjust the voice volume during a call status, the Contacts list, the date and time, and the signal and battery strength. 4. Press and...
... signal strength. 3. Side Volume Key allows you place or receive calls in standby mode (with the flip closed. 5. SPEAKER Key lets you to operate your phone, such as a shortcut key from standby mode. Ⅲ Press Up to access the Send Quick Text menu. Ⅲ Press Down to access My Content....(left line on the Main LCD. 7. MENU/OK lets you select softkey actions or menu items corresponding to make a voice dial or redial with the phone open) or adjust the voice volume during a call status, the Contacts list, the date and time, and the signal and battery strength. 4. Press and...
User Guide
Page 25
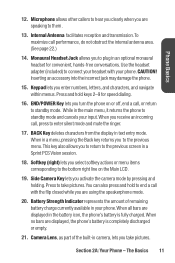
... you activate the camera mode by pressing and holding. The Basics 11 BACK Key deletes characters from the display in the battery icon, the phone's battery is completely discharged or empty. 21. Keypad lets you to the previous screen in an optional monaural headset for speed dialing. 16....(right) lets you to return to plug in a Sprint PCS Vision session. 18. Inserting an accessory into the incorrect jack may damage the phone. 15. Phone Basics 12. When you take pictures.You can also press and hold keys 2-9 for convenient, hands-free conversations. This key also allows you ...
... you activate the camera mode by pressing and holding. The Basics 11 BACK Key deletes characters from the display in the battery icon, the phone's battery is completely discharged or empty. 21. Keypad lets you to the previous screen in an optional monaural headset for speed dialing. 16....(right) lets you to return to plug in a Sprint PCS Vision session. 18. Inserting an accessory into the incorrect jack may damage the phone. 15. Phone Basics 12. When you take pictures.You can also press and hold keys 2-9 for convenient, hands-free conversations. This key also allows you ...
User Guide
Page 26
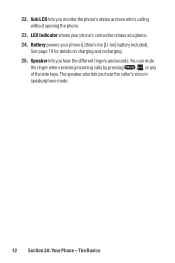
LED Indicator shows your phone (Lithium-Ion [Li-Ion] battery included). 22. See page 19 for details on charging and recharging. 25. The speaker also lets you monitor the phone's status and see who's calling without opening the phone. 23. Battery powers your phone's connection status at a glance. 24. Sub LCD lets you hear the caller's voice in speakerphone mode. 12 Section 2A: Your Phone - Speaker lets you hear the different ringers and sounds.You can mute the ringer when receiving incoming calls by pressing , , or any of the side keys. The Basics
LED Indicator shows your phone (Lithium-Ion [Li-Ion] battery included). 22. See page 19 for details on charging and recharging. 25. The speaker also lets you monitor the phone's status and see who's calling without opening the phone. 23. Battery powers your phone's connection status at a glance. 24. Sub LCD lets you hear the caller's voice in speakerphone mode. 12 Section 2A: Your Phone - Speaker lets you hear the different ringers and sounds.You can mute the ringer when receiving incoming calls by pressing , , or any of the side keys. The Basics
User Guide
Page 27
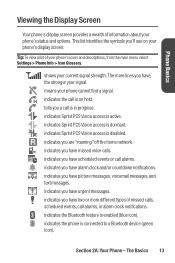
... notifications. indicates you have, the stronger your signal. indicates Sprint PCS Vision access is active. shows your phone's icons and descriptions, from the main menu select Settings > Phone Info > Icon Glossary. indicates the call is in progress. indicates you have two or more lines you ...have urgent messages. indicates you a call is enabled (blue icon). indicates the Bluetooth feature is on your phone's display screen: Tip: To view a list of missed calls, scheduled events, call alarms. indicates you have picture...
... notifications. indicates you have, the stronger your signal. indicates Sprint PCS Vision access is active. shows your phone's icons and descriptions, from the main menu select Settings > Phone Info > Icon Glossary. indicates the call is in progress. indicates you have two or more lines you ...have urgent messages. indicates you a call is enabled (blue icon). indicates the Bluetooth feature is on your phone's display screen: Tip: To view a list of missed calls, scheduled events, call alarms. indicates you have picture...


