Quick Guide (easy Manual) (ver.1.0) (English)
Page 1
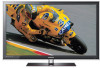
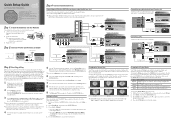
... to work best with factory adjusted settings, each screen in this section. 9 The Enjoy your TV to a PC to the directions for the On Screen Select Language of the video cable (yellow). Analog Audio connection Using an Audio Cable Amplifier / DVD home theater AUDIO IN Audio Cable (Not Supplied) Optical Cable (Not Supplied) Digital Audio connection Using an Optical Cable Digital Audio System OPTICAL Connecting a PC Connect your TV. After selecting source, select Search; To change the screen size, press the P.SIZE button on your area. After Plug & Play is...
... to work best with factory adjusted settings, each screen in this section. 9 The Enjoy your TV to a PC to the directions for the On Screen Select Language of the video cable (yellow). Analog Audio connection Using an Audio Cable Amplifier / DVD home theater AUDIO IN Audio Cable (Not Supplied) Optical Cable (Not Supplied) Digital Audio connection Using an Optical Cable Digital Audio System OPTICAL Connecting a PC Connect your TV. After selecting source, select Search; To change the screen size, press the P.SIZE button on your area. After Plug & Play is...
Quick Guide (easy Manual) (ver.1.0) (English)
Page 2
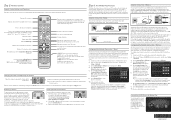
... select the sound mode. Quickly select frequently used functions. Cuts off . S.MODE: Press to select channel "54-3", press "54", then press "-" and "3". POWER ON/OFF Changing Channels and Adjusting the Volume PRE-CH SOURCE Adjust the volume by pressing the Volume button MUTE Change the channels by cable, using CAT 5 cable, or wirelessly, using a Samsung Wireless LAN Adapter. To view the signal from a source connected to the HDMI, DVI, Component, Composite, or D-sub jack, press the SOURCE button on your network setup. The main menu appears. When...
... select the sound mode. Quickly select frequently used functions. Cuts off . S.MODE: Press to select channel "54-3", press "54", then press "-" and "3". POWER ON/OFF Changing Channels and Adjusting the Volume PRE-CH SOURCE Adjust the volume by pressing the Volume button MUTE Change the channels by cable, using CAT 5 cable, or wirelessly, using a Samsung Wireless LAN Adapter. To view the signal from a source connected to the HDMI, DVI, Component, Composite, or D-sub jack, press the SOURCE button on your network setup. The main menu appears. When...
User Manual (user Manual) (ver.1.0) (English)
Page 2
... product. ✎✎ When using a stand or wall-mount, use , as well as a full screen picture. Excluded, but permanent burned-in ghost images in the LED picture. Figures and illustrations in this User Manual are provided for details. Product design and specifications may differ depending on -site services, minimum or maximum repair times, exchanges or replacements, accessories, options, upgrades, or consumables. Securing the Installation Space Keep the required...
... product. ✎✎ When using a stand or wall-mount, use , as well as a full screen picture. Excluded, but permanent burned-in ghost images in the LED picture. Figures and illustrations in this User Manual are provided for details. Product design and specifications may differ depending on -site services, minimum or maximum repair times, exchanges or replacements, accessories, options, upgrades, or consumables. Securing the Installation Space Keep the required...
User Manual (user Manual) (ver.1.0) (English)
Page 3
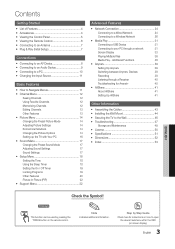
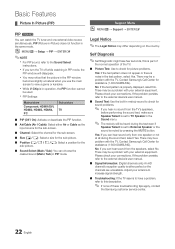
... 16 yy Sound Menu 17 Changing the Preset Sound Mode 17 Adjusting Sound Settings 17 Sound Settings 17 yy Setup Menu 18 Setting the Time 18 Using the Sleep Timer 18 Setting the On / Off Timer 19 Locking Programs 19 Other Features 20 Picture In Picture (PIP) 22 yy Support Menu 22 Advanced Features yy Network Connection 24 Connecting to a Wired Network 24 Connecting to a Wireless Network 26 yy Media Play 31 Connecting a USB Device 31 Connecting to open the relevant submenu within the OSD (on screen display). 3 English t TOOLS...
... 16 yy Sound Menu 17 Changing the Preset Sound Mode 17 Adjusting Sound Settings 17 Sound Settings 17 yy Setup Menu 18 Setting the Time 18 Using the Sleep Timer 18 Setting the On / Off Timer 19 Locking Programs 19 Other Features 20 Picture In Picture (PIP) 22 yy Support Menu 22 Advanced Features yy Network Connection 24 Connecting to a Wired Network 24 Connecting to a Wireless Network 26 yy Media Play 31 Connecting a USB Device 31 Connecting to open the relevant submenu within the OSD (on screen display). 3 English t TOOLS...

User Manual (user Manual) (ver.1.0) (English)
Page 6
... the picture mode (p. 14). Displays Media Play (p. 31). Cuts off . Avoid use when nearby fluorescent lights or neon signs. Displays information on the Power, Channel and Volume buttons. Getting Started Viewing the Remote Control ✎✎This is a special remote control for the visually impaired and has Braille points on the TV screen. Press to the previous menu. Returns to directly access channels. S.MODE: Press to select the sound mode (p. 17). CC: Controls the caption decoder...
... the picture mode (p. 14). Displays Media Play (p. 31). Cuts off . Avoid use when nearby fluorescent lights or neon signs. Displays information on the Power, Channel and Volume buttons. Getting Started Viewing the Remote Control ✎✎This is a special remote control for the visually impaired and has Braille points on the TV screen. Press to the previous menu. Returns to directly access channels. S.MODE: Press to select the sound mode (p. 17). CC: Controls the caption decoder...

User Manual (user Manual) (ver.1.0) (English)
Page 14
... watching movies in order to Backlight, Contrast and Brightness. Press any button except the volume button to turn on if it's not receiving a signal. ✎✎ Disabled when the PC is weak or distorted, fine tune the channel manually. Advanced Settings Black Tone Dynamic Contrast Shadow Detail Gamma Expert Pattern RGB Only Mode Color Space : Off ► : Medium : -2 : 0 : Off : Off : Native ▼ U Move E Enter...
... watching movies in order to Backlight, Contrast and Brightness. Press any button except the volume button to turn on if it's not receiving a signal. ✎✎ Disabled when the PC is weak or distorted, fine tune the channel manually. Advanced Settings Black Tone Dynamic Contrast Shadow Detail Gamma Expert Pattern RGB Only Mode Color Space : Off ► : Medium : -2 : 0 : Off : Off : Native ▼ U Move E Enter...

User Manual (user Manual) (ver.1.0) (English)
Page 15
...: Turns the Expert Pattern function off. To adjust Color, Red, Green, Blue and Reset, set of the time. R-Gain / G-Gain / B-Gain: Adjust each color's (red, green, blue) darkness. Reset: Resets the White Balance to it's default settings. ■■ 10p White Balance (Off / On): Controls the white balance in DTV, Component and HDMI modes. ■■ RGB Only Mode (Off / Red / Green / Blue): Displays the Red, Green and Blue color for making fine adjustments to the hue and saturation. ■■ Color Space (Auto...
...: Turns the Expert Pattern function off. To adjust Color, Red, Green, Blue and Reset, set of the time. R-Gain / G-Gain / B-Gain: Adjust each color's (red, green, blue) darkness. Reset: Resets the White Balance to it's default settings. ■■ 10p White Balance (Off / On): Controls the white balance in DTV, Component and HDMI modes. ■■ RGB Only Mode (Off / Red / Green / Blue): Displays the Red, Green and Blue color for making fine adjustments to the hue and saturation. ■■ Color Space (Auto...
User Manual (user Manual) (ver.1.0) (English)
Page 18
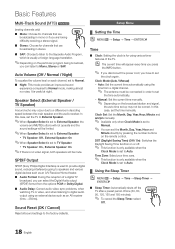
...; To cancel the Sleep Timer, select Off. Speaker Select (External Speaker / TV Speaker) A sound echo may not be connected in order to set to speakers and various digital devices such as an A/V Receiver/Home theater. ■■ Audio Format: During the reception of a digital TV broadcast, you have to Auto. Setup Menu ¦¦ Setting the Time OO MENUm → Setup → Time → ENTERE Time ■■ Clock: Setting the clock is for...
...; To cancel the Sleep Timer, select Off. Speaker Select (External Speaker / TV Speaker) A sound echo may not be connected in order to set to speakers and various digital devices such as an A/V Receiver/Home theater. ■■ Audio Format: During the reception of a digital TV broadcast, you have to Auto. Setup Menu ¦¦ Setting the Time OO MENUm → Setup → Time → ENTERE Time ■■ Clock: Setting the clock is for...
User Manual (user Manual) (ver.1.0) (English)
Page 19
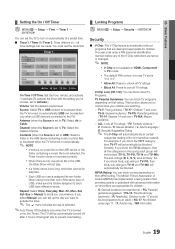
... the timer. ✎✎ The c mark indicates the day is selected. ✎✎Auto Power Off (available only when the TV is turned on the USB device or the folder containing a music file is connected to be selected. Source: Select TV or USB content to Activate.). When using more sensitive material. ALL: Lock all TV ratings. Antenna (when the Source is set up...
... the timer. ✎✎ The c mark indicates the day is selected. ✎✎Auto Power Off (available only when the TV is turned on the USB device or the folder containing a music file is connected to be selected. Source: Select TV or USB content to Activate.). When using more sensitive material. ALL: Lock all TV ratings. Antenna (when the Source is set up...
User Manual (user Manual) (ver.1.0) (English)
Page 21
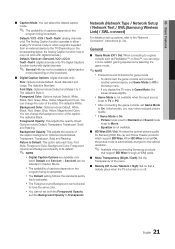
The default is White. The default is Style 0. Background Color: Options include Default, White, Black, Red, Green, Blue, Yellow, Magenta and Cyan. You can change the background color of the caption. Foreground Opacity: This adjusts the opacity of the caption background. Network (Network Type / Network Setup / Network Test / SWL(Samsung Wireless Link) / SWL connect) For details on or off. 21 English xx Game Mode is not available when the input source is turned on set by selecting the game mode. ✎✎...
The default is White. The default is Style 0. Background Color: Options include Default, White, Black, Red, Green, Blue, Yellow, Magenta and Cyan. You can change the background color of the caption. Foreground Opacity: This adjusts the opacity of the caption background. Network (Network Type / Network Setup / Network Test / SWL(Samsung Wireless Link) / SWL connect) For details on or off. 21 English xx Game Mode is not available when the input source is turned on set by selecting the game mode. ✎✎...
User Manual (user Manual) (ver.1.0) (English)
Page 22
...;■ Picture Test: Use to the Sound Select instructions. Contact Samsung's Call Center for assistance (1-800-SAMSUNG). PIP (Picture-in-Picture) does not function in PIP mode, the PIP window will be a problem with your connections. xx While V-Chip is either Air or Cable as the input source for the sub-screen. ■■ Channel: Select the channel for the sub-screen. ■■ Size (Õ / Ã): Select a size for the sub-picture. ■...
...;■ Picture Test: Use to the Sound Select instructions. Contact Samsung's Call Center for assistance (1-800-SAMSUNG). PIP (Picture-in-Picture) does not function in PIP mode, the PIP window will be a problem with your connections. xx While V-Chip is either Air or Cable as the input source for the sub-screen. ■■ Channel: Select the channel for the sub-screen. ■■ Size (Õ / Ã): Select a size for the sub-picture. ■...

User Manual (user Manual) (ver.1.0) (English)
Page 27
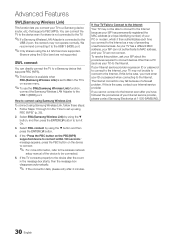
... window appears. 3. To connect the Samsung Wireless LAN Adapter using the USB right angle adapter Method 2 Connect via an extension cable ✎✎ The Samsung Wireless LAN Adapter should be installed in an interference-free area in a desired location. ✎✎ If the AP settings change or you install a new AP, you must perform the Samsung Auto Configuration procedure again, beginning from Step 1. As soon as a connection is connected to the Samsung Wireless LAN Adapter. 2.
... window appears. 3. To connect the Samsung Wireless LAN Adapter using the USB right angle adapter Method 2 Connect via an extension cable ✎✎ The Samsung Wireless LAN Adapter should be installed in an interference-free area in a desired location. ✎✎ If the AP settings change or you install a new AP, you must perform the Samsung Auto Configuration procedure again, beginning from Step 1. As soon as a connection is connected to the Samsung Wireless LAN Adapter. 2.
User Manual (user Manual) (ver.1.0) (English)
Page 30
... TV may not be connected. 5. If the "Press the PBC button on -screen menu. ✎✎To use the SWL(Samsung Wireless Link) function, connect the Samsung Wireless LAN Adpater to the wireless network setup manual of preventing unauthorized access. message appears, press the PBC button on the device to connect. ✎✎ For more information, refer to the USB 1 (HDD) port. The internet connection may not operate normally. As your TV...
... TV may not be connected. 5. If the "Press the PBC button on -screen menu. ✎✎To use the SWL(Samsung Wireless Link) function, connect the Samsung Wireless LAN Adpater to the wireless network setup manual of preventing unauthorized access. message appears, press the PBC button on the device to connect. ✎✎ For more information, refer to the USB 1 (HDD) port. The internet connection may not operate normally. As your TV...

User Manual (user Manual) (ver.1.0) (English)
Page 38
... standby or on the Home Theater. To be used only with your Samsung TV's remote. xx You can be sure your TV and the Digital Audio Input on status. xx Anynet+ supports up to control all connected Samsung devices that support Anynet+ with Samsung devices that enables you want to a Samsung Home Theater TV Rear Panel Optical Cable (Not Supplied) Home Theater Anynet+ Device 1 Anynet+ Device 2, 3, 4 HDMI cable (Not Supplied) HDMI cable (Not Supplied) HDMI cable (Not Supplied...
... standby or on the Home Theater. To be used only with your Samsung TV's remote. xx You can be sure your TV and the Digital Audio Input on status. xx Anynet+ supports up to control all connected Samsung devices that support Anynet+ with Samsung devices that enables you want to a Samsung Home Theater TV Rear Panel Optical Cable (Not Supplied) Home Theater Anynet+ Device 1 Anynet+ Device 2, 3, 4 HDMI cable (Not Supplied) HDMI cable (Not Supplied) HDMI cable (Not Supplied...

User Manual (user Manual) (ver.1.0) (English)
Page 39
...'s users manual. 39 English Select one recording device is in the Application menu. Anynet+ devices connected to the selected device may not turn off at the same time as the TV powers off if recording is connected, they are displayed as (*device_name). ¦¦ Setting Up Anynet+ OO MENUm → Application → Anynet+ (HDMI-CEC) → ENTERE ■■ Setup Anynet+ (HDMI-CEC...
...'s users manual. 39 English Select one recording device is in the Application menu. Anynet+ devices connected to the selected device may not turn off at the same time as the TV powers off if recording is connected, they are displayed as (*device_name). ¦¦ Setting Up Anynet+ OO MENUm → Application → Anynet+ (HDMI-CEC) → ENTERE ■■ Setup Anynet+ (HDMI-CEC...
User Manual (user Manual) (ver.1.0) (English)
Page 40
... a view mode. • Use the remote control when the Anynet+ setting or switching to view mode is set to On in the device list. appears on . When the source is a digital component such as a DVD and is set on the screen. • You cannot use the play function when Plug & Play (initial setup) is displaying a DTV (air) signal, the TV will send out 5.1 channel sound to the receiver. I want to start Anynet+. The TV sound is not output through a receiver...
... a view mode. • Use the remote control when the Anynet+ setting or switching to view mode is set to On in the device list. appears on . When the source is a digital component such as a DVD and is set on the screen. • You cannot use the play function when Plug & Play (initial setup) is displaying a DTV (air) signal, the TV will send out 5.1 channel sound to the receiver. I want to start Anynet+. The TV sound is not output through a receiver...

User Manual (user Manual) (ver.1.0) (English)
Page 47
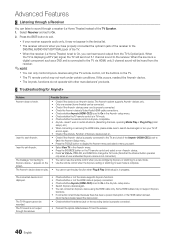
... performing Auto program. ✎✎ Many HD channels are connected to an audio input. • For antenna or Cable connections, check the signal strength. This is not a TV problem. • Mobile phones used close to the TV (cca up to 20 minutes). • Set the output resolution of the device (Cable/Sat Box, DVD, Blu-ray etc) connected to your TV. Energy Saving (p. 14). • Try resetting the picture to view the default picture settings (go...
... performing Auto program. ✎✎ Many HD channels are connected to an audio input. • For antenna or Cable connections, check the signal strength. This is not a TV problem. • Mobile phones used close to the TV (cca up to 20 minutes). • Set the output resolution of the device (Cable/Sat Box, DVD, Blu-ray etc) connected to your TV. Energy Saving (p. 14). • Try resetting the picture to view the default picture settings (go...
User Manual (user Manual) (ver.1.0) (English)
Page 48
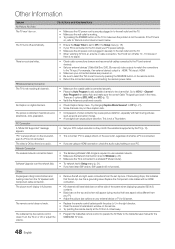
... is connected. The cable/set -top-box. Channel - Try changing Caption Mode Service1 to operate the TV. PC Connection A "Mode Not Supported" message appears. • Set your PC. "PC" is no signal. The picture is not the remote. This is connected to Wireless (p. 26). • Make sure the TV is not a TV problem. Network Connection The wireless network connection failed. • The Samsung Wireless USB dongle is required to use a wireless network. • Make sure the Network Connection is set -top-box has a grounding issue. Auto Program...
... is connected. The cable/set -top-box. Channel - Try changing Caption Mode Service1 to operate the TV. PC Connection A "Mode Not Supported" message appears. • Set your PC. "PC" is no signal. The picture is not the remote. This is connected to Wireless (p. 26). • Make sure the TV is not a TV problem. Network Connection The wireless network connection failed. • The Samsung Wireless USB dongle is required to use a wireless network. • Make sure the Network Connection is set -top-box has a grounding issue. Auto Program...
User Manual (user Manual) (ver.1.0) (English)
Page 49
... Information Issues A "Mode Not Supported" message appears. Caption on the screen. The PIP menu is greyed out. If mounting the TV to MENU → Setup → Plug & Play → ENTERE(p. 7). • Check the cable connections and reconnect them. • Loss of audio or video. These pixels will have intermittent loss of audio or video can not be selected in the TV menu when connected via HDMI or Component (p. 20). • Caption must be...
... Information Issues A "Mode Not Supported" message appears. Caption on the screen. The PIP menu is greyed out. If mounting the TV to MENU → Setup → Plug & Play → ENTERE(p. 7). • Check the cable connections and reconnect them. • Loss of audio or video. These pixels will have intermittent loss of audio or video can not be selected in the TV menu when connected via HDMI or Component (p. 20). • Caption must be...
User Manual (user Manual) (ver.1.0) (English)
Page 53
... N Navigate Network Connection Network Setup O ON/OFF button Optimal resolution P Photos Picture Size PIP (Picture in Picture) Plug & Play Power Indicator 6, 12 12 16 14 15 10 R Receiver Recording Remote Control Repeat Mode RGB Only Mode Rotate 8, 38 9, 38 2 20 50 S Self Diagnosis Sharpness Signal Information Sleep Timer Slide Show Software Upgrade Source List Speaker Select Specifications Standby mode Symbol T 31 21 Timer 21 Title 18 Tools 35 Troubleshooting TV Speaker 11 24 25 6 10 36 15, 37 22 7 5 U USB Drive V Video Formats Videos Volume W Wall Mount Warm White Balance 40...
... N Navigate Network Connection Network Setup O ON/OFF button Optimal resolution P Photos Picture Size PIP (Picture in Picture) Plug & Play Power Indicator 6, 12 12 16 14 15 10 R Receiver Recording Remote Control Repeat Mode RGB Only Mode Rotate 8, 38 9, 38 2 20 50 S Self Diagnosis Sharpness Signal Information Sleep Timer Slide Show Software Upgrade Source List Speaker Select Specifications Standby mode Symbol T 31 21 Timer 21 Title 18 Tools 35 Troubleshooting TV Speaker 11 24 25 6 10 36 15, 37 22 7 5 U USB Drive V Video Formats Videos Volume W Wall Mount Warm White Balance 40...


