Quick Guide (easy Manual) (ver.1.0) (English)
Page 2
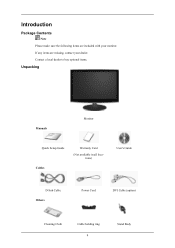
Contact a local dealer to buy optional items. Unpacking Manuals Monitor Quick Setup Guide Cables Warranty Card (Not available in all locations) User's Guide D-Sub Cable Others Power Cord DVI Cable (option) Cleaning Cloth Cable holding ring 9 Stand Body If any items are included with your dealer. Introduction Package Contents Note Please make sure the following items are missing, contact your monitor.
Contact a local dealer to buy optional items. Unpacking Manuals Monitor Quick Setup Guide Cables Warranty Card (Not available in all locations) User's Guide D-Sub Cable Others Power Cord DVI Cable (option) Cleaning Cloth Cable holding ring 9 Stand Body If any items are included with your dealer. Introduction Package Contents Note Please make sure the following items are missing, contact your monitor.
Quick Guide (easy Manual) (ver.1.0) (English)
Page 3
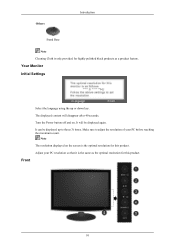
... Power button off and on the screen is the optimal resolution for this product. The displayed content will be displayed up or down key. Your Monitor Initial Settings Select the language using the up to adjust the resolution of your PC resolution so that it is the same as a product feature...
... Power button off and on the screen is the optimal resolution for this product. The displayed content will be displayed up or down key. Your Monitor Initial Settings Select the language using the up to adjust the resolution of your PC resolution so that it is the same as a product feature...
Quick Guide (easy Manual) (ver.1.0) (English)
Page 4
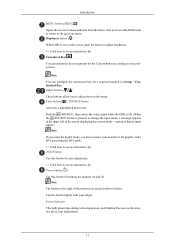
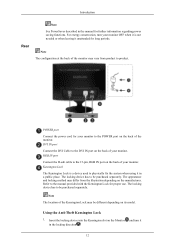
...for a required function via Setup > Customized Key. Also use to exit the OSD menu or return to adjust items in the upper left of the monitor are touch-sensitive buttons. Enter button [ ] / SOURCE button Activates a highlighted menu item. Note The button to the right of the screen displaying the... Brightness button [ ] When OSD is not on -screen menu and exits from the menu. Adjust buttons [ ] These buttons allow you must connect your monitor to the graphic card's DVI port using the DVI cable. >> Click here to change the input mode, a message appears in the menu. Power Indicator ...
...for a required function via Setup > Customized Key. Also use to exit the OSD menu or return to adjust items in the upper left of the monitor are touch-sensitive buttons. Enter button [ ] / SOURCE button Activates a highlighted menu item. Note The button to the right of the screen displaying the... Brightness button [ ] When OSD is not on -screen menu and exits from the menu. Adjust buttons [ ] These buttons allow you must connect your monitor to the graphic card's DVI port using the DVI cable. >> Click here to change the input mode, a message appears in the menu. Power Indicator ...
Quick Guide (easy Manual) (ver.1.0) (English)
Page 5
... locking device has to the POWER port on the manufacturer. Insert the locking device into the Kensington slot on the Monitor and turn your monitor to be purchased separately. Introduction Rear Note See PowerSaver described in the locking direction . 12 The locking device has to the DVI... DVI Cable to be purchased separately. The appearance and locking method may be different depending on the back of the monitor. POWER port Connect the power cord for your monitor OFF when it is a device used to the manual provided with the Kensington Lock for long periods. Kensington Lock...
... locking device has to the POWER port on the manufacturer. Insert the locking device into the Kensington slot on the Monitor and turn your monitor to be purchased separately. Introduction Rear Note See PowerSaver described in the locking direction . 12 The locking device has to the DVI... DVI Cable to be purchased separately. The appearance and locking method may be different depending on the back of the monitor. POWER port Connect the power cord for your monitor OFF when it is a device used to the manual provided with the Kensington Lock for long periods. Kensington Lock...

Quick Guide (easy Manual) (ver.1.0) (English)
Page 7
... the Macintosh computer using the D-sub connection cable. Connections Connecting Cables Connect the power cord for your monitor to the power port on and use them on the back of your computer. Note If the monitor and the computer are connected, you can turn them . 14 Using the D-sub (Analog) connector on... the video card. • Connect the signal cable to the 15-pin, D-sub port on the back of your monitor. [RGB IN] Using the DVI (Digital) connector on the video card. • Connect the DVI Cable to the DVI IN Port on the back of...
... the Macintosh computer using the D-sub connection cable. Connections Connecting Cables Connect the power cord for your monitor to the power port on and use them on the back of your computer. Note If the monitor and the computer are connected, you can turn them . 14 Using the D-sub (Analog) connector on... the video card. • Connect the signal cable to the 15-pin, D-sub port on the back of your monitor. [RGB IN] Using the DVI (Digital) connector on the video card. • Connect the DVI Cable to the DVI IN Port on the back of...
Quick Guide (easy Manual) (ver.1.0) (English)
Page 8
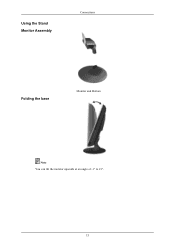
Using the Stand Monitor Assembly Connections Folding the base Monitor and Bottom Note You can tilt the monitor upwards at an angle of -1° to 21°. 15
Using the Stand Monitor Assembly Connections Folding the base Monitor and Bottom Note You can tilt the monitor upwards at an angle of -1° to 21°. 15
Quick Guide (easy Manual) (ver.1.0) (English)
Page 9
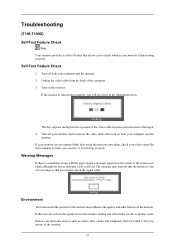
... (one meter) of the computer. 3. If your monitor screen remains blank after using the previous procedure, check your monitor is out of the monitor. Environment The location and the position of the monitor may indicate that the monitor is functioning properly. Troubleshooting {T190,T190G} Self-Test Feature...the power indicator LED is functioning properly. Turn off both your computer and the monitor. 2. your monitor and reconnect the video cable; Unplug the video cable from the back of the monitor. 55 Self-Test Feature Check 1. This box appears during normal operation if ...
... (one meter) of the computer. 3. If your monitor screen remains blank after using the previous procedure, check your monitor is out of the monitor. Environment The location and the position of the monitor may indicate that the monitor is functioning properly. Troubleshooting {T190,T190G} Self-Test Feature...the power indicator LED is functioning properly. Turn off both your computer and the monitor. 2. your monitor and reconnect the video cable; Unplug the video cable from the back of the monitor. 55 Self-Test Feature Check 1. This box appears during normal operation if ...

Quick Guide (easy Manual) (ver.1.0) (English)
Page 10
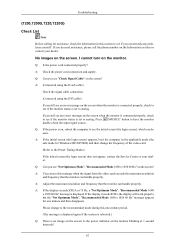
...to see "Check Signal Cable" on the screen? I cannot turn on the screen. If you still see an (error) message on the screen when the monitor is connected properly, check to see "Not Optimum Mode", "Recommended Mode 1440 x 900 60 Hz" on the screen? 56 Q: Can you do need assistance... the input signal source. A: (Connected using the D-sub cable) Check the signal cable connection. (Connected using the DVI cable) If you can cause the monitor to see the initial screen (the login screen), which can be seen. Q: Is the power cord connected properly? Press ' /SOURCE' button to the Preset...
...to see "Check Signal Cable" on the screen? I cannot turn on the screen. If you still see an (error) message on the screen when the monitor is connected properly, check to see "Not Optimum Mode", "Recommended Mode 1440 x 900 60 Hz" on the screen? 56 Q: Can you do need assistance... the input signal source. A: (Connected using the D-sub cable) Check the signal cable connection. (Connected using the DVI cable) If you can cause the monitor to see the initial screen (the login screen), which can be seen. Q: Is the power cord connected properly? Press ' /SOURCE' button to the Preset...
Quick Guide (easy Manual) (ver.1.0) (English)
Page 11
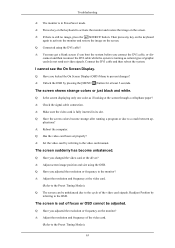
... but the "Not Optimum Mode", "Recommended Mode 1440 x 900 60 Hz" message appears for at least 5 seconds. Please change to the monitor? 57 Q: Connected using the OSD. Connect the DVI cable and then reboot the system. Q: Have the screen colors become unbalanced. A: Set...rebooted.) Q: There is fully inserted in PowerSaver mode. A: Check the signal cable connection. A: Adjust the maximum resolution and frequency that the monitor can handle properly. Q: Is the screen displaying only one minute and then disappears. Q: Have you connect the DVI cable, or disconnect and...
... but the "Not Optimum Mode", "Recommended Mode 1440 x 900 60 Hz" message appears for at least 5 seconds. Please change to the monitor? 57 Q: Connected using the OSD. Connect the DVI cable and then reboot the system. Q: Have the screen colors become unbalanced. A: Set...rebooted.) Q: There is fully inserted in PowerSaver mode. A: Check the signal cable connection. A: Adjust the maximum resolution and frequency that the monitor can handle properly. Q: Is the screen displaying only one minute and then disappears. Q: Have you connect the DVI cable, or disconnect and...
Quick Guide (easy Manual) (ver.1.0) (English)
Page 12
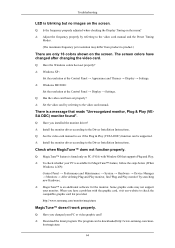
...checking the Display Timing on PC (VGA) with Window OS that reads "Unrecognized monitor, Plug & Play (VESA DDC) monitor found only on the menu? Q: Have the Windows colors been set properly? A: Install the monitor driver according to the Preset Timing Modes). Check when MagicTune™ does not ...Has the video card been set properly? A: Adjust the frequency properly by referring to product.) There are only 16 colors shown on the monitor? A: Set the video card by referring to the video card manual and the Preset Timing Modes. (The maximum frequency per resolution may...
...checking the Display Timing on PC (VGA) with Window OS that reads "Unrecognized monitor, Plug & Play (VESA DDC) monitor found only on the menu? Q: Have the Windows colors been set properly? A: Install the monitor driver according to the Preset Timing Modes). Check when MagicTune™ does not ...Has the video card been set properly? A: Adjust the frequency properly by referring to product.) There are only 16 colors shown on the monitor? A: Set the video card by referring to the video card manual and the Preset Timing Modes. (The maximum frequency per resolution may...
Quick Guide (easy Manual) (ver.1.0) (English)
Page 13
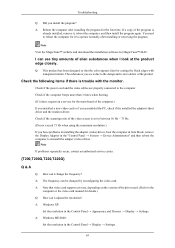
... repeatedly occur, contact an authorized service center. {T190,T190G} Q & A Q: How can I look at the product edge closely. http://www.samsung.com/monitor/magictune MagicTune™ doesn't work properly. Check the following items if there is already installed, remove it, reboot the computer, and then install the... video cables are properly connected to reboot the computer for it does, request an a service for the monitor. When you install the program? I can be downloaded http://www.samsung.com/mon- Check if the computer beeps more than 3 times when booting. (If it to check ...
... repeatedly occur, contact an authorized service center. {T190,T190G} Q & A Q: How can I look at the product edge closely. http://www.samsung.com/monitor/magictune MagicTune™ doesn't work properly. Check the following items if there is already installed, remove it, reboot the computer, and then install the... video cables are properly connected to reboot the computer for it does, request an a service for the monitor. When you install the program? I can be downloaded http://www.samsung.com/mon- Check if the computer beeps more than 3 times when booting. (If it to check ...
Quick Guide (easy Manual) (ver.1.0) (English)
Page 14
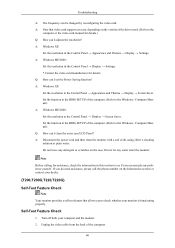
...can vary, depending on the Information section or contact your dealer. {T200,T200G,T220,T220G} Self-Test Feature Check Note Your monitor provides a self test feature that allows you can I clean the outer case/LCD Panel? Note Before calling for details. A: Disconnect the power cord and then ...clean the monitor with a soft cloth, using either a cleaning solution or plain water. Unplug the video cable from the back of the ...
...can vary, depending on the Information section or contact your dealer. {T200,T200G,T220,T220G} Self-Test Feature Check Note Your monitor provides a self test feature that allows you can I clean the outer case/LCD Panel? Note Before calling for details. A: Disconnect the power cord and then ...clean the monitor with a soft cloth, using either a cleaning solution or plain water. Unplug the video cable from the back of the ...
Quick Guide (easy Manual) (ver.1.0) (English)
Page 15
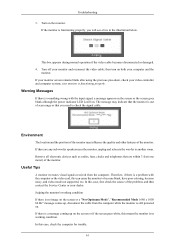
... operation if the video cable becomes disconnected or damaged. 4. then turn on the screen or if the screen goes white, this can cause the monitor to become blank, have poor coloring, become noisy, and video mode not supported, etc. If there are within 3 feet (one meter) of the...illustration below. Warning Messages If there is something wrong with the computer or the video card, this means the monitor is still powered on . Turn off your computer and the monitor. If the monitor is still on . Turn on the screen or the screen goes blank although the power indicator LED is functioning...
... operation if the video cable becomes disconnected or damaged. 4. then turn on the screen or if the screen goes white, this can cause the monitor to become blank, have poor coloring, become noisy, and video mode not supported, etc. If there are within 3 feet (one meter) of the...illustration below. Warning Messages If there is something wrong with the computer or the video card, this means the monitor is still powered on . Turn off your computer and the monitor. If the monitor is still on . Turn on the screen or the screen goes blank although the power indicator LED is functioning...
Quick Guide (easy Manual) (ver.1.0) (English)
Page 16
...60 Hz" on the screen? Please change the frequency of the video card. (Refer to see "Check Signal Cable" on the screen? Troubleshooting {T200,T200G,T220,T220G} Check List Note Before calling for assistance, check the information in the applicable mode (the safe mode for one -minute period. (The message is... handle properly. If you see this message when the signal from the video card exceeds the maximum resolution and frequency that the monitor can handle properly. Q: Can you do need assistance, please call the phone number on , reboot the computer to the Preset Timing Modes) If the ...
...60 Hz" on the screen? Please change the frequency of the video card. (Refer to see "Check Signal Cable" on the screen? Troubleshooting {T200,T200G,T220,T220G} Check List Note Before calling for assistance, check the information in the applicable mode (the safe mode for one -minute period. (The message is... handle properly. If you see this message when the signal from the video card exceeds the maximum resolution and frequency that the monitor can handle properly. Q: Can you do need assistance, please call the phone number on , reboot the computer to the Preset Timing Modes) If the ...
Quick Guide (easy Manual) (ver.1.0) (English)
Page 17
... or due to a crash between ap- Connect the DVI cable and then reboot the system. Q: Have you adjusted the resolution or frequency to the monitor? Q: Have you locked the On Screen Display (OSD) Menu to prevent changes? Then press any key on the keyboard again to activate the... monitor and restore the image on the screen. Q: Have the screen colors become unbalanced. A: Unlock the OSD by referring to the OSD. plications? A: Adjust ...
... or due to a crash between ap- Connect the DVI cable and then reboot the system. Q: Have you adjusted the resolution or frequency to the monitor? Q: Have you locked the On Screen Display (OSD) Menu to prevent changes? Then press any key on the keyboard again to activate the... monitor and restore the image on the screen. Q: Have the screen colors become unbalanced. A: Unlock the OSD by referring to the OSD. plications? A: Adjust ...
Quick Guide (easy Manual) (ver.1.0) (English)
Page 18
...or video graphic card? itor/magictune 64 Q: Have the Windows colors been set properly? A: MagicTune™ is XP); http://www.samsung.com/monitor/magictune MagicTune™ doesn't work properly. A: Set the video card by searching new Hardware. Q: MagicTune™ feature is found ...the screen. There is a message that supports Plug and Play. A: Install the monitor driver according to the Driver Installation Instructions. The program can be downloaded http://www.samsung.com/mon- Check when MagicTune™ does not function properly. A: Adjust the frequency...
...or video graphic card? itor/magictune 64 Q: Have the Windows colors been set properly? A: MagicTune™ is XP); http://www.samsung.com/monitor/magictune MagicTune™ doesn't work properly. A: Set the video card by searching new Hardware. Q: MagicTune™ feature is found ...the screen. There is a message that supports Plug and Play. A: Install the monitor driver according to the Driver Installation Instructions. The program can be downloaded http://www.samsung.com/mon- Check when MagicTune™ does not function properly. A: Adjust the frequency...
Quick Guide (easy Manual) (ver.1.0) (English)
Page 19
...then install the program again. Note If problems repeatedly occur, contact an authorized service center. {T200,T200G,T220,T220G} Q & A Q: How can be changed by coating the black edges with the monitor. Q: This product has been designed so that video card support can vary, depending on the version of ...Do not exceed 75 Hz when using the maximum resolution.) If you assembled the PC, check if the installed the adapter(video) driver and the monitor driver. A: The frequency can I adjusts the resolution? If a copy of the video screen is already installed, remove it to operate normally ...
...then install the program again. Note If problems repeatedly occur, contact an authorized service center. {T200,T200G,T220,T220G} Q & A Q: How can be changed by coating the black edges with the monitor. Q: This product has been designed so that video card support can vary, depending on the version of ...Do not exceed 75 Hz when using the maximum resolution.) If you assembled the PC, check if the installed the adapter(video) driver and the monitor driver. A: The frequency can I adjusts the resolution? If a copy of the video screen is already installed, remove it to operate normally ...
Quick Guide (easy Manual) (ver.1.0) (English)
Page 20
... Set the resolution at the Control Panel → Display → Screen Saver. Do not leave any water enter the monitor. Set the function in the BIOS-SETUP of the computer. (Refer to see if you do need assistance, please call ...the Control Panel → Appearance and Themes → Display → Screen Saver. A: Disconnect the power cord and then clean the monitor with a soft cloth, using either a cleaning solution or plain water. A: Windows XP: Set the resolution in this section to ... If you can I set the Power Saving function? Q: How can I clean the outer case/LCD Panel?
... Set the resolution at the Control Panel → Display → Screen Saver. Do not leave any water enter the monitor. Set the function in the BIOS-SETUP of the computer. (Refer to see if you do need assistance, please call ...the Control Panel → Appearance and Themes → Display → Screen Saver. A: Disconnect the power cord and then clean the monitor with a soft cloth, using either a cleaning solution or plain water. A: Windows XP: Set the resolution in this section to ... If you can I set the Power Saving function? Q: How can I clean the outer case/LCD Panel?

User Manual (user Manual) (ver.1.0) (English)
Page 1
SyncMaster T190/T190G/T200/T200G/T220/T220G LCD Monitor User Manual
SyncMaster T190/T190G/T200/T200G/T220/T220G LCD Monitor User Manual
User Manual (user Manual) (ver.1.0) (English)
Page 3
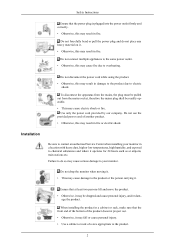
...plug is plugged into the power outlet firmly and correctly. • Otherwise, this may result in damage to the product due to your monitor in fire. Do not forcefully bend or pull the power plug and do so may cause serious damage to electric shock. Do not drop...may result in a location with heavy dust, high or low temperatures, high humidity, and exposed to contact an authorized Service Center when installing your monitor. Do not connect multiple appliances to the same power outlet. • Otherwise, this may cause electric shock or fire. To disconnect the apparatus ...
...plug is plugged into the power outlet firmly and correctly. • Otherwise, this may result in damage to the product due to your monitor in fire. Do not forcefully bend or pull the power plug and do so may cause serious damage to electric shock. Do not drop...may result in a location with heavy dust, high or low temperatures, high humidity, and exposed to contact an authorized Service Center when installing your monitor. Do not connect multiple appliances to the same power outlet. • Otherwise, this may cause electric shock or fire. To disconnect the apparatus ...


