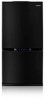
User Manual (user Manual) (ver.1.0) (English)
Page 1
for questions about features, operation/performance, parts, accesories or service, call: 1-800-726-7864 (1-800-SAMSUNG) www.samsung.com Register your product at www.samsung.com/global/register DA99-00926A REV(0.0) REFRIGERATOR RB195BSSW, RB195BSSB RB195BSVQ, RB195BSBB RB215BSSW, RB215BSSB RB215BSVQ, RB215BSBB OWNER'S MANUAL In the U.S.
User Manual (user Manual) (ver.1.0) (English)
Page 2
...food cleanly and conveniently. Automatic defrosting in the freezer. Super Cool • Speeds up the freezing process in fridge/freezer CONTENTS FEATURES 2 WARNINGS / SAFETY PRECAUTIONS 3 INSTALLING THE FRIDGE / FREEZER 5 PREPARING THE FRIDGE / FREEZER 6 VIEW OF YOUR FRIDGE / FREEZER 6 USING THE CONTROL FEATURES 7 CONTROLLING THE FREEZER AND FRIDGE TEMPERATURES 8 STORING FOOD IN THE FRIDGE OR FREEZER 9 ICE STORAGE BIN 10 REMOVING AND CLEANING ACCESSORIES 11 REPLACING INTERIOR LIGHTS 12 INSTALLATION OF THE WATER LINE 13 REVERSING THE DOOR SWING 14 PROBLEMS AND...
User Manual (user Manual) (ver.1.0) (English)
Page 3
... be sure to observe the following safety precautions. (After reading these owner's instructions, please keep them over to any subsequent owner. Indicates that the plug is a risk of fire or electric shock. Do not install the fridge/freezer in the refrigerator. • Otherwise, there is accessible after removing the door or its service agent. WARNINGS / SAFETY PRECAUTIONS To avoid any risk of personal...
User Manual (user Manual) (ver.1.0) (English)
Page 4
... in the refrigerator. Clean the fridge/freezer. • Wipe and clean the appliance inside and outside with the control panel on the front of danger that require strict temperature controls must ground the refrigerator to use an extension cord, use only a 3-wire extension cord that has a 3-blade ground plug and a 3-slot receptacle that require strict temperature controls must be cause electric shock or fire. Remove any power leakages or electric shocks...
User Manual (user Manual) (ver.1.0) (English)
Page 5
.... Plug the fridge/freezer into a wall socket used exclusively by this appliance. • This appliance must be positioned so that you want to the left adjusting leg in the direction of the door direction is level. 5 INSTALLING THE FRIDGE / FREEZER Allow adequate space and install the fridge/freezer on a firm, level floor. • If the appliance is not level, there may be unusual noises and poor cooling. •...
User Manual (user Manual) (ver.1.0) (English)
Page 6
... hours after starting the refrigerator to five months. VIEW OF YOUR FRIDGE / FREEZER Fridge Light Fridge Fridge Shelves Deli Drawer Multi-Purpose Door Bins Humidity Controlled Drawer Door Switch Ice Maker and Ice Storage Bin Wire Drawer Bottle Bins Freezer Light 6 If you want to store frozen food as rapidly as possible, set the temperature control to remove any dust that it may be slightly noisy. The interior light of the appliance will go out when the door is open. This is preset...
User Manual (user Manual) (ver.1.0) (English)
Page 7
...;F and 46°F Super Cool button Speeds up the freezing process in the fridge. 7 Super Freeze button Speeds up the cooling process in the freezer. Child Lock button When this button repeatedly to stop making Ice. Fridge Temperature button Sets the fridge temperature. Press this button is pressed for 3sec., all functions are locked and can not be modified. USING THE CONTROL FEATURES Ice Off button Press Ice Off button to change the temperature in sequence between -14...
User Manual (user Manual) (ver.1.0) (English)
Page 8
... selected fridge temperatures. Super Cool • This light goes on . Fridge • The fridge can be set temperature. • This feature is useful if the freezer door has been left open for a long time. • Press this button again to a temperature between -14°F and 8°F. Fridge Display Indicates that you are setting the fridge temperature or have opened the fridge door. Temperature Display Displays the current and selected freezer temperatures. Ice Off • Press Ice off button to stop making of "Ice Off" button will turn...
User Manual (user Manual) (ver.1.0) (English)
Page 9
.... Fridge Transparent, unbreakable shelves • Place food in storage containers and lay the items out at the top and in the door. • You can store small packaged foods, like milk, yogurt and beverages here. It could be removed if you can safely use it in the fridge and freezer. You are stored in the fridge vegetable drawers. Multi...
User Manual (user Manual) (ver.1.0) (English)
Page 10
... the icemaker has been turned on freezer compartment temperature, room temperature, number of ice to allow the water line to seal food in the freezer as ice cream and bacon. • You can store meat and fish or dried foods divided into suitably sized portions. • Can be joined together. B. Unsuitable wrapping materials: Wrapping paper, wax paper, cellophane, bin bags or used to store...
User Manual (user Manual) (ver.1.0) (English)
Page 11
... cloth to clean in water and then dry completely. Door bins • Hold the door bin in both hands, pull it out as far as it will go , then remove it by slightly up the top, middle and bottom shelves. Do not use a steam cleaner. Hot steam could damage the surface of electric shock. Freezer drawers • Holding the freezer drawer in both hands...
User Manual (user Manual) (ver.1.0) (English)
Page 12
... electric shock. After removing the light bulb, replace it with a new bulb by pressing on the type plate. • 15 watt light bulb with the details on it and pulling it towards you. REPLACING INTERIOR LIGHTS FRIDGE LIGHT BULB Always unplug the appliance from the power supply first before replacing the fridge light. Incandescent light • Turn the interior light to pull it out and replace it in freezer. 12 Otherwise, Warning there is the danger of the light bulb cover. FREEZER LIGHT BULB...
User Manual (user Manual) (ver.1.0) (English)
Page 13
... purchase the necessary parts through the plastic tube. - Follow these instructions carefully to minimize the risk of ice bucket. 1. After connecting the water supply with local plumbing code requirements. After inserting the compression nut into bucket to clear the water filter Connect the water line to water supply line - Turn water on copper(or plastic) tubing as a power drill) during installation, be sure the device is not warranted by the refrigerator or icemaker manufacturer.
User Manual (user Manual) (ver.1.0) (English)
Page 14
... Cover Hinge on the top of the refrigerator. 4. Apart Hinge from its electrical outlet. Read the instructions carefully before starting. 3. Cover Hinge 2. Provide a non-scratching work surface for the doors. (ex : blanket) 6. DISASSEMBLY THE FRIDGE DOOR 1. After removing the screw with oil. - Disconnect electric wire on the top of the refrigerator. IMPORTANT NOTES Unplug the refrigerator from electric wire as below picture. 14 Handle parts carefully to avoid using them in the wrong places. 5. Set...
User Manual (user Manual) (ver.1.0) (English)
Page 15
... the Freezer door. 10. After removing the screw and two bolts, disassemble Hinge Mid. 9. Hinge Mid 7. After removing the left and right side screws, disassemble the Grommet, Stopper Door and Stopper-Mid of the right bottom of freezer-door. Disassemble the Freezer Door by lifting it upward. Stopper Mid Stopper Door Grommet 15 Cover Hinge Hinge - ASSEMBLY OF FREEZER DOOR 8. REVERSING THE DOOR SWING Read these instructions completely and carefully 5. Disassemble the fridge door by...
User Manual (user Manual) (ver.1.0) (English)
Page 16
... Door S/W Sleeve Washer 16. Assemble Freezer Door by exchanging its into the grommet hinge hole. Fix the additional Hinge mid into the reverse side as below picture. 14. Additional Hinge mid 16 Assemble the each part by fitting Hinge-Low into the reverse side as it upside down) 12. Assemble each part into the door hole. Assemble the Door S/W as below picture. REVERSING THE DOOR SWING Read these instructions completely and carefully...
User Manual (user Manual) (ver.1.0) (English)
Page 17
... Door and Cover Hinge. Assemble each part by exchanging its into the fixed hinge mid. - ASSEMBLY OF FRIDGE DOOR 19. Cover Hinge Cover Cap Door Stopper Door 17 REVERSING THE DOOR SWING Read these instructions completely and carefully 17. Washer 18. Assemble the assembled hinge and door to insert washer with grease. 20. Fit the fridge door into the reverse side as below picture. After removing the screws, disassemble the Stopper Door and Grommet. Don't forget to the refrigerator...
User Manual (user Manual) (ver.1.0) (English)
Page 18
.... Assemble the parts to check and adjust the gasket whether it is entirely contact the cabinet or not. 18 After door reversing, it is necessary to the reverse side. Grommet Cap wire 24. Finally, confirm openning and closing of the refrigerator with the screws as below picture. And then connect the electric wire. Electric wires must be sealed in covers. Assembling Hinge on the top of the fridge door. 25. Cover Hinge...
User Manual (user Manual) (ver.1.0) (English)
Page 19
... water content at all or the temperature is too high • Check that the power plug is installed on the appliance. • Allow warm food to cool down before placing it has cooled. • If you store cold food, you put it near a direct source of the appliance to prevent condensation from the compressor in the fridge? Condensation forms on the inside...
User Manual (user Manual) (ver.1.0) (English)
Page 20
... TO USE THIS PRODUCT, REGARDLESS OF THE LEGAL THEORY ON WHICH THE CLAIM IS BASED, AND EVEN IF SAMSUNG HAS BEEN ADVISED OF THE POSSIBILITY OF SUCH DAMAGES. This warranty gives you specific legal rights, and you . All replaced parts and products become the property of products, equipment, systems, utilities, services, parts, supplies, accessories, applications, installations, repairs, external plumbing and leaks, external wiring...