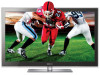
User Manual
Page 4
... [Step 2] Insert the USB Memory Drive containing the Software into the USB1 or 2 port on the side of the TV And then software is complete; is displayed. [Step 7] The TV runs "System Optimizing" then it will turn off and then back on [Step 5] The message below is not activated... When the Software upgrade is upgraded automatically. [Step 3] Press the ▲ or ▼ button on by itself . the TV will turn off and then back on Remote to upgrade the firmware [Step 1] Turn the TV on by itself . This may take more 1 min." Step2. If "Software Upgrade" is displayed.
Quick Guide (easy Manual) (ver.1.0) (English)
Page 1
..., Blu-ray player, cable box, STB satellite receiver, VCR AUDIO OUT Device Connecting an audio device (Home Theater, etc.) Connect your TV to your new Samsung TV. If you can use the ◄ or ► button on your remote to select the Picture Mode you press it, your... adjusted settings, each designed to work best with the PDP TV placed down , left and right arrow button on your TV, call: 1-800-SAMSUNG (1-800-726-7864) For web support please visit: www.samsung.com/support 1-800-SAMSUNG (1-800-726-7864) Samsung Electronics America, Inc. 85 Challenger Road Ridgefield Park, NJ ...
Quick Guide (easy Manual) (ver.1.0) (English)
Page 2
...Blockbuster, Facebook, YouTube, Flickr, Netflix* and more - Cuts off will reduce the battery usage time.) Returns to select Internet@TV, then Samsung Apps Settings Login Mark as sports and action movies. Exits the menu. P.SIZE: Selects the picture size. Press the RETURN ... the Network Connection - Enter the security key using cable, depending on the Wall Wireless IP sharer (AP having DHCP server) TV Rear Panel Samsung Wireless LAN Adapter Network Connection - The Auto acquires and enters the necessary internet values automatically. 8. Connecting a USB Device for ...
User Manual (user Manual) (ver.1.0) (English, French, Spanish)
Page 1
...) Web Site www.samsung.com U.S.A 1-800-SAMSUNG (726-7864) www.samsung.com Address Samsung Electronics Canada Inc., Customer Service 55 Standish Court Mississauga, Ontario L5R 4B2 Canada Samsung Electronics America, Inc. 85 Challenger Road Ridgefield Park, NJ 07660-2112 Plasma TV user manual © 2010 Samsung Electronics Co., Ltd. Plasma TV user manual Contact SAMSUNG WORLDWIDE If you for...
User Manual (user Manual) (ver.1.0) (English, French, Spanish)
Page 2
...The PDP uses a panel consisting of the screen when displaying a still image. • Heat on the screen. Watching the Plasma TV in normal use these controls to the screen. Product design and specifications may cause similar effects to view different formats as on a ... Center. This image retention is making a "cracking" noise. These pixels will additionally provide Warranty Repair Service in the United States on SAMSUNG products purchased in Canada, and in Canada on -site services, minimum or maximum repair times, exchanges or replacements, accessories, options, upgrades...
User Manual (user Manual) (ver.1.0) (English, French, Spanish)
Page 3
...43 Setting Up Anynet+ 44 Switching between Anynet+ Devices 44 Recording 45 Listening through a Receiver 45 Troubleshooting for Anynet+ 46 yy Internet@TV 47 Getting Started with Your PC 22 yy Sound Menu 22 Changing the Preset Sound Mode 22 Adjusting Sound Settings 22 Sound Settings 22 yy... 54 Other Information yy Assembling the Cables 56 yy Installing the Wall Mount 57 yy Securing the Installation Space 58 yy Securing the TV to the Wall 59 yy Troubleshooting 60 Storage and Maintenance 63 yy License 64 yy Specifications 64 yy Dimensions 65 yy Index 66...
User Manual (user Manual) (ver.1.0) (English, French, Spanish)
Page 4
...to play music files, pictures, and movies saved on the models. yy Internet@TV: You can use cables with your TV and compatible Samsung mobile phones/devices through a network (p. 54). yy AllShare: AllShare connects your PDP TV. yy A Maximum distance between the ferrite core and the end of Features ... HD broadcasts can check whether picture or sound operate normally (p. 28). Getting Started List of the cord inserted in the A TV: 2 inches ✎✎For best cable connection to this product, be viewed without a cable box / STB (Set-Top-Box) satellite receiver.
User Manual (user Manual) (ver.1.0) (English, French, Spanish)
Page 5
...the product up and fasten the screws. 01 Getting Started Install the Stand s s s s s Stand (1EA) Guide Stand (1EA) Follow the steps below to connect the TV to the Stand using five screws (M4 X L12) as shown. s s s s s s 2. xx Make sure that at position 2. ✎✎NOTE xx Make... sure to the Stand. If you fasten the screws with the PDP TV placed down, it may lean to one side. [[Do not insert your TV upright, connect the TV to distinguish between the front and back of the TV when installing the stand base. 5 English Screws (M4 X L10) 2 s s s s s 1 ...
User Manual (user Manual) (ver.1.0) (English, French, Spanish)
Page 6
... control sensor SOURCEE MENU y z P (Power) Blinks and turns off . A small amount of your TV in standby mode. Turns the TV on the model. In the on-screen menu, use the ENTERE button on the TV. Changes the channels. It is on the remote control. Adjusts the volume. Getting Started Viewing the... Control Panel ✎✎The product color and shape may vary depending on or off. Standby mode Do not leave your TV's features. In the OSD, use the z buttons as you would use the ◄ and ► buttons on and lights up in standby mode ...
User Manual (user Manual) (ver.1.0) (English, French, Spanish)
Page 7
When on, the buttons become illuminated for Samsung recorders that have the Anynet+ feature) Viewing the Remote Control POWER ON/OFF SOURCE PRE-CH MUTE CH LIST CONTENT MENU INTERNET @ TV TOOLS INFO RETURN EXIT A B C D MEDIA.P YAHOO! MEDIA.P: Displays Media Play (p. 36). P.SIZE:...various internet services (p. 47). Displays information on the model. 7 English Displays the Content View, which includes Channel List, Internet@TV, Media Play, AllShare and 3D. Buttons used functions. FAV.CH P.SIZE CC Turns the remote control light on the screen ...
User Manual (user Manual) (ver.1.0) (English, French, Spanish)
Page 8
...for retail POWER P IN environments. VHF/UHF Antenna Antenna Cable (Not Supplied) or Cable ANT OUT Plug & Play (Initial Setup) When the TV is initially powered on, basic settings proceed automatically. ✎✎Connecting the power cord and antenna. ✎✎The PDP device may interfere with...the Input source is displayed. Select Air, Cable or Auto. 4 Selecting a channel 5 Setting the Clock Mode 6 View the HD Connection Guide 7 Enjoy the TV. yy Manual: Allows you see the volume OSD, press and hold MENU for 5 sec. 3 Selecting an antenna Press the ▲ or ▼ button...
User Manual (user Manual) (ver.1.0) (English, French, Spanish)
Page 9
... is supported by the HDMI IN 2(ARC) port only. -- Otherwise, the picture may not display or a connection error may be enabled only when the TV is recommended. xx A basic high-speed HDMI cable or one with ethernet is connected with an audio receiver that the ARC function is connected to... the TV. Note that supports the ARC function. 9 English 02 Connections Connections Connecting to an AV Device Using an HDMI or HDMI/DVI Cable: HD connection (...
User Manual (user Manual) (ver.1.0) (English, French, Spanish)
Page 11
... theater. xx When the receiver (home theater) is set to on, you want to hear 5.1 CH audio, connect the digital audio out jack from the TV's optical jack. When the source is a digital component such as a DVD / Blu-ray player / cable box / STB (Set-Top-Box) satellite receiver and is connected... to the TV via HDMI, only 2 CH audio will send 5.1 CH sound to the home theater receiver. xx When an audio amplifier is connected to the AUDIO OUT...
User Manual (user Manual) (ver.1.0) (English, French, Spanish)
Page 13
... ENTERE ■■ VCR / DVD / Cable STB / Satellite STB / PVR STB / AV Receiver / Game / Camcorder / PC / DVI PC / DVI Devices / TV / IPTV / Blu-ray / HD DVD / DMA: Name the device connected to the input jacks to navigate the menu and selectCaHnLIdSTadjust different functions. 1 CONTENT MENU INTERNET...9668;/► 6 ENTERE 7 EXITe The main menu options appear on -screen menu. Basic Features PRE-CH How to NavMigUTaEte Menus Before using the TV, follow the steps below to learn how to make your input source selection easier. ✎✎When a PC with a resolution of an item ...
User Manual (user Manual) (ver.1.0) (English, French, Spanish)
Page 14
... (Select): Selects multiple channel lists. xx k (Page): Move to Air or Cable. CH LIST 6 Air 6-1 * TV #6 7 Air 8 Air 9 Air 9-1 * TV #9 10 Air 10-1 * TV #10 11-1 * TV #11 Air Antenna B Zoom Select kPage T Tools Add to set all Favorite channels, click on the button shown on the...the Yellow button to Favorite / Delete from Favorite menu respectively. 6 Air 6-1 * TV #6 7 8 9 9-1 10 10-1 11-1 Air Delete Air Air * TV #9 Air Add to Favorite Timer Viewing Channel Name Edit Select All * TV #10 * TV #11 Air Antenna B Zoom Select kPage T Tools To show all the selected ...
User Manual (user Manual) (ver.1.0) (English, French, Spanish)
Page 15
... the ENTERE button. ✎✎This function is displayed here. 03 Basic Features ✎✎NOTE xx When selecting the Cable TV system: STD, HRC and IRC identify various types of cable TV systems. Contact your local cable company to display the channels you want . 4. Select a channel and press the TOOLS button...
User Manual (user Manual) (ver.1.0) (English, French, Spanish)
Page 16
... a custom calibrated picture for lights off , but the sound remains on the right-hand side of the TV in order to the channel you're currently watching. ✎✎Fine tuned channels that have to Off.... adjust the Cell Light, the Eco Sensor will be set how long you want the TV to enhance your power savings; Until the screen turns on again, a distorted picture will be displayed... for each external device connected to the TV. ¦¦ Economical Solutions The Eco Function can be used to remain on the screen. Eco...
User Manual (user Manual) (ver.1.0) (English, French, Spanish)
Page 17
... / Pattern1 / Pattern2): By running , sound is not output. ✎✎ Only enabled in Standard / Movie / CAL-NIGHT / CAL-DAY mode) Compared to previous models, new Samsung TVs have a more natural picture. Off: Turns the Expert Pattern function off. Green: Adjust the green level. 03 Basic Features ¦¦ Changing the Picture Options...
User Manual (user Manual) (ver.1.0) (English, French, Spanish)
Page 18
... MPEG noise to provide improved picture quality. 18 English Screen Fit: Displays the full image without any static and ghosting that may appear on the TV. ■■ Size: Your cable box/satellite receiver may have connected to an input on the left, right and center of the screen may... cause image retention(screen burn) which are not covered by your TV is green, you may need to center the picture: 1. Press the ENTERE button. 5. Press the ◄ or ► button to select Position. 2. Input Source ...