

User Manual
Page 1
TL9 This user manual includes detailed usage instructions for more information. Quick search Contents 1 Basic functions 2 Extended functions 3 Shooting options 4 Playback/Editing 5 Multimedia 6 Appendix Index Please read this manual thoroughly. Click a button below for your camera.
TL9 This user manual includes detailed usage instructions for more information. Quick search Contents 1 Basic functions 2 Extended functions 3 Shooting options 4 Playback/Editing 5 Multimedia 6 Appendix Index Please read this manual thoroughly. Click a button below for your camera.

User Manual
Page 2
... batteries in a fire. Moving parts and accessories may cause choking or serious injury if swallowed. Prevent damage to subjects' eyesight Do not use your camera near fuels, combustibles, or flammable chemicals. Do not store or carry flammable liquids, gases, or explosive materials in close to your...) to people or animals. Incompatible batteries and chargers can cause temporary or permanent damage. Health and Safety Information Always comply with care • Use only Samsung-approved batteries and chargers.
... batteries in a fire. Moving parts and accessories may cause choking or serious injury if swallowed. Prevent damage to subjects' eyesight Do not use your camera near fuels, combustibles, or flammable chemicals. Do not store or carry flammable liquids, gases, or explosive materials in close to your...) to people or animals. Incompatible batteries and chargers can cause temporary or permanent damage. Health and Safety Information Always comply with care • Use only Samsung-approved batteries and chargers.

User Manual
Page 3
... may leak or corrode over time and cause serious damage to moving parts and internal components. • Remove the batteries from your camera when storing it on or in heating devices, such as this can reduce the charging capacity of your battery and lead to temporary or...can create a connection between the + and - Reformat the memory card with metal objects, as microwave ovens, stoves, or radiators. Water damage to your camera can void your batteries and can damage ports, connectors, and accessories. Damage due to very cold or very hot temperatures (below 0º C/32º...
... may leak or corrode over time and cause serious damage to moving parts and internal components. • Remove the batteries from your camera when storing it on or in heating devices, such as this can reduce the charging capacity of your battery and lead to temporary or...can create a connection between the + and - Reformat the memory card with metal objects, as microwave ovens, stoves, or radiators. Water damage to your camera can void your batteries and can damage ports, connectors, and accessories. Damage due to very cold or very hot temperatures (below 0º C/32º...
User Manual
Page 4
...be illegal in use earphones while driving, cycling, or operating motorized vehicles. Clean your warranty. Any damage that may result from camera malfunction or improper use The manufacturer takes no responsibility for any loss of files or damage that results from unqualifi...for at high volume can form on the delicate electronic circuitry and memory card. Health and Safety Information Use only Samsung-approved accessories Using incompatible accessories may damage your camera, cause injury, or void your lens with caution • Do not use . • Use batteries only...
...be illegal in use earphones while driving, cycling, or operating motorized vehicles. Clean your warranty. Any damage that may result from camera malfunction or improper use The manufacturer takes no responsibility for any loss of files or damage that results from unqualifi...for at high volume can form on the delicate electronic circuitry and memory card. Health and Safety Information Use only Samsung-approved accessories Using incompatible accessories may damage your camera, cause injury, or void your lens with caution • Do not use . • Use batteries only...
User Manual
Page 5
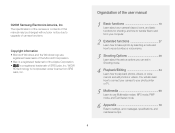
..., icons, and basic functions for shooting, and how to transfer files to and from SRS Labs, Inc. Organization of camera functions. You will also learn how to connect your camera to your computer. 2 Extended functions 27 Learn how to take a photo by selecting a mode and how to record a video or voice... mode, PMP mode, and Text Viewer mode. 6 Appendix 76 Refer to play back photos, videos, or voice memos and edit photos or videos. ©2008 Samsung Electronics America, Inc.
..., icons, and basic functions for shooting, and how to transfer files to and from SRS Labs, Inc. Organization of camera functions. You will also learn how to connect your camera to your computer. 2 Extended functions 27 Learn how to take a photo by selecting a mode and how to record a video or voice... mode, PMP mode, and Text Viewer mode. 6 Appendix 76 Refer to play back photos, videos, or voice memos and edit photos or videos. ©2008 Samsung Electronics America, Inc.

User Manual
Page 6
...must select to “ perform a step; The 4 mode may not support functions for reference The order of options or menus you need to be careful [ ] Camera buttons; for example: [Shutter] (represents the Shutter button) ( ) Page number for all scenes. e.g.) Available in the Auto, Program, Beauty Shot, and some...function is available in this manual Abbreviation ACB Definition Auto Contrast Balance AEB Auto Exposure Bracket AF Auto Focus DIS DPOF Digital Image Stabilization Digital Print Order Format EV Exposure Value OIS Optical Image Stabilization WB White Balance 5
...must select to “ perform a step; The 4 mode may not support functions for reference The order of options or menus you need to be careful [ ] Camera buttons; for example: [Shutter] (represents the Shutter button) ( ) Page number for all scenes. e.g.) Available in the Auto, Program, Beauty Shot, and some...function is available in this manual Abbreviation ACB Definition Auto Contrast Balance AEB Auto Exposure Bracket AF Auto Focus DIS DPOF Digital Image Stabilization Digital Print Order Format EV Exposure Value OIS Optical Image Stabilization WB White Balance 5

User Manual
Page 7
... the shutter all the way down Exposure (Brightness) The amount of a subject and background Subject Background Composition Overexposure (too bright) 6 By altering the exposure, your camera is called exposure. Normal exposure Half-press [Shutter] Press [Shutter] Subject, background, and composition • Subject: the main object of a scene, such as a person, animal...
... the shutter all the way down Exposure (Brightness) The amount of a subject and background Subject Background Composition Overexposure (too bright) 6 By altering the exposure, your camera is called exposure. Normal exposure Half-press [Shutter] Press [Shutter] Subject, background, and composition • Subject: the main object of a scene, such as a person, animal...

User Manual
Page 8
... (to apply a different color filter) f 51 • Image Adjust (to adjust saturation, sharpness, or contrast) f 52 Reducing camera shake • Optical Image Stabilization (OIS) f 17 • 7 mode f 29 • Connecting the camera to your computer f 21 • Deleting all files in the memory card f 57 • Viewing files in...
... (to apply a different color filter) f 51 • Image Adjust (to adjust saturation, sharpness, or contrast) f 52 Reducing camera shake • Optical Image Stabilization (OIS) f 17 • 7 mode f 29 • Connecting the camera to your computer f 21 • Deleting all files in the memory card f 57 • Viewing files in...

User Manual
Page 9
...files (for Windows 20 Installing programs 20 Connecting the camera to your PC 21 Transferring files to your PC 22 Transferring multimedia files to the camera 22 Using Samsung Converter 24 Using Samsung Master 25 Transferring files (for Mac 26 Transferring &#...64257;les to your computer 26 Transferring multimedia files to the camera 26 3. Shooting Options 36 Selecting a resolution and...
...files (for Windows 20 Installing programs 20 Connecting the camera to your PC 21 Transferring files to your PC 22 Transferring multimedia files to the camera 22 Using Samsung Converter 24 Using Samsung Master 25 Transferring files (for Mac 26 Transferring &#...64257;les to your computer 26 Transferring multimedia files to the camera 26 3. Shooting Options 36 Selecting a resolution and...

User Manual
Page 10
...your photos 51 Applying photo styles Photo style 51 Applying color Color effect 51 Adjusting your camera 82 About memory cards 83 About the battery 84 Before contacting a service center 85 Camera specifications 87 FCC notice 90 Index 91 9 Multimedia 68 Using Multimedia mode 69...73 Using the Text Viewer mode 74 Multimedia mode settings menu 75 6. Appendix 76 Camera settings menu 77 Accessing the settings menu 77 SOUND 78 DISPLAY 78 SETTINGS 79 Error messages 81 Camera maintenance 82 Cleaning your photos 52 4. Playback/Editing 54 Playing back 55 Starting ...
...your photos 51 Applying photo styles Photo style 51 Applying color Color effect 51 Adjusting your camera 82 About memory cards 83 About the battery 84 Before contacting a service center 85 Camera specifications 87 FCC notice 90 Index 91 9 Multimedia 68 Using Multimedia mode 69...73 Using the Text Viewer mode 74 Multimedia mode settings menu 75 6. Appendix 76 Camera settings menu 77 Accessing the settings menu 77 SOUND 78 DISPLAY 78 SETTINGS 79 Error messages 81 Camera maintenance 82 Cleaning your photos 52 4. Playback/Editing 54 Playing back 55 Starting ...

User Manual
Page 11
... and from your PC 22 Transferring multimedia files to the camera ... 22 Using Samsung Converter 24 Using Samsung Master 25 Transferring files (for shooting, and how to transfer files to the camera ... 26 Camera layout 11 Icons 13 Turning your camera on or off 14 Mini dashboard 14 Setting options 15 Taking photos...
... and from your PC 22 Transferring multimedia files to the camera ... 22 Using Samsung Converter 24 Using Samsung Master 25 Transferring files (for shooting, and how to transfer files to the camera ... 26 Camera layout 11 Icons 13 Turning your camera on or off 14 Mini dashboard 14 Setting options 15 Taking photos...

User Manual
Page 12
Camera layout Shutter button Mode dial (See below) Microphone Flash Mini dashboard (p.14) POWER button Lens AF assist light/Timer lamp Multifunction jack Accepts USB, A/V cable, ... a photo quickly and easily with minimal settings 1 Program Take a photo by setting options 7 8 Dual IS Photo Help Guide Take a photo with options suitable for reducing camera shake Get shooting tips and practice shooting Icon Mode Description 5 Beauty Shot Take a photo of a person with options to hide facial imperfections 4 Scene Take a photo...
Camera layout Shutter button Mode dial (See below) Microphone Flash Mini dashboard (p.14) POWER button Lens AF assist light/Timer lamp Multifunction jack Accepts USB, A/V cable, ... a photo quickly and easily with minimal settings 1 Program Take a photo by setting options 7 8 Dual IS Photo Help Guide Take a photo with options suitable for reducing camera shake Get shooting tips and practice shooting Icon Mode Description 5 Beauty Shot Take a photo of a person with options to hide facial imperfections 4 Scene Take a photo...

User Manual
Page 13
...highlighted option or menu. • Enter Playback mode. Apply effect on part of focus • Steady: When connecting to a PictBridge-compatible printer. Camera layout Speaker Display Status lamp • Blinking: When saving a photo, recording a voice memo, being read by a computer or printer, or ... • Adjust volume in Playback mode or Multimedia mode. OIS • Prevent camera shake in Shooting mode. • Lock the buttons in Multimedia mode. y • Print files after connecting the camera to a computer or in focus Button Zoom E Fn (See below) Function &#...
...highlighted option or menu. • Enter Playback mode. Apply effect on part of focus • Steady: When connecting to a PictBridge-compatible printer. Camera layout Speaker Display Status lamp • Blinking: When saving a photo, recording a voice memo, being read by a computer or printer, or ... • Adjust volume in Playback mode or Multimedia mode. OIS • Prevent camera shake in Shooting mode. • Lock the buttons in Multimedia mode. y • Print files after connecting the camera to a computer or in focus Button Zoom E Fn (See below) Function &#...

User Manual
Page 14
... Zoom ratio Available number of photos Available recording time Internal memory Memory card inserted : Fully charged : Charging needed : Partially charged Voice memo Auto focus frame Camera shake Current date and time B. Icons on the left Icon Description Face detection Photo style Color Flash Timer Auto focus Contrast Sharpness Voice Mute Saturation...
... Zoom ratio Available number of photos Available recording time Internal memory Memory card inserted : Fully charged : Charging needed : Partially charged Voice memo Auto focus frame Camera shake Current date and time B. Icons on the left Icon Description Face detection Photo style Color Flash Timer Auto focus Contrast Sharpness Voice Mute Saturation...

User Manual
Page 15
...les. • When exposing the camera to a hot and humid environment, condensation can form on the gauges. • If the hand of the battery and memory card. Press and hold [y] to turn your camera on or off . Basic functions 14 Turning your camera on the display may show different ...capacities. Mini dashboard While the camera is turned on, Mini dashboard shows you the remaining capacity of a gauge keeps ...
...les. • When exposing the camera to a hot and humid environment, condensation can form on the gauges. • If the hand of the battery and memory card. Press and hold [y] to turn your camera on or off . Basic functions 14 Turning your camera on the display may show different ...capacities. Mini dashboard While the camera is turned on, Mini dashboard shows you the remaining capacity of a gauge keeps ...

User Manual
Page 16
Basic functions 15 Daylight Press [Shutter] to return to the previous menu. WHITE BALANCE Going back to the previous menu Press [E], [Fn], or [MENU/OK] again to go back to Shooting mode. 4 Press [MENU/OK]. SIZE E.g. Select a white balance option in the P mode 1 Rotate the mode dial to 1. 2 Press [Fn]. 3 Press [w] or [r] and then [e] or [t] to set options by pressing [E], [MENU/OK], or [Fn] and using the navigation buttons ([e], [t], [w], [r]). 1 Press [E], [MENU/OK], or [Fn]. 2 Use the navigation buttons to scroll to confirm the highlighted option or menu. Setting ...
Basic functions 15 Daylight Press [Shutter] to return to the previous menu. WHITE BALANCE Going back to the previous menu Press [E], [Fn], or [MENU/OK] again to go back to Shooting mode. 4 Press [MENU/OK]. SIZE E.g. Select a white balance option in the P mode 1 Rotate the mode dial to 1. 2 Press [Fn]. 3 Press [w] or [r] and then [e] or [t] to set options by pressing [E], [MENU/OK], or [Fn] and using the navigation buttons ([e], [t], [w], [r]). 1 Press [E], [MENU/OK], or [Fn]. 2 Use the navigation buttons to scroll to confirm the highlighted option or menu. Setting ...

User Manual
Page 17
Taking photos 1 Rotate the mode dial to 2. 2 Align your subject. Push or push and hold [Zoom] down to zoom in on your subject in the frame. Basic functions 16 Zoom out By using both, you can shoot close-up photos by adjusting the zoom. Zoom in up to zoom out. Your camera has a 5X optical zoom and 5X digital zoom. Push or push and hold [Zoom] up to take a photo. Zooming You can zoom in 3 Half-press [Shutter] to focus. • Green: In focus • Red: Out of focus 4 Press [Shutter] to 25 times.
Taking photos 1 Rotate the mode dial to 2. 2 Align your subject. Push or push and hold [Zoom] down to zoom in on your subject in the frame. Basic functions 16 Zoom out By using both, you can shoot close-up photos by adjusting the zoom. Zoom in up to zoom out. Your camera has a 5X optical zoom and 5X digital zoom. Push or push and hold [Zoom] up to take a photo. Zooming You can zoom in 3 Half-press [Shutter] to focus. • Green: In focus • Red: Out of focus 4 Press [Shutter] to 25 times.

User Manual
Page 18
...may deteriorate when you use the digital zoom. Deactivate the OIS function when you select Nightscene in the 4 mode) - Taking photos Digital zoom If the zoom indicator is in the digital range, your camera is low - Optical range Zoom indicator Reducing camera shake Reduce camera shake optically by the vibration of... the OIS sensor. you use a tripod. • OIS is too much camera shake - When you move your camera to Center AF when using the digital zoom. • The focus area will be blurred by pressing [OIS] in the 3 mode. there is not...
...may deteriorate when you use the digital zoom. Deactivate the OIS function when you select Nightscene in the 4 mode) - Taking photos Digital zoom If the zoom indicator is in the digital range, your camera is low - Optical range Zoom indicator Reducing camera shake Reduce camera shake optically by the vibration of... the OIS sensor. you use a tripod. • OIS is too much camera shake - When you move your camera to Center AF when using the digital zoom. • The focus area will be blurred by pressing [OIS] in the 3 mode. there is not...

User Manual
Page 19
...; While practicing, you cannot set shooting options or menus. PHOTO HELP GUIDE Features to use when the image is out of focus Features to counter camera shake Features to use in low light conditions Features to use when adjusting brightness Features to use flash Press the Flash button repeatedly to...
...; While practicing, you cannot set shooting options or menus. PHOTO HELP GUIDE Features to use when the image is out of focus Features to counter camera shake Features to use in low light conditions Features to use when adjusting brightness Features to use flash Press the Flash button repeatedly to...

User Manual
Page 20
SIZE Set the photo size. In Shooting mode Press [w] once or twice to: • display all information about shooting • hide information about shooting, except the available number of information about the current photo, except the shooting settings and captured date Basic functions 19 Display every piece of photos In Playback mode Press [w] to: • display information about the current photo • hide information about the current file • hide information about shooting Press [w] once or twice to display or hide the description for Shooting and Playback modes....
SIZE Set the photo size. In Shooting mode Press [w] once or twice to: • display all information about shooting • hide information about shooting, except the available number of information about the current photo, except the shooting settings and captured date Basic functions 19 Display every piece of photos In Playback mode Press [w] to: • display information about the current photo • hide information about the current file • hide information about shooting Press [w] once or twice to display or hide the description for Shooting and Playback modes....