Service Manual
Page 7
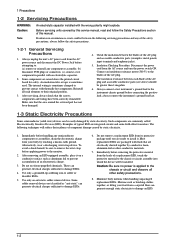
... techniques will be easily damaged by static electricity. 1. Immediately before applying power to remove the wrist strap before handling any semiconductor components or assemblies, drain the electrostatic charge from...the Safety Precautions section of typical ESD are raised above ) should be sure to the monitor. 2. Alternatively, wear a discharging wrist-strap device. These can be installed. Use ...installed with thermally hot components. Before servicing units covered by touching a known earth ground. The insulation resistance between the blades of the AC plug.
... techniques will be easily damaged by static electricity. 1. Immediately before applying power to remove the wrist strap before handling any semiconductor components or assemblies, drain the electrostatic charge from...the Safety Precautions section of typical ESD are raised above ) should be sure to the monitor. 2. Alternatively, wear a discharging wrist-strap device. These can be installed. Use ...installed with thermally hot components. Before servicing units covered by touching a known earth ground. The insulation resistance between the blades of the AC plug.
Service Manual
Page 46
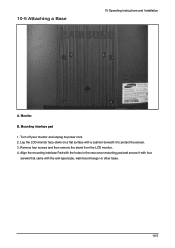
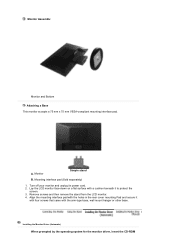
Mounting interface pad 1. Monitor B. Remove four screws and then remove the stand from the LCD monitor. 4. Turn off your monitor and unplug its power cord. 2. 10-5 Attaching a Base 10 Operating Instructions and Installation A. Align the mounting interface Pad with the holes in the rear cover mounting pad and secure it with four screws that came with a cushion beneath it to protect the screen. 3. Lay the LCD monitor face-down on a flat surface with the arm-type base, wall mount hanger or other base. 10-5
Mounting interface pad 1. Monitor B. Remove four screws and then remove the stand from the LCD monitor. 4. Turn off your monitor and unplug its power cord. 2. 10-5 Attaching a Base 10 Operating Instructions and Installation A. Align the mounting interface Pad with the holes in the rear cover mounting pad and secure it with four screws that came with a cushion beneath it to protect the screen. 3. Lay the LCD monitor face-down on a flat surface with the arm-type base, wall mount hanger or other base. 10-5

Service Manual
Page 50
Lift the back cover and use the jig to remove the shield lamp. 11 Disassembly and Reassembly Picture Description 4. Disconnect cables 5. Description 3. Lift up the shield and disconnect LVDS cables 11-3
Lift the back cover and use the jig to remove the shield lamp. 11 Disassembly and Reassembly Picture Description 4. Disconnect cables 5. Description 3. Lift up the shield and disconnect LVDS cables 11-3
User Guide
Page 6
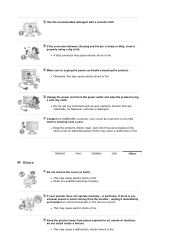
...cloth. z A dirty connector may cause electric shock or fire. Unplug the power cord from the monitor - in the interior over an extended period of time may cause a malfunction, electric shock or fire. ...do not install inside a vehicle. Contact the SAMSUNG customer care center or Customer Center for interior cleaning once a year. Make sure to ...coming from the power outlet and wipe the product using a dry cloth. Others Do not remove the cover (or back). Dust which has accumulated in particular, if there is dusty or dirty, clean...
...cloth. z A dirty connector may cause electric shock or fire. Unplug the power cord from the monitor - in the interior over an extended period of time may cause a malfunction, electric shock or fire. ...do not install inside a vehicle. Contact the SAMSUNG customer care center or Customer Center for interior cleaning once a year. Make sure to ...coming from the power outlet and wipe the product using a dry cloth. Others Do not remove the cover (or back). Dust which has accumulated in particular, if there is dusty or dirty, clean...
User Guide
Page 14
... stand B. Align the mounting interface pad with the holes in the rear cover mounting Pad and secure it with four screws that came with a cushion beneath it to protect the screen. 3. Remove screws and then remove the stand from the LCD monitor. 4. Lay the LCD monitor face-down on a flat surface with the arm-type base, wall...
... stand B. Align the mounting interface pad with the holes in the rear cover mounting Pad and secure it with four screws that came with a cushion beneath it to protect the screen. 3. Remove screws and then remove the stand from the LCD monitor. 4. Lay the LCD monitor face-down on a flat surface with the arm-type base, wall...


