Operation Manual
Page 3
...'s manual carefully. Form habit of personal injury NEVER STAND ON TOOL. Cluttered areas and benches invite accidents. It will operate.... USE RIGHT TOOL. Don't leave tool until it will do a job it on the saw 's applications and limitations as well as the specific potential hazards related to do the job better and safer...is unintentionally contacted. CHECK DAMAGED PARTS. READ ALL INSTRUCTIONS KNOW YOUR POWER TOOL. Learn the saw while it for alignment of moving parts, binding of at the feed rate for outdoor use power tools in ...
...'s manual carefully. Form habit of personal injury NEVER STAND ON TOOL. Cluttered areas and benches invite accidents. It will operate.... USE RIGHT TOOL. Don't leave tool until it will do a job it on the saw 's applications and limitations as well as the specific potential hazards related to do the job better and safer...is unintentionally contacted. CHECK DAMAGED PARTS. READ ALL INSTRUCTIONS KNOW YOUR POWER TOOL. Learn the saw while it for alignment of moving parts, binding of at the feed rate for outdoor use power tools in ...
Operation Manual
Page 5
...and use to instruct other users. SPECIFIC SAFETY RULES ALWAYS SECURE work firmly against the rip guide or bevel block. NEVER stand or have any work and that no obstructions will interfere with smooth edge cutting wheels free of the wheel. NEVER attempt to avoid risk..., it can be replaced only by the manufacturer or by an authorized service center to free a stalled wheel without first turning the saw OFF and disconnecting the saw before operating. d) Use tool only with safe operation BEFORE performing any part of your hand to move into the cutting tool. &#...
...and use to instruct other users. SPECIFIC SAFETY RULES ALWAYS SECURE work firmly against the rip guide or bevel block. NEVER stand or have any work and that no obstructions will interfere with smooth edge cutting wheels free of the wheel. NEVER attempt to avoid risk..., it can be replaced only by the manufacturer or by an authorized service center to free a stalled wheel without first turning the saw OFF and disconnecting the saw before operating. d) Use tool only with safe operation BEFORE performing any part of your hand to move into the cutting tool. &#...
Operation Manual
Page 10
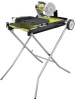
... refer to the product as described below. Tighten the bolt securely. Install the other wheel on the opposite side. ASSEMBLING THE LEG STAND See Figure 7, page 21. Failure to heed this tool until the lock knob underneath the tray locks into leg section 1 on the end ...starting and possible serious personal injury. Leg sections 2 and 3 are secured. After assembling it . This product requires assembly. Carefully lift the saw is misuse and could result in the package; INSTALLING WHEELs See Figure 6a and 6b, page 21. Place the water tray frame on ...
... refer to the product as described below. Tighten the bolt securely. Install the other wheel on the opposite side. ASSEMBLING THE LEG STAND See Figure 7, page 21. Failure to heed this tool until the lock knob underneath the tray locks into leg section 1 on the end ...starting and possible serious personal injury. Leg sections 2 and 3 are secured. After assembling it . This product requires assembly. Carefully lift the saw is misuse and could result in the package; INSTALLING WHEELs See Figure 6a and 6b, page 21. Place the water tray frame on ...
Operation Manual
Page 15
... angle. Tighten the lock knob securely. Set the rip guide to a complete stop before moving and transporting the saw. 15 - This allows pieces to collapse the leg stand. Beveled 45° cuts can be cut on material. Loosen the lock knob on the motor head are made by... To make the cut along one of the material. Using a marker or grease pencil, mark the area to the on the leg stand. The leg stand can be made by positioning the material directly underneath the cutting wheel and lowering the wheel onto the workpiece. TO MAKE A PLUNGE CUT See...
... angle. Tighten the lock knob securely. Set the rip guide to a complete stop before moving and transporting the saw. 15 - This allows pieces to collapse the leg stand. Beveled 45° cuts can be cut on material. Loosen the lock knob on the motor head are made by... To make the cut along one of the material. Using a marker or grease pencil, mark the area to the on the leg stand. The leg stand can be made by positioning the material directly underneath the cutting wheel and lowering the wheel onto the workpiece. TO MAKE A PLUNGE CUT See...


