
Maintenance Manual
Page 2
... DustProof Glass 75 Checking the Earth Leakage Breaker 77 Adjusting the Printer Adjusting the Color Registration 79 Auto Adjust...79 Adjusting the Fuser for Thick Paper 80 Test Sheet Samples 83 Correcting the Color Gradation 84 Set the Gradation Correction Value 84 Viewing the Color Calibration Sample Sheet and Gradation Correction Sheet ....... 88 Resetting the...
... DustProof Glass 75 Checking the Earth Leakage Breaker 77 Adjusting the Printer Adjusting the Color Registration 79 Auto Adjust...79 Adjusting the Fuser for Thick Paper 80 Test Sheet Samples 83 Correcting the Color Gradation 84 Set the Gradation Correction Value 84 Viewing the Color Calibration Sample Sheet and Gradation Correction Sheet ....... 88 Resetting the...

Maintenance Manual
Page 80
... when using thick paper If color registration shifts when using thick paper, adjust the fuser for thick paper. ❒ Fuser adjustment for thick paper is needed to the color adjustment menu. appears on the display. The initial screen appears. mally use. A confirmation message appears when complete. Adjusting the Printer Automatic color adjustment begins, and the following...
... when using thick paper If color registration shifts when using thick paper, adjust the fuser for thick paper. ❒ Fuser adjustment for thick paper is needed to the color adjustment menu. appears on the display. The initial screen appears. mally use. A confirmation message appears when complete. Adjusting the Printer Automatic color adjustment begins, and the following...

Maintenance Manual
Page 81
...details about changing the toner cartridge, see p.40 "Replacing the Toner Cartridge".) Failed. Press # to display "Fuser Adjust", and then press the {# Enter} key. E Press the {U} or {T} key to adjust 81 ...D Press the {U} or {T} key to display "Maintenance", and then press the {# Enter} key. Fuser Adjust: Thick Paper ❒ If the toner cartridge is almost empty, the following message appears, and then press ... the {# Enter} key. C Press the {U} or {T} key to display "Color Regist.", and then press the {# Enter} key. Press # to exit G Check the following message appears on...
...details about changing the toner cartridge, see p.40 "Replacing the Toner Cartridge".) Failed. Press # to display "Fuser Adjust", and then press the {# Enter} key. E Press the {U} or {T} key to adjust 81 ...D Press the {U} or {T} key to display "Maintenance", and then press the {# Enter} key. Fuser Adjust: Thick Paper ❒ If the toner cartridge is almost empty, the following message appears, and then press ... the {# Enter} key. C Press the {U} or {T} key to display "Color Regist.", and then press the {# Enter} key. Press # to exit G Check the following message appears on...

Maintenance Manual
Page 82
... Printer H Press the {# Enter} key. Otherwise, select one of the following message appears: Set Sheet, then# A4 (297 x 210) Make sure the paper size set in stepH appears, and then press the {# Enter} key. Press # for the following message to the previous menu. 82 K Compare the color... adjustment sheet sample with the framed white part of the color in the bypass tray. If sample and printed pattern are almost the same, select "0". Adjusting... The Fuser Adjust Sheet is complete, the confirmation mes- Wait for Test ...
... Printer H Press the {# Enter} key. Otherwise, select one of the following message appears: Set Sheet, then# A4 (297 x 210) Make sure the paper size set in stepH appears, and then press the {# Enter} key. Press # for the following message to the previous menu. 82 K Compare the color... adjustment sheet sample with the framed white part of the color in the bypass tray. If sample and printed pattern are almost the same, select "0". Adjusting... The Fuser Adjust Sheet is complete, the confirmation mes- Wait for Test ...

Maintenance Manual
Page 83
Keep adjusting until you select "-1" or "+1", the printer returns to stepI. L Press the {Online} key. Test Sheet Samples The following illustration is an example of a test sheet printed during fuser adjustment for thick paper ❖ Fuser Adjust Sheet 83 The initial screen appears. Adjusting the Printer If you can select " 0 ".
Keep adjusting until you select "-1" or "+1", the printer returns to stepI. L Press the {Online} key. Test Sheet Samples The following illustration is an example of a test sheet printed during fuser adjustment for thick paper ❖ Fuser Adjust Sheet 83 The initial screen appears. Adjusting the Printer If you can select " 0 ".
Maintenance Manual
Page 119
...settings to print out True Type fonts as an image. See the printer driver Help. See p.79 "Adjusting the Color Registration". 119 Color registration shifts when printing in color documents. See p.80 "Adjusting the Fuser for Thick Paper". The print side of pages is not clear.... Curled or folded paper might appear inside the printer, reducing print quality. Printing at...
...settings to print out True Type fonts as an image. See the printer driver Help. See p.79 "Adjusting the Color Registration". 119 Color registration shifts when printing in color documents. See p.80 "Adjusting the Fuser for Thick Paper". The print side of pages is not clear.... Curled or folded paper might appear inside the printer, reducing print quality. Printing at...

Setup Guide
Page 294
Replacmnt Alert Date/Time WL.LAN Signal WL.LAN Defaults Key Repeat Erase All Mem. ❖ System Menu Prt. All Stored HD Format 4C. Err Report Auto Continue Memory Overflow Copies Printer Lang. 154 Making Printer Settings Using the Control Panel Menu Color Demo Page PCL Config.Page PS Config. Image Density Registration Plain Paper Thick Paper Specisal Paper Del. All Temp Del. Graphic Mode Fuser Temperat. Page PDF Config.Page Hex Dump Operations Test ❖ Maintenance Menu Color Calibrate Color Regist.
Replacmnt Alert Date/Time WL.LAN Signal WL.LAN Defaults Key Repeat Erase All Mem. ❖ System Menu Prt. All Stored HD Format 4C. Err Report Auto Continue Memory Overflow Copies Printer Lang. 154 Making Printer Settings Using the Control Panel Menu Color Demo Page PCL Config.Page PS Config. Image Density Registration Plain Paper Thick Paper Specisal Paper Del. All Temp Del. Graphic Mode Fuser Temperat. Page PDF Config.Page Hex Dump Operations Test ❖ Maintenance Menu Color Calibrate Color Regist.

Setup Guide
Page 309
... the situation. Use this menu item to delete saved document data all at which the fuser will be fixed to select a temperature at once. ❖ Del. Special Paper1, Special ...Paper2, Special Paper3, Special Paper4 For details, see "Type of overlap between the colors CMYK when printing. Use this function to select a quantity of Paper and Other Media", Maintenance Guide... use p.165 "HD Format". ❖ WL.LAN Signal You can accept thick paper. Making Printer Settings Using the Control Panel ❖ Thick Paper Set the thick paper configuration. Thick Paper 1,...
... the situation. Use this menu item to delete saved document data all at which the fuser will be fixed to select a temperature at once. ❖ Del. Special Paper1, Special ...Paper2, Special Paper3, Special Paper4 For details, see "Type of overlap between the colors CMYK when printing. Use this function to select a quantity of Paper and Other Media", Maintenance Guide... use p.165 "HD Format". ❖ WL.LAN Signal You can accept thick paper. Making Printer Settings Using the Control Panel ❖ Thick Paper Set the thick paper configuration. Thick Paper 1,...
Setup Guide
Page 483
... DustProof Glass 75 Checking the Earth Leakage Breaker 77 Adjusting the Printer Adjusting the Color Registration 79 Auto Adjust...79 Adjusting the Fuser for Thick Paper 80 Test Sheet Samples 83 Correcting the Color Gradation 84 Set the Gradation Correction Value 84 Viewing the Color Calibration Sample Sheet and Gradation Correction Sheet ....... 88 Resetting the...
... DustProof Glass 75 Checking the Earth Leakage Breaker 77 Adjusting the Printer Adjusting the Color Registration 79 Auto Adjust...79 Adjusting the Fuser for Thick Paper 80 Test Sheet Samples 83 Correcting the Color Gradation 84 Set the Gradation Correction Value 84 Viewing the Color Calibration Sample Sheet and Gradation Correction Sheet ....... 88 Resetting the...

Setup Guide
Page 561
... the power while "Adjusting..." Adjusting the Printer Automatic color adjustment begins, and the following message appears. appears on the display. Adjusting the Fuser for Thick Paper If color registration shifts when using thick paper If color registration shifts when using thick paper, adjust the fuser for thick paper. ❒ Fuser adjustment for thick paper is needed to...
... the power while "Adjusting..." Adjusting the Printer Automatic color adjustment begins, and the following message appears. appears on the display. Adjusting the Fuser for Thick Paper If color registration shifts when using thick paper If color registration shifts when using thick paper, adjust the fuser for thick paper. ❒ Fuser adjustment for thick paper is needed to...

Setup Guide
Page 562
... # to display "Color Regist.", and then press the {# Enter} key. D Press the {U} or {T} key to adjust 81 Press # to exit G Check the following message appears on the display. E Press the {U} or {T} key to display "Maintenance", and then press the {# Enter} key. Fuser Adjust: Thick Paper.... Menu: Maintenance The maintenance menu appears. The [Menu] screen appears on the display: (After changing the toner cartridge, carry out fuser adjustment for thick paper. For details about changing the toner cartridge, see p.40 "Replacing the Toner Cartridge".) Failed. C Press the {U} or...
... # to display "Color Regist.", and then press the {# Enter} key. D Press the {U} or {T} key to adjust 81 Press # to exit G Check the following message appears on the display. E Press the {U} or {T} key to display "Maintenance", and then press the {# Enter} key. Fuser Adjust: Thick Paper.... Menu: Maintenance The maintenance menu appears. The [Menu] screen appears on the display: (After changing the toner cartridge, carry out fuser adjustment for thick paper. For details about changing the toner cartridge, see p.40 "Replacing the Toner Cartridge".) Failed. C Press the {U} or...

Setup Guide
Page 563
... of the following message to the previous menu. 82 K Compare the color adjustment sheet sample with the framed white part of the color in the bypass tray. Adjusting the Printer H Press the {# Enter} key. sage about printing a test sheet appears. The Fuser Adjust Sheet is complete, the confirmation mes- For test sheet samples, see...
... of the following message to the previous menu. 82 K Compare the color adjustment sheet sample with the framed white part of the color in the bypass tray. Adjusting the Printer H Press the {# Enter} key. sage about printing a test sheet appears. The Fuser Adjust Sheet is complete, the confirmation mes- For test sheet samples, see...

Setup Guide
Page 564
Keep adjusting until you select "-1" or "+1", the printer returns to stepI. The initial screen appears. Test Sheet Samples The following illustration is an example of a test sheet printed during fuser adjustment for thick paper ❖ Fuser Adjust Sheet 83 L Press the {Online} key. Adjusting the Printer If you can select " 0 ".
Keep adjusting until you select "-1" or "+1", the printer returns to stepI. The initial screen appears. Test Sheet Samples The following illustration is an example of a test sheet printed during fuser adjustment for thick paper ❖ Fuser Adjust Sheet 83 L Press the {Online} key. Adjusting the Printer If you can select " 0 ".

Setup Guide
Page 600
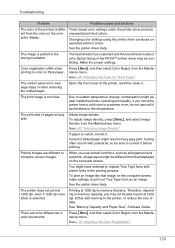
...might result in the wrong orientation. Troubleshooting Problem Possible causes and solutions The color of the printout is hazy gray. unexpected printout colors. See the printer driver Help. The print side of pages is differ- Adjust image density....printer does not print at 1200 dpi is printed in hazy gray print. Therefore, depending on after removing the misfed paper. expected printout colors. The control panel error message stays on memory capacity, you use until it . When you may be able to computer screen images. See p.80 "Adjusting the Fuser...
...might result in the wrong orientation. Troubleshooting Problem Possible causes and solutions The color of the printout is hazy gray. unexpected printout colors. See the printer driver Help. The print side of pages is differ- Adjust image density....printer does not print at 1200 dpi is printed in hazy gray print. Therefore, depending on after removing the misfed paper. expected printout colors. The control panel error message stays on memory capacity, you use until it . When you may be able to computer screen images. See p.80 "Adjusting the Fuser...


