Hardware Guide
Page 1
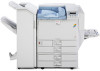
For safe and correct use, be sure to the Printer 2 Installing Options 3 Connecting the Printer Cables 4 Configuration 5 Paper and Other Media 6 Replacing Consumables 7 Cleaning the Printer 8 Adjusting the Printer 9 Troubleshooting 10 Removing Misfed Paper 11 Appendix Read this manual carefully before using the machine. Operating Instructions Hardware Guide 1 Guide to read the Safety Information before you use this machine and keep it handy for future reference.
For safe and correct use, be sure to the Printer 2 Installing Options 3 Connecting the Printer Cables 4 Configuration 5 Paper and Other Media 6 Replacing Consumables 7 Cleaning the Printer 8 Adjusting the Printer 9 Troubleshooting 10 Removing Misfed Paper 11 Appendix Read this manual carefully before using the machine. Operating Instructions Hardware Guide 1 Guide to read the Safety Information before you use this machine and keep it handy for future reference.
Hardware Guide
Page 5
...Sample Sheet and Gradation Correction Sheet 163 Resetting the Gradation Correction Value to the Initial Value 165 Adjusting Printing Position...167 9. Troubleshooting Error and Status Messages Appears on the Control Panel 171 Panel Tones...174 Printer Does Not Print...175 Checking the Port Connection......177 Printing Problems...178 Additional Troubleshooting...186 Removing Jammed Staples...188 When the Booklet Finisher is Installed...188 When the 2 Tray Finisher is Installed...191 Removing ...
...Sample Sheet and Gradation Correction Sheet 163 Resetting the Gradation Correction Value to the Initial Value 165 Adjusting Printing Position...167 9. Troubleshooting Error and Status Messages Appears on the Control Panel 171 Panel Tones...174 Printer Does Not Print...175 Checking the Port Connection......177 Printing Problems...178 Additional Troubleshooting...186 Removing Jammed Staples...188 When the Booklet Finisher is Installed...188 When the 2 Tray Finisher is Installed...191 Removing ...
Hardware Guide
Page 173
... that appear on again to the normal mode. No action is in Energy Saver mode. The printer is initializing, replenishing toner, or executing maintenance operations. Troubleshooting Error and Status Messages Appears on the Control Panel This section explains what to do when a particular message appears. Turn off the printer, and turn...
... that appear on again to the normal mode. No action is in Energy Saver mode. The printer is initializing, replenishing toner, or executing maintenance operations. Troubleshooting Error and Status Messages Appears on the Control Panel This section explains what to do when a particular message appears. Turn off the printer, and turn...
Hardware Guide
Page 174
... and re-install the transfer unit. Independent-supply toner A non-supported toner is setting changing. Replace the IEEE 1284 board that it is installed correctly. Troubleshooting Resetting Job... The printer is installed. See p.124 "Replacing the Intermediate Transfer Unit and Dustproof Filter" for the next data to print. Alert Messages (in...
... and re-install the transfer unit. Independent-supply toner A non-supported toner is setting changing. Replace the IEEE 1284 board that it is installed correctly. Troubleshooting Resetting Job... The printer is installed. See p.124 "Replacing the Intermediate Transfer Unit and Dustproof Filter" for the next data to print. Alert Messages (in...

Hardware Guide
Page 176
... the various tone patterns that the printer used to alerts to alert users of a paper jam or toner request, if the printer's covers are pressed. Troubleshooting Panel Tones The following table explains the meaning of the energy-saving mode or was pressed. Single short beep.
... the various tone patterns that the printer used to alerts to alert users of a paper jam or toner request, if the printer's covers are pressed. Troubleshooting Panel Tones The following table explains the meaning of the energy-saving mode or was pressed. Single short beep.

Hardware Guide
Page 178
... printer you use . • Interference may occur with the store where the printer was purchased for information about the location of the printer. HCRP, BIP 1. Troubleshooting How is the signal strength when using the wireless LAN? 9. Make sure "Bluetooth Serial Client (COMx)" appears under Client Ports in the [IEEE 802.11b...
... printer you use . • Interference may occur with the store where the printer was purchased for information about the location of the printer. HCRP, BIP 1. Troubleshooting How is the signal strength when using the wireless LAN? 9. Make sure "Bluetooth Serial Client (COMx)" appears under Client Ports in the [IEEE 802.11b...
Hardware Guide
Page 180
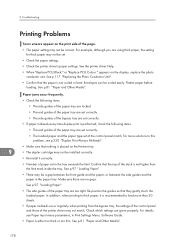
... or too thin. In addition, when printing to this problem, see Paper Input menu parameters, in the paper tray. Check which settings are no gaps. Troubleshooting Printing Problems Toner smears appear on the print side of the bypass tray are set correctly. • If paper misfeeds every time duplex print is...
... or too thin. In addition, when printing to this problem, see Paper Input menu parameters, in the paper tray. Check which settings are no gaps. Troubleshooting Printing Problems Toner smears appear on the print side of the bypass tray are set correctly. • If paper misfeeds every time duplex print is...

Hardware Guide
Page 182
... of the image might have selected to process it is loaded. To resume from that the paper size and direction set in the printing process. Troubleshooting Duplex printing cannot be done from the selected tray. • When you use some functions, such as enlargement and reduction, the layout of the printer...
... of the image might have selected to process it is loaded. To resume from that the paper size and direction set in the printing process. Troubleshooting Duplex printing cannot be done from the selected tray. • When you use some functions, such as enlargement and reduction, the layout of the printer...

Hardware Guide
Page 184
... [K (Black)] for [Gray reproduction (Text/Line Art):] in the printer properties dialog box, printing is generally less dense. Use paper that has been stored properly. Troubleshooting See the printer driver Help. Solid lines are printed as a mixture of the paper tray are printed at an angle. or "Replace PCU:Colour." The...
... [K (Black)] for [Gray reproduction (Text/Line Art):] in the printer properties dialog box, printing is generally less dense. Use paper that has been stored properly. Troubleshooting See the printer driver Help. Solid lines are printed as a mixture of the paper tray are printed at an angle. or "Replace PCU:Colour." The...

Hardware Guide
Page 186
... are obvious. • The registration roller is deteriorated or damaged. See p.137 "Replacing the Fusing Unit and Transfer Roller". See p.155 "Cleaning the Registration Roller". 9. Troubleshooting For details, see the "PDF 9 Menu", Software Guide. If rubbed with a password set, set [Paper Input] to standard PDF. Clean the registration roller. See p.155...
... are obvious. • The registration roller is deteriorated or damaged. See p.137 "Replacing the Fusing Unit and Transfer Roller". See p.155 "Cleaning the Registration Roller". 9. Troubleshooting For details, see the "PDF 9 Menu", Software Guide. If rubbed with a password set, set [Paper Input] to standard PDF. Clean the registration roller. See p.155...

Hardware Guide
Page 188
Error notification e-mail was received, but not received, it is properly attached. Troubleshooting Additional Troubleshooting Strange noise is heard. • If a supply was changed from , check the supply or option is possible the destination was fixed. If the e-mail was ...
Error notification e-mail was received, but not received, it is properly attached. Troubleshooting Additional Troubleshooting Strange noise is heard. • If a supply was changed from , check the supply or option is possible the destination was fixed. If the e-mail was ...

Hardware Guide
Page 189
... Bluetooth devices are in sent e-mail, the mail server has a malfunction. • Configure the setting for obtaining time information from the SNTP server. Con- Additional Troubleshooting Alert Occurrence and Alert Resolving are set with the earlier notification level, arrives, later e-mail will not be blocked by obstructions.
... Bluetooth devices are in sent e-mail, the mail server has a malfunction. • Configure the setting for obtaining time information from the SNTP server. Con- Additional Troubleshooting Alert Occurrence and Alert Resolving are set with the earlier notification level, arrives, later e-mail will not be blocked by obstructions.

Hardware Guide
Page 190
In this case, try turning over the paper in the finisher's staple unit. 9. Troubleshooting Removing Jammed Staples • Keep your fingers if you do not. • Staples might be stapled until the finisher has adjusted the position of curled ...
In this case, try turning over the paper in the finisher's staple unit. 9. Troubleshooting Removing Jammed Staples • Keep your fingers if you do not. • Staples might be stapled until the finisher has adjusted the position of curled ...

Hardware Guide
Page 192
Troubleshooting 6. Remove the jammed staples. Push the face plate down until it clicks. Holding the lever on the cartridge, push the cartridge gently into the staple unit until it clicks. 9 ASZ225S 190 9. ASZ202S 8. ASZ201S 7.
Troubleshooting 6. Remove the jammed staples. Push the face plate down until it clicks. Holding the lever on the cartridge, push the cartridge gently into the staple unit until it clicks. 9 ASZ225S 190 9. ASZ202S 8. ASZ201S 7.

Hardware Guide
Page 194
ASZ230S 5. Remove the jammed staples. 9 ASZ231S 192 9. Troubleshooting 3. Raise the face plate of the staple unit. ASZ229S 4. Hold and lift the lever on the cartridge and pull the cartridge gently out of the cartridge.
ASZ230S 5. Remove the jammed staples. 9 ASZ231S 192 9. Troubleshooting 3. Raise the face plate of the staple unit. ASZ229S 4. Hold and lift the lever on the cartridge and pull the cartridge gently out of the cartridge.

Hardware Guide
Page 196
Pull out the punch waste box carefully, and then remove punch waste. 9 ASZ281S 3. message appears, remove punch waste from the finisher. When these messages appear on the display, you cannot use the punch function. Troubleshooting Removing Punch Waste "The punch hole receptacle is Installed 1. or "Empty the punch receptacle." When the Booklet Finisher is full." ASZ271S 2. Re-install the punch waste box. 194 ASZ290S 9. Open the front cover of the finisher.
Pull out the punch waste box carefully, and then remove punch waste. 9 ASZ281S 3. message appears, remove punch waste from the finisher. When these messages appear on the display, you cannot use the punch function. Troubleshooting Removing Punch Waste "The punch hole receptacle is Installed 1. or "Empty the punch receptacle." When the Booklet Finisher is full." ASZ271S 2. Re-install the punch waste box. 194 ASZ290S 9. Open the front cover of the finisher.

Hardware Guide
Page 198
Remove the punch waste. 196 ASZ302S ASZ282S 3. Re-install the punch waste box. 9. Troubleshooting 2. In this case, there may be some punch waste on the surface shown by the arrow. Close the front cover of the finisher. 9 • If you do not re-install the punch waste box in step 3, the message remains displayed. • If the message remains displayed, re-install the punch waste box. • The message might appear even when the punch waste box is not full. ASZ291S 4. Pull out the punch waste box carefully, and then remove punch waste.
Remove the punch waste. 196 ASZ302S ASZ282S 3. Re-install the punch waste box. 9. Troubleshooting 2. In this case, there may be some punch waste on the surface shown by the arrow. Close the front cover of the finisher. 9 • If you do not re-install the punch waste box in step 3, the message remains displayed. • If the message remains displayed, re-install the punch waste box. • The message might appear even when the punch waste box is not full. ASZ291S 4. Pull out the punch waste box carefully, and then remove punch waste.

Hardware Guide
Page 247
T the Gigabit Ethernet Board 62 Thick Paper 88 Thin Paper 89 Toner 16 Transfer Roller 15 Transfer Unit 15 Tray 1 11, 97 Tray 2 11, 97 Tray 3 97, 105 Tray 4 97 Tray 5 97 Tray Unit TK3000 231 Troubleshooting 171 Types of Paper and Other Media 86 U Upper Right Cover 11 USB Cable Connection 62 USB host interface board 23 USB Host Interface Board 54, 63 USB Port 14, 62 User Account Enhance Unit 39 V Ventilator 13 Viewing the Color Calibration Sample Sheet and Gradation Correction Sheet 163 W waste toner bottle 11 Waste Toner Bottle 132, 227 Wireless LAN 46 245
T the Gigabit Ethernet Board 62 Thick Paper 88 Thin Paper 89 Toner 16 Transfer Roller 15 Transfer Unit 15 Tray 1 11, 97 Tray 2 11, 97 Tray 3 97, 105 Tray 4 97 Tray 5 97 Tray Unit TK3000 231 Troubleshooting 171 Types of Paper and Other Media 86 U Upper Right Cover 11 USB Cable Connection 62 USB host interface board 23 USB Host Interface Board 54, 63 USB Port 14, 62 User Account Enhance Unit 39 V Ventilator 13 Viewing the Color Calibration Sample Sheet and Gradation Correction Sheet 163 W waste toner bottle 11 Waste Toner Bottle 132, 227 Wireless LAN 46 245

Software Guide
Page 9
... Driver 51 Form Feed...52 Banner Page...52 Printing after Resetting the Printer...52 Installing the Printer Driver Using USB...53 Windows Me - USB 56 Troubleshooting USB...57 Printing with Parallel Connection...58 Installing the PCL or RPCS Printer Driver...58 Installing the PostScript 3 Printer Driver (Windows 95/98/Me 59...
... Driver 51 Form Feed...52 Banner Page...52 Printing after Resetting the Printer...52 Installing the Printer Driver Using USB...53 Windows Me - USB 56 Troubleshooting USB...57 Printing with Parallel Connection...58 Installing the PCL or RPCS Printer Driver...58 Installing the PostScript 3 Printer Driver (Windows 95/98/Me 59...

Software Guide
Page 59
...-ROM. • The number after "USB" varies depending on the supplier's website, and download USB Printing Support. 57 Conflicting devices have a [!] or [?] icon by them. Troubleshooting USB Problem Solutions The printer is displayed under [Universal Serial Bus controllers], remove any conflicting devices. Windows ME and the printer cannot be connected. Click...
...-ROM. • The number after "USB" varies depending on the supplier's website, and download USB Printing Support. 57 Conflicting devices have a [!] or [?] icon by them. Troubleshooting USB Problem Solutions The printer is displayed under [Universal Serial Bus controllers], remove any conflicting devices. Windows ME and the printer cannot be connected. Click...

