User's Guide
Page 104
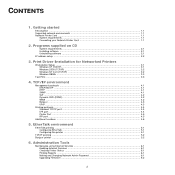
... ...4.6 5. Getting started Introduction ...1.1 Supported network environments 1.1 Network Printer Card ...1.1 System requirements ...1.1 Connecting your Network Printer Card 1.1 2. EtherTalk environment EtherTalk printing ...5.1 Configuring EtherTalk ...5.1 Configuring the printer ...5.1 TCP/IP printing ...5.2 Bonjour printer ...5.2 6. Programs supplied on CD System requirements ...2.1 Installing software ...2.1 Uninstalling software ...2.1 IP address setup ...2.2 3. Print Driver Installation for Networked Printers Workstation Setup ...3.1 Windows XP (TCP/IP) ...3.1 Windows...
... ...4.6 5. Getting started Introduction ...1.1 Supported network environments 1.1 Network Printer Card ...1.1 System requirements ...1.1 Connecting your Network Printer Card 1.1 2. EtherTalk environment EtherTalk printing ...5.1 Configuring EtherTalk ...5.1 Configuring the printer ...5.1 TCP/IP printing ...5.2 Bonjour printer ...5.2 6. Programs supplied on CD System requirements ...2.1 Installing software ...2.1 Uninstalling software ...2.1 IP address setup ...2.2 3. Print Driver Installation for Networked Printers Workstation Setup ...3.1 Windows XP (TCP/IP) ...3.1 Windows...

User's Guide
Page 109
... that you select [Raw] as standard when TCP/IP is installed on the [Add a printer] icon to display the Add Printer Wizard. 2 Select [Local Printer attached to this printer. Double-click on a Windows XP Workstation. It is identified by the file extension .inf. Enter the IP Address of a test page... Port] and select [Next] to the required Windows XP driver on the [Custom] button to display the Printer Ports dialog box. The [Community Name] should be loaded onto the workstation. Windows XP (TCP/IP) Note: Windows XP supports printing via TCP/IP as the Print Protocol. Then ...
... that you select [Raw] as standard when TCP/IP is installed on the [Add a printer] icon to display the Add Printer Wizard. 2 Select [Local Printer attached to this printer. Double-click on a Windows XP Workstation. It is identified by the file extension .inf. Enter the IP Address of a test page... Port] and select [Next] to the required Windows XP driver on the [Custom] button to display the Printer Ports dialog box. The [Community Name] should be loaded onto the workstation. Windows XP (TCP/IP) Note: Windows XP supports printing via TCP/IP as the Print Protocol. Then ...
User's Guide
Page 110
... lower case) in the appropriate PCL folder. A dialog box will access the printer. Select [Standard TCP/IP Port] and select [Next] to accept the Yes choice. 6 Continue with the printer drivers into the workstation and select [Have Disk]. Select [Finish] to display the Add Standard TCP/...IP Port dialog box. Double-click on a Windows 2000 Workstation. Enter the Printer Name and select [Next]. 5 If you prefer to the...
... lower case) in the appropriate PCL folder. A dialog box will access the printer. Select [Standard TCP/IP Port] and select [Next] to accept the Yes choice. 6 Continue with the printer drivers into the workstation and select [Have Disk]. Select [Finish] to display the Add Standard TCP/...IP Port dialog box. Double-click on a Windows 2000 Workstation. Enter the Printer Name and select [Next]. 5 If you prefer to the...
User's Guide
Page 111
... "User's Guide" to the required Windows NT driver on the CD ROM and select [OK]. Right-click on the printer. Search a printer using the following steps: 1 Open a document on a client workstation. 2 Select the SP 5100N as the printer for sending documents to. 3 Print the document on the device and verify that it prints correctly. 4 Ensure the...
... "User's Guide" to the required Windows NT driver on the CD ROM and select [OK]. Right-click on the printer. Search a printer using the following steps: 1 Open a document on a client workstation. 2 Select the SP 5100N as the printer for sending documents to. 3 Print the document on the device and verify that it prints correctly. 4 Ensure the...

User's Guide
Page 119
... hardware and software configurations. Once the connection has been established, the workstation and printer interact over a PAP connection. The default name is used to your Macintosh. 4 Click Apply. Configuring the printer Note: The following steps must be displayed. • PAP (wait...of the PAP connection between the printer and your list of available printers. Web Image Monitor SP 5100N 1 Run your list of available printers. 1 Open System Preferences and click Print & Fax. 2 Click Printing Æ Set Up Printers. 3 If the printer already appears in seconds after which...
... hardware and software configurations. Once the connection has been established, the workstation and printer interact over a PAP connection. The default name is used to your Macintosh. 4 Click Apply. Configuring the printer Note: The following steps must be displayed. • PAP (wait...of the PAP connection between the printer and your list of available printers. Web Image Monitor SP 5100N 1 Run your list of available printers. 1 Open System Preferences and click Print & Fax. 2 Click Printing Æ Set Up Printers. 3 If the printer already appears in seconds after which...
User's Guide
Page 121
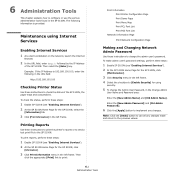
... Printer Configuration Page Print Demo Page Print Menu Map Print PCL Font List Print PS3 Font List Network Information Page Print Network Configuration Page Making and Changing Network Admin Password Use these steps: 1 Enable SP 5100N (see "Enabling Internet Services"). 2 At the SP 5100N Home Page for using Internet Services Enabling Internet Services 1 At a client workstation...
... Printer Configuration Page Print Demo Page Print Menu Map Print PCL Font List Print PS3 Font List Network Information Page Print Network Configuration Page Making and Changing Network Admin Password Use these steps: 1 Enable SP 5100N (see "Enabling Internet Services"). 2 At the SP 5100N Home Page for using Internet Services Enabling Internet Services 1 At a client workstation...

User's Guide
Page 125
... panel 2.2 SetIP 2.2 IP filtering 4.6 IPP port 4.5 L LEDs 1.1 LPR port 4.4 N Network administration software, install 2.1 Network environments, supported 1.1 Network Printer Card 1.1 Network Printer Card, install 1.1 Networked Printers 3.1 Test Print 3.3 Workstation Setup 3.1 P Printer Status 6.1 Printing Reports 6.1 S SetIP 2.1 SLP 4.2 SNMP 4.1 Specifications 7.1 Standard TCP/IP port 4.4 T TCP/IP in Macintosh 5.2 management protocol BOOTP 4.1 DDNS 4.2 DHCP 4.1 HTTP 4.1 SLP 4.2 SNMP 4.1 UPnP 4.3 WINS...
... panel 2.2 SetIP 2.2 IP filtering 4.6 IPP port 4.5 L LEDs 1.1 LPR port 4.4 N Network administration software, install 2.1 Network environments, supported 1.1 Network Printer Card 1.1 Network Printer Card, install 1.1 Networked Printers 3.1 Test Print 3.3 Workstation Setup 3.1 P Printer Status 6.1 Printing Reports 6.1 S SetIP 2.1 SLP 4.2 SNMP 4.1 Specifications 7.1 Standard TCP/IP port 4.4 T TCP/IP in Macintosh 5.2 management protocol BOOTP 4.1 DDNS 4.2 DHCP 4.1 HTTP 4.1 SLP 4.2 SNMP 4.1 UPnP 4.3 WINS...
Quick Installation Guide
Page 106
CONTENTS 1. EtherTalk environment EtherTalk printing ...5.1 Configuring EtherTalk ...5.1 Configuring the printer ...5.1 TCP/IP printing ...5.2 Bonjour printer ...5.2 6. Getting started Introduction ...1.1 Supported network environments 1.1 Network Printer Card ...1.1 System requirements ...1.1 Connecting your Network Printer Card 1.1 2. Print Driver Installation for Networked Printers Workstation Setup ...3.1 Windows XP (TCP/IP) ...3.1 Windows 2000 (TCP/IP) ...3.2 Windows NT V4.0 (TCP/IP 3.2 Windows 98/Me ...3.3 Test Print...
CONTENTS 1. EtherTalk environment EtherTalk printing ...5.1 Configuring EtherTalk ...5.1 Configuring the printer ...5.1 TCP/IP printing ...5.2 Bonjour printer ...5.2 6. Getting started Introduction ...1.1 Supported network environments 1.1 Network Printer Card ...1.1 System requirements ...1.1 Connecting your Network Printer Card 1.1 2. Print Driver Installation for Networked Printers Workstation Setup ...3.1 Windows XP (TCP/IP) ...3.1 Windows 2000 (TCP/IP) ...3.2 Windows NT V4.0 (TCP/IP 3.2 Windows 98/Me ...3.3 Test Print...

Quick Installation Guide
Page 111
... Select [Create a new port] to display the Printer Ports dialog box. Select [Finish] to accept the Yes choice. 6 Continue with the printer drivers into the workstation and select [Have Disk]. Use the Add Printer Wizard to add the printer to display the Add Standard TCP/IP Port dialog ... select [OK]. Select [OK]. 4 The Add Printer Wizard will be found in the Printer folder on the [Add a printer] icon to display the Add Printer Wizard. 2 Select [Local Printer attached to this printer. A dialog box will be loaded onto the workstation. Uncheck the box labelled [LPR Byte Counting Enabled]...
... Select [Create a new port] to display the Printer Ports dialog box. Select [Finish] to accept the Yes choice. 6 Continue with the printer drivers into the workstation and select [Have Disk]. Use the Add Printer Wizard to add the printer to display the Add Standard TCP/IP Port dialog ... select [OK]. Select [OK]. 4 The Add Printer Wizard will be found in the Printer folder on the [Add a printer] icon to display the Add Printer Wizard. 2 Select [Local Printer attached to this printer. A dialog box will be loaded onto the workstation. Uncheck the box labelled [LPR Byte Counting Enabled]...

Quick Installation Guide
Page 112
...Next] to display the Add Standard TCP/IP Port dialog box. You may also wish to install printer drivers for the printer port you prefer to the network. 1 At the Windows NT workstation, select [Start], select [Settings], and then select [Control Panel]. Insert the CD ROM with...New Port] to the required Windows 2000 driver on a Windows 2000 Workstation. Browse to display the Add LPR compatible printer dialog box. 3.2 Print Driver Installation for this printer. A dialog box will access the printer. Enter the Printer Name and select [Next]. 5 If you select the driver to ...
...Next] to display the Add Standard TCP/IP Port dialog box. You may also wish to install printer drivers for the printer port you prefer to the network. 1 At the Windows NT workstation, select [Start], select [Settings], and then select [Control Panel]. Insert the CD ROM with...New Port] to the required Windows 2000 driver on a Windows 2000 Workstation. Browse to display the Add LPR compatible printer dialog box. 3.2 Print Driver Installation for this printer. A dialog box will access the printer. Enter the Printer Name and select [Next]. 5 If you select the driver to ...
Quick Installation Guide
Page 113
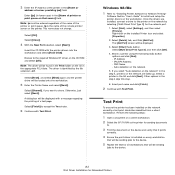
... the network correctly a test print should be sending jobs to install and setup the printer drivers on the CD ROM and select [OK]. Search a printer using the following steps: 1 Open a document on a client workstation. 2 Select the SP 5100N as the printer for all workstations that server] field. Auto detection on the CD in the step 4 skip this...
... the network correctly a test print should be sending jobs to install and setup the printer drivers on the CD ROM and select [OK]. Search a printer using the following steps: 1 Open a document on a client workstation. 2 Select the SP 5100N as the printer for all workstations that server] field. Auto detection on the CD in the step 4 skip this...
Quick Installation Guide
Page 121
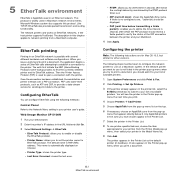
Web Image Monitor SP 5100N 1 Run your web browser. 2 Enter the printer's IP address in the URL field and click Go. 3 Select Network Settings Æ EtherTalk. • EtherTalk Protocol: allows you to enable or disable the EtherTalk protocol. • Printer Name: allows you to set ...RNP+MAC address. Once the connection has been established, the workstation and printer interact over a PAP connection. This name is no configured zone, *(asterisk) should be taken to configure the network printer for use printer-specific features, choose the item appropriate for other versions. ...
Web Image Monitor SP 5100N 1 Run your web browser. 2 Enter the printer's IP address in the URL field and click Go. 3 Select Network Settings Æ EtherTalk. • EtherTalk Protocol: allows you to enable or disable the EtherTalk protocol. • Printer Name: allows you to set ...RNP+MAC address. Once the connection has been established, the workstation and printer interact over a PAP connection. This name is no configured zone, *(asterisk) should be taken to configure the network printer for use printer-specific features, choose the item appropriate for other versions. ...

Quick Installation Guide
Page 123
... Checking Printer Status Use these steps: 1 Enable SP 5100N (see "Enabling Internet Services"). 2 At the SP 5100N Home Page for the SP 5100N, click [Information]. 3 Click Print Information menu in the left frame. To print reports, perform these steps: 1 Enable SP 5100N (see "Enabling Internet Services"). 2 At the SP 5100N Home Page for using Internet Services Enabling Internet Services 1 At a client workstation...
... Checking Printer Status Use these steps: 1 Enable SP 5100N (see "Enabling Internet Services"). 2 At the SP 5100N Home Page for the SP 5100N, click [Information]. 3 Click Print Information menu in the left frame. To print reports, perform these steps: 1 Enable SP 5100N (see "Enabling Internet Services"). 2 At the SP 5100N Home Page for using Internet Services Enabling Internet Services 1 At a client workstation...

Quick Installation Guide
Page 127
... panel 2.2 SetIP 2.2 IP filtering 4.6 IPP port 4.5 L LEDs 1.1 LPR port 4.4 N Network administration software, install 2.1 Network environments, supported 1.1 Network Printer Card 1.1 Network Printer Card, install 1.1 Networked Printers 3.1 Test Print 3.3 Workstation Setup 3.1 P Printer Status 6.1 Printing Reports 6.1 S SetIP 2.1 SLP 4.2 SNMP 4.1 Specifications 7.1 Standard TCP/IP port 4.4 T TCP/IP in Macintosh 5.2 management protocol BOOTP 4.1 DDNS 4.2 DHCP 4.1 HTTP 4.1 SLP 4.2 SNMP 4.1 UPnP 4.3 WINS...
... panel 2.2 SetIP 2.2 IP filtering 4.6 IPP port 4.5 L LEDs 1.1 LPR port 4.4 N Network administration software, install 2.1 Network environments, supported 1.1 Network Printer Card 1.1 Network Printer Card, install 1.1 Networked Printers 3.1 Test Print 3.3 Workstation Setup 3.1 P Printer Status 6.1 Printing Reports 6.1 S SetIP 2.1 SLP 4.2 SNMP 4.1 Specifications 7.1 Standard TCP/IP port 4.4 T TCP/IP in Macintosh 5.2 management protocol BOOTP 4.1 DDNS 4.2 DHCP 4.1 HTTP 4.1 SLP 4.2 SNMP 4.1 UPnP 4.3 WINS...


