User Guide
Page 6
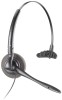
DIAGRAM KEY Headset (Both Configurations Shown) 1 Adjustable Headband (P/N 43298-01) 2 Ear Cushion Assembly (P/N 43299-01) 3 Headset Assembly 4 Voice Boom 5 Cord 6 Clothing Clip (P/N 43220-01) 7 Pivot Ball Ring (P/N 45650-01) 8 Flexible Earloop (P/N 45651-01) 3
DIAGRAM KEY Headset (Both Configurations Shown) 1 Adjustable Headband (P/N 43298-01) 2 Ear Cushion Assembly (P/N 43299-01) 3 Headset Assembly 4 Voice Boom 5 Cord 6 Clothing Clip (P/N 43220-01) 7 Pivot Ball Ring (P/N 45650-01) 8 Flexible Earloop (P/N 45651-01) 3
User Guide
Page 10
The Amplifier is described in a separate guide which should be read following familiarization with the headset. This User Guide will help you for selecting the DuoSet® Headset from Plantronics. WELCOME Thank you install your DuoSet Headset and learn its basic operation.
The Amplifier is described in a separate guide which should be read following familiarization with the headset. This User Guide will help you for selecting the DuoSet® Headset from Plantronics. WELCOME Thank you install your DuoSet Headset and learn its basic operation.
User Guide
Page 11
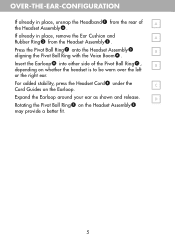
... already in place, remove the Ear Cushion and A Rubber Ring from the rear of the Pivot Ball Ring , B depending on whether the headset is to be worn over the left or the right ear. Expand the Earloop around your ear as shown and release. If already in place..., unsnap the Headband from the Headset Assembly . Insert the Earloop into either side of A the Headset Assembly . Press the Pivot Ball Ring onto the Headset Assembly B aligning the Pivot Ball Ring with the Voice Boom .
... already in place, remove the Ear Cushion and A Rubber Ring from the rear of the Pivot Ball Ring , B depending on whether the headset is to be worn over the left or the right ear. Expand the Earloop around your ear as shown and release. If already in place..., unsnap the Headband from the Headset Assembly . Insert the Earloop into either side of A the Headset Assembly . Press the Pivot Ball Ring onto the Headset Assembly B aligning the Pivot Ball Ring with the Voice Boom .
User Guide
Page 12
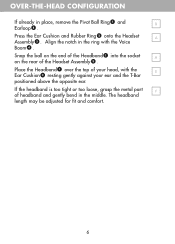
... the rear of headband and gently bend in the middle. If the headband is too tight or too loose, grasp the metal part F of the Headset Assembly . OVER-THE-HEAD CONFIGURATION If already in the ring with the E Ear Cushion resting gently against your ear and the T-Bar positioned above the... opposite ear. The headband length may be adjusted for fit and comfort. 6 Press the Ear Cushion and Rubber Ring onto the Headset A Assembly . Align the notch in place, remove the Pivot Ball Ring and B Earloop .
... the rear of headband and gently bend in the middle. If the headband is too tight or too loose, grasp the metal part F of the Headset Assembly . OVER-THE-HEAD CONFIGURATION If already in the ring with the E Ear Cushion resting gently against your ear and the T-Bar positioned above the... opposite ear. The headband length may be adjusted for fit and comfort. 6 Press the Ear Cushion and Rubber Ring onto the Headset A Assembly . Align the notch in place, remove the Pivot Ball Ring and B Earloop .

User Guide
Page 14
SECURING THE HEADSET Attach the Clothing Clip at about chest level. This is particularly important in the Earloop configuration. 8 The clip keeps I the headset properly seated and free of the weight of the Headset Cable .
SECURING THE HEADSET Attach the Clothing Clip at about chest level. This is particularly important in the Earloop configuration. 8 The clip keeps I the headset properly seated and free of the weight of the Headset Cable .
User Guide
Page 15
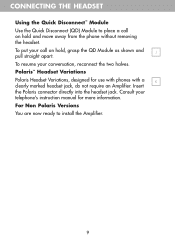
... apart. To put your call on hold and move away from the phone without removing the headset. Consult your conversation, reconnect the two halves. CONNECTING THE HEADSET Using the Quick Disconnect™ Module Use the Quick Disconnect (QD) Module to install the Amplifier.... 9 To resume your telephone's instruction manual for use with phones with a K clearly marked headset jack, do not require an Amplifier. Insert the Polaris connector directly into the headset jack. Polaris™ Headset Variations Polaris Headset Variations, designed for more information.
... apart. To put your call on hold and move away from the phone without removing the headset. Consult your conversation, reconnect the two halves. CONNECTING THE HEADSET Using the Quick Disconnect™ Module Use the Quick Disconnect (QD) Module to install the Amplifier.... 9 To resume your telephone's instruction manual for use with phones with a K clearly marked headset jack, do not require an Amplifier. Insert the Polaris connector directly into the headset jack. Polaris™ Headset Variations Polaris Headset Variations, designed for more information.
User Guide
Page 16
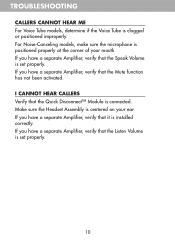
If you have a separate Amplifier, verify that the Quick Disconnect™ Module is installed correctly. Make sure the Headset Assembly is set properly. 10 TROUBLESHOOTING CALLERS CANNOT HEAR ME For Voice Tube models, determine if the Voice Tube is positioned properly at the corner ...
If you have a separate Amplifier, verify that the Quick Disconnect™ Module is installed correctly. Make sure the Headset Assembly is set properly. 10 TROUBLESHOOTING CALLERS CANNOT HEAR ME For Voice Tube models, determine if the Voice Tube is positioned properly at the corner ...
User Guide
Page 17
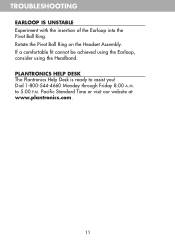
PLANTRONICS HELP DESK The Plantronics Help Desk is ready to 5:00 P.M. Dial 1-800-544-4660 Monday through Friday 8:00 A.M. Pacific Standard Time or visit our website at www.plantronics.com. 11 If a comfortable fit cannot be achieved using the Earloop, consider using the Headband. TROUBLESHOOTING EARLOOP IS UNSTABLE Experiment with the insertion of the Earloop into the Pivot Ball Ring. Rotate the Pivot Ball Ring on the Headset Assembly. to assist you!
PLANTRONICS HELP DESK The Plantronics Help Desk is ready to 5:00 P.M. Dial 1-800-544-4660 Monday through Friday 8:00 A.M. Pacific Standard Time or visit our website at www.plantronics.com. 11 If a comfortable fit cannot be achieved using the Earloop, consider using the Headband. TROUBLESHOOTING EARLOOP IS UNSTABLE Experiment with the insertion of the Earloop into the Pivot Ball Ring. Rotate the Pivot Ball Ring on the Headset Assembly. to assist you!


