
User Guide
Page 1
...have other trademarks are trademarks or registered trademarks of Plantronics, Inc. USER GUIDE CS55H HOME EDITION WIRELESS HEADSET SYSTEM SOUND INNOVATION Plantronics Inc. 345 Encinal Street Santa Cruz, CA 95060 USA Tel: (800) 544-4660 www.plantronics.com ©2006 Plantronics, Inc. Patents U.S. 5,210,791; 6,735,... ii WARRANTY Limited Warranty • This warranty covers defects in materials and workmanship of products manufactured, sold or certified by Plantronics which were purchased and used in the United States. • This warranty lasts for the full details of our limited ...
...have other trademarks are trademarks or registered trademarks of Plantronics, Inc. USER GUIDE CS55H HOME EDITION WIRELESS HEADSET SYSTEM SOUND INNOVATION Plantronics Inc. 345 Encinal Street Santa Cruz, CA 95060 USA Tel: (800) 544-4660 www.plantronics.com ©2006 Plantronics, Inc. Patents U.S. 5,210,791; 6,735,... ii WARRANTY Limited Warranty • This warranty covers defects in materials and workmanship of products manufactured, sold or certified by Plantronics which were purchased and used in the United States. • This warranty lasts for the full details of our limited ...

User Guide
Page 2
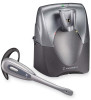
... Off 18 Battery Replacement 19 Maintenance 20 Technical Assistance 20 Regulatory Notices 20 REGISTER YOUR PRODUCT ONLINE Visit www.plantronics.com/productregistration to installation or use. PACKAGE CONTENTS Headset and Wearing Options Headset Headband Earloops Base AC Charger Base Splitter Adapter 2 3 Please refer to the separate Safety Instructions booklet for important product safety...
... Off 18 Battery Replacement 19 Maintenance 20 Technical Assistance 20 Regulatory Notices 20 REGISTER YOUR PRODUCT ONLINE Visit www.plantronics.com/productregistration to installation or use. PACKAGE CONTENTS Headset and Wearing Options Headset Headband Earloops Base AC Charger Base Splitter Adapter 2 3 Please refer to the separate Safety Instructions booklet for important product safety...

User Guide
Page 5
...indicator light on CHARGING 1 2 • 20 minutes = minimum charge to the headset automatically when you want to ensure that headset is in the headset by pressing the headset control button. Slide headset into retaining ring of desired wearing option (headband or earloop). 1. Adjust headband ... can cause noise and interference problems. ADJUSTING FIT Wearing Options Retaining Ring 2 1 1 Snap speaker into charging cradle. 2. Rotate headset in retaining ring until microphone is shown above. IntelliStand off the charging cradle. CS55_HO_42606.qxd 4/26/06 1:31 PM Page 8 ...
...indicator light on CHARGING 1 2 • 20 minutes = minimum charge to the headset automatically when you want to ensure that headset is in the headset by pressing the headset control button. Slide headset into retaining ring of desired wearing option (headband or earloop). 1. Adjust headband ... can cause noise and interference problems. ADJUSTING FIT Wearing Options Retaining Ring 2 1 1 Snap speaker into charging cradle. 2. Rotate headset in retaining ring until microphone is shown above. IntelliStand off the charging cradle. CS55_HO_42606.qxd 4/26/06 1:31 PM Page 8 ...

User Guide
Page 6
... someone you know. Take your handset off-hook. 2. Press the call control button on the headset. Hang up the handset. See page 8. Press the call control button on the headset. While speaking, turn the telephone configuration dial until you can. Dial numbers using handset keypad....indicator. Select the position that a number is set at the factory to turn the configuration dial through headset. 3. NOTE: To use a coin or small screwdriver to work with the headset on . NOTE: If either you or the recipient have trouble hearing, please check compatibility (page ...
... someone you know. Take your handset off-hook. 2. Press the call control button on the headset. Hang up the handset. See page 8. Press the call control button on the headset. While speaking, turn the telephone configuration dial until you can. Dial numbers using handset keypad....indicator. Select the position that a number is set at the factory to turn the configuration dial through headset. 3. NOTE: To use a coin or small screwdriver to work with the headset on . NOTE: If either you or the recipient have trouble hearing, please check compatibility (page ...

User Guide
Page 7
... in . D is the most common setting. Use the speaking volume major adjust control on the back of the base for large incremental adjustments. Headset Mute To mute headset, press the listening volume/mute button straight in minor incremental adjustments. CS55_HO_42606.qxd 4/26/06 1:31 PM Page 12 LISTENING VOLUME Note: Be sure...
... in . D is the most common setting. Use the speaking volume major adjust control on the back of the base for large incremental adjustments. Headset Mute To mute headset, press the listening volume/mute button straight in minor incremental adjustments. CS55_HO_42606.qxd 4/26/06 1:31 PM Page 12 LISTENING VOLUME Note: Be sure...

User Guide
Page 8
... closer to base 2 tones Press call control 3 repetitive tones button to charging cradle 1 tone every 10 seconds - CS55_HO_42606.qxd 4/26/06 1:31 PM Page 14 HEADSET CONTROLS Key Feature Action Tone Listening volume minor adjust Rock back and forth Mute Short key press straight in Ascending/descending tones, 2 tones at limit...
... closer to base 2 tones Press call control 3 repetitive tones button to charging cradle 1 tone every 10 seconds - CS55_HO_42606.qxd 4/26/06 1:31 PM Page 14 HEADSET CONTROLS Key Feature Action Tone Listening volume minor adjust Rock back and forth Mute Short key press straight in Ascending/descending tones, 2 tones at limit...

User Guide
Page 10
... AC charger from the AC charging jack for 5 seconds. Call Plantronics at the connection. Press and hold the headset mute button for 5 seconds. 4. The power indicator will return to indicate the headset is complete. 18 BATTERY REPLACEMENT The custom battery inside the headset should replace the battery. Disconnect the AC charger from the AC...
... AC charger from the AC charging jack for 5 seconds. Call Plantronics at the connection. Press and hold the headset mute button for 5 seconds. 4. The power indicator will return to indicate the headset is complete. 18 BATTERY REPLACEMENT The custom battery inside the headset should replace the battery. Disconnect the AC charger from the AC...

