
Operating Instructions
Page 1
A6 SX-A6-J Stereo Receiver Register your product at: www.pioneerelectronics.com (US) www.pioneerelectronics.ca (Canada) • Protect your new investment The details of your purchase will ... service bulletins on your new product • Improve product development Your input helps us continue to design products that meet your needs. • Receive a free Pioneer newsletter Registered customers can opt in to receive a monthly newsletter. Operating Instructions Downloaded from www.Manualslib.com...
A6 SX-A6-J Stereo Receiver Register your product at: www.pioneerelectronics.com (US) www.pioneerelectronics.ca (Canada) • Protect your new investment The details of your purchase will ... service bulletins on your new product • Improve product development Your input helps us continue to design products that meet your needs. • Receive a free Pioneer newsletter Registered customers can opt in to receive a monthly newsletter. Operating Instructions Downloaded from www.Manualslib.com...

Operating Instructions
Page 2
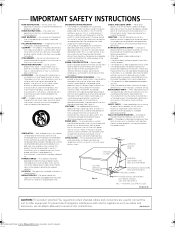
... that may cause harmful interference to the State of the FCC Rules. D1-4-2-1_En WARNING: Handling the cord on a circuit different from www.Manualslib.com manuals search engine The exclamation point within an equilateral triangle is encouraged to try to correct the interference by turning the equipment off and on proposition...
... that may cause harmful interference to the State of the FCC Rules. D1-4-2-1_En WARNING: Handling the cord on a circuit different from www.Manualslib.com manuals search engine The exclamation point within an equilateral triangle is encouraged to try to correct the interference by turning the equipment off and on proposition...
Operating Instructions
Page 3
... located in a fire or electric shock. REPLACEMENT PARTS - OVERLOADING - Do not attempt to the product. This product should be operated only from www.Manualslib.com manuals search engine All the safety and operating instructions should be read before the product is damaged. • If liquid has been spilled, or objects have...
... located in a fire or electric shock. REPLACEMENT PARTS - OVERLOADING - Do not attempt to the product. This product should be operated only from www.Manualslib.com manuals search engine All the safety and operating instructions should be read before the product is damaged. • If liquid has been spilled, or objects have...

Operating Instructions
Page 4
... without affecting your sensitive hearing. Once you find it is too late, this by the plug. Since hearing damage from www.Manualslib.com manuals search engine and Australia Model C67-7-3_En POWER-CORD CAUTION Handle the power cord by setting your equipment at a safe level. S002_En " ...80 Average city traffic, garbage disposals, alarm clock at a low setting. • Slowly increase the sound until it damaged, ask your nearest PIONEER authorized service center or your dealer for a replacement. Never make a knot in the future. One that they are wet as long-term use ...
... without affecting your sensitive hearing. Once you find it is too late, this by the plug. Since hearing damage from www.Manualslib.com manuals search engine and Australia Model C67-7-3_En POWER-CORD CAUTION Handle the power cord by setting your equipment at a safe level. S002_En " ...80 Average city traffic, garbage disposals, alarm clock at a low setting. • Slowly increase the sound until it damaged, ask your nearest PIONEER authorized service center or your dealer for a replacement. Never make a knot in the future. One that they are wet as long-term use ...
Operating Instructions
Page 5
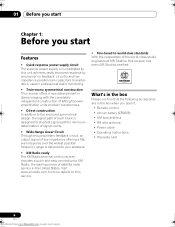
... Connecting your XM Radio receiver 17 Listening to operate your system Using Direct listening 14 Using the balance and tone controls 14 Playing other Pioneer components with this Pioneer product. Thank you have finished reading the instructions, put them in 10 03 Controls and displays Front panel 11 Remote control 12 Using... the 12 volt trigger 20 07 Additional information Troubleshooting 21 XM radio messages 22 Specifications 22 Cleaning the unit 23 Downloaded from www.Manualslib.com manuals search engine
... Connecting your XM Radio receiver 17 Listening to operate your system Using Direct listening 14 Using the balance and tone controls 14 Playing other Pioneer components with this Pioneer product. Thank you have finished reading the instructions, put them in 10 03 Controls and displays Front panel 11 Remote control 12 Using... the 12 volt trigger 20 07 Additional information Troubleshooting 21 XM radio messages 22 Specifications 22 Cleaning the unit 23 Downloaded from www.Manualslib.com manuals search engine
Operating Instructions
Page 6
... battery (CR2025) • AM loop antenna • FM wire antenna • Power cable • Operating instructions • Warranty card 6 En Downloaded from www.Manualslib.com manuals search engine
... battery (CR2025) • AM loop antenna • FM wire antenna • Power cable • Operating instructions • Warranty card 6 En Downloaded from www.Manualslib.com manuals search engine

Operating Instructions
Page 7
... incinerate. • Remove the battery if the unit isn't going to be used for the first time, remove the protective seal from www.Manualslib.com manuals search engine near a heater. Make sure to put it . 4 Place a new battery in the space provided. Don't install it in the casing. in direct sunlight...
... incinerate. • Remove the battery if the unit isn't going to be used for the first time, remove the protective seal from www.Manualslib.com manuals search engine near a heater. Make sure to put it . 4 Place a new battery in the space provided. Don't install it in the casing. in direct sunlight...

Operating Instructions
Page 8
... receiver. Tape deck, etc. CD player, etc. 1 Connect the analog audio outputs of your CD player (or other countries. 8 En Downloaded from www.Manualslib.com manuals search engine Use a stereo RCA phono cable as shown. • Connect any connections, switch off the power and disconnect the power cord from the speakers...
... receiver. Tape deck, etc. CD player, etc. 1 Connect the analog audio outputs of your CD player (or other countries. 8 En Downloaded from www.Manualslib.com manuals search engine Use a stereo RCA phono cable as shown. • Connect any connections, switch off the power and disconnect the power cord from the speakers...

Operating Instructions
Page 9
... fix to the attached stand. b 3 Fix the AM loop antenna to a wall or door frame. a). • If you to make recordings from www.Manualslib.com manuals search engine 75 Ω coaxial cable To improve AM reception Connect a 5 m to the stand. Using external antennas To improve FM reception Use a 75 Ω coaxial...
... fix to the attached stand. b 3 Fix the AM loop antenna to a wall or door frame. a). • If you to make recordings from www.Manualslib.com manuals search engine 75 Ω coaxial cable To improve AM reception Connect a 5 m to the stand. Using external antennas To improve FM reception Use a 75 Ω coaxial...

Operating Instructions
Page 10
... a terminal, unscrew the terminal a few turns until the wire is enough space to insert the exposed wire (fig. C Important • Please refer to the manual that the speaker cable you connect the speaker on the right to the right terminal and the speaker on how to connect the other end... up Connecting the speakers Make sure you 're going to use is properly prepared with about 3/8 inch of insulator stripped from www.Manualslib.com manuals search engine Once the wire is in Make sure to complete all connections before connecting this may cause the receiver to turn off automatically.
... a terminal, unscrew the terminal a few turns until the wire is enough space to insert the exposed wire (fig. C Important • Please refer to the manual that the speaker cable you connect the speaker on the right to the right terminal and the speaker on how to connect the other end... up Connecting the speakers Make sure you 're going to use is properly prepared with about 3/8 inch of insulator stripped from www.Manualslib.com manuals search engine Once the wire is in Make sure to complete all connections before connecting this may cause the receiver to turn off automatically.

Operating Instructions
Page 11
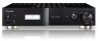
Controls and displays 03 Chapter 3: Controls and displays Front panel 1 2 3 POWER STANDBY OFF ON PHONES 4 5 6 DIRECT INPUT SELECTOR VOLUME STEREO RECEIVER A6 7 8 1 POWER OFF ON 2 STANDBY indicator 3 Character display (page 13) 4 DIRECT Press to switch the Direct listening feature on or off (page 14). 5 INPUT SELECTOR dial Selects an input source. 6 MASTER VOLUME 7 Remote sensor 8 PHONES jack Use to connect headphones (when connected, there is no sound output from the speakers). 11 En Downloaded from www.Manualslib.com manuals search engine
Controls and displays 03 Chapter 3: Controls and displays Front panel 1 2 3 POWER STANDBY OFF ON PHONES 4 5 6 DIRECT INPUT SELECTOR VOLUME STEREO RECEIVER A6 7 8 1 POWER OFF ON 2 STANDBY indicator 3 Character display (page 13) 4 DIRECT Press to switch the Direct listening feature on or off (page 14). 5 INPUT SELECTOR dial Selects an input source. 6 MASTER VOLUME 7 Remote sensor 8 PHONES jack Use to connect headphones (when connected, there is no sound output from the speakers). 11 En Downloaded from www.Manualslib.com manuals search engine
Operating Instructions
Page 12
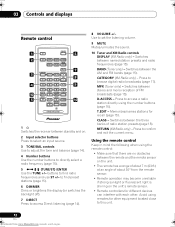
... remote sensor on the unit. • The remote has a range of about 7 m (23 ft.) at an angle of about 30º from www.Manualslib.com manuals search engine T.EDIT - Switches between the three banks of FM broadcasts (page 15). Avoid using the number buttons (page 15). Press to access a radio station...
... remote sensor on the unit. • The remote has a range of about 7 m (23 ft.) at an angle of about 30º from www.Manualslib.com manuals search engine T.EDIT - Switches between the three banks of FM broadcasts (page 15). Avoid using the number buttons (page 15). Press to access a radio station...

Operating Instructions
Page 13
... frequency is used to select mono mode. 2 Tone control indicators TREBLE - Lights when the MPX button is displayed. 13 En Downloaded from www.Manualslib.com manuals search engine AM - Lights when an FM frequency is being received. Lights when a stereo FM broadcast is displayed. BASS -
... frequency is used to select mono mode. 2 Tone control indicators TREBLE - Lights when the MPX button is displayed. 13 En Downloaded from www.Manualslib.com manuals search engine AM - Lights when an FM frequency is being received. Lights when a stereo FM broadcast is displayed. BASS -
Operating Instructions
Page 14
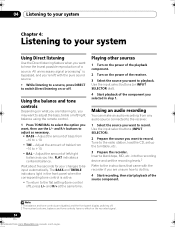
... want to playback. Adjust the amount of a source. Use the input select buttons (or INPUT SELECTOR dial). 4 Start playback of treble from www.Manualslib.com manuals search engine 04 Listening to your system Chapter 4: Listening to your changes to be input automatically. All unnecessary signal processing1 is active. • To return...
... want to playback. Adjust the amount of a source. Use the input select buttons (or INPUT SELECTOR dial). 4 Start playback of treble from www.Manualslib.com manuals search engine 04 Listening to your system Chapter 4: Listening to your changes to be input automatically. All unnecessary signal processing1 is active. • To return...
Operating Instructions
Page 15
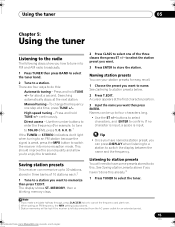
...FM frequency, the MPX setting is left disconnected from the AC power outlet for an extended period. 15 En Downloaded from www.Manualslib.com manuals search engine There are four ways to do this : Automatic tuning - continuously. Use the number buttons to enter the frequency (For example...to select the tuner band. 2 Tune to a station. See Saving station presets above if you to enjoy the broadcast. Press and hold TUNE +/- Manual tuning - Direct access - Press and hold TUNE +/- This should improve the sound quality and allow you haven't done this already.3 1 Press TUNER ...
...FM frequency, the MPX setting is left disconnected from the AC power outlet for an extended period. 15 En Downloaded from www.Manualslib.com manuals search engine There are four ways to do this : Automatic tuning - continuously. Use the number buttons to enter the frequency (For example...to select the tuner band. 2 Tune to a station. See Saving station presets above if you to enjoy the broadcast. Press and hold TUNE +/- Manual tuning - Direct access - Press and hold TUNE +/- This should improve the sound quality and allow you haven't done this already.3 1 Press TUNER ...

Operating Instructions
Page 16
Press repeatedly to select the station preset you want. 16 En Downloaded from www.Manualslib.com manuals search engine to cycle through classes A, B and C. 3 Press ST +/- 05 Using the tuner 2 Press CLASS to select the class in which the station is stored.
Press repeatedly to select the station preset you want. 16 En Downloaded from www.Manualslib.com manuals search engine to cycle through classes A, B and C. 3 Press ST +/- 05 Using the tuner 2 Press CLASS to select the class in which the station is stored.
Operating Instructions
Page 17
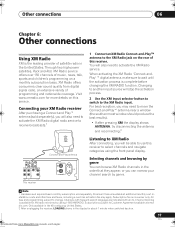
... apply. Subscriptions subject to select channels and navigate categories using the front panel display. XM Radio offers consumers clear sound quality from www.Manualslib.com manuals search engine Other connections 06 Chapter 6: Other connections Using XM Radio XM is consumer only. Changing to another input source will be able to use...
... apply. Subscriptions subject to select channels and navigate categories using the front panel display. XM Radio offers consumers clear sound quality from www.Manualslib.com manuals search engine Other connections 06 Chapter 6: Other connections Using XM Radio XM is consumer only. Changing to another input source will be able to use...

Operating Instructions
Page 18
... & Play™, XM-Ready® and The Ultimate Playlist are the property of the Connect-and-Play antenna. 18 En Downloaded from www.Manualslib.com manuals search engine All rights reserved. Saving channel presets This receiver can memorize up to check the Radio ID of their respective owners. Listening to channel...
... & Play™, XM-Ready® and The Ultimate Playlist are the property of the Connect-and-Play antenna. 18 En Downloaded from www.Manualslib.com manuals search engine All rights reserved. Saving channel presets This receiver can memorize up to check the Radio ID of their respective owners. Listening to channel...
Operating Instructions
Page 19
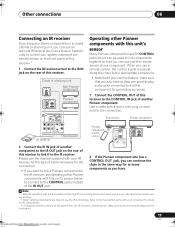
... the connection. • If you want to link a Pioneer component to the IR receiver, see the manual supplied with this unit's sensor Many Pioneer components have SR CONTROL jacks which can be possible if direct light from www.Manualslib.com manuals search engine Use a cable with your component to check for...on the front panel of this receiver. Note 1 • Remote operation may not be used to the IR receiver. IN CONTROL IN OUT Pioneer component 1 Connect the CONTROL OUT of this unit's sensor below to connect to the CONTROL jacks instead of this receiver to link it to ...
... the connection. • If you want to link a Pioneer component to the IR receiver, see the manual supplied with this unit's sensor Many Pioneer components have SR CONTROL jacks which can be possible if direct light from www.Manualslib.com manuals search engine Use a cable with your component to check for...on the front panel of this receiver. Note 1 • Remote operation may not be used to the IR receiver. IN CONTROL IN OUT Pioneer component 1 Connect the CONTROL OUT of this unit's sensor below to connect to the CONTROL jacks instead of this receiver to link it to ...

Operating Instructions
Page 20
... while this receiver is currently off using the 12 volt trigger You can connect components in any case). 20 En Downloaded from www.Manualslib.com manuals search engine If you turn the power to a connected component on, the power to this receiver is already on, switching the connected component on each...
... while this receiver is currently off using the 12 volt trigger You can connect components in any case). 20 En Downloaded from www.Manualslib.com manuals search engine If you turn the power to a connected component on, the power to this receiver is already on, switching the connected component on each...


