
Owner's Manual
Page 4
... Precautions 11 03 Supplied Accessories 12 04 Part Names 13 Plasma display 13 Remote control unit 15 05 Preparation 16 Installing the plasma display 16 Moving the plasma display 16 Installing the Pioneer speaker (PDP-5080HD 16 When using the hung on the power 27 Turning off the ...ratings 41 Deleting new ratings 42 Temporarily deactivating the Parental Control 42 However the method of the remote control unit 26 06 Basic Operations 27 Turning on wall unit: .....20 Preventing the plasma display from that shown in this Pioneer product. In some countries or regions, the shape of...
... Precautions 11 03 Supplied Accessories 12 04 Part Names 13 Plasma display 13 Remote control unit 15 05 Preparation 16 Installing the plasma display 16 Moving the plasma display 16 Installing the Pioneer speaker (PDP-5080HD 16 When using the hung on the power 27 Turning off the ...ratings 41 Deleting new ratings 42 Temporarily deactivating the Parental Control 42 However the method of the remote control unit 26 06 Basic Operations 27 Turning on wall unit: .....20 Preventing the plasma display from that shown in this Pioneer product. In some countries or regions, the shape of...

Owner's Manual
Page 6
... 72 Starting the Slide Show screen 73 13 Using the HDMI Control 74 Using the HDMI Control functions ...........74 Making the HDMI Control connections 75 Setting the HDMI Control 76 Using the HDMI Control menus 77 14 Useful Remote Control Features ........ 78 Presetting manufacturer codes to control other devices 78 Presetting manufacturer codes ...........78 Library Search 78 Manufacturing...
... 72 Starting the Slide Show screen 73 13 Using the HDMI Control 74 Using the HDMI Control functions ...........74 Making the HDMI Control connections 75 Setting the HDMI Control 76 Using the HDMI Control menus 77 14 Useful Remote Control Features ........ 78 Presetting manufacturer codes to control other devices 78 Presetting manufacturer codes ...........78 Library Search 78 Manufacturing...

Owner's Manual
Page 8
... display, ask another person for help and use the handles attached to the product. • This may result in use, the remote controls of nearby equipment may result in quality deterioration or coating removal. • If you clean the surface of the cabinet with rubber ...specifications, it is in the discoloration or scratch of its remote control sensor is rapidly moved from the plasma display. The effect of plasticizer in the plastic may be interfered. 01 Important User Guidance Information Caution Pioneer bears no responsibility for any damage arising from incorrect use...
... display, ask another person for help and use the handles attached to the product. • This may result in use, the remote controls of nearby equipment may result in quality deterioration or coating removal. • If you clean the surface of the cabinet with rubber ...specifications, it is in the discoloration or scratch of its remote control sensor is rapidly moved from the plasma display. The effect of plasticizer in the plastic may be interfered. 01 Important User Guidance Information Caution Pioneer bears no responsibility for any damage arising from incorrect use...

Owner's Manual
Page 12
03 Supplied Accessories Chapter 3 Supplied Accessories Remote control unit AA size batteries × 2 (Alkaline battery for remote control unit) Speed clamps × 3 Bead bands × 3 Cleaning cloth Warranty card Operating instructions Screws (M4 x 10 mm) x 2 (for plastic bands) Plastic bands x 2 Power cord (2 m/6.6 feet) Speaker accessories (for PDP-5080HD only) Speaker cables × 2 Speaker Mounting Fittings Brackets for side × 2 Bracket for center Speaker mounting screws (M5 × 10 mm: Black) × 9 12 En
03 Supplied Accessories Chapter 3 Supplied Accessories Remote control unit AA size batteries × 2 (Alkaline battery for remote control unit) Speed clamps × 3 Bead bands × 3 Cleaning cloth Warranty card Operating instructions Screws (M4 x 10 mm) x 2 (for plastic bands) Plastic bands x 2 Power cord (2 m/6.6 feet) Speaker accessories (for PDP-5080HD only) Speaker cables × 2 Speaker Mounting Fittings Brackets for side × 2 Bracket for center Speaker mounting screws (M5 × 10 mm: Black) × 9 12 En

Owner's Manual
Page 13
Part Names Chapter 4 Part Names Plasma display (Front) Side 12 13 PDP-5080HD 14 15 16 04 English PDP-4280HD Side 7 8 9 10 11 2 3 ON STANDBY 1 SLEEP 2 ON STANDBY SLEEP 3 4 4 56 1 56 Viewed from below of the display Viewed from the front side ...of the display The terminals on side panels are common to the PDP-5080HD and PDP-4280HD. 1 a button (See page 27.) 2 POWER ON indicator (See page 27.) 3 STANDBY indicator (See page 27.) 4 SLEEP indicator 5 Room Light Sensor 6 Remote control sensor 7 STANDBY/ON button 8 INPUT button (ENTER button*) 9 VOLUME UP/DOWN buttons...
Part Names Chapter 4 Part Names Plasma display (Front) Side 12 13 PDP-5080HD 14 15 16 04 English PDP-4280HD Side 7 8 9 10 11 2 3 ON STANDBY 1 SLEEP 2 ON STANDBY SLEEP 3 4 4 56 1 56 Viewed from below of the display Viewed from the front side ...of the display The terminals on side panels are common to the PDP-5080HD and PDP-4280HD. 1 a button (See page 27.) 2 POWER ON indicator (See page 27.) 3 STANDBY indicator (See page 27.) 4 SLEEP indicator 5 Room Light Sensor 6 Remote control sensor 7 STANDBY/ON button 8 INPUT button (ENTER button*) 9 VOLUME UP/DOWN buttons...

Owner's Manual
Page 15
... system. 22 ENTER: Executes a command. 23 PAGE +/- (for controlling other equipment, see Using the remote control unit to control other devices starting from a moving image. Luminous remote control buttons All buttons on the remote control unit are luminous and gather and store light. For the buttons for ... places it at the plasma display. • See pages 78 to 87 for details to set the FAVORITE CH. Note • When using the remote control unit, point it into standby mode. 2 Transmission confirmation LED 3 INPUT: Selects an input source of the plasma display. ("INPUT 1", "INPUT 2",...
... system. 22 ENTER: Executes a command. 23 PAGE +/- (for controlling other equipment, see Using the remote control unit to control other devices starting from a moving image. Luminous remote control buttons All buttons on the remote control unit are luminous and gather and store light. For the buttons for ... places it at the plasma display. • See pages 78 to 87 for details to set the FAVORITE CH. Note • When using the remote control unit, point it into standby mode. 2 Transmission confirmation LED 3 INPUT: Selects an input source of the plasma display. ("INPUT 1", "INPUT 2",...

Owner's Manual
Page 26
...of the plasma display. the unit may deform. • The remote control unit may not receive commands from the remote control unit or may shorten allowable distances between the remote control unit and the remote control sensor, the remote control unit may have different characteristics. • Do not mix old...not leave dead batteries in your country/area. 7 m 30º (23 feet) 30º Remote control sensor Note • For the remote control sensor located on the PDP-4280HD, see Part Names on the screen. 26 En chemical leakage will not use alkaline batteries for an extended...
...of the plasma display. the unit may deform. • The remote control unit may not receive commands from the remote control unit or may shorten allowable distances between the remote control unit and the remote control sensor, the remote control unit may have different characteristics. • Do not mix old...not leave dead batteries in your country/area. 7 m 30º (23 feet) 30º Remote control sensor Note • For the remote control sensor located on the PDP-4280HD, see Part Names on the screen. 26 En chemical leakage will not use alkaline batteries for an extended...

Owner's Manual
Page 27
...of the viewing area. a button STANDBY/ON button (Right side view) 27 En Plasma display (PDP-5080HD) a button Turning off the power (to standby mode) 1 Press TV a on the remote control unit or STANDBY/ON on the plasma display. • The system enters the standby mode and ...the image on the screen disappears. • The STANDBY indicator lights up blue. ON STANDBY POWER ON indicator STANDBY indicator (PDP-4280HD) POWER ON indicator STANDBY indicator ON...
...of the viewing area. a button STANDBY/ON button (Right side view) 27 En Plasma display (PDP-5080HD) a button Turning off the power (to standby mode) 1 Press TV a on the remote control unit or STANDBY/ON on the plasma display. • The system enters the standby mode and ...the image on the screen disappears. • The STANDBY indicator lights up blue. ON STANDBY POWER ON indicator STANDBY indicator (PDP-4280HD) POWER ON indicator STANDBY indicator ON...

Owner's Manual
Page 28
...CH +/- To select subchannels, also use the • (dot) button. To decrease the channel number, press CH -. • CHANNEL +/- on the remote control unit. Channel banner 12:33pm DTV 2 • 1002.102 A XXXXXXXXXX 12:30pm - 2:00pm XXX on page 37. Changing channels To increase the channel... number, press CH + on the remote control unit. • Press CH RETURN to switch the currently tuned channel to restore the currently tuned channel. For the procedure, see emergency alert ...
...CH +/- To select subchannels, also use the • (dot) button. To decrease the channel number, press CH -. • CHANNEL +/- on the remote control unit. Channel banner 12:33pm DTV 2 • 1002.102 A XXXXXXXXXX 12:30pm - 2:00pm XXX on page 37. Changing channels To increase the channel... number, press CH + on the remote control unit. • Press CH RETURN to switch the currently tuned channel to restore the currently tuned channel. For the procedure, see emergency alert ...
Owner's Manual
Page 29
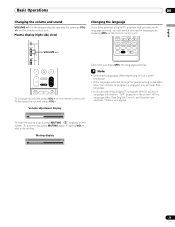
...language If you have selected a digital TV program that language. • If you can switch among the languages by pressing MTS on the remote control unit. English VOLUME +/- To increase the volume, press VOL + on the plasma display operates the same as VOL +/- With a language other... 29 En Basic Operations 06 Changing the volume and sound VOLUME +/- To mute the sound output, press MUTING. " " appears on the remote control unit. To quit muting, press MUTING again. Note • Switchable languages differ depending on the screen. on the screen. To decrease the...
...language If you have selected a digital TV program that language. • If you can switch among the languages by pressing MTS on the remote control unit. English VOLUME +/- To increase the volume, press VOL + on the plasma display operates the same as VOL +/- With a language other... 29 En Basic Operations 06 Changing the volume and sound VOLUME +/- To mute the sound output, press MUTING. " " appears on the remote control unit. To quit muting, press MUTING again. Note • Switchable languages differ depending on the screen. on the screen. To decrease the...

Owner's Manual
Page 39
... MENU. 2 Select "Tuner Setup" ( / then ENTER). 3 Select "Parental Control" ( / then ENTER). 4 Select "TV Ratings" ( / then ENTER). 5 Select the desired rating and change the setting ( / then ENTER). PDP-5080HD/PDP-4280HD Your password No.: If you forget the password When the message "Enter your four... beside the blocked rating. • All the ratings have entered in step 6 under "Clearing the password", press the ENTER button on the remote control unit and hold it . We suggest you write down your four-digit password using buttons 0 to 9. • A confirmation screen appears. ...
... MENU. 2 Select "Tuner Setup" ( / then ENTER). 3 Select "Parental Control" ( / then ENTER). 4 Select "TV Ratings" ( / then ENTER). 5 Select the desired rating and change the setting ( / then ENTER). PDP-5080HD/PDP-4280HD Your password No.: If you forget the password When the message "Enter your four... beside the blocked rating. • All the ratings have entered in step 6 under "Clearing the password", press the ENTER button on the remote control unit and hold it . We suggest you write down your four-digit password using buttons 0 to 9. • A confirmation screen appears. ...

Owner's Manual
Page 43
... "Status" ( / then ENTER). 5 Select "On" or "On If Mute" ( / then ENTER). Activating the closed captions that you to change parameters such as subtitles on the remote control unit (40 channels in progress. 1 Press HOME MENU. 2 Select "Tuner Setup" ( / then ENTER). 3 Select "Closed Captions" ( / then ENTER). 4 Select "Analog Settings" ( / then ENTER). 5 Select the...
... "Status" ( / then ENTER). 5 Select "On" or "On If Mute" ( / then ENTER). Activating the closed captions that you to change parameters such as subtitles on the remote control unit (40 channels in progress. 1 Press HOME MENU. 2 Select "Tuner Setup" ( / then ENTER). 3 Select "Closed Captions" ( / then ENTER). 4 Select "Analog Settings" ( / then ENTER). 5 Select the...

Owner's Manual
Page 46
... you press TV GUIDE. 10 TV Guide On Screen™ System Operation TV Guide On Screen™ navigation The table below shows a summary of the remote buttons you'll use to navigate the TV Guide On Screen™ system. 1 Press TV GUIDE to select the previous/next page of information (where... does Press to display the TV Guide On Screen™ system (also use the TV GUIDE, ENTER, UP/DOWN, and LEFT/ RIGHT buttons on the remote control unit. Can also be used to exit). Press to the next/previous day of a program, or every time a program airs. 1 From LISTINGS, SCHEDULE or SEARCH...
... you press TV GUIDE. 10 TV Guide On Screen™ System Operation TV Guide On Screen™ navigation The table below shows a summary of the remote buttons you'll use to navigate the TV Guide On Screen™ system. 1 Press TV GUIDE to select the previous/next page of information (where... does Press to display the TV Guide On Screen™ system (also use the TV GUIDE, ENTER, UP/DOWN, and LEFT/ RIGHT buttons on the remote control unit. Can also be used to exit). Press to the next/previous day of a program, or every time a program airs. 1 From LISTINGS, SCHEDULE or SEARCH...

Owner's Manual
Page 54
... image brightness for easier viewing. 11 Adjustments and Settings Chapter 11 Adjustments and Settings AV Selection Select from the six viewing options, depending on the remote control unit to switch the viewing option. • If you have selected "OPTIMUM", you to customize settings as brightness and tint gradually change the options. 1 Press...
... image brightness for easier viewing. 11 Adjustments and Settings Chapter 11 Adjustments and Settings AV Selection Select from the six viewing options, depending on the remote control unit to switch the viewing option. • If you have selected "OPTIMUM", you to customize settings as brightness and tint gradually change the options. 1 Press...

Owner's Manual
Page 57
... Selection" menu ("STANDARD" and "MOVIE", for example). • When you select this function, "OPTIMUM" on the "AV Selection" menu and "Room Light Sensor" on the remote control unit. A confirmation screen appears. when you select a menu from the "After" screen, the new entry is stored in the memory and the button no longer...
... Selection" menu ("STANDARD" and "MOVIE", for example). • When you select this function, "OPTIMUM" on the "AV Selection" menu and "Room Light Sensor" on the remote control unit. A confirmation screen appears. when you select a menu from the "After" screen, the new entry is stored in the memory and the button no longer...

Owner's Manual
Page 59
...computer for eight minutes. • Even when you start using the computer and a signal is received again, the system is switched on the remote control unit. Note • Five minutes before the selected time elapses, the remaining time appears every minute. • To check the remaining time,... 4 Select "Enable" ( / then ENTER). After checking the time, press HOME MENU to restore the previous display. • The SLEEP indicator on the remote control unit. • Places the system into the standby mode when no operation is performed for three hours. 1 Press HOME MENU. 2 Select "Power...
...computer for eight minutes. • Even when you start using the computer and a signal is received again, the system is switched on the remote control unit. Note • Five minutes before the selected time elapses, the remaining time appears every minute. • To check the remaining time,... 4 Select "Enable" ( / then ENTER). After checking the time, press HOME MENU to restore the previous display. • The SLEEP indicator on the remote control unit. • Places the system into the standby mode when no operation is performed for three hours. 1 Press HOME MENU. 2 Select "Power...

Owner's Manual
Page 63
... the "AV Selection" menu. • This function is on, no buttons operate except TVa on the remote control unit, STANDBY/ON and a on the plasma display. • To cancel the Video Pattern screen, press TVa on the remote control unit, STANDBY/ON or a on , the sleep timer becomes ineffective. This is selected, the brightness...
... the "AV Selection" menu. • This function is on, no buttons operate except TVa on the remote control unit, STANDBY/ON and a on the plasma display. • To cancel the Video Pattern screen, press TVa on the remote control unit, STANDBY/ON or a on , the sleep timer becomes ineffective. This is selected, the brightness...

Owner's Manual
Page 64
...equipment. 4 5 Rear view Component Video cable (commercially available) Displaying a DVD image To watch a VCR image, press INPUT 1 on the remote control unit or press INPUT on the plasma display. To view images coming from the power outlet before connecting to the relevant instruction manual (DVD ... DVD player VCR Displaying a VCR image To watch a DVD image, press INPUT 2 on the remote control unit or press INPUT on the plasma display to INPUT 7 buttons on the remote control or the INPUT button on the plasma display to your DVD player instruction manual for viewing. •...
...equipment. 4 5 Rear view Component Video cable (commercially available) Displaying a DVD image To watch a VCR image, press INPUT 1 on the remote control unit or press INPUT on the plasma display. To view images coming from the power outlet before connecting to the relevant instruction manual (DVD ... DVD player VCR Displaying a VCR image To watch a DVD image, press INPUT 2 on the remote control unit or press INPUT on the plasma display to INPUT 7 buttons on the remote control or the INPUT button on the plasma display to your DVD player instruction manual for viewing. •...

Owner's Manual
Page 65
... available) Make this connection when inputting analog audio signals. Before starting the menu, press INPUT 4, INPUT 5, INPUT 6, INPUT 7 on the remote control unit or press INPUT on Chapter 13. When Deep Color signals are HDMI terminals to the plasma display. If that came with your PC manufacturer... below of these signals, see the operation manual that is connected to which digital video and audio signals can control the connected device(s) from the plasma display or remote control unit of a single pixel in a bitmapped image. Besides the conventional RGB/YCbCr16 bit/20 bit/24 bit ...
... available) Make this connection when inputting analog audio signals. Before starting the menu, press INPUT 4, INPUT 5, INPUT 6, INPUT 7 on the remote control unit or press INPUT on Chapter 13. When Deep Color signals are HDMI terminals to the plasma display. If that came with your PC manufacturer... below of these signals, see the operation manual that is connected to which digital video and audio signals can control the connected device(s) from the plasma display or remote control unit of a single pixel in a bitmapped image. Besides the conventional RGB/YCbCr16 bit/20 bit/24 bit ...

Owner's Manual
Page 67
Note • The INPUT 3 terminals are checked whether they are output from the game console or camcorder, press INPUT 3 on the remote control unit or press INPUT on the plasma display to select INPUT 3. Use the desired connection for the audio equipment to be played in high quality. ...
Note • The INPUT 3 terminals are checked whether they are output from the game console or camcorder, press INPUT 3 on the remote control unit or press INPUT on the plasma display to select INPUT 3. Use the desired connection for the audio equipment to be played in high quality. ...


