Owner's Manual
Page 36
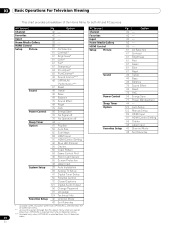
... Gallery 93 - Option 122 Auto Setup 122 Manual Setup 84 HDMI Input 91 HDMI Control Setting 56 Orbiter 43 Label Input Favorites Setup 42 Channel Mode 43 Sort Favorites 46 Blue LED ... Light Sensor 55 Screen Protection System Setup 43 Label Input 38 Auto Installation 39 Analog TV Setup 41 Digital Tuner Setup 50 Parental Control 72 Closed Captions 121 Digital Audio Output ... option other than OPTIMUM is selected from the AV Selection menu. ** Access this option through the Pro Adjust menu when any option other than OPTIMUM is selected from the AV Selection menu. *** Available...
... Gallery 93 - Option 122 Auto Setup 122 Manual Setup 84 HDMI Input 91 HDMI Control Setting 56 Orbiter 43 Label Input Favorites Setup 42 Channel Mode 43 Sort Favorites 46 Blue LED ... Light Sensor 55 Screen Protection System Setup 43 Label Input 38 Auto Installation 39 Analog TV Setup 41 Digital Tuner Setup 50 Parental Control 72 Closed Captions 121 Digital Audio Output ... option other than OPTIMUM is selected from the AV Selection menu. ** Access this option through the Pro Adjust menu when any option other than OPTIMUM is selected from the AV Selection menu. *** Available...
Owner's Manual
Page 46
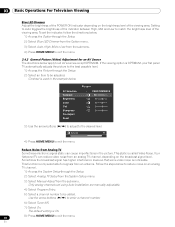
...match the brightness level of the viewing area. If the viewing option is called Video Noise. Reduce Noise from Analog TV Sometimes electronic signal static can reduce video noise from an antenna. 03 Basic Operations For Television Viewing Blue LED Dimmer... Tuner NR. 7 ) Select On. AV Selection Contrast Brightness Color Tint Sharpness Pro Adjust Reset Picture : PERFORMANCE : 40 : 0 : 0 : 0 : 0 3 ) Use the arrow buttons (/) to adjust to exit the menu. The default setting is used in the picture. Use the arrow buttons (/) to reduce...
...match the brightness level of the viewing area. If the viewing option is called Video Noise. Reduce Noise from Analog TV Sometimes electronic signal static can reduce video noise from an antenna. 03 Basic Operations For Television Viewing Blue LED Dimmer... Tuner NR. 7 ) Select On. AV Selection Contrast Brightness Color Tint Sharpness Pro Adjust Reset Picture : PERFORMANCE : 40 : 0 : 0 : 0 : 0 3 ) Use the arrow buttons (/) to adjust to exit the menu. The default setting is used in the picture. Use the arrow buttons (/) to reduce...

Owner's Manual
Page 61
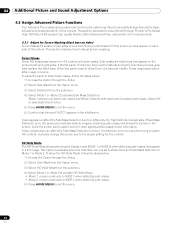
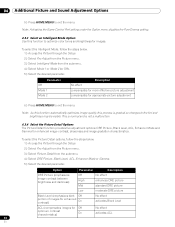
...Repeat the process for any additional adjustments. 5 ) Press HOME MENU to exit the menu after all settings to the factory defaults. 61 En AV Source PC Source AV Selection Contrast Brightness Color Tint Sharpness Pro Adjust Reset Picture : PERFORMANCE : 40 : 0 : 0 : 0 : 0 AV Selection Contrast ...the Setup. 2 ) Select an option to your personal preferences, often the source causes unanticipated image changes. Your flat panel TV offers several adjustment options. Additional Picture and Sound Adjustment Options 04 4.2.2 Correct the Picture for an AV or PC Source Although...
...Repeat the process for any additional adjustments. 5 ) Press HOME MENU to exit the menu after all settings to the factory defaults. 61 En AV Source PC Source AV Selection Contrast Brightness Color Tint Sharpness Pro Adjust Reset Picture : PERFORMANCE : 40 : 0 : 0 : 0 : 0 AV Selection Contrast ...the Setup. 2 ) Select an option to your personal preferences, often the source causes unanticipated image changes. Your flat panel TV offers several adjustment options. Additional Picture and Sound Adjustment Options 04 4.2.2 Correct the Picture for an AV or PC Source Although...
Owner's Manual
Page 62
.... This option is available when the Auto Size menu is set to Wide-Zoom and Side Mask Detection to activate Side Mask Detection. To allow the HD Wide Mode, follow the steps below . 1 ) Access the Option through Pioneer's Pro Adjust High Definition (HD) support, top quality blacks, better...image concerns. Select Off to adjust screen masking. 04 Additional Picture and Sound Adjustment Options 4.3 Assign Advanced Picture Functions Your flat panel TV provides various advanced functions for Screen Masking (black bars on sides) Screen Masks fill areas on both black and illustrated side masks. ...
.... This option is available when the Auto Size menu is set to Wide-Zoom and Side Mask Detection to activate Side Mask Detection. To allow the HD Wide Mode, follow the steps below . 1 ) Access the Option through Pioneer's Pro Adjust High Definition (HD) support, top quality blacks, better...image concerns. Select Off to adjust screen masking. 04 Additional Picture and Sound Adjustment Options 4.3 Assign Advanced Picture Functions Your flat panel TV provides various advanced functions for Screen Masking (black bars on sides) Screen Masks fill areas on both black and illustrated side masks. ...

Owner's Manual
Page 63
... 72 Hz when displaying DVD images (e.g., movies) having 24 frames per second for High Quality Image Pioneer's PureCinema automatically detects and analyses a film-based source (originally encoded at 24 frames/ second) then... Off deactivates PureCinema Standard (not available for input signals 480p, 720p @60 Hz, or 1080p @60 Hz) automatically detects recorded image data when displaying DVD or high-definition images...63 En However, the gray is set the PureCinema level for HD picture quality. With AV Selection set to any options other than OPTIMUM, select Pro Adjust then go to a lighter ...
... 72 Hz when displaying DVD images (e.g., movies) having 24 frames per second for High Quality Image Pioneer's PureCinema automatically detects and analyses a film-based source (originally encoded at 24 frames/ second) then... Off deactivates PureCinema Standard (not available for input signals 480p, 720p @60 Hz, or 1080p @60 Hz) automatically detects recorded image data when displaying DVD or high-definition images...63 En However, the gray is set the PureCinema level for HD picture quality. With AV Selection set to any options other than OPTIMUM, select Pro Adjust then go to a lighter ...
Owner's Manual
Page 64
... On activates ACL 64 En To select the Picture Detail options, follow the steps below . 1 ) Access the Picture through the Setup. 2 ) Select Pro Adjust from the Picture menu. 3 ) Select Intelligent Mode from the submenu. 4 ) Select DRE Picture, Black Level, ACL, Enhancer Mode or Gamma. .... This is normal and is gradual so changes to exit the menu. Note: Activating the Game Control Pref setting under the Option menu disables the PureCinema setting. 4.3.3 Select an Intelligent Mode Option Use this process is not a malfunction. 4.3.4 Select the Picture Detail Options...
... On activates ACL 64 En To select the Picture Detail options, follow the steps below . 1 ) Access the Picture through the Setup. 2 ) Select Pro Adjust from the Picture menu. 3 ) Select Intelligent Mode from the submenu. 4 ) Select DRE Picture, Black Level, ACL, Enhancer Mode or Gamma. .... This is normal and is gradual so changes to exit the menu. Note: Activating the Game Control Pref setting under the Option menu disables the PureCinema setting. 4.3.3 Select an Intelligent Mode Option Use this process is not a malfunction. 4.3.4 Select the Picture Detail Options...
Owner's Manual
Page 65
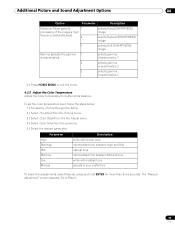
... Mid and Low white with reddish tone adjusts to Step 6. 65 En To set the color temperature level, follow the steps below. 1 ) Access the Picture through the Setup. 2 ) Select Pro Adjust from the Picture menu. 3 ) Select Color Detail from the Pro Adjust menu. 4 ) Select Color Temp from the submenu. 5 ) Select the desired parameter...
... Mid and Low white with reddish tone adjusts to Step 6. 65 En To set the color temperature level, follow the steps below. 1 ) Access the Picture through the Setup. 2 ) Select Pro Adjust from the Picture menu. 3 ) Select Color Detail from the Pro Adjust menu. 4 ) Select Color Temp from the submenu. 5 ) Select the desired parameter...
Owner's Manual
Page 66
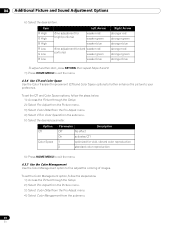
To set the CTI and Color Space options, follow the steps below . 1 ) Access the Picture through the Setup. 2 ) Select Pro Adjust from the Picture menu. 3 ) Select Color Detail from the Pro Adjust menu. 4 ) Select Color Management from the submenu. 5 ) Select the desired parameter. Option...Management Use the Color Management option to your preference. To set the Color Management option, follow the steps below . 1 ) Access the Picture through the Setup. 2 ) Select Pro Adjust from the Picture menu. 3 ) Select Color Detail from the Pro Adjust menu. 4 ) Select CTI or Color Space from...
To set the CTI and Color Space options, follow the steps below . 1 ) Access the Picture through the Setup. 2 ) Select Pro Adjust from the Picture menu. 3 ) Select Color Detail from the Pro Adjust menu. 4 ) Select Color Management from the submenu. 5 ) Select the desired parameter. Option...Management Use the Color Management option to your preference. To set the Color Management option, follow the steps below . 1 ) Access the Picture through the Setup. 2 ) Select Pro Adjust from the Picture menu. 3 ) Select Color Detail from the Pro Adjust menu. 4 ) Select CTI or Color Space from...

Owner's Manual
Page 68
...or 1080p. To select the 3DYC and I-P Mode options, follow the steps below. 1 ) Access the Picture through the Setup. 2 ) Select Pro Adjust from the Picture menu. 3 ) Select Others from the Pro Adjust menu. 4 ) Select 3DYC or I-P Mode. 5 ) Select the desired parameter. 3DYC Option I -P Mode provides optimum conversion from interlace ... signals while the I -P Mode Parameter Description Off No effect High enhances 3DYC Mid standard 3DYC Low moderate 3DYC 1 optimizes video images 2 standard setting 3 optimizes still images 6 ) Press HOME MENU to progressive signals. En
...or 1080p. To select the 3DYC and I-P Mode options, follow the steps below. 1 ) Access the Picture through the Setup. 2 ) Select Pro Adjust from the Picture menu. 3 ) Select Others from the Pro Adjust menu. 4 ) Select 3DYC or I-P Mode. 5 ) Select the desired parameter. 3DYC Option I -P Mode provides optimum conversion from interlace ... signals while the I -P Mode Parameter Description Off No effect High enhances 3DYC Mid standard 3DYC Low moderate 3DYC 1 optimizes video images 2 standard setting 3 optimizes still images 6 ) Press HOME MENU to progressive signals. En
Owner's Manual
Page 124
...you select Video for Signal Type in . • Set Screen Protection to On. • Select PC for the front bezel. Why won't my Pioneer flat panel TV turn it with a clean, dry cloth such as ... the directions below. 1 ) Access the System Setup through the PRO-151FD/111FD's HDMI input? Avoid a wet or damp cloth as that your flat panel TV, unplug the power cord from the outlet. Do not use chemicals...moisture seep into the panel. What can check the version of plasma technology. Continuing to solve the problem, contact your flat panel TV. Rubbing hard on the back of time can scratch the ...
...you select Video for Signal Type in . • Set Screen Protection to On. • Select PC for the front bezel. Why won't my Pioneer flat panel TV turn it with a clean, dry cloth such as ... the directions below. 1 ) Access the System Setup through the PRO-151FD/111FD's HDMI input? Avoid a wet or damp cloth as that your flat panel TV, unplug the power cord from the outlet. Do not use chemicals...moisture seep into the panel. What can check the version of plasma technology. Continuing to solve the problem, contact your flat panel TV. Rubbing hard on the back of time can scratch the ...
Owner's Manual
Page 135
...the user's right to +104 ºF); To prevent electromagnetic interference with electric appliances such as radios and televisions, use of a set-top box. To avoid fire hazard, the power cord should also be determined by turning the equipment off all power. A ...These limits are used in accordance with part 15 of the FCC Rules. Product Name: Flat Panel TV Model Number: PRO-151FD/PRO-111FD Product Category: Class B Personal Computers & Peripherals Responsible Party Name: PIONEER ELECTRONICS SERVICE, INC. Address: 1925 E. DOMINGUEZ ST., LONG BEACH, CA 90801-1760, U.S.A. This ...
...the user's right to +104 ºF); To prevent electromagnetic interference with electric appliances such as radios and televisions, use of a set-top box. To avoid fire hazard, the power cord should also be determined by turning the equipment off all power. A ...These limits are used in accordance with part 15 of the FCC Rules. Product Name: Flat Panel TV Model Number: PRO-151FD/PRO-111FD Product Category: Class B Personal Computers & Peripherals Responsible Party Name: PIONEER ELECTRONICS SERVICE, INC. Address: 1925 E. DOMINGUEZ ST., LONG BEACH, CA 90801-1760, U.S.A. This ...


