User manual
Page 2
... batteries and old equipment. NOTE: PICTURES SHOWN MAYBE DIFFERENT BETWEEN COUNTRIES. CAUTION (WARNING LOCATION: ON THE BACKPLATE OF THE SET) NEVER MAKE OR CHANGE CONNECTIONS WITH THE POWER SWITCHED ON. Should you have difficulty playing any such CD-Audio discs, kindly refer them to service this DVD Player is fully compatible with such new discs. Please observe the local regulations regarding the disposal of new CD-Audio copy...
... batteries and old equipment. NOTE: PICTURES SHOWN MAYBE DIFFERENT BETWEEN COUNTRIES. CAUTION (WARNING LOCATION: ON THE BACKPLATE OF THE SET) NEVER MAKE OR CHANGE CONNECTIONS WITH THE POWER SWITCHED ON. Should you have difficulty playing any such CD-Audio discs, kindly refer them to service this DVD Player is fully compatible with such new discs. Please observe the local regulations regarding the disposal of new CD-Audio copy...
User manual
Page 6
... discs 8 Setup 8 Connections Connecting TV 9-10 Using Composite Video jacks (CVBS) ........ 9 Using Component Video jacks (Pr Pb Y) ... 9 Using an accessory RF modulator 10 Connecting the power cord 10 Optional : Connecting to a Stereo System 11 Stereo system has Dolby Pro Logic or Right / Left Audio In jack 11 Optional: Connecting Digital AV Receiver 11 Receiver has a PCM, Dolby Digital, or MPEG2 decoder 11 Functional Overview Front and Rear Panels 12 Remote Control 13 Getting Started Step 1: Inserting batteries into the Remote Control...
... discs 8 Setup 8 Connections Connecting TV 9-10 Using Composite Video jacks (CVBS) ........ 9 Using Component Video jacks (Pr Pb Y) ... 9 Using an accessory RF modulator 10 Connecting the power cord 10 Optional : Connecting to a Stereo System 11 Stereo system has Dolby Pro Logic or Right / Left Audio In jack 11 Optional: Connecting Digital AV Receiver 11 Receiver has a PCM, Dolby Digital, or MPEG2 decoder 11 Functional Overview Front and Rear Panels 12 Remote Control 13 Getting Started Step 1: Inserting batteries into the Remote Control...
User manual
Page 7
... PM turning on /off 31 Picture Setting 32 Preference Page 33-35 Audio, Subtitle, Disc Menu 33 Restricting playback by Parental Control 33-34 PBC 34 MP3/JPEG Menu - turning on /off 30 Video Setup Menu 30-32 TV Type 30 Setting the TV Display 31 Progressive - English DVD Setup Menu Options General Setup menu 26-27 Locking/Unlocking the disc for viewing ... 26 Programming disc tracks 26-27 OSD Language 27 Sleep 27 Audio Setup Menu 28-30 Analogue output 28 Digital Audio Setup 28-29 Sound Mode 29 Night Mode -
... PM turning on /off 31 Picture Setting 32 Preference Page 33-35 Audio, Subtitle, Disc Menu 33 Restricting playback by Parental Control 33-34 PBC 34 MP3/JPEG Menu - turning on /off 30 Video Setup Menu 30-32 TV Type 30 Setting the TV Display 31 Progressive - English DVD Setup Menu Options General Setup menu 26-27 Locking/Unlocking the disc for viewing ... 26 Programming disc tracks 26-27 OSD Language 27 Sleep 27 Audio Setup Menu 28-30 Analogue output 28 Digital Audio Setup 28-29 Sound Mode 29 Night Mode -
User manual
Page 9
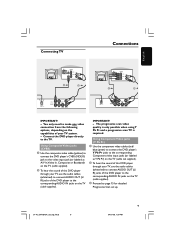
... a progressive scan TV is required. Using Composite Video jacks (CVBS) 1 Use the composite video cable (yellow) to connect the DVD player's CVBS (VIDEO) jack to the video input jack (or labeled as Y Pb Pr) on the TV (cable not supplied). 2 To hear the sound of this DVD player through your TV system. - Using Component Video jacks (Y Pb Pr) 1 Use the component video cables (red/ blue/green) to connect the DVD player's Y Pb Pr jacks to the corresponding Component video input jacks...
... a progressive scan TV is required. Using Composite Video jacks (CVBS) 1 Use the composite video cable (yellow) to connect the DVD player's CVBS (VIDEO) jack to the video input jack (or labeled as Y Pb Pr) on the TV (cable not supplied). 2 To hear the sound of this DVD player through your TV system. - Using Component Video jacks (Y Pb Pr) 1 Use the component video cables (red/ blue/green) to connect the DVD player's Y Pb Pr jacks to the corresponding Component video input jacks...
User manual
Page 10
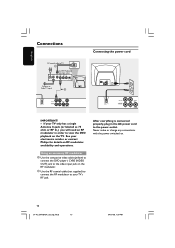
... change any connections with the power switched on RF modulator availability and operations. See your TV's RF jack. After everything is connected properly, plug in order to view the DVD playback on the RF modulator. 2 Use the RF coaxial cable (not supplied) to connect the RF modulator to the video input jack on the TV. Using an accessory RF modulator 1 Use the composite video cable (yellow) to connect the DVD player...
... change any connections with the power switched on RF modulator availability and operations. See your TV's RF jack. After everything is connected properly, plug in order to view the DVD playback on the RF modulator. 2 Use the RF coaxial cable (not supplied) to connect the RF modulator to the video input jack on the TV. Using an accessory RF modulator 1 Use the composite video cable (yellow) to connect the DVD player...
User manual
Page 14
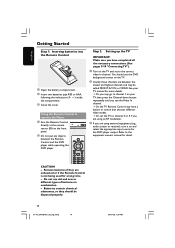
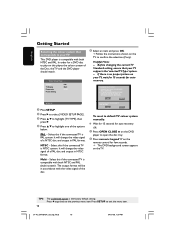
... video modes. ➜ Or, set to the correct video-in combination. - English Getting Started Step 1: Inserting batteries into the Remote Control 1 Open the battery compartment. 2 Insert two batteries type R03 or AAA, following the indications (+-) inside the compartment. 3 Close the cover. audio system or receiver), turn it on the TV and set the TV to the equipment owner's manual for the DVD player output. Refer to channel 3 or 4 if you are using external equipment, (e.g.. Remove batteries...
... video modes. ➜ Or, set to the correct video-in combination. - English Getting Started Step 1: Inserting batteries into the Remote Control 1 Open the battery compartment. 2 Insert two batteries type R03 or AAA, following the indications (+-) inside the compartment. 3 Close the cover. audio system or receiver), turn it on the TV and set the TV to the equipment owner's manual for the DVD player output. Refer to channel 3 or 4 if you are using external equipment, (e.g.. Remove batteries...
User manual
Page 15
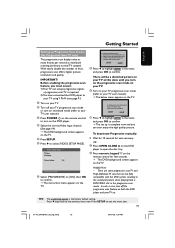
... fully compatible with this state until you must ensure: 1) Your TV can start enjoy the high quality picture. IMPORTANT! IF PICTURE IS GOOD, PRESS OK BUTTON ON REMOTE. English Getting Started Setting up is the factory default setting. CONFIRM AGAIN TO USE PROGRESSIVE SCAN. With nearly double the number of lines, progressive scan offers higher picture resolution and quality. Before enabling the progressive scan feature, you turn on the DVD player. 4 Select the correct Video Input channel...
... fully compatible with this state until you must ensure: 1) Your TV can start enjoy the high quality picture. IMPORTANT! IF PICTURE IS GOOD, PRESS OK BUTTON ON REMOTE. English Getting Started Setting up is the factory default setting. CONFIRM AGAIN TO USE PROGRESSIVE SCAN. With nearly double the number of lines, progressive scan offers higher picture resolution and quality. Before enabling the progressive scan feature, you turn on the DVD player. 4 Select the correct Video Input channel...
User manual
Page 16
... PAL (multi-system). OK CANCEL To reset to the previous menu item. Helpful Hints: - ENSURE THAT YOUR TV SUPPORTS NTSC STANDARD. 2. The output format will be in accordance with both NTSC and PAL. It will change the video signal of the disc. OR 1 Press OPEN CLOSE 0 on the DVD player to open the disc tray. 2 Press numeric keypad '3' on the remote control for auto recovery. Press 1 to go back to default TV colour system manually...
... PAL (multi-system). OK CANCEL To reset to the previous menu item. Helpful Hints: - ENSURE THAT YOUR TV SUPPORTS NTSC STANDARD. 2. The output format will be in accordance with both NTSC and PAL. It will change the video signal of the disc. OR 1 Press OPEN CLOSE 0 on the DVD player to open the disc tray. 2 Press numeric keypad '3' on the remote control for auto recovery. Press 1 to go back to default TV colour system manually...

User manual
Page 18
...other than disc on CD-R(W). - Digital Video Discs (DVDs) - Digital Video Discs + Recordable[Rewritable] (DVD+R[W]) - WMA files on the disc tray. Always refer to support the Region Management System. Improperly formatted disc will play: - Maximum 30 characters display. - Supported Bit-rates : 32~192 kbps SUPER VIDEO Region Codes This DVD player is not available on the DVD or VIDEO CD, some operations may not be unable to play on this DVD Player. Compact Discs (CDs) - Helpful Hints: - Region U.S.A. Playable Discs Your DVD Player will not play CD...
...other than disc on CD-R(W). - Digital Video Discs (DVDs) - Digital Video Discs + Recordable[Rewritable] (DVD+R[W]) - WMA files on the disc tray. Always refer to support the Region Management System. Improperly formatted disc will play: - Maximum 30 characters display. - Supported Bit-rates : 32~192 kbps SUPER VIDEO Region Codes This DVD player is not available on the DVD or VIDEO CD, some operations may not be unable to play on this DVD Player. Compact Discs (CDs) - Helpful Hints: - Region U.S.A. Playable Discs Your DVD Player will not play CD...
User manual
Page 19
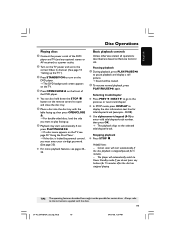
... 33). Pausing playback 1 During playback, press PLAY/PAUSE 2; G In STOP mode, press DISPLAY to the selected title/chapter/track. Helpful hints: - If not press PLAY/PAUSE 2;. ➜ If a disc menu appears on the front of the DVD player. Screen saver will automatically switch to play facing up. 6 Playback may start automatically if the disc playback is locked by parental control, you do not press any optional stereo or AV receiver) to a power outlet. 2 Turn on Remote Control use.
... 33). Pausing playback 1 During playback, press PLAY/PAUSE 2; G In STOP mode, press DISPLAY to the selected title/chapter/track. Helpful hints: - If not press PLAY/PAUSE 2;. ➜ If a disc menu appears on the front of the DVD player. Screen saver will automatically switch to play facing up. 6 Playback may start automatically if the disc playback is locked by parental control, you do not press any optional stereo or AV receiver) to a power outlet. 2 Turn on Remote Control use.

User manual
Page 24
... - G Use 3 4 1 2 to pause/resume playback. Helpful Hints: - Preview Function (JPEG) This function shows the content of the recording. - repeatedly to view the zoomed picture. General Operation 1 Load a disc. ➜ The disc reading time may not be possible to play certain MP3/WMA/JPEG disc due to the configuration and characteristics of the disc or condition of the current folder or the whole disc. 1 Press DISPLAY during playback. ➜ 12 thumbnail pictures will...
... - G Use 3 4 1 2 to pause/resume playback. Helpful Hints: - Preview Function (JPEG) This function shows the content of the recording. - repeatedly to view the zoomed picture. General Operation 1 Load a disc. ➜ The disc reading time may not be possible to play certain MP3/WMA/JPEG disc due to the configuration and characteristics of the disc or condition of the current folder or the whole disc. 1 Press DISPLAY during playback. ➜ 12 thumbnail pictures will...
User manual
Page 25
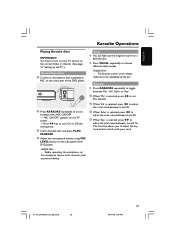
... with your TV and set to turn on the side panel of the disc. Helpful Hint: - Helpful Hint: - Before connecting the microphone, set Mic On/Off. 2 When 'Vol' is selected, press 1 2 to adjust the vocal value between 0 and 20. 3 When 'Echo' is selected, press 1 2 to turn On or Off the microphone. 3 Load a karaoke disc and press PLAY/ PAUSE 2; . 4 Adjust the microphone volume using MIC LEVEL button on your vocal...
... with your TV and set to turn on the side panel of the disc. Helpful Hint: - Helpful Hint: - Before connecting the microphone, set Mic On/Off. 2 When 'Vol' is selected, press 1 2 to adjust the vocal value between 0 and 20. 3 When 'Echo' is selected, press 1 2 to turn On or Off the microphone. 3 Load a karaoke disc and press PLAY/ PAUSE 2; . 4 Adjust the microphone volume using MIC LEVEL button on your vocal...
User manual
Page 26
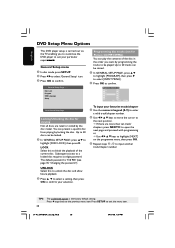
... programming or, ➜ Use 1 2 3 4 keys to highlight {NEXT} on the programme menu, then press OK. 5 Repeat steps 3~4 to the next position. ➜ If there are rated or coded by the disc maker. The default password is the factory default setting. General Setup Page - - Up to 20 tracks can play the contents of the current disc. Press 1 to go back to confirm. - - LOCK Select this to unlock the disc...
... programming or, ➜ Use 1 2 3 4 keys to highlight {NEXT} on the programme menu, then press OK. 5 Repeat steps 3~4 to the next position. ➜ If there are rated or coded by the disc maker. The default password is the factory default setting. General Setup Page - - Up to 20 tracks can play the contents of the current disc. Press 1 to go back to confirm. - - LOCK Select this to unlock the disc...
User manual
Page 28
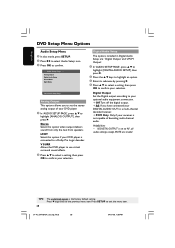
... {ANALOG OUTPUT}, then press 2. English DVD Setup Menu Options Audio Setup Menu 1 In disc mode, press SETUP. 2 Press 1 2 to select 'Audio Setup' icon. 3 Press OK to a multi-channel decoder/receiver. ➜ PCM Only: Only if your receiver is not capable of your DVD player. 1 In 'AUDIO SETUP PAGE', press 3 4 to confirm your DIGITAL AUDIO OUT to confirm. - - Stereo Select this option if your DVD player is the factory default setting. Digital Output Set the Digital output according to your optional audio equipment connection. ➜ Off:Turn off the digital output. ➜...
... {ANALOG OUTPUT}, then press 2. English DVD Setup Menu Options Audio Setup Menu 1 In disc mode, press SETUP. 2 Press 1 2 to select 'Audio Setup' icon. 3 Press OK to a multi-channel decoder/receiver. ➜ PCM Only: Only if your receiver is not capable of your DVD player. 1 In 'AUDIO SETUP PAGE', press 3 4 to confirm your DIGITAL AUDIO OUT to confirm. - - Stereo Select this option if your DVD player is the factory default setting. Digital Output Set the Digital output according to your optional audio equipment connection. ➜ Off:Turn off the digital output. ➜...
User manual
Page 29
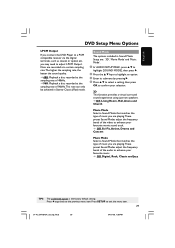
... Church Movie Mode Select a Sound Mode that matches the type of music you are playing.These preset Sound Modes adjust the frequency bands of the video to enhance your favourite music. ➜ Off, Digital, Rock, Classic and Jazz TIPS: The underlined option is the factory default setting. Sound Mode The options included in Stereo-Classic (Flat) mode. English DVD Setup Menu Options LPCM Output If you connect the DVD Player to a PCM compatible receiver via the digital terminals, such...
... Church Movie Mode Select a Sound Mode that matches the type of music you are playing.These preset Sound Modes adjust the frequency bands of the video to enhance your favourite music. ➜ Off, Digital, Rock, Classic and Jazz TIPS: The underlined option is the factory default setting. Sound Mode The options included in Stereo-Classic (Flat) mode. English DVD Setup Menu Options LPCM Output If you connect the DVD Player to a PCM compatible receiver via the digital terminals, such...
User manual
Page 31
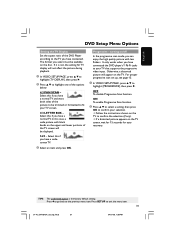
... connected. OFF To disable Progressive Scan function. English DVD Setup Menu Options Setting the TV Display Set the aspect ratio of the DVD Player according to the TV you have a widescreen TV. 3 Select an item and press OK. If it is the factory default setting. Select this if you have connected the DVD player's Y Pb Pr jacks to your selection. ➜ Follow the instructions shown on the TV to confirm the selection (if any). ➜ If a distorted picture...
... connected. OFF To disable Progressive Scan function. English DVD Setup Menu Options Setting the TV Display Set the aspect ratio of the DVD Player according to the TV you have a widescreen TV. 3 Select an item and press OK. If it is the factory default setting. Select this if you have connected the DVD player's Y Pb Pr jacks to your selection. ➜ Follow the instructions shown on the TV to confirm the selection (if any). ➜ If a distorted picture...
User manual
Page 32
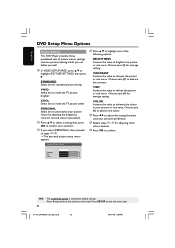
... {PICTURE SETTING}, then press 2. Personal Picture Setup Brightness 0 Contrast 0 Tint 0 Color 0 TIPS: The underlined option is the factory default setting. STANDARD Select this to make the TV picture softer. English DVD Setup Menu Options Picture Setting This DVD Player provides three predefined sets of the following options. BRIGHTNESS Increase the value to enhance the colour in your personal preference. 6 Repeat steps 4~5 for average setting. Choose zero (0) for standard picture setting. COOL Select this for average setting. COLOR...
... {PICTURE SETTING}, then press 2. Personal Picture Setup Brightness 0 Contrast 0 Tint 0 Color 0 TIPS: The underlined option is the factory default setting. STANDARD Select this to make the TV picture softer. English DVD Setup Menu Options Picture Setting This DVD Player provides three predefined sets of the following options. BRIGHTNESS Increase the value to enhance the colour in your personal preference. 6 Repeat steps 4~5 for average setting. Choose zero (0) for standard picture setting. COOL Select this for average setting. COLOR...
User manual
Page 36
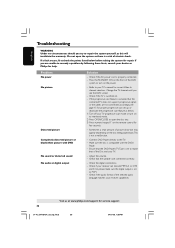
... audio format of the Disc and your TV's manual for help. Change the TV channel until you see page 15 for few seconds. - Adjust the volume. - Check if the TV is properly connected. - Visit us at digital output Solution - Check if the AC power cord is switched on the remote control for proper progressive scan set to your TV. - Do not open the disc tray. 3) Press numeric keypad '1' on . - Ensure that the DVD Player's TV Type...
... audio format of the Disc and your TV's manual for help. Change the TV channel until you see page 15 for few seconds. - Adjust the volume. - Check if the TV is properly connected. - Visit us at digital output Solution - Check if the AC power cord is switched on the remote control for proper progressive scan set to your TV. - Do not open the disc tray. 3) Press numeric keypad '1' on . - Ensure that the DVD Player's TV Type...
User manual
Page 37
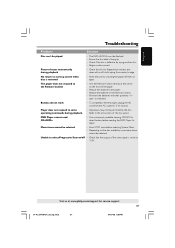
Region code incorrect. Reduce the distance to 'YUV'. Replace the batteries in the Remote Control. - DVD Player cannot read CDs/DVDs - Check that the output of the video signal is switch to the player. - The DVD+R/CD-R must be permitted by the disc. Picture freezes momentarily during playback. Reset the unit by trying another disc. - Aim the Remote Control directly at www.philips.com/support for fingerprints/scratches and clean with their polarities (+/- Re-insert the batteries with...
Region code incorrect. Reduce the distance to 'YUV'. Replace the batteries in the Remote Control. - DVD Player cannot read CDs/DVDs - Check that the output of the video signal is switch to the player. - The DVD+R/CD-R must be permitted by the disc. Picture freezes momentarily during playback. Reset the unit by trying another disc. - Aim the Remote Control directly at www.philips.com/support for fingerprints/scratches and clean with their polarities (+/- Re-insert the batteries with...
User manual
Page 39
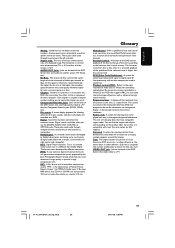
.... Parental Control: A function of the DVD to limit playback of the DVD System that send high-quality video to a TV that send audio to disc; is available when you use more channels. measured in each sound track constitute one region (or ALL regions). Progressive Scan: It displays all the horizontal lines of a picture at which features small decrease in image quality in the region designated beforehand. Region code: A system for controlling reproduction. Surround...
.... Parental Control: A function of the DVD to limit playback of the DVD System that send high-quality video to a TV that send audio to disc; is available when you use more channels. measured in each sound track constitute one region (or ALL regions). Progressive Scan: It displays all the horizontal lines of a picture at which features small decrease in image quality in the region designated beforehand. Region code: A system for controlling reproduction. Surround...


