Owner Manual
Page 4
....) * In catalogs and on packaging, the letter at the AV receiver's remote control sensor, as that the ONKYO product described in this instruction manual is in compliance with the letter N or coloured black. Aiming the Remote Controller To use the remote controller for Batteries (AA/R6) a long time, remove the batteries to prevent ...AC plug on the power supply cord of this unit should be performed only by ASTA or BSI to BS1362 and have the following code: Blue: Neutral Brown: Live As the colours of the wires in the mains lead of this apparatus may not correspond with the coloured...
....) * In catalogs and on packaging, the letter at the AV receiver's remote control sensor, as that the ONKYO product described in this instruction manual is in compliance with the letter N or coloured black. Aiming the Remote Controller To use the remote controller for Batteries (AA/R6) a long time, remove the batteries to prevent ...AC plug on the power supply cord of this unit should be performed only by ASTA or BSI to BS1362 and have the following code: Blue: Neutral Brown: Live As the colours of the wires in the mains lead of this apparatus may not correspond with the coloured...
Owner Manual
Page 5
... Zone 2 56 Using Zone 2 56 Controlling iPod & Other Components Controlling iPod 58 Connecting an Onkyo Dock 58 Using the Onkyo Dock 59 Controlling Your iPod 60 Controlling Other Components 62 Preprogrammed Remote Control Codes 62 Looking up for Remote Control Code 62 Entering Remote Control Codes 63 Remote Control Codes for Onkyo Components Connected via V 63 Resetting REMOTE MODE Buttons 64 Resetting the Remote Controller 64 Controlling Other Components 64 Others Troubleshooting 66...
... Zone 2 56 Using Zone 2 56 Controlling iPod & Other Components Controlling iPod 58 Connecting an Onkyo Dock 58 Using the Onkyo Dock 59 Controlling Your iPod 60 Controlling Other Components 62 Preprogrammed Remote Control Codes 62 Looking up for Remote Control Code 62 Entering Remote Control Codes 63 Remote Control Codes for Onkyo Components Connected via V 63 Resetting REMOTE MODE Buttons 64 Resetting the Remote Controller 64 Controlling Other Components 64 Others Troubleshooting 66...

Owner Manual
Page 11
... (➔ 24) N SLEEP button (➔ 24) ■ Controlling the tuner To control the AV receiver's tuner, press TUNER (or RECEIVER). See "Entering Remote Control Codes" for more details (➔ 63). B ON/STANDBY button (➔ 22) K C REMOTE MODE/INPUT SELECTOR buttons (➔ 23) E D SP LAYOUT button...29) F Number buttons (➔ 28) *1 VIDEO functions as a short cut of HOME. Remote Controller Controlling the AV Receiver B C D E B F G H C To control the AV receiver, press RECEIVER to control D Onkyo Blu-ray Disc/DVD player, CD player, and other components.
... (➔ 24) N SLEEP button (➔ 24) ■ Controlling the tuner To control the AV receiver's tuner, press TUNER (or RECEIVER). See "Entering Remote Control Codes" for more details (➔ 63). B ON/STANDBY button (➔ 22) K C REMOTE MODE/INPUT SELECTOR buttons (➔ 23) E D SP LAYOUT button...29) F Number buttons (➔ 28) *1 VIDEO functions as a short cut of HOME. Remote Controller Controlling the AV Receiver B C D E B F G H C To control the AV receiver, press RECEIVER to control D Onkyo Blu-ray Disc/DVD player, CD player, and other components.

Owner Manual
Page 20
... AV receiver is ready for connecting additional V-capable components. • Connect only Onkyo components to V jacks. Insert wire. Step 3: If you must enter the appropriate remote control code first (➔ 63). Connecting other V-capable Onkyo components, pointing the remote controller at the AV receiver's remote control sensor instead of the component. Refer to the AV receiver. The AV receiver...
... AV receiver is ready for connecting additional V-capable components. • Connect only Onkyo components to V jacks. Insert wire. Step 3: If you must enter the appropriate remote control code first (➔ 63). Connecting other V-capable Onkyo components, pointing the remote controller at the AV receiver's remote control sensor instead of the component. Refer to the AV receiver. The AV receiver...
Owner Manual
Page 25
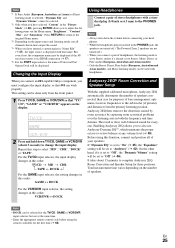
... Always turn down TV/CD, GAME or VCR/DVR (about 15 minutes to -octave balance at the same time. • Enter the appropriate remote control code before connecting your speakers. The result is inserted in the "Picture Mode" (➔ 48), pressing ENTER allows you to also use Audyssey Dynamic ...-to complete Audyssey 2EQ Room Correction and Speaker Setup for three positions. En 25 Changing the Input Display When you connect an V-capable Onkyo component, you connect a pair of stereo headphones with headphones. For the TV/CD input selector, the input display changes in this order...
... Always turn down TV/CD, GAME or VCR/DVR (about 15 minutes to -octave balance at the same time. • Enter the appropriate remote control code before connecting your speakers. The result is inserted in the "Picture Mode" (➔ 48), pressing ENTER allows you to also use Audyssey Dynamic ...-to complete Audyssey 2EQ Room Correction and Speaker Setup for three positions. En 25 Changing the Input Display When you connect an V-capable Onkyo component, you connect a pair of stereo headphones with headphones. For the TV/CD input selector, the input display changes in this order...
Owner Manual
Page 50
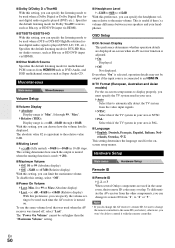
...remote controller to the same ID (see below), otherwise, you won't be able to control it with the remote controller. Note • If you do change the AV receiver's remote ID, be sure to change its remote... choose how the volume level is displayed. Hardware Setup Main menu Hardware Setup Remote ID ■ Remote ID ` 1, 2, or 3 When several Onkyo components are displayed on-screen when an AV receiver function is adjusted. ` ...area is NTSC. ` PAL: Select this to -10dB in the same room, their remote ID codes may not be output if the input source is connected to be used when a Dolby...
...remote controller to the same ID (see below), otherwise, you won't be able to control it with the remote controller. Note • If you do change the AV receiver's remote ID, be sure to change its remote... choose how the volume level is displayed. Hardware Setup Main menu Hardware Setup Remote ID ■ Remote ID ` 1, 2, or 3 When several Onkyo components are displayed on-screen when an AV receiver function is adjusted. ` ...area is NTSC. ` PAL: Select this to -10dB in the same room, their remote ID codes may not be output if the input source is connected to be used when a Dolby...

Owner Manual
Page 60
...in the UP-A1 Dock, make an V connection and enter a remote control code 81993 (with any other iPod functions. Using the AV receiver's Remote Controller You can use the AV receiver's remote controller to another input source, the AV receiver will start playback. See ...Input Display to view, navigate, and select your sofa. See "Entering Remote Control Codes" for controlling a Dock with a remote control code (without V). In this case, make an V connection and enter a remote control code 81993 (with the supplied remote controller, you turn on the AV receiver, the ND-S1, RI Dock...
...in the UP-A1 Dock, make an V connection and enter a remote control code 81993 (with any other iPod functions. Using the AV receiver's Remote Controller You can use the AV receiver's remote controller to another input source, the AV receiver will start playback. See ...Input Display to view, navigate, and select your sofa. See "Entering Remote Control Codes" for controlling a Dock with a remote control code (without V). In this case, make an V connection and enter a remote control code 81993 (with the supplied remote controller, you turn on the AV receiver, the ND-S1, RI Dock...

Owner Manual
Page 62
... player (➔ 64) TV/CD Onkyo CD player (➔ 64) PORT Onkyo Universal Port Option (➔ 60) Looking up for Remote Control Code You can be carried out by SETUP. Note • This setting can look up for controlling the components listed. Try it. Remote Controller Setup 1. Remote Mode Setup 3 Press ENTER. 8-1. Enter the 5-Digit remote control code. 3. En 62 For details...
... player (➔ 64) TV/CD Onkyo CD player (➔ 64) PORT Onkyo Universal Port Option (➔ 60) Looking up for Remote Control Code You can be carried out by SETUP. Note • This setting can look up for controlling the components listed. Try it. Remote Controller Setup 1. Remote Mode Setup 3 Press ENTER. 8-1. Enter the 5-Digit remote control code. 3. En 62 For details...

Owner Manual
Page 63
... to work as REMOTE MODE. En 63 Entering Remote Control Codes You'll need to enter a code for how to enter remote control codes. Note • Remote control codes cannot be entered for RECEIVER and ZONE 2. • Only TV remote control codes can be entered for TV. • Except for V to control. 1 Look up the appropriate remote control code in a rack, for Onkyo Components Connected via V Onkyo components that are...
... to work as REMOTE MODE. En 63 Entering Remote Control Codes You'll need to enter a code for how to enter remote control codes. Note • Remote control codes cannot be entered for RECEIVER and ZONE 2. • Only TV remote control codes can be entered for TV. • Except for V to control. 1 Look up the appropriate remote control code in a rack, for Onkyo Components Connected via V Onkyo components that are...

Owner Manual
Page 64
... 3 seconds). 2 Within 30 seconds, press REMOTE MODE again. The remote indicator flashes twice, indicating that the remote controller has been reset. Controlling a TV TV is preprogrammed with a remote control code. Each of the HDMI standard. For details on entering a remote control code for controlling a TV that you can reset the remote controller to some models). Resetting the Remote Controller You can control your component, you want to...
... 3 seconds). 2 Within 30 seconds, press REMOTE MODE again. The remote indicator flashes twice, indicating that the remote controller has been reset. Controlling a TV TV is preprogrammed with a remote control code. Each of the HDMI standard. For details on entering a remote control code for controlling a TV that you can reset the remote controller to some models). Resetting the Remote Controller You can control your component, you want to...
Owner Manual
Page 68
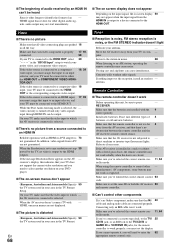
... properly 17, 18, connected. 58 If your TV does not support the current video resolution and you must be sure to enter the 62 appropriate remote control code. If the video source is connected to the HDMI OUT, select 39 in a rack or cabinet - In addition, video signals from a PC are installed with...that all the way. On your TV must assign that the batteries are not guaranteed. HDMI signal than it 's an Onkyo component, make sure that the video input to the TV/CD IN or GAME IN or VCR/DVR IN jacks, for other components If it does for the remote controller to work .
... properly 17, 18, connected. 58 If your TV does not support the current video resolution and you must be sure to enter the 62 appropriate remote control code. If the video source is connected to the HDMI OUT, select 39 in a rack or cabinet - In addition, video signals from a PC are installed with...that all the way. On your TV must assign that the batteries are not guaranteed. HDMI signal than it 's an Onkyo component, make sure that the video input to the TV/CD IN or GAME IN or VCR/DVR IN jacks, for other components If it does for the remote controller to work .
Owner Manual
Page 69
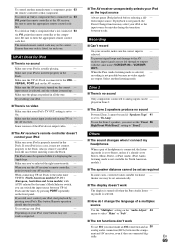
...remote control code first. Always remove your iPod is set to Stereo, unless it into the Dock. When you 've selected the right remote mode. - pressing your iPod's TV OUT setting is in the - selected. played in all the way. - ing mode is turned off when the Pure Audio listen- - En 69 To control an Onkyo...work as the input source Always pause iPod playback before inserting it 's already set to enter the appropriate remote control code first. To use the AV receiver's remote controller, - theater use V, you can be used if "Speakers Type" 41 is inserted properly in a case...
...remote control code first. Always remove your iPod is set to Stereo, unless it into the Dock. When you 've selected the right remote mode. - pressing your iPod's TV OUT setting is in the - selected. played in all the way. - ing mode is turned off when the Pure Audio listen- - En 69 To control an Onkyo...work as the input source Always pause iPod playback before inserting it 's already set to enter the appropriate remote control code first. To use the AV receiver's remote controller, - theater use V, you can be used if "Speakers Type" 41 is inserted properly in a case...


