

Reference Manual
Page 3
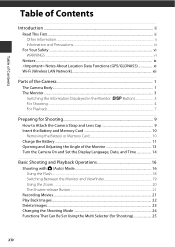
Introduction ii Table of Contents xiv Parts of the Camera 1 Preparing for Shooting 9 Basic Shooting and Playback Operations 16 Shooting Features 26 Functions That Can Be Set with the d (Menu) Button 49 Using Location Data Functions 59 Using the Wi-Fi (Wireless LAN) Function 60 Connecting the Camera to a TV, Printer, or Computer 61 Reference Section E1 Technical Notes and Index F1 i
Introduction ii Table of Contents xiv Parts of the Camera 1 Preparing for Shooting 9 Basic Shooting and Playback Operations 16 Shooting Features 26 Functions That Can Be Set with the d (Menu) Button 49 Using Location Data Functions 59 Using the Wi-Fi (Wireless LAN) Function 60 Connecting the Camera to a TV, Printer, or Computer 61 Reference Section E1 Technical Notes and Index F1 i
Reference Manual
Page 4
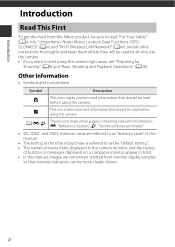
...." • SD, SDHC, and SDXC memory cards are referred to as "memory cards" in this manual. • The setting at the time of purchase is referred to as the "default setting." • The names of menu items displayed in the camera monitor, and the names of buttons or messages displayed on... a computer monitor appear in bold. • In this manual, images are sometimes omitted from this Nikon product, be sure to start using the...
...." • SD, SDHC, and SDXC memory cards are referred to as "memory cards" in this manual. • The setting at the time of purchase is referred to as the "default setting." • The names of menu items displayed in the camera monitor, and the names of buttons or messages displayed on... a computer monitor appear in bold. • In this manual, images are sometimes omitted from this Nikon product, be sure to start using the...
Reference Manual
Page 7
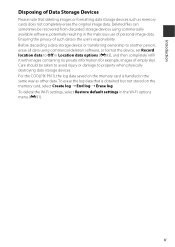
Care should be recovered from discarded storage devices using commercial deletion software, or format the device, set Record location data to Off in the same way as memory cards does not completely erase the original image data. To erase the log data ... handled in Location data options (E93), and then completely refill it with images containing no private information (for example, images of empty sky). For the COOLPIX P610, the log data saved on the memory card, select Create log ➝ End log ➝ Erase log. Before discarding a data storage device or transferring ownership...
Care should be recovered from discarded storage devices using commercial deletion software, or format the device, set Record location data to Off in the same way as memory cards does not completely erase the original image data. To erase the log data ... handled in Location data options (E93), and then completely refill it with images containing no private information (for example, images of empty sky). For the COOLPIX P610, the log data saved on the memory card, select Create log ➝ End log ➝ Erase log. Before discarding a data storage device or transferring ownership...
Reference Manual
Page 13
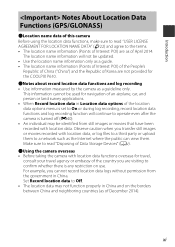
...land survey applications. • When Record location data in Location data options of December 2014). This information cannot be used for the COOLPIX P610. Set Record location data to On or during log recording, record location data functions and log recording function will not be identified from the ...on use. bUsing the camera overseas • Before taking the camera with location data, or log files to operate even after the camera is set to Off. • The location data may be updated. • Use the location name information only as a guideline only. The location...
...land survey applications. • When Record location data in Location data options of December 2014). This information cannot be used for the COOLPIX P610. Set Record location data to On or during log recording, record location data functions and log recording function will not be identified from the ...on use. bUsing the camera overseas • Before taking the camera with location data, or log files to operate even after the camera is set to Off. • The location data may be updated. • Use the location name information only as a guideline only. The location...
Reference Manual
Page 15
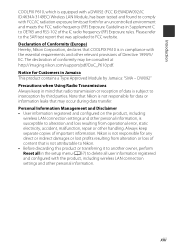
... connection settings and other personal information. Please refer to the SAR test report that may be consulted at http://imaging.nikon.com/support/pdf/DoC_P610.pdf. Note that Nikon is not responsible for data or information leaks that was uploaded to alteration and loss resulting from alteration or loss of content that COOLPIX P610 is...
... connection settings and other personal information. Please refer to the SAR test report that may be consulted at http://imaging.nikon.com/support/pdf/DoC_P610.pdf. Note that Nikon is not responsible for data or information leaks that was uploaded to alteration and loss resulting from alteration or loss of content that COOLPIX P610 is...
Reference Manual
Page 16
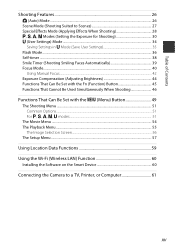
... Removing the Battery or Memory Card 10 Charge the Battery ...11 Opening and Adjusting the Angle of the Monitor 13 Turn the Camera On and Set the Display Language, Date, and Time 14 Basic Shooting and Playback Operations 16 Shooting with A (Auto) Mode 16 Using the Flash ...18 Switching Between the......20 The Shutter-release Button...21 Recording Movies ...21 Play Back Images...22 Delete Images ...23 Changing the Shooting Mode 24 Functions That Can Be Set Using the Multi Selector (for Shooting 25 xiv
... Removing the Battery or Memory Card 10 Charge the Battery ...11 Opening and Adjusting the Angle of the Monitor 13 Turn the Camera On and Set the Display Language, Date, and Time 14 Basic Shooting and Playback Operations 16 Shooting with A (Auto) Mode 16 Using the Flash ...18 Switching Between the......20 The Shutter-release Button...21 Recording Movies ...21 Play Back Images...22 Delete Images ...23 Changing the Shooting Mode 24 Functions That Can Be Set Using the Multi Selector (for Shooting 25 xiv
Reference Manual
Page 17
... Mode (Shooting Suited to Scenes 27 Special Effects Mode (Applying Effects When Shooting 28 j, k, l, m Modes (Setting the Exposure for Shooting 30 M (User Settings) Mode ...34 Saving Settings in M Mode (Save User Settings 35 Flash Mode...36 Self-timer ...38 Smile Timer (Shooting Smiling Faces Automatically 39 Focus Mode...40 Using Manual... the Fn (Function) Button 45 Functions That Cannot Be Used Simultaneously When Shooting 46 Functions That Can Be Set with the d (Menu) Button 49 The Shooting Menu ...51 Common Options...51 For j, k, l, m, M modes ...51 The Movie Menu ...54 The Playback ...
... Mode (Shooting Suited to Scenes 27 Special Effects Mode (Applying Effects When Shooting 28 j, k, l, m Modes (Setting the Exposure for Shooting 30 M (User Settings) Mode ...34 Saving Settings in M Mode (Save User Settings 35 Flash Mode...36 Self-timer ...38 Smile Timer (Shooting Smiling Faces Automatically 39 Focus Mode...40 Using Manual... the Fn (Function) Button 45 Functions That Cannot Be Used Simultaneously When Shooting 46 Functions That Can Be Set with the d (Menu) Button 49 The Shooting Menu ...51 Common Options...51 For j, k, l, m, M modes ...51 The Movie Menu ...54 The Playback ...
Reference Manual
Page 18
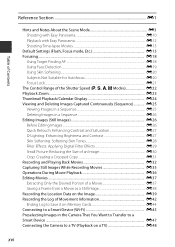
... E1 Hints and Notes About the Scene Mode E3 Shooting with Easy Panorama E10 Playback with Easy Panorama E12 Shooting Time-lapse Movies ...E13 Default Settings (Flash, Focus mode, Etc E15 Focusing...E18 Using Target Finding AF ...E18 Using Face Detection ...E19 Using Skin Softening...E20 Subjects Not Suitable for Autofocus...
... E1 Hints and Notes About the Scene Mode E3 Shooting with Easy Panorama E10 Playback with Easy Panorama E12 Shooting Time-lapse Movies ...E13 Default Settings (Flash, Focus mode, Etc E15 Focusing...E18 Using Target Finding AF ...E18 Using Face Detection ...E19 Using Skin Softening...E20 Subjects Not Suitable for Autofocus...
Reference Manual
Page 20
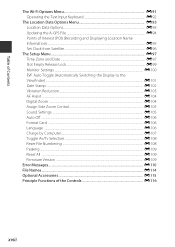
... Menu E93 Location Data Options...E93 Updating the A-GPS File...E94 Points of Interest (POI) (Recording and Displaying Location Name Information)...E95 Set Clock from Satellite...E96 The Setup Menu ...E97 Time Zone and Date ...E97 Slot Empty Release Lock...E99 Monitor... the Display to the Viewfinder) ...E101 Date Stamp ...E102 Vibration Reduction...E103 AF Assist ...E104 Digital Zoom ...E104 Assign Side Zoom Control...E105 Sound Settings ...E105 Auto Off ...E106 Format Card ...E106 Language ...E106 Charge by Computer...E107 Toggle Av/Tv Selection ...E108 Reset File Numbering ...E108 Peaking ......
... Menu E93 Location Data Options...E93 Updating the A-GPS File...E94 Points of Interest (POI) (Recording and Displaying Location Name Information)...E95 Set Clock from Satellite...E96 The Setup Menu ...E97 Time Zone and Date ...E97 Slot Empty Release Lock...E99 Monitor... the Display to the Viewfinder) ...E101 Date Stamp ...E102 Vibration Reduction...E103 AF Assist ...E104 Digital Zoom ...E104 Assign Side Zoom Control...E105 Sound Settings ...E105 Auto Off ...E106 Format Card ...E106 Language ...E106 Charge by Computer...E107 Toggle Av/Tv Selection ...E108 Reset File Numbering ...E108 Peaking ......

Reference Manual
Page 25
...the image and Display the range of the manual options. • The histogram cannot be set using Monitor settings in the setup menu (A57). • To display a histogram in j, k, l or m shooting mode, set AF area mode (A52) to one of a Display the image only. Hide information ...Button) To switch the information displayed in the monitor during shooting and playback changes depending on the camera's settings and state of use. C Histogram and Framing Grid for Shooting Each setting can be displayed in A (auto) mode or some scene modes. the shooting information. The Monitor The...
...the image and Display the range of the manual options. • The histogram cannot be set using Monitor settings in the setup menu (A57). • To display a histogram in j, k, l or m shooting mode, set AF area mode (A52) to one of a Display the image only. Hide information ...Button) To switch the information displayed in the monitor during shooting and playback changes depending on the camera's settings and state of use. C Histogram and Framing Grid for Shooting Each setting can be displayed in A (auto) mode or some scene modes. the shooting information. The Monitor The...

Reference Manual
Page 27
... Aperture value 30 23 Shutter speed 30 24 ISO sensitivity 52 Charging AC adapter 25 connection indicator 26 Battery level indicator 16 27 "Date not set" indicator...... 57, F8 28 Date stamp 57 29 Travel destination icon 57 30 Location data reception 59 31 Log display E42 Wi-Fi communication... 32 indicator 60, E45 33 White balance 51 34 COOLPIX Picture Control 51 35 Active D-Lighting 52 Continuous shooting 36 mode 52, E8 37 Backlighting (HDR 27, E7 Noise reduction burst/single 38 shot...
... Aperture value 30 23 Shutter speed 30 24 ISO sensitivity 52 Charging AC adapter 25 connection indicator 26 Battery level indicator 16 27 "Date not set" indicator...... 57, F8 28 Date stamp 57 29 Travel destination icon 57 30 Location data reception 59 31 Log display E42 Wi-Fi communication... 32 indicator 60, E45 33 White balance 51 34 COOLPIX Picture Control 51 35 Active D-Lighting 52 Continuous shooting 36 mode 52, E8 37 Backlighting (HDR 27, E7 Noise reduction burst/single 38 shot...

Reference Manual
Page 36
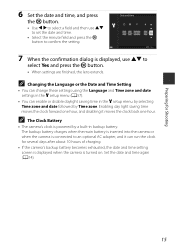
... Display Language, Date, and Time When the camera is turned on for the first time, the language-selection screen and the date and time setting screen for the camera clock are displayed. 1 Press the power switch to turn on the camera. • The monitor turns on. • To turn the ...
... Display Language, Date, and Time When the camera is turned on for the first time, the language-selection screen and the date and time setting screen for the camera clock are displayed. 1 Press the power switch to turn on the camera. • The monitor turns on. • To turn the ...
Reference Manual
Page 37
... is turned on. Preparing for several days after about 10 hours of charging. • If the camera's backup battery becomes exhausted, the date and time setting screen is displayed when the camera is powered by Time zone. The backup battery charges when the main battery is inserted into the camera or... when the camera is connected to an optional AC adapter, and it moves the clock back one hour. 6 Set the date and time, and press the k button. • Use J K to select a field and then use HI to select Yes and press the k button. •...
... is turned on. Preparing for several days after about 10 hours of charging. • If the camera's backup battery becomes exhausted, the date and time setting screen is displayed when the camera is powered by Time zone. The backup battery charges when the main battery is inserted into the camera or... when the camera is connected to an optional AC adapter, and it moves the clock back one hour. 6 Set the date and time, and press the k button. • Use J K to select a field and then use HI to select Yes and press the k button. •...

Reference Manual
Page 38
... high. Basic Shooting and Playback Operations 16 Basic Shooting and Playback Operations Shooting with A (Auto) Mode 1 Rotate the mode dial to A. • The camera is set to A (auto) mode and general shooting can be performed. • Press the s (display) button to switch the information displayed in the monitor during shooting and...
... high. Basic Shooting and Playback Operations 16 Basic Shooting and Playback Operations Shooting with A (Auto) Mode 1 Rotate the mode dial to A. • The camera is set to A (auto) mode and general shooting can be performed. • Press the s (display) button to switch the information displayed in the monitor during shooting and...

Reference Manual
Page 40
... an operation such as in dark locations or when the subject is at a telephoto position • When using a tripod to stabilize the camera during shooting, set to W (off) - When the zoom is backlit, press the m (flash pop-up) button to raise the flash. • When not using a tripod to stabilize the... remaining in the following situations: - C The Auto Off Function • When no operations are being saved. When shooting in dim lighting with the flash mode set Vibration reduction to Off in the setup menu (A57) to the camera or the memory card. Doing this function.
... an operation such as in dark locations or when the subject is at a telephoto position • When using a tripod to stabilize the camera during shooting, set to W (off) - When the zoom is backlit, press the m (flash pop-up) button to raise the flash. • When not using a tripod to stabilize the... remaining in the following situations: - C The Auto Off Function • When no operations are being saved. When shooting in dim lighting with the flash mode set Vibration reduction to Off in the setup menu (A57) to the camera or the memory card. Doing this function.

Reference Manual
Page 41
... between the monitor and viewfinder. Diopter adjustment control B Notes About Checking and Adjusting Image Colors Use the monitor on while the monitor turns off (default setting). • You can use the viewfinder when bright light under the open sky makes it difficult to see the monitor. • When you bring your...
... between the monitor and viewfinder. Diopter adjustment control B Notes About Checking and Adjusting Image Colors Use the monitor on while the monitor turns off (default setting). • You can use the viewfinder when bright light under the open sky makes it difficult to see the monitor. • When you bring your...

Reference Manual
Page 42
Basic Shooting and Playback Operations 20 The function of the side zoom control can be set in the Assign side zoom control in the setup menu (A57). • A zoom indicator is displayed on the shooting screen when the zoom control is ... yellow when the zoom magnification is increased further. • Zoom indicator is blue: Image quality is not noticeably reduced by using certain continuous shooting settings or other settings. Using the Zoom When you to further magnify the subject up to approximately 4× the maximum optical zoom ratio, can also be operated by...
Basic Shooting and Playback Operations 20 The function of the side zoom control can be set in the Assign side zoom control in the setup menu (A57). • A zoom indicator is displayed on the shooting screen when the zoom control is ... yellow when the zoom magnification is increased further. • Zoom indicator is blue: Image quality is not noticeably reduced by using certain continuous shooting settings or other settings. Using the Zoom When you to further magnify the subject up to approximately 4× the maximum optical zoom ratio, can also be operated by...

Reference Manual
Page 43
... zoom position. • Snap-back zoom is not available during movie recording. 1/250 F5.6 25m 0 s 840 Framing border The Shutter-release Button Press halfway To set focus and exposure (shutter speed and aperture value), press the shutter-release button lightly until you can frame the subject more easily. • While pressing...
... zoom position. • Snap-back zoom is not available during movie recording. 1/250 F5.6 25m 0 s 840 Framing border The Shutter-release Button Press halfway To set focus and exposure (shutter speed and aperture value), press the shutter-release button lightly until you can frame the subject more easily. • While pressing...

Reference Manual
Page 45
... deleting, press the d button. • When Erase selected images is displayed for a sequence of the sequence (the key picture) is displayed in playback mode (default setting). • If you press the l button while a key picture is selected, see "The Image Selection Screen" (A56). 3 Select Yes and press the k button. • Deleted...
... deleting, press the d button. • When Erase selected images is displayed for a sequence of the sequence (the key picture) is displayed in playback mode (default setting). • If you press the l button while a key picture is selected, see "The Image Selection Screen" (A56). 3 Select Yes and press the k button. • Deleted...

Reference Manual
Page 46
... and select an effect. • j, k, l, m modes Select these modes for greater control over shutter speed and aperture value. • M (User settings) mode Setting combinations that are approximately 10 seconds long. - X (night landscape): Use this mode to shoot landscapes. • u (Special effects) mode Effects can be... saved. The saved settings can be immediately retrieved for shooting simply by rotating the mode dial. • A (Auto) mode Used for shooting can be applied to...
... and select an effect. • j, k, l, m modes Select these modes for greater control over shutter speed and aperture value. • M (User settings) mode Setting combinations that are approximately 10 seconds long. - X (night landscape): Use this mode to shoot landscapes. • u (Special effects) mode Effects can be... saved. The saved settings can be immediately retrieved for shooting simply by rotating the mode dial. • A (Auto) mode Used for shooting can be applied to...


