
Reference Manual
Page 6
.... The use with normal operation of the camera or result in the batteries overheating, igniting, rupturing, or leaking. Nikon will not be available from product malfunction. http://imaging.nikon.com/ Use Only Nikon Brand Electronic Accessories Nikon COOLPIX cameras are engineered and proven to operate within the operational and safety requirements of this device as at...
.... The use with normal operation of the camera or result in the batteries overheating, igniting, rupturing, or leaking. Nikon will not be available from product malfunction. http://imaging.nikon.com/ Use Only Nikon Brand Electronic Accessories Nikon COOLPIX cameras are engineered and proven to operate within the operational and safety requirements of this device as at...

Reference Manual
Page 8
.... viii Introduction For Your Safety Do not touch internal parts that become exposed as the product producing smoke, heat, or unusual odors, immediately disconnect the battery or power source. Do not handle with this product will read "For Your Safety" in the presence of death or severe injury. Failure to observe...
.... viii Introduction For Your Safety Do not touch internal parts that become exposed as the product producing smoke, heat, or unusual odors, immediately disconnect the battery or power source. Do not handle with this product will read "For Your Safety" in the presence of death or severe injury. Failure to observe...

Reference Manual
Page 9
... Failure to observe these precautions could result in fire or electric shock. • Do not handle the plug when charging the product or using batteries, chargers, AC adapters, and USB cables designated for an extended period such as in an enclosed automobile or in injury or product malfunction. The...could result in burns or frostbite. • Do not leave the lens pointed at the sun or other medical facilities. • Remove the battery and disconnect the AC adapter if this product will be used for use is prohibited. Light focused by this product could result in hospitals or...
... Failure to observe these precautions could result in fire or electric shock. • Do not handle the plug when charging the product or using batteries, chargers, AC adapters, and USB cables designated for an extended period such as in an enclosed automobile or in injury or product malfunction. The...could result in burns or frostbite. • Do not leave the lens pointed at the sun or other medical facilities. • Remove the battery and disconnect the AC adapter if this product will be used for use is prohibited. Light focused by this product could result in hospitals or...
Reference Manual
Page 10
... dry the product with a towel or similar object should it become wet. • Discontinue use in the batteries leaking, overheating, rupturing, or catching fire. • If battery liquid comes into contact with the eyes, rinse with the terminals. x Introduction For Your Safety Failure to observe... the following precautions could result in the batteries leaking, overheating, rupturing, or catching fire. • Prior to observe this precaution could result in the specified period of clean water...
... dry the product with a towel or similar object should it become wet. • Discontinue use in the batteries leaking, overheating, rupturing, or catching fire. • If battery liquid comes into contact with the eyes, rinse with the terminals. x Introduction For Your Safety Failure to observe... the following precautions could result in the batteries leaking, overheating, rupturing, or catching fire. • Prior to observe this precaution could result in the specified period of clean water...

Reference Manual
Page 11
... Shooting...8 For Playback...11 Getting Started...13 How to Attach the Camera Strap and Lens Cap 14 Inserting the Battery and Memory Card 15 Removing the Battery or Memory Card ...15 Charging the Battery ...16 Opening the Monitor ...17 Camera Setup...18 Setup from a Smartphone or Tablet ...18 Setup from the Camera Menus...
... Shooting...8 For Playback...11 Getting Started...13 How to Attach the Camera Strap and Lens Cap 14 Inserting the Battery and Memory Card 15 Removing the Battery or Memory Card ...15 Charging the Battery ...16 Opening the Monitor ...17 Camera Setup...18 Setup from a Smartphone or Tablet ...18 Setup from the Camera Menus...

Reference Manual
Page 16
Technical Notes...172 Notices...173 Notes About Wireless Communication Functions 175 Caring for the Product ...178 The Camera...178 The Battery ...179 The Charging AC Adapter...180 Memory Cards...181 Cleaning and Storage...182 Cleaning...182 Storage...182 Error Messages...183 Troubleshooting ...186 File Names...194 Optional Accessories ...195 Specifications ...196 Memory Cards That Can Be Used...200 Index...202 xvi Table of Contents
Technical Notes...172 Notices...173 Notes About Wireless Communication Functions 175 Caring for the Product ...178 The Camera...178 The Battery ...179 The Charging AC Adapter...180 Memory Cards...181 Cleaning and Storage...182 Cleaning...182 Storage...182 Error Messages...183 Troubleshooting ...186 File Names...194 Optional Accessories ...195 Specifications ...196 Memory Cards That Can Be Used...200 Index...202 xvi Table of Contents

Reference Manual
Page 19
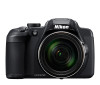
...) button 14 111, 114 15 l (delete) button 30 16 k (apply selection) button 111 17 Rotary multi selector (multi selector 55, 111 18 Tripod socket 19 Battery-chamber/memory card slot cover 15 * Also referred to as the "multi selector" in this manual. 3 Parts of the Camera The Camera Body
...) button 14 111, 114 15 l (delete) button 30 16 k (apply selection) button 111 17 Rotary multi selector (multi selector 55, 111 18 Tripod socket 19 Battery-chamber/memory card slot cover 15 * Also referred to as the "multi selector" in this manual. 3 Parts of the Camera The Camera Body

Reference Manual
Page 24
... memory 21 card is inserted 159, 188 22 F-number 49 23 Shutter speed 49 24 ISO sensitivity 134 Charging AC Adapter 25 connection indicator 26 Battery level indicator 25 8 Parts of the Camera The Monitor/Viewfinder
... memory 21 card is inserted 159, 188 22 F-number 49 23 Shutter speed 49 24 ISO sensitivity 134 Charging AC Adapter 25 connection indicator 26 Battery level indicator 25 8 Parts of the Camera The Monitor/Viewfinder

Reference Manual
Page 27
... .........46 18 Sequence playback guide 82 Movie playback guide 90 19 Time of recording 20 Date of recording Charging AC Adapter connection 21 indicator 22 Battery level indicator 25 23 File number and type 194 24 Recorded location data indicator ...169 11 Parts of the Camera The Monitor/Viewfinder
... .........46 18 Sequence playback guide 82 Movie playback guide 90 19 Time of recording 20 Date of recording Charging AC Adapter connection 21 indicator 22 Battery level indicator 25 23 File number and type 194 24 Recorded location data indicator ...169 11 Parts of the Camera The Monitor/Viewfinder

Reference Manual
Page 29
Getting Started How to Attach the Camera Strap and Lens Cap 14 Inserting the Battery and Memory Card 15 Charging the Battery...16 Opening the Monitor ...17 Camera Setup ...18 13 Getting Started
Getting Started How to Attach the Camera Strap and Lens Cap 14 Inserting the Battery and Memory Card 15 Charging the Battery...16 Opening the Monitor ...17 Camera Setup ...18 13 Getting Started

Reference Manual
Page 31
... Card The first time you insert a memory card that has been used in another device into this camera, make sure to insert the battery or memory card upside-down or backward, as this camera. • Note that formatting a memory card permanently deletes all images and other...may be hot. 15 Getting Started Inserting the Battery and Memory Card Inserting the Battery and Memory Card Battery latch Memory card slot • With the battery's positive and negative terminals oriented correctly, move the orange battery latch (3), and fully insert the battery (4). • Slide the memory card in ...
... Card The first time you insert a memory card that has been used in another device into this camera, make sure to insert the battery or memory card upside-down or backward, as this camera. • Note that formatting a memory card permanently deletes all images and other...may be hot. 15 Getting Started Inserting the Battery and Memory Card Inserting the Battery and Memory Card Battery latch Memory card slot • With the battery's positive and negative terminals oriented correctly, move the orange battery latch (3), and fully insert the battery (4). • Slide the memory card in ...

Reference Manual
Page 32
...Unplug the Charging AC Adapter from the electrical outlet, and disconnect the USB cable. Charging time is about 3 hours for a fully exhausted battery. • The battery cannot be omitted if the plug adapter comes permanently bonded to the Charging AC Adapter. • Charging starts when the camera is connected ...of the plug adapter varies according to the country or region in the illustration. The power-on lamp (charge lamp) slowly flashes while the battery is charging. • When charging is not properly connected. - The USB cable or Charging AC Adapter is complete, the power-on lamp ...
...Unplug the Charging AC Adapter from the electrical outlet, and disconnect the USB cable. Charging time is about 3 hours for a fully exhausted battery. • The battery cannot be omitted if the plug adapter comes permanently bonded to the Charging AC Adapter. • Charging starts when the camera is connected ...of the plug adapter varies according to the country or region in the illustration. The power-on lamp (charge lamp) slowly flashes while the battery is charging. • When charging is not properly connected. - The USB cable or Charging AC Adapter is complete, the power-on lamp ...

Reference Manual
Page 33
... monitor, do not apply excessive force and move slowly within the monitor's adjustable range so that the connection will not be recorded while the battery is charging. • Do not, under any circumstances, use another make or model of AC adapter other than the EH-73P/EH-73PCH...(1). Movies cannot be damaged. 17 Getting Started Opening the Monitor Opening the Monitor • You can be operated while the battery is being operated. - B Notes About Charging the Battery • The camera can adjust the direction and angle of the plugs and do not use a commercially available USB-AC ...
... monitor, do not apply excessive force and move slowly within the monitor's adjustable range so that the connection will not be recorded while the battery is charging. • Do not, under any circumstances, use another make or model of AC adapter other than the EH-73P/EH-73PCH...(1). Movies cannot be damaged. 17 Getting Started Opening the Monitor Opening the Monitor • You can be operated while the battery is being operated. - B Notes About Charging the Battery • The camera can adjust the direction and angle of the plugs and do not use a commercially available USB-AC ...

Reference Manual
Page 41
...screen each time. A (auto) mode enables you to perform general shooting in a variety of exposures remaining 1/250 F5.6 25m 0s 1400 Battery level indicator 2 Hold the camera steady. • Keep fingers and other objects away from the lens, flash, AF-assist illuminator, microphone,... and speaker. 25 Basic Shooting and Playback Operations Shooting Images B: The battery level is low. • Press the s (display) button to A. • Battery level indicator b: The battery level is used here as an example. Shooting Images A (auto) mode is high.
...screen each time. A (auto) mode enables you to perform general shooting in a variety of exposures remaining 1/250 F5.6 25m 0s 1400 Battery level indicator 2 Hold the camera steady. • Keep fingers and other objects away from the lens, flash, AF-assist illuminator, microphone,... and speaker. 25 Basic Shooting and Playback Operations Shooting Images B: The battery level is low. • Press the s (display) button to A. • Battery level indicator b: The battery level is used here as an example. Shooting Images A (auto) mode is high.

Reference Manual
Page 43
... the subject is at a telephoto position • When using a tripod to the camera or the memory card. Do not open the battery-chamber/memory card slot cover or remove the battery or memory card while an indicator is needed, such as in standby mode, perform an operation such as pressing the power...
... the subject is at a telephoto position • When using a tripod to the camera or the memory card. Do not open the battery-chamber/memory card slot cover or remove the battery or memory card while an indicator is needed, such as in standby mode, perform an operation such as pressing the power...

Reference Manual
Page 58
... a shutter speed of shooting is automatically saved. Lighten • Do not rotate the mode dial or insert a new memory card until shooting ends. • Use batteries with trails overlapped from turning off during the shooting interval. Lighten is off during shooting. 42 Shooting Features Scene Mode (Shooting Suited to B (infinity) or...
... a shutter speed of shooting is automatically saved. Lighten • Do not rotate the mode dial or insert a new memory card until shooting ends. • Use batteries with trails overlapped from turning off during the shooting interval. Lighten is off during shooting. 42 Shooting Features Scene Mode (Shooting Suited to B (infinity) or...

Reference Manual
Page 70
... settings as the M mode. Writing down any important setting is exhausted, the settings saved in M will also be reset. B Notes About the Clock Battery If the internal clock battery is recommended. 54 Shooting Features M (User Settings) Mode Saving Settings in M Mode (Save User Settings) The frequently used combination of j mode are saved...
... settings as the M mode. Writing down any important setting is exhausted, the settings saved in M will also be reset. B Notes About the Clock Battery If the internal clock battery is recommended. 54 Shooting Features M (User Settings) Mode Saving Settings in M Mode (Save User Settings) The frequently used combination of j mode are saved...

Reference Manual
Page 108
... recording movies for Movie Recording Autofocus may not perform as a moving train or car, may appear skewed. - Do not open the battery-chamber/memory card slot cover or remove the battery or memory card while an indicator is panned. - Doing this occur, focus using manual focus (A62, 63) or try the following...
... recording movies for Movie Recording Autofocus may not perform as a moving train or car, may appear skewed. - Do not open the battery-chamber/memory card slot cover or remove the battery or memory card while an indicator is panned. - Doing this occur, focus using manual focus (A62, 63) or try the following...

Reference Manual
Page 111
...-lapse movies cannot be saved. B Notes About Time-lapse Movie • Do not exchange the memory card until shooting is complete. • Use a sufficiently charged battery to prevent the camera from turning off while the camera is not capturing images. • Shooting ends automatically when 300 or 250 images are fixed...
...-lapse movies cannot be saved. B Notes About Time-lapse Movie • Do not exchange the memory card until shooting is complete. • Use a sufficiently charged battery to prevent the camera from turning off while the camera is not capturing images. • Shooting ends automatically when 300 or 250 images are fixed...

Reference Manual
Page 114
... turning off during editing. Editing Movies When editing movies, use HI to move the end point. • To preview the specified portion, use a sufficiently charged battery to stop previewing. Extracting Only the Desired Portion of a Movie The desired portion of a recorded movie can be saved as a separate file. 1 Play back a desired...
... turning off during editing. Editing Movies When editing movies, use HI to move the end point. • To preview the specified portion, use a sufficiently charged battery to stop previewing. Extracting Only the Desired Portion of a Movie The desired portion of a recorded movie can be saved as a separate file. 1 Play back a desired...


