P5000 User's Manual
Page 9
... Control 78 p Metering 72 d Fixed Aperture 78 a Continuous 73 h Noise Reduction 78 L BSS 75 e Converter 79 Playback Options: The Playback Menu 80 J D-Lighting 44 X Transfer Marking 82 M Print Set 64 Z Hide Image 82 d Slide Show 81 w Small Pic 45 j Delete 81 f Copy ...N FUNC Button 89 K Vibration Reduction 87 V Reset All 89 B AF Assist 87 f Firmware Version 89 0 Digital Zoom 87 Technical Notes ...90 Optional Accessories...90 Caring for the Camera ...94 Cleaning...96 Storage ...96 Error Messages ...97 Troubleshooting ...100 Appendix...104 Specifications...108 Index ...111 vii
... Control 78 p Metering 72 d Fixed Aperture 78 a Continuous 73 h Noise Reduction 78 L BSS 75 e Converter 79 Playback Options: The Playback Menu 80 J D-Lighting 44 X Transfer Marking 82 M Print Set 64 Z Hide Image 82 d Slide Show 81 w Small Pic 45 j Delete 81 f Copy ...N FUNC Button 89 K Vibration Reduction 87 V Reset All 89 B AF Assist 87 f Firmware Version 89 0 Digital Zoom 87 Technical Notes ...90 Optional Accessories...90 Caring for the Camera ...94 Cleaning...96 Storage ...96 Error Messages ...97 Troubleshooting ...100 Appendix...104 Specifications...108 Index ...111 vii

P5000 User's Manual
Page 15
Introduction 3 Repeat for the second eyelet. u io q !3 !4 w e r t y !0 1 A (FUNC) button 29, 48, 89 2 Q (monitor) button 8 3 G (playback) button 22, 23 4 F (menu) button........29, 48, 53, 65, 80 5 I (delete) button 22, 43, 46, 50, 52 6 Speaker 7 Viewfinder 18 8 Flash lamp 24 9 Autofocus (AF) lamp 20 10 Monitor ...........4-5, 16-17, 18, 85, 96, 108 !1 !2 !5 !6 !7 ... socket 14 Battery-chamber/memory card slot cover 10, 14 15 Memory card slot 14 16 Battery chamber 10 17 Battery latch 10 Attaching the Camera Strap Attach the strap as shown at right.
Introduction 3 Repeat for the second eyelet. u io q !3 !4 w e r t y !0 1 A (FUNC) button 29, 48, 89 2 Q (monitor) button 8 3 G (playback) button 22, 23 4 F (menu) button........29, 48, 53, 65, 80 5 I (delete) button 22, 43, 46, 50, 52 6 Speaker 7 Viewfinder 18 8 Flash lamp 24 9 Autofocus (AF) lamp 20 10 Monitor ...........4-5, 16-17, 18, 85, 96, 108 !1 !2 !5 !6 !7 ... socket 14 Battery-chamber/memory card slot cover 10, 14 15 Memory card slot 14 16 Battery chamber 10 17 Battery latch 10 Attaching the Camera Strap Attach the strap as shown at right.

P5000 User's Manual
Page 56
... After After selecting a picture in shadows. Copies may be unable to make copies of pictures that were created with other types of camera. D-Lighting is not available with copies created with the same transfer marking and date and time of recording as the original, but any... dialog will be applied before using D-Lighting are indicated by an icon (B 5). Copies can not be created from the playback menu (B 80). The camera may not display or transfer correctly when viewed on the copy. The crop and small picture options can not be used to create retouched copies...
... After After selecting a picture in shadows. Copies may be unable to make copies of pictures that were created with other types of camera. D-Lighting is not available with copies created with the same transfer marking and date and time of recording as the original, but any... dialog will be applied before using D-Lighting are indicated by an icon (B 5). Copies can not be created from the playback menu (B 80). The camera may not display or transfer correctly when viewed on the copy. The crop and small picture options can not be used to create retouched copies...

P5000 User's Manual
Page 57
from the playback menu (B 80). Suited to a separate file. Copies are stored as JPEG files with a compression ratio of the original and the zoom ratio at right; Creating a Cropped Copy ...
from the playback menu (B 80). Suited to a separate file. Copies are stored as JPEG files with a compression ratio of the original and the zoom ratio at right; Creating a Cropped Copy ...

P5000 User's Manual
Page 76
...and aperture are shown by icon during playback (B 5). Pic- tures in print order are not printed when the camera is connected directly to the printer. 64 Connecting to create digital "print orders" for printing on all pictures in print order. • Done: Complete print order and exit.... 1, below. 1 2 Highlight Print selected.* Display selection dialog. * To delete current print order, highlight Delete print set option in the playback menu (B 80) is displayed. Creating a DPOF Print Order: Print Set The Print set and press B. 3 Select pictures as described in steps 1-3 on page 63....
...and aperture are shown by icon during playback (B 5). Pic- tures in print order are not printed when the camera is connected directly to the printer. 64 Connecting to create digital "print orders" for printing on all pictures in print order. • Done: Complete print order and exit.... 1, below. 1 2 Highlight Print selected.* Display selection dialog. * To delete current print order, highlight Delete print set option in the playback menu (B 80) is displayed. Creating a DPOF Print Order: Print Set The Print set and press B. 3 Select pictures as described in steps 1-3 on page 63....

P5000 User's Manual
Page 92
... accidental deletion. 81 X Transfer marking Change transfer marking for Delete, Protect, Transfer marking, Hide image, and Copy: 1 2 Scroll through pictures (command dial can be displayed. 80 Menu Guide Create small copy of multi selector). Select current picture. Playback Options: The Playback Menu To display the playback menu, press the G button to...
... accidental deletion. 81 X Transfer marking Change transfer marking for Delete, Protect, Transfer marking, Hide image, and Copy: 1 2 Scroll through pictures (command dial can be displayed. 80 Menu Guide Create small copy of multi selector). Select current picture. Playback Options: The Playback Menu To display the playback menu, press the G button to...

P5000 User's Manual
Page 93
...at right. When the slide show ends or is in progress, press the multi selector to the right to skip ahead, left to select. The camera will turn off automatically if no operations are marked with a O icon will not be deleted. Pause Restart End Frame intvl A Slide Show Movies... (B 47) appear as still images showing the first frame. O Protect Protect selected pictures from accidental deletion (B 80). Start Start slide show , even if Loop is pressed. length of time each slide will be deleted using the I button or Delete. Press the...
...at right. When the slide show ends or is in progress, press the multi selector to the right to skip ahead, left to select. The camera will turn off automatically if no operations are marked with a O icon will not be deleted. Pause Restart End Frame intvl A Slide Show Movies... (B 47) appear as still images showing the first frame. O Protect Protect selected pictures from accidental deletion (B 80). Start Start slide show , even if Loop is pressed. length of time each slide will be deleted using the I button or Delete. Press the...

P5000 User's Manual
Page 94
...internal memory to copy all pictures. Q q Copy pictures from all images for transfer (B 80). The camera may be copied (B 80) or All images to memory card. Z Hide Image Hide or reveal selected pictures (B 80). Hidden pictures are not marked for transfer to a computer (B 56-59). Option All on...press B. Hidden pictures can not be copied. X Transfer Marking Mark existing pictures for printing or transfer. Selecting either of camera or that formatting will be unable to internal memory. Remove transfer marking from memory card to copy pictures that will delete hidden ...
...internal memory to copy all pictures. Q q Copy pictures from all images for transfer (B 80). The camera may be copied (B 80) or All images to memory card. Z Hide Image Hide or reveal selected pictures (B 80). Hidden pictures are not marked for transfer to a computer (B 56-59). Option All on...press B. Hidden pictures can not be copied. X Transfer Marking Mark existing pictures for printing or transfer. Selecting either of camera or that formatting will be unable to internal memory. Remove transfer marking from memory card to copy pictures that will delete hidden ...

P5000 User's Manual
Page 116
... Off Noise reduction Off Converter None Wide-angle converter Distortion control on Playback menu (B 80-82) Slide show Frame intvl 3s Setup menu (B 83-89) Menus Quick startup Welcome screen Brightness Date imprint Vibration reduction AF assist Digital zoom Sound settings Button sound Shutter sound Volume Auto off Interface Auto transfer FUNC...
... Off Noise reduction Off Converter None Wide-angle converter Distortion control on Playback menu (B 80-82) Slide show Frame intvl 3s Setup menu (B 83-89) Menus Quick startup Welcome screen Brightness Date imprint Vibration reduction AF assist Digital zoom Sound settings Button sound Shutter sound Volume Auto off Interface Auto transfer FUNC...
P5000 User's Manual
Page 120
... mode: approx. 100% vertical and 100% horizontal Storage Media File system File formats Internal memory (approx. 21MB); SD (Secure Digital) memory cards DCF, Exif 2.2, and DPOF compliant Compressed: JPEG-Baseline-compliant (Fine 1:4, Normal 1:8, Basic 1:16) Movies: AVI... change without notice. 108 Technical Notes Specifications Nikon COOLPIX P5000 Digital Camera Type Compact digital camera Effective pixels 10.0 million Image sensor 1/1.8-in ., 230,000-dot, wide viewing angle TFT LCD with LED indication Approx. 80% vertical and 80% horizontal Monitor Frame coverage 2.5-in . The...
... mode: approx. 100% vertical and 100% horizontal Storage Media File system File formats Internal memory (approx. 21MB); SD (Secure Digital) memory cards DCF, Exif 2.2, and DPOF compliant Compressed: JPEG-Baseline-compliant (Fine 1:4, Normal 1:8, Basic 1:16) Movies: AVI... change without notice. 108 Technical Notes Specifications Nikon COOLPIX P5000 Digital Camera Type Compact digital camera Effective pixels 10.0 million Image sensor 1/1.8-in ., 230,000-dot, wide viewing angle TFT LCD with LED indication Approx. 80% vertical and 80% horizontal Monitor Frame coverage 2.5-in . The...
P5000 User's Manual
Page 125
...See also Date and time, printing; See Flash, mode 7, 24, 102 Reset all 89, 104 Retouching pictures 44-45 S S. See Shutter-priority auto 38, 40 S. Digital Print Order Format; Date imprint; See Power switch 2, 12 Optimize image 68-69 P P. See Video mode 55, 89 Panorama 33, 35 PictBridge 60-63, 110... Night landscape (I) 31 Night portrait (D) 30 Index 113 See Video mode 55, 89 Number of 48, 67 formatting 15 inserting 14 removing 15 F button 3, 65, 80 Menus 29, 37, 48, 65-89 text or icons 83 Menus 83 Metering 72 Metering 72 Microphone 2, 46, 47, 51 Mode dial 2, 6 Monitor 3, 4-5, ...
...See also Date and time, printing; See Flash, mode 7, 24, 102 Reset all 89, 104 Retouching pictures 44-45 S S. See Shutter-priority auto 38, 40 S. Digital Print Order Format; Date imprint; See Power switch 2, 12 Optimize image 68-69 P P. See Video mode 55, 89 Panorama 33, 35 PictBridge 60-63, 110... Night landscape (I) 31 Night portrait (D) 30 Index 113 See Video mode 55, 89 Number of 48, 67 formatting 15 inserting 14 removing 15 F button 3, 65, 80 Menus 29, 37, 48, 65-89 text or icons 83 Menus 83 Metering 72 Metering 72 Microphone 2, 46, 47, 51 Mode dial 2, 6 Monitor 3, 4-5, ...
Instruction Manual
Page 11
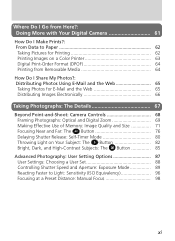
Where Do I Go from Here?: Doing More with Your Digital Camera 61 How Do I Make Prints?: From Data to Paper 62 Taking Pictures for Printing 62 Printing Images on a Color Printer 63 Digital Print-Order Format (DPOF 64 Printing from Removable Media 64 How Do I Share My Photos?: Distributing Photos ... 68 Framing Photographs: Optical and Digital Zoom 69 Making Effective Use of Memory: Image Quality and Size 71 Focusing Near and Far: The Button 76 Delaying Shutter Release: Self-Timer Mode 80 Throwing Light on Your Subject: The Button 82 Bright, Dark, and High-Contrast Subjects: The Button...
Where Do I Go from Here?: Doing More with Your Digital Camera 61 How Do I Make Prints?: From Data to Paper 62 Taking Pictures for Printing 62 Printing Images on a Color Printer 63 Digital Print-Order Format (DPOF 64 Printing from Removable Media 64 How Do I Share My Photos?: Distributing Photos ... 68 Framing Photographs: Optical and Digital Zoom 69 Making Effective Use of Memory: Image Quality and Size 71 Focusing Near and Far: The Button 76 Delaying Shutter Release: Self-Timer Mode 80 Throwing Light on Your Subject: The Button 82 Bright, Dark, and High-Contrast Subjects: The Button...

Instruction Manual
Page 21
... Accessory shoe 192 3 Built-in Speedlight 82 4 Viewfinder window 8 5 Microphone 109 6 Lens 33, 191 7 Self-timer lamp 80 8 Eyelet for camera strap ......... 33 9 Battery-chamber cover .......... 34 10 Coupling contacts for MB-E5000 battery pack 35 11 Tripod socket 12 Battery-chamber...Green (autofocus) lamp .......... 8 18 Red (flash-ready) lamp 8 19 Speaker 164 20 Audio/video (A/V) out connector (under cover 178 21 Eyelet for camera strap ......... 33 A Viewfinder 8 B Monitor 9 C Control panel 11 D Power switch 12 E Shutter-release button ....... 12 F Mode selector 12 G Zoom...
... Accessory shoe 192 3 Built-in Speedlight 82 4 Viewfinder window 8 5 Microphone 109 6 Lens 33, 191 7 Self-timer lamp 80 8 Eyelet for camera strap ......... 33 9 Battery-chamber cover .......... 34 10 Coupling contacts for MB-E5000 battery pack 35 11 Tripod socket 12 Battery-chamber...Green (autofocus) lamp .......... 8 18 Red (flash-ready) lamp 8 19 Speaker 164 20 Audio/video (A/V) out connector (under cover 178 21 Eyelet for camera strap ......... 33 A Viewfinder 8 B Monitor 9 C Control panel 11 D Power switch 12 E Shutter-release button ....... 12 F Mode selector 12 G Zoom...

Instruction Manual
Page 24
... icon 43 12 Aperture 89 13 Exposure compensation ........ 85 14 Image size 74 15 Image quality 72 16 Number of the following camera settings. The indicators displayed in (playback) mode are described in the monitor indicate the status of exposures remaining 46 17 Focus areas ...-white indicator ... 115 29 Spot metering exposure target 105 10 Introduction-Getting to Know the COOLPIX5000 User Set A User Sets 1, 2, and 3 1 Digital zoom 70 2 Zoom indicator 69 3 Current folder 137 4 Battery level indicator 39 5 Shutter speed 89 6 Exposure mode 89 7 Metering mode 105 8 ...
... icon 43 12 Aperture 89 13 Exposure compensation ........ 85 14 Image size 74 15 Image quality 72 16 Number of the following camera settings. The indicators displayed in (playback) mode are described in the monitor indicate the status of exposures remaining 46 17 Focus areas ...-white indicator ... 115 29 Spot metering exposure target 105 10 Introduction-Getting to Know the COOLPIX5000 User Set A User Sets 1, 2, and 3 1 Digital zoom 70 2 Zoom indicator 69 3 Current folder 137 4 Battery level indicator 39 5 Shutter speed 89 6 Exposure mode 89 7 Metering mode 105 8 ...

Instruction Manual
Page 82
Taking Photographs-Beyond Point-and-Shoot Beyond Point-and-Shoot Camera Controls This section covers operations that can be performed whenever the camera is in the following table. Control Described in Framing Photographs 69-70 Making Effective Use of the controls in (shooting) mode. These operations are performed by means of Memory 71-75 Focusing Near and Far 76-79 Delaying Shutter Release 80-81 Throwing Light on Your Subject 82-84 Bright, Dark, and High-Contrast Subjects 85-86 68
Taking Photographs-Beyond Point-and-Shoot Beyond Point-and-Shoot Camera Controls This section covers operations that can be performed whenever the camera is in the following table. Control Described in Framing Photographs 69-70 Making Effective Use of the controls in (shooting) mode. These operations are performed by means of Memory 71-75 Focusing Near and Far 76-79 Delaying Shutter Release 80-81 Throwing Light on Your Subject 82-84 Bright, Dark, and High-Contrast Subjects 85-86 68

Instruction Manual
Page 94
... not take a picture until the self-timer icon ( ) is displayed. To use the self-timer: 1 Position the camera Mount the camera on a tripod (recommended) or rest it gives you time to appear yourself, when it on a flat, stable surface. 2 Select a self-timer mode Press the button ... Release: Self-Timer Mode When the self-timer is used for photographs in which you wish to position yourself in control panel and monitor Press 80 Self-timer icon displayed in front of the camera after the shutter-release button is pressed. The three-second timer prevents photographs from being blurred by...
... not take a picture until the self-timer icon ( ) is displayed. To use the self-timer: 1 Position the camera Mount the camera on a tripod (recommended) or rest it gives you time to appear yourself, when it on a flat, stable surface. 2 Select a self-timer mode Press the button ... Release: Self-Timer Mode When the self-timer is used for photographs in which you wish to position yourself in control panel and monitor Press 80 Self-timer icon displayed in front of the camera after the shutter-release button is pressed. The three-second timer prevents photographs from being blurred by...

Instruction Manual
Page 113
check focus in effect. Manual focus can be used while manual focus is selected ( 80) before shooting and adjust the camera position as necessary. Using the Self-Timer When using the FOCUS OPTIONS > Distance Units option in the control panel and monitor; Changing the focus mode ...
check focus in effect. Manual focus can be used while manual focus is selected ( 80) before shooting and adjust the camera position as necessary. Using the Self-Timer When using the FOCUS OPTIONS > Distance Units option in the control panel and monitor; Changing the focus mode ...

Instruction Manual
Page 119
...it Matrix Compares measure- The following options are available: Option How it works When to your composition and lighting conditions. Spot Camera measures light in area shown by square in metering target will be correctly exposed even when background is used). Ensures that determine how ... ments from 256 areas of frame with autoexposure lock ( 106) to pro- duce optimal exposure for portraits; CenterWeighted Camera meters light in entire frame but assigns a weight of 80% to area in User Set A, matrix metering is much brighter or darker. Can be used with manual or automatic...
...it Matrix Compares measure- The following options are available: Option How it works When to your composition and lighting conditions. Spot Camera measures light in area shown by square in metering target will be correctly exposed even when background is used). Ensures that determine how ... ments from 256 areas of frame with autoexposure lock ( 106) to pro- duce optimal exposure for portraits; CenterWeighted Camera meters light in entire frame but assigns a weight of 80% to area in User Set A, matrix metering is much brighter or darker. Can be used with manual or automatic...

Instruction Manual
Page 207
...80 MB • Lexar Media 10× USB series 128 MB and 160 MB Microdrive® cards: • IBM DSCM-10512 and DSCM-11000 Microdrive® cards Operation is not guaranteed with other makes of memory card. Using another make of flash could damage the internal circuitry of Nikon digital...Oceania, the Middle East, and Africa: http://www.nikon-asia.com/ For Contact Information Contact information for users of the camera or flash. Before using a Nikon Speedlight not included in the list on the opposite page, contact a Nikon-authorized service representative for more details on -line ...
...80 MB • Lexar Media 10× USB series 128 MB and 160 MB Microdrive® cards: • IBM DSCM-10512 and DSCM-11000 Microdrive® cards Operation is not guaranteed with other makes of memory card. Using another make of flash could damage the internal circuitry of Nikon digital...Oceania, the Middle East, and Africa: http://www.nikon-asia.com/ For Contact Information Contact information for users of the camera or flash. Before using a Nikon Speedlight not included in the list on the opposite page, contact a Nikon-authorized service representative for more details on -line ...

Instruction Manual
Page 210
... during shot: increase shutter 89 speed. Note that built-in image • Sensitivity raised above 100. 96 • Shutter speed too slow. Zoom the camera out 69 - If making a long time- 128 exposure of 1/15 s or longer, turn noise reduction on. • Clear Image Mode is selected (User Set 1, ... Set 1, 2, 3) - Use the flash 82 - Use the Best-Shot Selector (BSS) 112 - Focus is low. 39 196 Use the self-timer 80 - Clear Image Mode is not selected: select 128 Clear Image Mode. Speedlight Cntrl is set to Auto and an ex- 152 ternal flash accessory attached...
... during shot: increase shutter 89 speed. Note that built-in image • Sensitivity raised above 100. 96 • Shutter speed too slow. Zoom the camera out 69 - If making a long time- 128 exposure of 1/15 s or longer, turn noise reduction on. • Clear Image Mode is selected (User Set 1, ... Set 1, 2, 3) - Use the flash 82 - Use the Best-Shot Selector (BSS) 112 - Focus is low. 39 196 Use the self-timer 80 - Clear Image Mode is not selected: select 128 Clear Image Mode. Speedlight Cntrl is set to Auto and an ex- 152 ternal flash accessory attached...