XE104 User Guide
Page 5
... Ports ...2-4 The Label on the Rear Panel of the XE104 2-4 Chapter 3 Installing the XE104 Wall-Plugged Ethernet Switch How the PowerLine Switch Fits in Your Network 3-1 Prepare to Install Your PowerLine Switch 3-2 Connect an XE104 to the Router 3-2 Connect other Ethernet PowerLine Switches 3-4 Install the XE104 PowerLine Encryption Utility (Highly Recommended 3-5 Set Your Network Password 3-9 Add a Device...
... Ports ...2-4 The Label on the Rear Panel of the XE104 2-4 Chapter 3 Installing the XE104 Wall-Plugged Ethernet Switch How the PowerLine Switch Fits in Your Network 3-1 Prepare to Install Your PowerLine Switch 3-2 Connect an XE104 to the Router 3-2 Connect other Ethernet PowerLine Switches 3-4 Install the XE104 PowerLine Encryption Utility (Highly Recommended 3-5 Set Your Network Password 3-9 Add a Device...
XE104 User Guide
Page 11
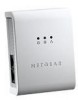
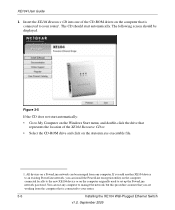
... The XE104 Wall-Plugged Ethernet Switch lets you can be available in every room. Key Features Note: This manual provides information on your high-speed cable/DSL connection can also extend an existing Ethernet network to http://kbserver.netgear.com/products/XE104.asp where... • Easy installation and management utility • Device and PowerLine network passwords • Front panel LEDs for your network connection is as close as of the date of status and activity. Earlier versions of the NETGEAR XE104 85 Mbps Wall-Plugged Ethernet Switch. Introduction 2-1 v1.0, ...
... The XE104 Wall-Plugged Ethernet Switch lets you can be available in every room. Key Features Note: This manual provides information on your high-speed cable/DSL connection can also extend an existing Ethernet network to http://kbserver.netgear.com/products/XE104.asp where... • Easy installation and management utility • Device and PowerLine network passwords • Front panel LEDs for your network connection is as close as of the date of status and activity. Earlier versions of the NETGEAR XE104 85 Mbps Wall-Plugged Ethernet Switch. Introduction 2-1 v1.0, ...

XE104 User Guide
Page 12
...product. 2-2 Introduction v1.0, September 2005 XE104 User Guide Easy Installation and Management You can install, configure, and operate the XE104 85 Mbps Wall-Plugged Ethernet Switch within minutes after connecting it to easily configure your NETGEAR dealer. This guide. - Connectors,...almost any personal computer running the Windows operating system. The utility allows you to the network. The following items: • A XE104 85 Mbps Wall-Plugged Ethernet Switch. • XE104 Resource CD, including: - XE104 Installation Guide. • Registration, Warranty Card, and Support...
...product. 2-2 Introduction v1.0, September 2005 XE104 User Guide Easy Installation and Management You can install, configure, and operate the XE104 85 Mbps Wall-Plugged Ethernet Switch within minutes after connecting it to easily configure your NETGEAR dealer. This guide. - Connectors,...almost any personal computer running the Windows operating system. The utility allows you to the network. The following items: • A XE104 85 Mbps Wall-Plugged Ethernet Switch. • XE104 Resource CD, including: - XE104 Installation Guide. • Registration, Warranty Card, and Support...
XE104 User Guide
Page 19
Installing the XE104 Wall-Plugged Ethernet Switch 3-5 v1.0, September 2005 This is not the network password, but you are setting the network password via the PowerLine network. • A device password is printed on each NETGEAR PowerLine product. PowerLine devices on the same network. XE104 User Guide Install the XE104 PowerLine Encryption Utility (Highly Recommended) The utility provides you with...
Installing the XE104 Wall-Plugged Ethernet Switch 3-5 v1.0, September 2005 This is not the network password, but you are setting the network password via the PowerLine network. • A device password is printed on each NETGEAR PowerLine product. PowerLine devices on the same network. XE104 User Guide Install the XE104 PowerLine Encryption Utility (Highly Recommended) The utility provides you with...
XE104 User Guide
Page 20
... be managed from the computer that is connected to your router. 3-6 Installing the XE104 Wall-Plugged Ethernet Switch v1.0, September 2005 All devices on a PowerLine network can install the PowerLine encryption utility on the computer connected locally to the new XE104 device or on the computer originally used to an existing PowerLine network, you add...
... be managed from the computer that is connected to your router. 3-6 Installing the XE104 Wall-Plugged Ethernet Switch v1.0, September 2005 All devices on a PowerLine network can install the PowerLine encryption utility on the computer connected locally to the new XE104 device or on the computer originally used to an existing PowerLine network, you add...

XE104 User Guide
Page 24
g. Select a PowerLine device and, if more than one remote device is selected. Enter the password recorded from the MAC address. Check that the Main tab is listed, identify it from the label on the back of the selected PowerLine device. XE104 User Guide b. Click OK. 3-10 Installing the XE104 Wall-Plugged Ethernet Switch v1.0, September 2005 Figure 3-12 f. Start the PowerLine encryption utility and ensure that the utility lists all the remote PowerLine devices d. Click the button labelled Enter Password. Figure 3-11 c. e.
g. Select a PowerLine device and, if more than one remote device is selected. Enter the password recorded from the MAC address. Check that the Main tab is listed, identify it from the label on the back of the selected PowerLine device. XE104 User Guide b. Click OK. 3-10 Installing the XE104 Wall-Plugged Ethernet Switch v1.0, September 2005 Figure 3-12 f. Start the PowerLine encryption utility and ensure that the utility lists all the remote PowerLine devices d. Click the button labelled Enter Password. Figure 3-11 c. e.

XE104 User Guide
Page 25
...in the Private Network Password text box. The procedure for all that the operation was successful. XE104 User Guide h. Type a password in the PowerLine network (remote). The utility should display a pop-up window indicating that is required is connected to the established network password.... on whether the computer running the PowerLine encryption utility is connnected directly to the new PowerLine device (local) or is to plug the new device into a power outlet. Select the Security tab. Figure 3-13 b. Installing the XE104 Wall-Plugged Ethernet Switch v1.0, September 2005 3-11
...in the Private Network Password text box. The procedure for all that the operation was successful. XE104 User Guide h. Type a password in the PowerLine network (remote). The utility should display a pop-up window indicating that is required is connected to the established network password.... on whether the computer running the PowerLine encryption utility is connnected directly to the new PowerLine device (local) or is to plug the new device into a power outlet. Select the Security tab. Figure 3-13 b. Installing the XE104 Wall-Plugged Ethernet Switch v1.0, September 2005 3-11

XE104 User Guide
Page 26
... 9. Start the PowerLine encryption utility on the computer. 2. Click the Set All Devices button. 6. Select the new PowerLine device from a Locally Connected Computer 1. Click the Set All Devices button. 3-12 Installing the XE104 Wall-Plugged Ethernet Switch v1.0, September 2005 Plug the new PowerLine device into an... Ethernet port on the remote computer and select the Security tab. 4. Click the Use Default (Public Network) button. Plug the new PowerLine device into the Private Network Password text box and click the button labelled Set Local Device Only. 4. Start the...
... 9. Start the PowerLine encryption utility on the computer. 2. Click the Set All Devices button. 6. Select the new PowerLine device from a Locally Connected Computer 1. Click the Set All Devices button. 3-12 Installing the XE104 Wall-Plugged Ethernet Switch v1.0, September 2005 Plug the new PowerLine device into an... Ethernet port on the remote computer and select the Security tab. 4. Click the Use Default (Public Network) button. Plug the new PowerLine device into the Private Network Password text box and click the button labelled Set Local Device Only. 4. Start the...
