Manual
Page 1
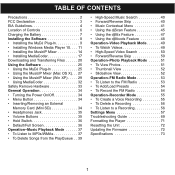
...6 Charging the Battery 7 Installing the Software 8 • Installing the MyDJ Plug-In 9 • Installing Windows Media Player 10. . . . 11 • Installing the MusicIP Mixer 14 • Installing MediaCoder 17 Downloading and Transferring Files 20 Using the Software 25 • Using the MyDJ Plug-In 25 • Using the MusicIP Mixer (Mac OS... To Create a Voice Recording 55 • To Delete a Recording 56 • To Listen to a Recording 56 Settings Menu 57 Troubleshooting Guide 69 Formatting the Player 71 Resetting the Unit 72 Updating the Firmware 72 Specifications 73 1
...6 Charging the Battery 7 Installing the Software 8 • Installing the MyDJ Plug-In 9 • Installing Windows Media Player 10. . . . 11 • Installing the MusicIP Mixer 14 • Installing MediaCoder 17 Downloading and Transferring Files 20 Using the Software 25 • Using the MyDJ Plug-In 25 • Using the MusicIP Mixer (Mac OS... To Create a Voice Recording 55 • To Delete a Recording 56 • To Listen to a Recording 56 Settings Menu 57 Troubleshooting Guide 69 Formatting the Player 71 Resetting the Unit 72 Updating the Firmware 72 Specifications 73 1

Manual
Page 6
... Cover) 13. Navigation Up Button 7. LOCATION OF CONTROLS 1. Enter/Play/Pause ®p Button 8. EPEAREP70600000-0-00*, USB CABLE PART NO. Navigation Right/Skip-Search n Button 14. MyDJ Button 2. Navigation Left/Skip-Search o Button 9. Display 4. Headphones Jack, MIC (Microphone) and USB Jack (Bottom of Unit) (HEADPHONES PART NO. CTPCLUSBLCN6000-0-00*) 11. Mini SD...
... Cover) 13. Navigation Up Button 7. LOCATION OF CONTROLS 1. Enter/Play/Pause ®p Button 8. EPEAREP70600000-0-00*, USB CABLE PART NO. Navigation Right/Skip-Search n Button 14. MyDJ Button 2. Navigation Left/Skip-Search o Button 9. Display 4. Headphones Jack, MIC (Microphone) and USB Jack (Bottom of Unit) (HEADPHONES PART NO. CTPCLUSBLCN6000-0-00*) 11. Mini SD...
Manual
Page 8
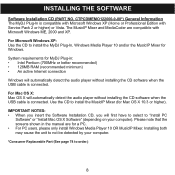
... • When you insert the Software Installation CD, you will first have to select to install the MyDJ Plug-In, Windows Media Player 10 and/or the MusicIP Mixer for MyDJ Plug-in the manual are compatible with Service Pack 2 or higher) or Vista. CTPCDMEMO122000-0-00*) General Information... The MyDJ Plug-In is compatible with Microsoft Windows XP (Home or Professional Edition with Microsoft Windows ME, 2000 and XP. For Mac OS X: Mac OS X will automatically detect the audio player without installing the CD software when the USB ...
... • When you insert the Software Installation CD, you will first have to select to install the MyDJ Plug-In, Windows Media Player 10 and/or the MusicIP Mixer for MyDJ Plug-in the manual are compatible with Service Pack 2 or higher) or Vista. CTPCDMEMO122000-0-00*) General Information... The MyDJ Plug-In is compatible with Microsoft Windows XP (Home or Professional Edition with Microsoft Windows ME, 2000 and XP. For Mac OS X: Mac OS X will automatically detect the audio player without installing the CD software when the USB ...

Manual
Page 9
see requirements on the CD drive, then the installation screen will appear. Save in for Windows Media Player 10; Insert the installation CD-Rom into the CD Drive, then the installation screen will appear. If the installation screen doesn't automatically appear, double... then double-click on the previous page): 1. Double-click on the "wmp_plugin" icon on your Desktop. 3. After selecting "Install PC Software", click "Download & Install MyDJ Plug-in a convenient location, such as on your Desktop (if saved there) and the Setup Wizard will appear. Click "Next". 9 INSTALLING THE...
see requirements on the CD drive, then the installation screen will appear. Save in for Windows Media Player 10; Insert the installation CD-Rom into the CD Drive, then the installation screen will appear. If the installation screen doesn't automatically appear, double... then double-click on the previous page): 1. Double-click on the "wmp_plugin" icon on your Desktop. 3. After selecting "Install PC Software", click "Download & Install MyDJ Plug-in a convenient location, such as on your Desktop (if saved there) and the Setup Wizard will appear. Click "Next". 9 INSTALLING THE...

Manual
Page 10
Then click "Next". 5. At the "Confirm Installation" screen, click "Next" to exit the Setup Wizard. Click "Close" to start the installation. 6. It is . When successfully completed, the "Installation Complete" screen will appear. Please see page 25 for how to keep the folder as is recommended to use the MyDJ Plug-In. 10 INSTALLING THE MyDJ PLUG-IN 4. The "Select Installation Folder" screen will appear.
Then click "Next". 5. At the "Confirm Installation" screen, click "Next" to exit the Setup Wizard. Click "Close" to start the installation. 6. It is . When successfully completed, the "Installation Complete" screen will appear. Please see page 25 for how to keep the folder as is recommended to use the MyDJ Plug-In. 10 INSTALLING THE MyDJ PLUG-IN 4. The "Select Installation Folder" screen will appear.

Manual
Page 21
IMPORTANT NOTE FOR MP3s: Windows Media Player Sync may remove MyDJ ready information from the list, click the "Properties" button and then select the "Quality" tab. Select your PC at this unit plugged in to "Tools" c "... is not checked. Once you have made any changes, click the "OK" button. 21 menu within Windows Media Player and then click the Devices tab. To disable this option go to your player from MP3 files if the "Convert files as required by this device (recommended)" is active. Please be sure you...
IMPORTANT NOTE FOR MP3s: Windows Media Player Sync may remove MyDJ ready information from the list, click the "Properties" button and then select the "Quality" tab. Select your PC at this unit plugged in to "Tools" c "... is not checked. Once you have made any changes, click the "OK" button. 21 menu within Windows Media Player and then click the Devices tab. To disable this option go to your player from MP3 files if the "Convert files as required by this device (recommended)" is active. Please be sure you...
Manual
Page 23
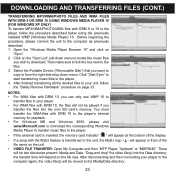
...will appear at the bottom of the file name on the unit. • VIDEO FILE TRANSFER: Open My Computer and then "MTP Player, "Aptitude" or "MMP8640". After disconnecting and then connecting your unit, follow the procedure described below using the previously installed WMP (Windows Media... Player) 10. Click on page 33. There will appear in front of the display. • If a song with the MyDJ feature is transferred to from the ...
...will appear at the bottom of the file name on the unit. • VIDEO FILE TRANSFER: Open My Computer and then "MTP Player, "Aptitude" or "MMP8640". After disconnecting and then connecting your unit, follow the procedure described below using the previously installed WMP (Windows Media... Player) 10. Click on page 33. There will appear in front of the display. • If a song with the MyDJ feature is transferred to from the ...

Manual
Page 25
...will open automatically when you start Windows Media Player 10 for use the Extended Analysis capability of activating your music within your music files. The windows can . Extended Analysis of Your Music By default, the MyDJ Plug-In will be closed/minimized with the MyDJ feature on this unit. This means your music... that it can be validated and prepared for the first time after installation. (If you don't have any songs in your WMP [Windows Media Player] library, you will first need to add some in your WMP library are ready to be able to make your tracks will now be used...
...will open automatically when you start Windows Media Player 10 for use the Extended Analysis capability of activating your music within your music files. The windows can . Extended Analysis of Your Music By default, the MyDJ Plug-In will be closed/minimized with the MyDJ feature on this unit. This means your music... that it can be validated and prepared for the first time after installation. (If you don't have any songs in your WMP [Windows Media Player] library, you will first need to add some in your WMP library are ready to be able to make your tracks will now be used...

Manual
Page 26
In the window that appears, ensure that there is MyDJ ready by following the steps below: 1. Checking for Mixable Tracks In order to add at the... your WMP library, the number of tracks that are ready to save the preferences. 5. If you intend to use the MyDJ feature on "More..." at least 25 tracks that have in the background, select "Low". Click on this unit and the... number of tracks that could use further validation or extended analysis. USING THE MyDJ PLUG-IN (CONTINUED) The box that appears will display the total number of tracks you have been analyzed using the...
In the window that appears, ensure that there is MyDJ ready by following the steps below: 1. Checking for Mixable Tracks In order to add at the... your WMP library, the number of tracks that are ready to save the preferences. 5. If you intend to use the MyDJ feature on "More..." at least 25 tracks that have in the background, select "Low". Click on this unit and the... number of tracks that could use further validation or extended analysis. USING THE MyDJ PLUG-IN (CONTINUED) The box that appears will display the total number of tracks you have been analyzed using the...
Manual
Page 38
... Genre menu, you can pause playback at the beginning of the last track which was playing before turning the power off , when the unit is MyDJ ready, the player will be shown in the display.
... Genre menu, you can pause playback at the beginning of the last track which was playing before turning the power off , when the unit is MyDJ ready, the player will be shown in the display.

Manual
Page 40
... the beginning of the currently playing file. When you release the button, normal playback will move the player forward or backward within a file to locate a specific musical passage. IMPORTANT NOTE: • For the MyDJ feature, please see the page 45. 40 OPERATION-MUSIC PLAYBACK MODE (CONTINUED) HIGH-SPEED MUSIC SEARCH ... at high speed as long as the button is held. Press the Navigation Left/Skip-Search o button repeatedly to move the player back to the beginning of the next file. FORWARD/REVERSE SKIP 1 2 During playback, press the Navigation Left/Skip-Search o button to move...
... the beginning of the currently playing file. When you release the button, normal playback will move the player forward or backward within a file to locate a specific musical passage. IMPORTANT NOTE: • For the MyDJ feature, please see the page 45. 40 OPERATION-MUSIC PLAYBACK MODE (CONTINUED) HIGH-SPEED MUSIC SEARCH ... at high speed as long as the button is held. Press the Navigation Left/Skip-Search o button repeatedly to move the player back to the beginning of the next file. FORWARD/REVERSE SKIP 1 2 During playback, press the Navigation Left/Skip-Search o button to move...

Manual
Page 45
...playback, Radio/Voice Recording or Video/Photo playback modes. 3 2 1 Press the Enter/Play/Pause ®p button 1 or MyDJ button 2 to select djScan. Select MyDJ using the djScan, djMix and djMoods options described on the device itself, wherever and whenever you listen to music! OPERATION-MUSIC ...PLAYBACK MODE (CONTINUED) MyDJ offers an exciting, new way to enjoy your collection-instantly. The player will change the way you want. Your music instantly becomes more usable and fun, allowing you ...
...playback, Radio/Voice Recording or Video/Photo playback modes. 3 2 1 Press the Enter/Play/Pause ®p button 1 or MyDJ button 2 to select djScan. Select MyDJ using the djScan, djMix and djMoods options described on the device itself, wherever and whenever you listen to music! OPERATION-MUSIC ...PLAYBACK MODE (CONTINUED) MyDJ offers an exciting, new way to enjoy your collection-instantly. The player will change the way you want. Your music instantly becomes more usable and fun, allowing you ...

Manual
Page 46
...MODE (CONTINUED) NOTES: • IMPORTANT!: The unit must have at least 25 MyDJ ready songs for the MyDJ functions to work. • Maximum 20 songs will be placed into the MyDJ playlists. • You can also press the MyDJ button with a track selected in the Browse Music menus or in Music Playback ...mode by pressing the Menu button or create a playlist by pressing the MyDJ button or Enter/Play/Pause ®p button. • For MyDJ information, enter the MyDJ menu as directed in Step 1 on the previous page, scroll to About MyDJ using the Navigation Up and/or Down buttons, followed by the Enter...
...MODE (CONTINUED) NOTES: • IMPORTANT!: The unit must have at least 25 MyDJ ready songs for the MyDJ functions to work. • Maximum 20 songs will be placed into the MyDJ playlists. • You can also press the MyDJ button with a track selected in the Browse Music menus or in Music Playback ...mode by pressing the Menu button or create a playlist by pressing the MyDJ button or Enter/Play/Pause ®p button. • For MyDJ information, enter the MyDJ menu as directed in Step 1 on the previous page, scroll to About MyDJ using the Navigation Up and/or Down buttons, followed by the Enter...

Manual
Page 47
...; Maximum 20 songs will be placed into the MyDJ playlists. • djMix Mode: You can also press the MyDJ button, with a MyDJ ready song playing or selected, to create a djMix. • For MyDJ information, enter the MyDJ menu as described on page 34. Select MyDJ using the Navigation Up and/or Down buttons, ... main menu as directed in Step 1, scroll to select it . Follow the Browse Music (All Songs, Albums, Artists) instructions on that song. The player will create a playlist based on page 38 to select it . 47 Scroll to djMix using the Navigation Up 1 and/or Down 2 buttons, followed ...
...; Maximum 20 songs will be placed into the MyDJ playlists. • djMix Mode: You can also press the MyDJ button, with a MyDJ ready song playing or selected, to create a djMix. • For MyDJ information, enter the MyDJ menu as described on page 34. Select MyDJ using the Navigation Up and/or Down buttons, ... main menu as directed in Step 1, scroll to select it . Follow the Browse Music (All Songs, Albums, Artists) instructions on that song. The player will create a playlist based on page 38 to select it . 47 Scroll to djMix using the Navigation Up 1 and/or Down 2 buttons, followed ...

Manual
Page 48
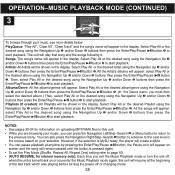
...CONTINUED) USING THE djMoods FEATURE 1 2 2 1 1 3 2 Turn the unit on and access the main menu as directed in Step 1, scroll to About MyDJ using the Navigation Up and/or Down buttons, followed by the Enter/Play/Pause ®p button 3 to the desired Energy (Energy 1- 5) using the Navigation Up... 1 and/or Down 2 buttons, followed by the Enter/Play/Pause ®p button 2. Select MyDJ using the Navigation Up 1 and/or Down 2 buttons, followed by the Enter/Play/Pause ®p button to select it . Scroll to djMoods using the ...
...CONTINUED) USING THE djMoods FEATURE 1 2 2 1 1 3 2 Turn the unit on and access the main menu as directed in Step 1, scroll to About MyDJ using the Navigation Up and/or Down buttons, followed by the Enter/Play/Pause ®p button 3 to the desired Energy (Energy 1- 5) using the Navigation Up... 1 and/or Down 2 buttons, followed by the Enter/Play/Pause ®p button 2. Select MyDJ using the Navigation Up 1 and/or Down 2 buttons, followed by the Enter/Play/Pause ®p button to select it . Scroll to djMoods using the ...