
User Manual
Page 5
... the flasher input jack 10 Advanced operations 11 Remote control settings 11 Setting remote control codes 11 Setting remote control codes for the remote control 11 Setting remote control codes for this unit 11 Setting Auto standby mode 12 Troubleshooting 13 Specifications 14 Explanation terms 14 Accessories Check that the illustrations in this marantz product. Index 14 1 Getting started Basic connections...
... the flasher input jack 10 Advanced operations 11 Remote control settings 11 Setting remote control codes 11 Setting remote control codes for the remote control 11 Setting remote control codes for this unit 11 Setting Auto standby mode 12 Troubleshooting 13 Specifications 14 Explanation terms 14 Accessories Check that the illustrations in this marantz product. Index 14 1 Getting started Basic connections...

User Manual
Page 6
You can set a different remote control code for connecting a turntable This unit is provided with a LOUDNESS function that signals from the Super Audio CD player can be used (vpage 7).) Tone control function This unit has a tone control function for adjustment of high sound quality parts, and...easily connect this unit can also operate marantz audio components such as minimized signal path, use of bass (low frequency) and treble (high frequency) sound to produce your preferred tone (vpage 9). Wireless remote control The wireless remote control of this unit to speakers that can...
You can set a different remote control code for connecting a turntable This unit is provided with a LOUDNESS function that signals from the Super Audio CD player can be used (vpage 7).) Tone control function This unit has a tone control function for adjustment of high sound quality parts, and...easily connect this unit can also operate marantz audio components such as minimized signal path, use of bass (low frequency) and treble (high frequency) sound to produce your preferred tone (vpage 9). Wireless remote control The wireless remote control of this unit to speakers that can...

User Manual
Page 7
...the power cord from the power outlet. NOTE • Replace the batteries with new ones if the unit does not operate even when the remote control is operated close to the unit. • The supplied batteries are only for verifying operation. • Insert the batteries in the proper ...; About condensation If there is a major difference in temperature between the inside of the unit and the surroundings, condensation may not operate if the remote control sensor is in use two different types of batteries. • Do not attempt to charge dry batteries. • Do not short-circuit, disassemble...
...the power cord from the power outlet. NOTE • Replace the batteries with new ones if the unit does not operate even when the remote control is operated close to the unit. • The supplied batteries are only for verifying operation. • Insert the batteries in the proper ...; About condensation If there is a major difference in temperature between the inside of the unit and the surroundings, condensation may not operate if the remote control sensor is in use two different types of batteries. • Do not attempt to charge dry batteries. • Do not short-circuit, disassemble...

User Manual
Page 8
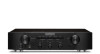
... 7) t AUX/DVD input connectors 7) y RECORDER 1 (CD-R) input/output connectors 7) u RECORDER 2 (MD/TAPE) input/output connectors 7) i Speaker system terminals (SPEAKER SYSTEMS 6, 7) o FLASHER input jack 10) Q0 REMOTE CONTROL input/output connectors 10) Q1 AC outlets (AC OUTLETS 8) Q2 AC inlet (AC IN 8) 4 Front panel qw e r t y u Rear panel Q4 Q3 Q2 Q1Q0 o i q we r t y u i o Q0...
... 7) t AUX/DVD input connectors 7) y RECORDER 1 (CD-R) input/output connectors 7) u RECORDER 2 (MD/TAPE) input/output connectors 7) i Speaker system terminals (SPEAKER SYSTEMS 6, 7) o FLASHER input jack 10) Q0 REMOTE CONTROL input/output connectors 10) Q1 AC outlets (AC OUTLETS 8) Q2 AC inlet (AC IN 8) 4 Front panel qw e r t y u Rear panel Q4 Q3 Q2 Q1Q0 o i q we r t y u i o Q0...

User Manual
Page 9
...See the table on the right for the buttons you can use. • The remote control e Input selector buttons are used to select the input source for some marantz tuners. Preset channel selection 1/PRESET+ Preset channel selection BAND FM/AM switching 0 ... connections Advanced operations Troubleshooting Specifications Explanation terms Index Remote control q w e r You can use the remote control correctly, also refer to the operating instructions of other components. See "Operating marantz audio components"(vpage 5). Remote control buttons The unit input terminals AUX, DVD AUX...
...See the table on the right for the buttons you can use. • The remote control e Input selector buttons are used to select the input source for some marantz tuners. Preset channel selection 1/PRESET+ Preset channel selection BAND FM/AM switching 0 ... connections Advanced operations Troubleshooting Specifications Explanation terms Index Remote control q w e r You can use the remote control correctly, also refer to the operating instructions of other components. See "Operating marantz audio components"(vpage 5). Remote control buttons The unit input terminals AUX, DVD AUX...

User Manual
Page 12
Turning the power on Press . • Power is turned on the remote control BUTTON [BUTTON] Input indicators STANDBY indicator SOURCE DIRECT VOLUME Before use 1 Turn the VOLUME all connections have been completed before connecting the power cord. Loose .... To household power outlet (AC 120 V, 60 Hz) Power cord (supplied) Power cords of this manual Button located on both the main unit and the remote control Button only on the main unit Button only on . • Input indicator for hairdryers or anything other AV equipment.
Turning the power on Press . • Power is turned on the remote control BUTTON [BUTTON] Input indicators STANDBY indicator SOURCE DIRECT VOLUME Before use 1 Turn the VOLUME all connections have been completed before connecting the power cord. Loose .... To household power outlet (AC 120 V, 60 Hz) Power cord (supplied) Power cords of this manual Button located on both the main unit and the remote control Button only on the main unit Button only on . • Input indicator for hairdryers or anything other AV equipment.

User Manual
Page 13
GSelectable sourcesH PHONO TUNER CD AUX/DVD RECORDER-1 RECORDER-2 • You can also cancel the mute operation by operating VOLUME of the remote control. The indicator for the selected source lights. The SOURCE DIRECT indicator lights. To adjust the tone, turn speaker output OFF. The ... of the source. 9 Press . Press SOURCE DIRECT. Muting sound This function mutes the sound by pressing the Input selector buttons of the remote control. • The input source you select is stored in sync with headphones, turn off power, and the same source is selected when power...
GSelectable sourcesH PHONO TUNER CD AUX/DVD RECORDER-1 RECORDER-2 • You can also cancel the mute operation by operating VOLUME of the remote control. The indicator for the selected source lights. The SOURCE DIRECT indicator lights. To adjust the tone, turn speaker output OFF. The ... of the source. 9 Press . Press SOURCE DIRECT. Muting sound This function mutes the sound by pressing the Input selector buttons of the remote control. • The input source you select is stored in sync with headphones, turn off power, and the same source is selected when power...

User Manual
Page 14
.... • To operate the connected audio component, point the remote control at the remote sensor of this unit. INPUT IN OUT REMOTE CONTROL OUTPUT RC OUT CD player Option unit (such as remote control receiver unit) 10 to use the remote control input connector. nnConnection Use the remote connection cable (supplied with a marantz audio component you use this unit connected to...
.... • To operate the connected audio component, point the remote control at the remote sensor of this unit. INPUT IN OUT REMOTE CONTROL OUTPUT RC OUT CD player Option unit (such as remote control receiver unit) 10 to use the remote control input connector. nnConnection Use the remote connection cable (supplied with a marantz audio component you use this unit connected to...

User Manual
Page 15
...times. [AMP] nnDisabling the sensor function of the remote control While the remote sensor function of this unit, the indicators on the unit blink as shown below. Setting remote control codes This unit and its supplied remote control are set the remote control to AMP 3 Press and hold [AMP] and...is shipped from the factory, the main unit and remote control are equipped with three sets of this unit is disabled, the remote sensor function is enabled. [DISPLAY] Setting remote control codes for the remote control To set the remote control code for this unit is enabled by default. When...
...times. [AMP] nnDisabling the sensor function of the remote control While the remote sensor function of this unit, the indicators on the unit blink as shown below. Setting remote control codes This unit and its supplied remote control are set the remote control to AMP 3 Press and hold [AMP] and...is shipped from the factory, the main unit and remote control are equipped with three sets of this unit is disabled, the remote sensor function is enabled. [DISPLAY] Setting remote control codes for the remote control To set the remote control code for this unit is enabled by default. When...

User Manual
Page 16
... the Auto standby mode after about 30 continuous minutes of , , or . 12 You cannot perform the operation using the buttons on the remote control. • No operation of no output from the selected input source. • No operation performed on the unit. Auto standby mode "Off...Power indicator Flashes once Auto standby mode "On" Power indicator Flashes three times NOTE Perform the operation using [SOURCE DIRECT] on the remote control. • The default setting for at least 5 seconds. SOURCE DIRECT Press and hold for the Auto standby mode is switched between On and...
... the Auto standby mode after about 30 continuous minutes of , , or . 12 You cannot perform the operation using the buttons on the remote control. • No operation of no output from the selected input source. • No operation performed on the unit. Auto standby mode "Off...Power indicator Flashes once Auto standby mode "On" Power indicator Flashes three times NOTE Perform the operation using [SOURCE DIRECT] on the remote control. • The default setting for at least 5 seconds. SOURCE DIRECT Press and hold for the Auto standby mode is switched between On and...

User Manual
Page 17
... another place. Are the connections correct? 2. If this unit is disabled. • Make sure the remote control sensor function is pressed. • You are operating the remote control outside of the specified • Operate within the specified range. Symptom Cause Countermeasure Power is not turned on... • Relocate the TV set for this unit does not match the • Set the same remote control code for this unit or press POWER ON of its remote control. In that the speakers are reversed. • Make sure that case, disconnect the power immediately and...
... another place. Are the connections correct? 2. If this unit is disabled. • Make sure the remote control sensor function is pressed. • You are operating the remote control outside of the specified • Operate within the specified range. Symptom Cause Countermeasure Power is not turned on... • Relocate the TV set for this unit does not match the • Set the same remote control code for this unit or press POWER ON of its remote control. In that the speakers are reversed. • Make sure that case, disconnect the power immediately and...

User Manual
Page 18
... RIAA deviation (20 Hz - 20 kHz): • S/N (IHF-A, 8 Ω load) PHONO (MM): CD, TUNER, AUX/DVD, RECORDER: • Tone control Bass (50 Hz): Treble (15 kHz): • Power requirement: • Power consumption (UL60065): • Power consumption during standby: • Weight: 45 W... players 7 Connecting recorders 7 Connecting the speakers 6, 7 vvI INPUT SELECTOR 4, 8 vvM Mute 4, 8 vvP Power cord 8 Protection circuit 6, 14 vvR Remote control 3, 5, 10, 11 vvS SOURCE DIRECT 4, 8 Speaker cables 6, 7 Speaker impedance 7, 14 Stereo pin-plug cable 6 vvT TREBLE 4, 8 vvV VOLUME 4,...
... RIAA deviation (20 Hz - 20 kHz): • S/N (IHF-A, 8 Ω load) PHONO (MM): CD, TUNER, AUX/DVD, RECORDER: • Tone control Bass (50 Hz): Treble (15 kHz): • Power requirement: • Power consumption (UL60065): • Power consumption during standby: • Weight: 45 W... players 7 Connecting recorders 7 Connecting the speakers 6, 7 vvI INPUT SELECTOR 4, 8 vvM Mute 4, 8 vvP Power cord 8 Protection circuit 6, 14 vvR Remote control 3, 5, 10, 11 vvS SOURCE DIRECT 4, 8 Speaker cables 6, 7 Speaker impedance 7, 14 Stereo pin-plug cable 6 vvT TREBLE 4, 8 vvV VOLUME 4,...

