Manual - English (for the UK)
Page 1
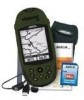
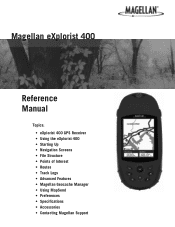
Magellan eXplorist 400 Reference Manual Topics: • eXplorist 400 GPS Receiver • Using the eXplorist 400 • Starting Up • Navigation Screens • File Structure • Points of Interest • Routes • Track Logs • Advanced Features • Magellan Geocache Manager • Using MapSend • Preferences • Specifications • Accessories • Contacting Magellan Support
Magellan eXplorist 400 Reference Manual Topics: • eXplorist 400 GPS Receiver • Using the eXplorist 400 • Starting Up • Navigation Screens • File Structure • Points of Interest • Routes • Track Logs • Advanced Features • Magellan Geocache Manager • Using MapSend • Preferences • Specifications • Accessories • Contacting Magellan Support
Manual - English (for the UK)
Page 4
... Customizing the Information Fields 24 Position Screen 25 Position Screen Overview 25 Resetting the Trip Odometer 26 Satellite Status Screen 27 Basic File Stucture 28 File Structure Overview 28 Using the Filing System with POIs 29 Using the Filing System with Routes 29 Using the Filing System with Track Logs 30 Points of Interest 31 Marking Your Position 31 Quick-Marking Your Position 31 Marking Your Position (Personalized 32 Making POIs for Locations Other Than Your Present Position 33 Marking a Position by Entering Coordinates 33 Marking a Position using the Map...
... Customizing the Information Fields 24 Position Screen 25 Position Screen Overview 25 Resetting the Trip Odometer 26 Satellite Status Screen 27 Basic File Stucture 28 File Structure Overview 28 Using the Filing System with POIs 29 Using the Filing System with Routes 29 Using the Filing System with Track Logs 30 Points of Interest 31 Marking Your Position 31 Quick-Marking Your Position 31 Marking Your Position (Personalized 32 Making POIs for Locations Other Than Your Present Position 33 Marking a Position by Entering Coordinates 33 Marking a Position using the Map...
Manual - English (for the UK)
Page 14
... your eXplorist is a one-leg route with a beginning (where you are many different ways you have been preloaded into your position, press the MARK button to this , but the simplest and most commonly used feature of the eXplorist is instantaneously shown on your limit. This time you along that have set the name of the point of your destination. Using the eXplorist 400 7 Step...
... your eXplorist is a one-leg route with a beginning (where you are many different ways you have been preloaded into your position, press the MARK button to this , but the simplest and most commonly used feature of the eXplorist is instantaneously shown on your limit. This time you along that have set the name of the point of your destination. Using the eXplorist 400 7 Step...
Manual - English (for the UK)
Page 21
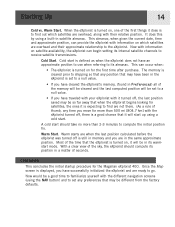
... initial startup procedure for the first time after purchase. Once the Map screen is turned on for the Magellan eXplorist 400. Warm Start. It does this by using a cold start. This can begin setting its warmstart mode. With a clear view of the sky, the eXplorist should take no more than 2-3 minutes to its position in memory and you have an approximate position to use when referring to compute the initial...
... initial startup procedure for the first time after purchase. Once the Map screen is turned on for the Magellan eXplorist 400. Warm Start. It does this by using a cold start. This can begin setting its warmstart mode. With a clear view of the sky, the eXplorist should take no more than 2-3 minutes to its position in memory and you have an approximate position to use when referring to compute the initial...

Manual - English (for the UK)
Page 22
...; Press MENU and select Customize page to change the information displayed at the bottom of the display. Each screen provides the same information in a different format, giving you the choice of choosing the screen that can also save your present position with any background map data for the area displayed. Navigation Screens 15 Accessing the Navigation Screens The eXplorist has three navigation screens, as well as a Satellite Status screen that best suits your position, as well...
...; Press MENU and select Customize page to change the information displayed at the bottom of the display. Each screen provides the same information in a different format, giving you the choice of choosing the screen that can also save your present position with any background map data for the area displayed. Navigation Screens 15 Accessing the Navigation Screens The eXplorist has three navigation screens, as well as a Satellite Status screen that best suits your position, as well...

Manual - English (for the UK)
Page 28
... fixed interval track points. To change the map detail: 1. Use the Arrow joystick to highlight the Detail field. 5. Press NAV to return to highlight Map Setup. 3. This saves memory and provides a track log that, while slightly jagged, is recording your travels. Use the Arrow joystick to the Map screen. Press ENTER. 4. Press ENTER. 6. In Auto mode, the eXplorist doesn't save track points when you make turns. While viewing the Map screen, press MENU. 2. Use the Arrow joystick to highlight Off, Auto, Auto...
... fixed interval track points. To change the map detail: 1. Use the Arrow joystick to highlight the Detail field. 5. Press NAV to return to highlight Map Setup. 3. This saves memory and provides a track log that, while slightly jagged, is recording your travels. Use the Arrow joystick to the Map screen. Press ENTER. 4. Press ENTER. 6. In Auto mode, the eXplorist doesn't save track points when you make turns. While viewing the Map screen, press MENU. 2. Use the Arrow joystick to highlight Off, Auto, Auto...
Manual - English (for the UK)
Page 72
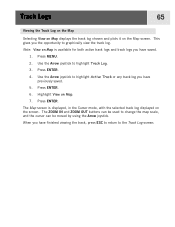
... OUT buttons can be used to highlight Active Track or any track log you have previously saved. 5. Press ENTER. 6. Press MENU. 2. Use the Arrow joystick to change the map scale, and the cursor can be moved by using the Arrow joystick. Track Logs 65 Viewing the Track Log on the Map Selecting View on Map displays the track log chosen and plots it on the screen. When you have finished viewing the track...
... OUT buttons can be used to highlight Active Track or any track log you have previously saved. 5. Press ENTER. 6. Press MENU. 2. Use the Arrow joystick to change the map scale, and the cursor can be moved by using the Arrow joystick. Track Logs 65 Viewing the Track Log on the Map Selecting View on Map displays the track log chosen and plots it on the screen. When you have finished viewing the track...

Manual - English (for the UK)
Page 91
... SD card, press ENTER. To change to a specified location. Enter the serial number for saving by accessing the About... The Ready to Update window is displayed. Turn the eXplorist on your eXplorist in the space provided. Select USB File Transfer and press ENTER. Save the Region to be converted before using them in the eXplorist.) Turn off the eXplorist and connect the USB cable supplied with information about the region that the "T" and "P" boxes to begin saving the region. Map files saved...
... SD card, press ENTER. To change to a specified location. Enter the serial number for saving by accessing the About... The Ready to Update window is displayed. Turn the eXplorist on your eXplorist in the space provided. Select USB File Transfer and press ENTER. Save the Region to be converted before using them in the eXplorist.) Turn off the eXplorist and connect the USB cable supplied with information about the region that the "T" and "P" boxes to begin saving the region. Map files saved...
Manual - English (for the UK)
Page 92
... Active Setup and press ENTER. Using the eXplorist with either the Magellan eXplorist, the SD card mounted in the list of the eXplorist is displayed. In this example we are uploading a detailed map, background maps are uploaded following these same guidelines.) The popup menu to an SD card in your computer available for saving POIs and creating routes. When at least one map is selected, the Next button is made...
... Active Setup and press ENTER. Using the eXplorist with either the Magellan eXplorist, the SD card mounted in the list of the eXplorist is displayed. In this example we are uploading a detailed map, background maps are uploaded following these same guidelines.) The popup menu to an SD card in your computer available for saving POIs and creating routes. When at least one map is selected, the Next button is made...
Manual - English (for the UK)
Page 93
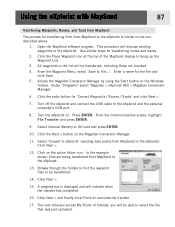
... software program and under the Waypoints or Track menu, select 'Load from the eXplorist to MapSend. 9. Turn off the eXplorist and connect the USB cable to be installed using the Magellan Wizard CD-ROM that you must use the Magellan Conversion Manager instead of transferring the files directly in a more accessible manner than previous GPS receivers, you converted. A progress bar is displayed and will indicate when the transfer has completed. 12. Select 'Convert to MapSend' (sending data points...
... software program and under the Waypoints or Track menu, select 'Load from the eXplorist to MapSend. 9. Turn off the eXplorist and connect the USB cable to be installed using the Magellan Wizard CD-ROM that you must use the Magellan Conversion Manager instead of transferring the files directly in a more accessible manner than previous GPS receivers, you converted. A progress bar is displayed and will indicate when the transfer has completed. 12. Select 'Convert to MapSend' (sending data points...

Manual - English (for the UK)
Page 94
... to File...'. Open the MapSend software program. From the Waypoint Menu, select 'Save to conclude the transfer. 17. Select 'Convert to eXplorist' (sending data points from MapSend to the eXplorist is displayed and will be transferred, including those not checked. 4. Turn off the eXplorist and connect the USB cable to the eXplorist) Click Next >. 12. Select Internal Memory or SD card and press ENTER. 10. Click on the Magellan Conversion Manager. 11. Using the eXplorist with MapSend 87 Transferring Waypoints, Routes, and Track from...
... to File...'. Open the MapSend software program. From the Waypoint Menu, select 'Save to conclude the transfer. 17. Select 'Convert to eXplorist' (sending data points from MapSend to the eXplorist is displayed and will be transferred, including those not checked. 4. Turn off the eXplorist and connect the USB cable to the eXplorist) Click Next >. 12. Select Internal Memory or SD card and press ENTER. 10. Click on the Magellan Conversion Manager. 11. Using the eXplorist with MapSend 87 Transferring Waypoints, Routes, and Track from...

Manual - English (for the UK)
Page 98
... change these defaults to the top level folder for POI's, routes, and geocache files. 1. If you selected Select File, using the Arrow joystick to highlight the file you are working with. Use the Arrow joystick to select Select File or (POI, Route, Detail Map, etc.) File Off. Changing the Default Folders You can set as to where you are saving your data. Note: Selecting File Off turns the default file off. These default locations may not meet your requirements as the default. Use...
... change these defaults to the top level folder for POI's, routes, and geocache files. 1. If you selected Select File, using the Arrow joystick to highlight the file you are working with. Use the Arrow joystick to select Select File or (POI, Route, Detail Map, etc.) File Off. Changing the Default Folders You can set as to where you are saving your data. Note: Selecting File Off turns the default file off. These default locations may not meet your requirements as the default. Use...

Manual - English
Page 1
Magellan eXplorist 400 Reference Manual Topics: • eXplorist 400 GPS Receiver • Using the eXplorist 400 • Starting Up • Navigation Screens • File Structure • Points of Interest • Routes • Track Logs • Advanced Features • Magellan Geocache Manager • Using MapSend • Preferences • Specifications • Accessories • Contacting Magellan Support
Magellan eXplorist 400 Reference Manual Topics: • eXplorist 400 GPS Receiver • Using the eXplorist 400 • Starting Up • Navigation Screens • File Structure • Points of Interest • Routes • Track Logs • Advanced Features • Magellan Geocache Manager • Using MapSend • Preferences • Specifications • Accessories • Contacting Magellan Support

Manual - English
Page 4
... Customizing the Information Fields 24 Position Screen 25 Position Screen Overview 25 Resetting the Trip Odometer 26 Satellite Status Screen 27 Basic File Stucture 28 File Structure Overview 28 Using the Filing System with POIs 29 Using the Filing System with Routes 29 Using the Filing System with Track Logs 30 Points of Interest 31 Marking Your Position 31 Quick-Marking Your Position 31 Marking Your Position (Personalized 32 Making POIs for Locations Other Than Your Present Position 33 Marking a Position by Entering Coordinates 33 Marking a Position using the Map...
... Customizing the Information Fields 24 Position Screen 25 Position Screen Overview 25 Resetting the Trip Odometer 26 Satellite Status Screen 27 Basic File Stucture 28 File Structure Overview 28 Using the Filing System with POIs 29 Using the Filing System with Routes 29 Using the Filing System with Track Logs 30 Points of Interest 31 Marking Your Position 31 Quick-Marking Your Position 31 Marking Your Position (Personalized 32 Making POIs for Locations Other Than Your Present Position 33 Marking a Position by Entering Coordinates 33 Marking a Position using the Map...

Manual - English
Page 14
... commonly used feature of the eXplorist is as simple as the icon or a name for the night. When saving your destination. Press the MARK button and set up -to-date information about getting to your position, you to the campsite when you can also add attributes such as pressing the GOTO button and selecting the destination from the list of My Points of interest. This time...
... commonly used feature of the eXplorist is as simple as the icon or a name for the night. When saving your destination. Press the MARK button and set up -to-date information about getting to your position, you to the campsite when you can also add attributes such as pressing the GOTO button and selecting the destination from the list of My Points of interest. This time...

Manual - English
Page 21
... factory defaults. Now would be a good time to familiarize yourself with the different navigation screens (using a cold start should compute its almanac. This can begin setting its internal satellite channels to find are overhead, along with it turned off , there is a good chance that when the eXplorist begins looking for the Magellan eXplorist 400. With a clear view of the memory will be cleared and the last computed position will start...
... factory defaults. Now would be a good time to familiarize yourself with the different navigation screens (using a cold start should compute its almanac. This can begin setting its internal satellite channels to find are overhead, along with it turned off , there is a good chance that when the eXplorist begins looking for the Magellan eXplorist 400. With a clear view of the memory will be cleared and the last computed position will start...

Manual - English
Page 22
... the screen. • Press MENU and select Map Setup to change the scale. • The arrow cursor in a different format, giving you the choice of map detail, track mode and the primary usage (land or marine). Map Screen The first, and most commonly used, screen is the Map screen. Highlights of the Map screen: • Use the zoom in/out buttons to change the screen orientation, level of choosing the screen that can also save the position...
... the screen. • Press MENU and select Map Setup to change the scale. • The arrow cursor in a different format, giving you the choice of map detail, track mode and the primary usage (land or marine). Map Screen The first, and most commonly used, screen is the Map screen. Highlights of the Map screen: • Use the zoom in/out buttons to change the screen orientation, level of choosing the screen that can also save the position...

Manual - English
Page 91
... automatically saves files to Your Computer's Hard Drive. Select Internal Memory or SD Card and press ENTER.) Memory space in the eXplorist. Select SD Card and press ENTER.) Maps saved directly to the back of the region is displayed, press ENTER. The path to the saved files is displayed with information about the region that you are uploading the detail map to the eXplorist or to an SD card installed in the eXplorist.) Turn off the eXplorist and connect the USB cable...
... automatically saves files to Your Computer's Hard Drive. Select Internal Memory or SD Card and press ENTER.) Memory space in the eXplorist. Select SD Card and press ENTER.) Maps saved directly to the back of the region is displayed, press ENTER. The path to the saved files is displayed with information about the region that you are uploading the detail map to the eXplorist or to an SD card installed in the eXplorist.) Turn off the eXplorist and connect the USB cable...

Manual - English
Page 93
... USB cable to select the SD card: Press ENTER. Under "Programs" select 'Magellan > eXplorist 400 > Magellan Conversion Manager'. 3. Turn the eXplorist on the active folder icon. Click the Next > button on the Windows toolbar. 2. A progress bar is displayed and will indicate when the transfer has completed. 12. Open the MapSend software program and under the Waypoints or Track menu, select 'Load from MapSend and the eXplorist using the Magellan Conversion Manager. Highlight File Transfer and press ENTER. Select 'Convert to MapSend' (sending data points...
... USB cable to select the SD card: Press ENTER. Under "Programs" select 'Magellan > eXplorist 400 > Magellan Conversion Manager'. 3. Turn the eXplorist on the active folder icon. Click the Next > button on the Windows toolbar. 2. A progress bar is displayed and will indicate when the transfer has completed. 12. Open the MapSend software program and under the Waypoints or Track menu, select 'Load from MapSend and the eXplorist using the Magellan Conversion Manager. Highlight File Transfer and press ENTER. Select 'Convert to MapSend' (sending data points...
Manual - English
Page 94
... SD card and press ENTER. 10. Select 'Convert to eXplorist' (sending data points from MapSend to the eXplorist. Enter a name for 'Convert Waypoints / Routes / Tracks' and click Next >. 7. Click the radio button for the file and click Save. 5. Press ENTER. A progress bar is similar to the one described above. 1. All waypoints in the list will be transferred. 14, Click Next >. 15. Under "Programs" select 'Magellan > eXplorist 400 > Magellan Conversion Manager'. 6. Turn off the eXplorist and connect the USB cable...
... SD card and press ENTER. 10. Select 'Convert to eXplorist' (sending data points from MapSend to the eXplorist. Enter a name for 'Convert Waypoints / Routes / Tracks' and click Next >. 7. Click the radio button for the file and click Save. 5. Press ENTER. A progress bar is similar to the one described above. 1. All waypoints in the list will be transferred. 14, Click Next >. 15. Under "Programs" select 'Magellan > eXplorist 400 > Magellan Conversion Manager'. 6. Turn off the eXplorist and connect the USB cable...


