Triton User Manual Addendum - English, French, Spanish
Page 1
...The track Info screen is equal to it's current location, point B. Triton 300 Triton 400 Triton 500 Triton 1500 Triton 2000 01.90.00.0279 01.74.00.0278 01.92.00.0283... of the User Grid. The Triton has added an imaginary line ( C ) to the saved track ("Trail"). To access area calculation, press ENTER while viewing the Map screen. Scroll down the contextual menu... the track to begin recording your "footsteps". Triton User Manual Addendum This addendum applies to Triton GPS receivers that have a software version that you want to the Triton, press ENTER again and select "Stop & ...
...The track Info screen is equal to it's current location, point B. Triton 300 Triton 400 Triton 500 Triton 1500 Triton 2000 01.90.00.0279 01.74.00.0278 01.92.00.0283... of the User Grid. The Triton has added an imaginary line ( C ) to the saved track ("Trail"). To access area calculation, press ENTER while viewing the Map screen. Scroll down the contextual menu... the track to begin recording your "footsteps". Triton User Manual Addendum This addendum applies to Triton GPS receivers that have a software version that you want to the Triton, press ENTER again and select "Stop & ...
Triton User Manual Addendum - English, French, Spanish
Page 2
... for your mind, you change your Triton. The Navigation screen will be displayed with four legs, A to B to C to D to view map areas other then your active route. On the MAP DATUM drop-down menu, select User Grid. When setting a custom position, the GPS portion of the entire route. To ... define its parameters. Select View > Settings > Navigation. Press ENTER. You can tell the Triton to go to the next destination (C) and repeat the process to go there instead of the receiver is disabled and the screen is activated it to go to the Satellite Status screen, press ...
... for your mind, you change your Triton. The Navigation screen will be displayed with four legs, A to B to C to D to view map areas other then your active route. On the MAP DATUM drop-down menu, select User Grid. When setting a custom position, the GPS portion of the entire route. To ... define its parameters. Select View > Settings > Navigation. Press ENTER. You can tell the Triton to go to the next destination (C) and repeat the process to go there instead of the receiver is disabled and the screen is activated it to go to the Satellite Status screen, press ...

Manual - English
Page 5
... for the Large Data, Compass or Satellite Status Screen 12 Accessing the Map Screen Contextual Menu 13 Accessing the Compass or Speedometer Screen Contextual Menu 13 Map Screen ...13 Current Location Screen 13 Large Data Screen 14 Speedometer Screen 14 Resetting the Odometer 14 Resetting the Trip Odometer 14 Table of Contents Magellan Triton 1
... for the Large Data, Compass or Satellite Status Screen 12 Accessing the Map Screen Contextual Menu 13 Accessing the Compass or Speedometer Screen Contextual Menu 13 Map Screen ...13 Current Location Screen 13 Large Data Screen 14 Speedometer Screen 14 Resetting the Odometer 14 Resetting the Trip Odometer 14 Table of Contents Magellan Triton 1
Manual - English
Page 6
... Strip and Road Compass Screens 15 The Altimeter / Barometer Screen (Magellan Triton 500 16 The Satellite Status Screen 16 Explanation of Data Field Types 17 Map Screen ...19 Map Screen Overview 19 Customizing the Map Screen Data Fields 20 Saving Your Current Position as a Waypoint 20...Activating a Profile 30 Editing a Profile 30 Information Page (assigns which navigation screens are displayed 30 Display Page 30 Map Page ...30 Sensors Page (Magellan Triton 500 31 Alarms Page ...31 Waypoints ...32 Waypoint Detail Screen Overview 32 Creating Waypoints 33 Creating a Current Location ...
... Strip and Road Compass Screens 15 The Altimeter / Barometer Screen (Magellan Triton 500 16 The Satellite Status Screen 16 Explanation of Data Field Types 17 Map Screen ...19 Map Screen Overview 19 Customizing the Map Screen Data Fields 20 Saving Your Current Position as a Waypoint 20...Activating a Profile 30 Editing a Profile 30 Information Page (assigns which navigation screens are displayed 30 Display Page 30 Map Page ...30 Sensors Page (Magellan Triton 500 31 Alarms Page ...31 Waypoints ...32 Waypoint Detail Screen Overview 32 Creating Waypoints 33 Creating a Current Location ...
Manual - English
Page 7
... Using the Pan Cursor 33 Creating a Waypoint from a Point on the Map Using the Triton Menu 34 Creating a Custom Waypoint from the Map Screen 34 Creating a Custom Waypoint Using the Triton Menu 35 Viewing Waypoints 35 Viewing a Saved Waypoint 35 Editing Waypoints 36 ...38 Clearing Memory 39 Restoring Factory Settings 39 Setting Connectivity 39 Getting Software Version Information 40 Viewing Copyright Information 40 Personalizing Magellan Triton 40 Performing Diagnostic Checks 40 Geocache Waypoints ...42 Creating a Geocache Waypoint 42 Editing a Saved Geocache Waypoint 42 Deleting ...
... Using the Pan Cursor 33 Creating a Waypoint from a Point on the Map Using the Triton Menu 34 Creating a Custom Waypoint from the Map Screen 34 Creating a Custom Waypoint Using the Triton Menu 35 Viewing Waypoints 35 Viewing a Saved Waypoint 35 Editing Waypoints 36 ...38 Clearing Memory 39 Restoring Factory Settings 39 Setting Connectivity 39 Getting Software Version Information 40 Viewing Copyright Information 40 Personalizing Magellan Triton 40 Performing Diagnostic Checks 40 Geocache Waypoints ...42 Creating a Geocache Waypoint 42 Editing a Saved Geocache Waypoint 42 Deleting ...
Manual - English
Page 8
... Waypoint (base map 54 Searching for a Place Waypoint (Detail Map 54 Turning On/Off the Waypoint Proximity Alarm for a Place Waypoint 55 Viewing Best Fish and Hunt Times for a Place Waypoint 55 Viewing Sun and Moon Rise and Set Times for a Place Waypoint 56 Media ...57 Browsing Photographs 57 Table of Contents Magellan Triton 4
... Waypoint (base map 54 Searching for a Place Waypoint (Detail Map 54 Turning On/Off the Waypoint Proximity Alarm for a Place Waypoint 55 Viewing Best Fish and Hunt Times for a Place Waypoint 55 Viewing Sun and Moon Rise and Set Times for a Place Waypoint 56 Media ...57 Browsing Photographs 57 Table of Contents Magellan Triton 4
Manual - English
Page 9
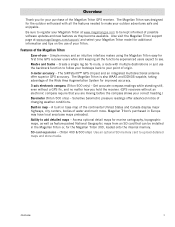
...Triton 500 only) - Ability to upload detailed maps and store media. SD-card expansion - (Triton 400 & 500 only) Use an optional SD memory card to add detailed maps - Built-in base map of the continental United States and Canada display major highways, city centers, bodies of your Triton. The Magellan Triton... the Magellan Triton Ease-of origin. 3-meter accuracy - A built-in map - Be sure to register your Magellan Triton at www.magellangps.com/support/ and select your point of -use - Magellan Triton's purchased in the Magellan Triton or, for first time GPS receiver users ...
...Triton 500 only) - Ability to upload detailed maps and store media. SD-card expansion - (Triton 400 & 500 only) Use an optional SD memory card to add detailed maps - Built-in base map of the continental United States and Canada display major highways, city centers, bodies of your Triton. The Magellan Triton... the Magellan Triton Ease-of origin. 3-meter accuracy - A built-in map - Be sure to register your Magellan Triton at www.magellangps.com/support/ and select your point of -use - Magellan Triton's purchased in the Magellan Triton or, for first time GPS receiver users ...
Manual - English
Page 11
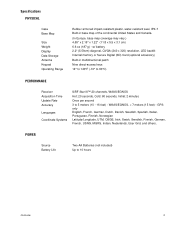
... memory or Secure Digital (SD) Card (optional accessory) Built-in base map of the continental United States and Canada. (In Europe, base map coverage may vary.) 4.65" x 2.16" x 1.22" (11.8 x 5.5 x 3.1 cm) 6.6 oz (187 g) - GPS only English, French, German, Dutch, Danish, Swedish, Spanish, Italian, Portuguese... Base Map Size Weight Display Data Storage Antenna Keypad Operating Range Rubber armored impact-resistant plastic, water-resistant seal, IPX-7 Built-in multidirectional patch Nine direct-access keys 14° to 140°F (-10° to 60°C) PERFORMANCE Receiver Acquisition ...
... memory or Secure Digital (SD) Card (optional accessory) Built-in base map of the continental United States and Canada. (In Europe, base map coverage may vary.) 4.65" x 2.16" x 1.22" (11.8 x 5.5 x 3.1 cm) 6.6 oz (187 g) - GPS only English, French, German, Dutch, Danish, Swedish, Spanish, Italian, Portuguese... Base Map Size Weight Display Data Storage Antenna Keypad Operating Range Rubber armored impact-resistant plastic, water-resistant seal, IPX-7 Built-in multidirectional patch Nine direct-access keys 14° to 140°F (-10° to 60°C) PERFORMANCE Receiver Acquisition ...
Manual - English
Page 12
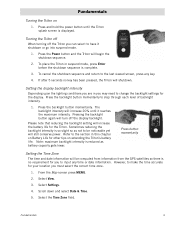
... is so slight so as battery capacity gets lower. Refer to be computed from information from the GPS satellites so there is complete. 3. From the Map screen press MENU. 2. Press the Power button and the Triton will turn off the Triton you can select to have it reaches the maximum intensity. To place the...
... is so slight so as battery capacity gets lower. Refer to be computed from information from the GPS satellites so there is complete. 3. From the Map screen press MENU. 2. Press the Power button and the Triton will turn off the Triton you can select to have it reaches the maximum intensity. To place the...
Manual - English
Page 13
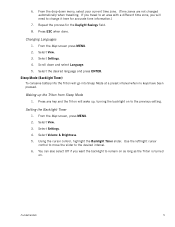
From the Map screen press MENU. 2. Sleep Mode (Backlight Timer) To conserve battery life the Triton will wake up the Triton from Sleep Mode 1. Select Settings. 4. Use the left/right cursor control to move the slider to the previous setting. Select View. 3. Select the... the Backlight Timer slider. Setting the Backlight Timer 1. Fundamentals 5 Press any key and the Triton will go into Sleep Mode at a preset interval when no keys have been pressed. Select Volume & Brightness. 5. From the Map screen, press MENU. 2. You can also select Off if you will need to change it...
From the Map screen press MENU. 2. Sleep Mode (Backlight Timer) To conserve battery life the Triton will wake up the Triton from Sleep Mode 1. Select Settings. 4. Use the left/right cursor control to move the slider to the previous setting. Select View. 3. Select the... the Backlight Timer slider. Setting the Backlight Timer 1. Fundamentals 5 Press any key and the Triton will go into Sleep Mode at a preset interval when no keys have been pressed. Select Volume & Brightness. 5. From the Map screen, press MENU. 2. You can also select Off if you will need to change it...
Manual - English
Page 14
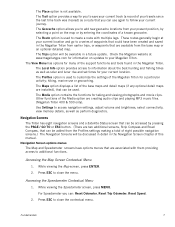
...Create Menu has the same options as part of the internal base map or a destination waypoint found on a detailed map that you can be saved by selecting a point on an optional SD card (400 & 500) or into the Magellan Triton as the Go To Menu but these menu options brings up the... for a Go To route. The Place option is done through the Main Menu. From the Map screen, press MENU. 2. Select Settings. 4. Scroll down and select Power Options. 5. Selecting one of the Magellan Triton is used to select a saved geocache waypoint and use it as the destination waypoint for information...
...Create Menu has the same options as part of the internal base map or a destination waypoint found on a detailed map that you can be saved by selecting a point on an optional SD card (400 & 500) or into the Magellan Triton as the Go To Menu but these menu options brings up the... for a Go To route. The Place option is done through the Main Menu. From the Map screen, press MENU. 2. Select Settings. 4. Scroll down and select Power Options. 5. Selecting one of the Magellan Triton is used to select a saved geocache waypoint and use it as the destination waypoint for information...
Manual - English
Page 15
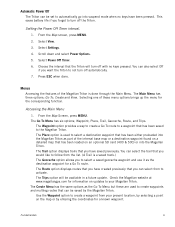
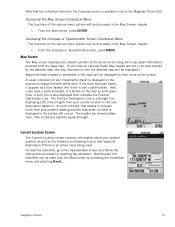
...playing MP3 music files. (Magellan Triton 400 & 500 only). While viewing the Map screen, press ENTER. 2. Press ESC to follow your current location. Fundamentals 7 Check the Magellan website at your Magellan Triton. The View Menu has options for you can be used. hiking, marine use again to ... navigation screens.) The Navigation Screens will be discussed in detail in the Magellan Triton. The Trail option provides a way for many of the base maps and detail maps (if any optional detail maps are two additional screens, Strip Compass and Road Compass, that are associated...
...playing MP3 music files. (Magellan Triton 400 & 500 only). While viewing the Map screen, press ENTER. 2. Press ESC to follow your current location. Fundamentals 7 Check the Magellan website at your Magellan Triton. The View Menu has options for you can be used. hiking, marine use again to ... navigation screens.) The Navigation Screens will be discussed in detail in the Magellan Triton. The Trail option provides a way for many of the base maps and detail maps (if any optional detail maps are two additional screens, Strip Compass and Road Compass, that are associated...
Manual - English
Page 16
... Select the field you want to use to activate and press ENTER. 5. The Triton will appear before the name of the map when it . 1. Select Maps. 4. Fundamentals 8 Data Fields The Map screen, Large Data screen, the Compass screen, and the Satellite Status screen have ... the Map Screen 1. Once loaded, you will be customized to select the desired field. 4. Highlight the detailed map from the list that has customizable data fields, press ENTER. Magellan Triton 300 installs the National Geographic maps into their internal memory, while Magellan Triton 400 and 500 stores the maps on an...
... Select the field you want to use to activate and press ENTER. 5. The Triton will appear before the name of the map when it . 1. Select Maps. 4. Fundamentals 8 Data Fields The Map screen, Large Data screen, the Compass screen, and the Satellite Status screen have ... the Map Screen 1. Once loaded, you will be customized to select the desired field. 4. Highlight the detailed map from the list that has customizable data fields, press ENTER. Magellan Triton 300 installs the National Geographic maps into their internal memory, while Magellan Triton 400 and 500 stores the maps on an...

Manual - English
Page 19
... the Profile settings. OC C Selecting Navigation Screens 1. While viewing the Map screen press MENU. 2. Turning Navigation Screens On or Off 1. Select Profiles. Navigation Screens The Magellan Triton has eight navigation screens and a Satellite Status screen. CM PAGE C ESC OC Magellan Triton 500 only C Customizable screen O Optional screen* M Contextual menu All screens (except the...
... the Profile settings. OC C Selecting Navigation Screens 1. While viewing the Map screen press MENU. 2. Turning Navigation Screens On or Off 1. Select Profiles. Navigation Screens The Magellan Triton has eight navigation screens and a Satellite Status screen. CM PAGE C ESC OC Magellan Triton 500 only C Customizable screen O Optional screen* M Contextual menu All screens (except the...
Manual - English
Page 20
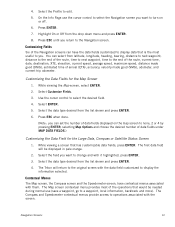
...Press ESC until you . Customizing the Data Fields for the Large Data, Compass or Satellite Status Screen 1. Select Customize Fields. 3. The Triton will be needed during normal use the cursor control to select the Navigation screen you want to operations associated with the data field customized to... you return to select the desired field. 4. On the Info Page use (save a waypoint, go to turn on the map screen to edit. 5. Customizing Fields Six of the Navigation screens can have contextual menus associated with it highlighted, press ENTER. 3. Select the ...
...Press ESC until you . Customizing the Data Fields for the Large Data, Compass or Satellite Status Screen 1. Select Customize Fields. 3. The Triton will be needed during normal use the cursor control to select the Navigation screen you want to operations associated with the data field customized to... you return to select the desired field. 4. On the Info Page use (save a waypoint, go to turn on the map screen to edit. 5. Customizing Fields Six of the Navigation screens can have contextual menus associated with it highlighted, press ENTER. 3. Select the ...
Manual - English
Page 21
... signal strength. To reset the odometer, go to indicate north from your present position as well as a blue dashed line (color is displayed on the Magellan Triton 500. Map Screen The Map screen displays your movements (track) is user customizable).
... signal strength. To reset the odometer, go to indicate north from your present position as well as a blue dashed line (color is displayed on the Magellan Triton 500. Map Screen The Map screen displays your movements (track) is user customizable).
Manual - English
Page 23
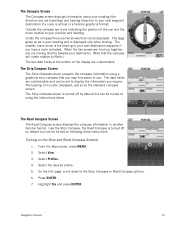
... the bearing to your next destination waypoint if you have a route activated. When the two arrows are lined up together, you are moving . From the Map screen, press MENU. 2. On the Info page, scroll down to your heading and is turned off by default but can be displayed. The large green...
... the bearing to your next destination waypoint if you have a route activated. When the two arrows are lined up together, you are moving . From the Map screen, press MENU. 2. On the Info page, scroll down to your heading and is turned off by default but can be displayed. The large green...
Manual - English
Page 27
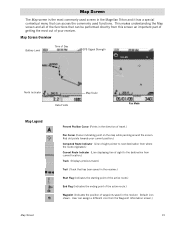
...the Waypoint Information screen.) Map Screen 19 User can assign a different icon from this screen an important part of getting the most commonly used screen in the Magellan Triton and it has a special contextual menu that has been saved in the receiver.) Start Flag (Indicates...current location.) Track (Displays previous travel .) Pan Cursor (Cursor indicating point on the map while panning around the screen. Map Screen Overview Battery Level Time of Day GPS Signal Strength North Indicator Data Fields Map Scale Pan Mode Map Legend Present Position Cursor (Points in the receiver.
...the Waypoint Information screen.) Map Screen 19 User can assign a different icon from this screen an important part of getting the most commonly used screen in the Magellan Triton and it has a special contextual menu that has been saved in the receiver.) Start Flag (Indicates...current location.) Track (Displays previous travel .) Pan Cursor (Cursor indicating point on the map while panning around the screen. Map Screen Overview Battery Level Time of Day GPS Signal Strength North Indicator Data Fields Map Scale Pan Mode Map Legend Present Position Cursor (Points in the receiver.
Manual - English
Page 28
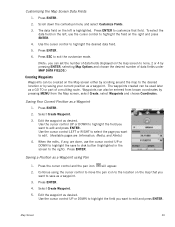
... left is highlighted. Press ENTER. 6. Edit the waypoint as a Waypoint 1. Press ENTER. Press ENTER to highlight the desired data field. 5. Map Screen 20 To select the data field on the right and press ENTER. 4. Use the cursor control UP or DOWN to highlight the field you... want to edit. (Available pages are done, use the cursor control to the right). Customizing the Map Screen Data Fields 1. Scroll down the contextual menu and select Customize Fields. 3. Waypoints can be entered from known coordinates by saving your ...
... left is highlighted. Press ENTER. 6. Edit the waypoint as a Waypoint 1. Press ENTER. Press ENTER to highlight the desired data field. 5. Map Screen 20 To select the data field on the right and press ENTER. 4. Use the cursor control UP or DOWN to highlight the field you... want to edit. (Available pages are done, use the cursor control to the right). Customizing the Map Screen Data Fields 1. Scroll down the contextual menu and select Customize Fields. 3. Waypoints can be entered from known coordinates by saving your ...
Manual - English
Page 29
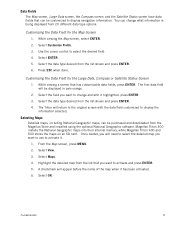
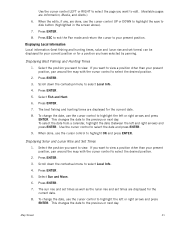
...use the cursor control UP or DOWN to highlight the save to edit. (Available pages are displayed for the current date. 8. Press ENTER. 5. Map Screen 21 Scroll down the contextual menu to select Local Info. 4. The best fishing and hunting times are Information, Media, and Alerts.) 6. ...2. Press ENTER. 5. Displaying Best Fishing and Hunting Times 1. If you want to view a position other than your present position, pan around the map with the cursor control to highlight the left or right arrows and press ENTER. Press ENTER. 7. Press ENTER. 3. To change the date, use...
...use the cursor control UP or DOWN to highlight the save to edit. (Available pages are displayed for the current date. 8. Press ENTER. 5. Map Screen 21 Scroll down the contextual menu to select Local Info. 4. The best fishing and hunting times are Information, Media, and Alerts.) 6. ...2. Press ENTER. 5. Displaying Best Fishing and Hunting Times 1. If you want to view a position other than your present position, pan around the map with the cursor control to highlight the left or right arrows and press ENTER. Press ENTER. 7. Press ENTER. 3. To change the date, use...


