User Manual
Page 13
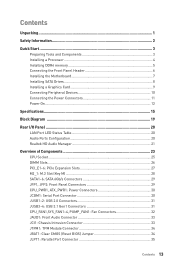
...2 Quick Start ...3 Preparing Tools and Components 3 Installing a Processor 4 Installing DDR4 memory 5 Connecting the Front Panel Header 6 Installing the Motherboard 7 Installing SATA Drives 8 Installing a Graphics Card 9 Connecting Peripheral Devices 10 Connecting the Power Connectors 11 Power On...12 Specifications...15 Block Diagram ...19 Rear I/O Panel ...20 LAN Port LED Status Table 20 Audio Ports Configuration 20 Realtek HD Audio Manager 21 Overview of Components 23 CPU Socket ...25 DIMM Slots...26 PCI_E1~6: PCIe Expansion Slots 27 M2_1: M.2 Slot (Key M 28 SATA1~6: SATA 6Gb...
...2 Quick Start ...3 Preparing Tools and Components 3 Installing a Processor 4 Installing DDR4 memory 5 Connecting the Front Panel Header 6 Installing the Motherboard 7 Installing SATA Drives 8 Installing a Graphics Card 9 Connecting Peripheral Devices 10 Connecting the Power Connectors 11 Power On...12 Specifications...15 Block Diagram ...19 Rear I/O Panel ...20 LAN Port LED Status Table 20 Audio Ports Configuration 20 Realtek HD Audio Manager 21 Overview of Components 23 CPU Socket ...25 DIMM Slots...26 PCI_E1~6: PCIe Expansion Slots 27 M2_1: M.2 Slot (Key M 28 SATA1~6: SATA 6Gb...
User Manual
Page 14
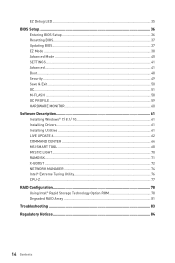
... Boot...48 Security ...49 Save & Exit...50 OC...51 M-FLASH ...58 OC PROFILE ...59 HARDWARE MONITOR 60 Software Description 61 Installing Windows® 7/ 8.1/ 10 61 Installing Drivers 61 Installing Utilities 61 LIVE UPDATE 6...62 COMMAND CENTER 64 MSI SMART TOOL 68 MYSTIC LIGHT...70 RAMDISK...71 X-BOOST ...72 NETWORK MANAGER 74 Intel® Extreme Tuning Utility 76 CPU-Z...77 RAID Configuration 78 Using Intel® Rapid Storage Technology Option ROM 78 Degraded RAID Array 81 Troubleshooting...
... Boot...48 Security ...49 Save & Exit...50 OC...51 M-FLASH ...58 OC PROFILE ...59 HARDWARE MONITOR 60 Software Description 61 Installing Windows® 7/ 8.1/ 10 61 Installing Drivers 61 Installing Utilities 61 LIVE UPDATE 6...62 COMMAND CENTER 64 MSI SMART TOOL 68 MYSTIC LIGHT...70 RAMDISK...71 X-BOOST ...72 NETWORK MANAGER 74 Intel® Extreme Tuning Utility 76 CPU-Z...77 RAID Configuration 78 Using Intel® Rapid Storage Technology Option ROM 78 Degraded RAID Array 81 Troubleshooting...
User Manual
Page 15
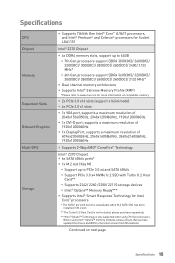
... updated the drivers and BIOS to the latest version from MSI website. Before using 7th Gen processors. Continued on compatible memory. Specifications CPU Chipset Memory Expansion Slots Onboard Graphics Multi-GPU Storage y Supports 7th/6th Gen Intel® Core™ i3/i5/i7 processors, and Intel® Pentium® and Celeron® processors for Socket LGA1151 Intel® Z270 Chipset y 4x DDR4 memory slots, support up to PCIe 3.0 x4 and SATA 6Gb/s ƒ Support PCIe 3.0 x4 NVMe U.2 SSD with Turbo U.2 Host Card...
... updated the drivers and BIOS to the latest version from MSI website. Before using 7th Gen processors. Continued on compatible memory. Specifications CPU Chipset Memory Expansion Slots Onboard Graphics Multi-GPU Storage y Supports 7th/6th Gen Intel® Core™ i3/i5/i7 processors, and Intel® Pentium® and Celeron® processors for Socket LGA1151 Intel® Z270 Chipset y 4x DDR4 memory slots, support up to PCIe 3.0 x4 and SATA 6Gb/s ƒ Support PCIe 3.0 x4 NVMe U.2 SSD with Turbo U.2 Host Card...

User Manual
Page 16
... internal USB connectors) y Realtek® ALC892 Codec y 7.1-Channel High Definition Audio 1x Realtek® RTL8111H Gigabit LAN controller y 1x PS/2 mouse & keyboard combo port y 4x USB 3.1 Gen1 Type-A ports y 1x VGA port y 1x DVI-D port y 1x DisplayPort y 1x LAN (RJ45) port y 2x USB 2.0 ports y 6x audio jacks y 1x 24-pin ATX main power connector y 1x 8-pin ATX 12V power connector y 6x SATA 6Gb/s connectors y 2x USB 3.1 Gen1 connectors (supports additional 4 USB 3.1 Gen1 ports) y 2x USB 2.0 connectors (supports additional 4 USB 2.0 ports) y 1x 4-pin CPU fan connector y 1x 4-pin water pump fan...
... internal USB connectors) y Realtek® ALC892 Codec y 7.1-Channel High Definition Audio 1x Realtek® RTL8111H Gigabit LAN controller y 1x PS/2 mouse & keyboard combo port y 4x USB 3.1 Gen1 Type-A ports y 1x VGA port y 1x DVI-D port y 1x DisplayPort y 1x LAN (RJ45) port y 2x USB 2.0 ports y 6x audio jacks y 1x 24-pin ATX main power connector y 1x 8-pin ATX 12V power connector y 6x SATA 6Gb/s connectors y 2x USB 3.1 Gen1 connectors (supports additional 4 USB 3.1 Gen1 ports) y 2x USB 2.0 connectors (supports additional 4 USB 2.0 ports) y 1x 4-pin CPU fan connector y 1x 4-pin water pump fan...
User Manual
Page 34
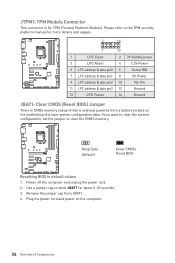
... to default values 1. JTPM1: TPM Module Connector This connector is for more details and usages. 2 14 1 13 1 LPC Clock 2 3V Standby power 3 LPC Reset 4 5 LPC address & data pin0 6 3.3V Power Serial IRQ 7 LPC address & data pin1 8 9 LPC address & data pin2 10 5V Power No Pin 11 LPC address & data pin3 12 13 LPC Frame 14 Ground Ground JBAT1: Clear CMOS (Reset BIOS) Jumper There is CMOS memory onboard...
... to default values 1. JTPM1: TPM Module Connector This connector is for more details and usages. 2 14 1 13 1 LPC Clock 2 3V Standby power 3 LPC Reset 4 5 LPC address & data pin0 6 3.3V Power Serial IRQ 7 LPC address & data pin1 8 9 LPC address & data pin2 10 5V Power No Pin 11 LPC address & data pin3 12 13 LPC Frame 14 Ground Ground JBAT1: Clear CMOS (Reset BIOS) Jumper There is CMOS memory onboard...
User Manual
Page 37
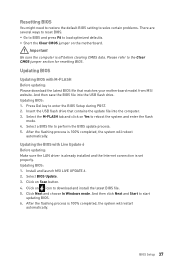
... Windows mode. And then click Next and Start to perform the BIOS update process. 5. Please refer to load optimized defaults. Click on the motherboard. Resetting BIOS You might need to restore the default BIOS setting to solve certain problems. There are several ways to reset BIOS: y Go to BIOS and press F6 to the Clear CMOS jumper section for resetting BIOS. And then save the BIOS file into the computer. 3. Install and launch MSI LIVE UPDATE 6. 2. y Short the Clear CMOS jumper...
... Windows mode. And then click Next and Start to perform the BIOS update process. 5. Please refer to load optimized defaults. Click on the motherboard. Resetting BIOS You might need to restore the default BIOS setting to solve certain problems. There are several ways to reset BIOS: y Go to BIOS and press F6 to the Clear CMOS jumper section for resetting BIOS. And then save the BIOS file into the computer. 3. Install and launch MSI LIVE UPDATE 6. 2. y Short the Clear CMOS jumper...

User Manual
Page 38
... key to switch between Advanced mode and EZ mode. Important Please don't make any changes in OC menu and don't load defaults to enable/ disable the X.M.P. (Extreme Memory Profile). supported memory module is installed. click on the inner circle to keep the optimal performance and system stability after activating the OC GENIE 4 function. y Language - shows the CPU/ DDR speed, CPU/ MB temperature, MB/ CPU type, memory size, CPU/ DDR voltage, BIOS version and build date. 38 BIOS Setup...
... key to switch between Advanced mode and EZ mode. Important Please don't make any changes in OC menu and don't load defaults to enable/ disable the X.M.P. (Extreme Memory Profile). supported memory module is installed. click on the inner circle to keep the optimal performance and system stability after activating the OC GENIE 4 function. y Language - shows the CPU/ DDR speed, CPU/ MB temperature, MB/ CPU type, memory size, CPU/ DDR voltage, BIOS version and build date. 38 BIOS Setup...

User Manual
Page 39
... only on BIOS menu but also on this button to display the M-Flash menu that allows you can save and access favorite/ frequently-used / favorite BIOS setting items in one page. ƒ To add a BIOS item to update BIOS with a USB flash drive. y Boot device priority bar - you to enter Favorites menu. The boot priority from favorite page 1. y Information display - y Function buttons - y Hardware Monitor - click on search page. 2. press the F3 key to manually control the fan speed by...
... only on BIOS menu but also on this button to display the M-Flash menu that allows you can save and access favorite/ frequently-used / favorite BIOS setting items in one page. ƒ To add a BIOS item to update BIOS with a USB flash drive. y Boot device priority bar - you to enter Favorites menu. The boot priority from favorite page 1. y Information display - y Function buttons - y Hardware Monitor - click on search page. 2. press the F3 key to manually control the fan speed by...
User Manual
Page 42
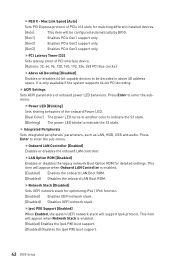
..., 248 PCI Bus clocks] fAbove 4G Decoding [Disabled] Enables or disables 64-bit capable devices to indicate the S3 state. f Integrated Peripherals Sets integrated peripherals' parameters, such as LAN, HDD, USB and audio. fOnboard LAN Controller [Enabled] Enables or disables the onboard LAN controller. fPower LED [Blinking] Sets shining behaviors of onboard power LED behaviors. This item will be decoded in above 4G address space. fLAN Option ROM [Disabled] Enables or disables the legacy network Boot Option ROM for optimizing IPv4 / IPv6 function. [Enabled] Enables UEFI...
..., 248 PCI Bus clocks] fAbove 4G Decoding [Disabled] Enables or disables 64-bit capable devices to indicate the S3 state. f Integrated Peripherals Sets integrated peripherals' parameters, such as LAN, HDD, USB and audio. fOnboard LAN Controller [Enabled] Enables or disables the onboard LAN controller. fPower LED [Blinking] Sets shining behaviors of onboard power LED behaviors. This item will be decoded in above 4G address space. fLAN Option ROM [Disabled] Enables or disables the legacy network Boot Option ROM for optimizing IPv4 / IPv6 function. [Enabled] Enables UEFI...
User Manual
Page 43
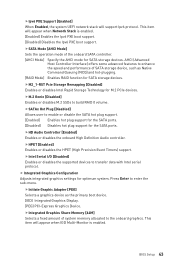
.... [Enabled] Enables hot plug support for the SATA ports. [Disabled] Disables hot plug support for M.2 PCIe devices. fIntel Serial I/O [Disabled] Enables or disables the supported devices to build RAID 0 volume. fHD Audio Controller [Enabled] Enables or disables the onboard High Definition Audio controller. fSATAx Hot Plug [Disabled] Allows user to enhance the speed and performance of SATA storage device, such as the primary boot device. [IGD] Integrated Graphics Display. [PEG] PCI-Express Graphics Device. fSATA Mode [AHCI Mode] Sets the operation mode of system memory...
.... [Enabled] Enables hot plug support for the SATA ports. [Disabled] Disables hot plug support for M.2 PCIe devices. fIntel Serial I/O [Disabled] Enables or disables the supported devices to build RAID 0 volume. fHD Audio Controller [Enabled] Enables or disables the onboard High Definition Audio controller. fSATAx Hot Plug [Disabled] Allows user to enhance the speed and performance of SATA storage device, such as the primary boot device. [IGD] Integrated Graphics Display. [PEG] PCI-Express Graphics Device. fSATA Mode [AHCI Mode] Sets the operation mode of system memory...
User Manual
Page 44
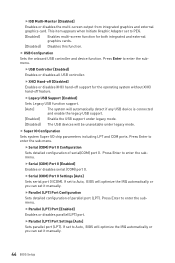
...-Monitor [Disabled] Enables or disables the multi-screen output from integrated graphics and external graphics card. fUSB Controller [Enabled] Enables or disables all USB controller. fLegacy USB Support [Enabled] Sets Legacy USB function support. [Auto] The system will automatically detect if any USB device is connected and enable the legacy USB support. [Enabled] Enable the USB support under legacy mode. f Super IO Configuration Sets system Super I/O chip parameters including LPT and COM ports. Press Enter to enter the submenu. fSerial (COM) Port 0 [Enabled] Enables...
...-Monitor [Disabled] Enables or disables the multi-screen output from integrated graphics and external graphics card. fUSB Controller [Enabled] Enables or disables all USB controller. fLegacy USB Support [Enabled] Sets Legacy USB function support. [Auto] The system will automatically detect if any USB device is connected and enable the legacy USB support. [Enabled] Enable the USB support under legacy mode. f Super IO Configuration Sets system Super I/O chip parameters including LPT and COM ports. Press Enter to enter the submenu. fSerial (COM) Port 0 [Enabled] Enables...
User Manual
Page 45
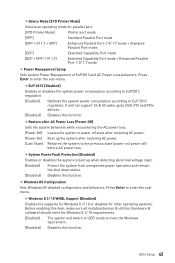
... to boot up when detecting abnormal voltage input. [Enabled] Protect the system from unexpected power operation and remain the shut down status. [Disabled] Disables this function. f Windows OS Configuration Sets Windows OS detailed configuration and behaviors. BIOS Setup 45 Press Enter to enter the submenu. It will switch to UEFI mode to EuP 2013 regulation. Press Enter to enter the sub-menu. fWindows 8.1/ 10 WHQL Support [Disabled] Enables the supports for Windows 8.1/ 10 or disables for parallel port...
... to boot up when detecting abnormal voltage input. [Enabled] Protect the system from unexpected power operation and remain the shut down status. [Disabled] Disables this function. f Windows OS Configuration Sets Windows OS detailed configuration and behaviors. BIOS Setup 45 Press Enter to enter the submenu. It will switch to UEFI mode to EuP 2013 regulation. Press Enter to enter the sub-menu. fWindows 8.1/ 10 WHQL Support [Disabled] Enables the supports for Windows 8.1/ 10 or disables for parallel port...
User Manual
Page 47
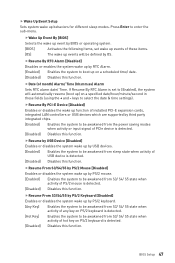
.../2 keyboard. [Any Key] Enables the system to be awakened from sleep state when activity of USB device is detected. [Disabled] Disables this function. BIOS Setup 47 fResume By RTC Alarm [Disabled] Disables or enables the system wake up function of installed PCI-E expansion cards, integrated LAN controllers or USB devices which are supported by OS. If Resume By RTC Alarm is set wake up events of these fields (using the + and - f Wake Up Event Setup Sets system wake...
.../2 keyboard. [Any Key] Enables the system to be awakened from sleep state when activity of USB device is detected. [Disabled] Disables this function. BIOS Setup 47 fResume By RTC Alarm [Disabled] Disables or enables the system wake up function of installed PCI-E expansion cards, integrated LAN controllers or USB devices which are supported by OS. If Resume By RTC Alarm is set wake up events of these fields (using the + and - f Wake Up Event Setup Sets system wake...

User Manual
Page 48
... enabled. [UEFI] Enables UEFI BIOS boot mode support only. [LEGACY+UEFI] Enables both Legacy BIOS boot mode and UEFI BIOS boot mode. 48 BIOS Setup f Bootup NumLock State [On] Select the keyboard NumLock state upon bootup. f Boot Mode Select [LEGACY+UEFI] Sets the system boot mode from a SSD. This item appears when you set the Resume From S3/S4/S5 by BIOS when Windows 8.1/ 10 WHQL Support is the best way to Hot Key. f Full Screen Logo Display [Enabled] Enables or disables to wake the system. f Realtek ( R ) Ethernet Connection Shows driver information...
... enabled. [UEFI] Enables UEFI BIOS boot mode support only. [LEGACY+UEFI] Enables both Legacy BIOS boot mode and UEFI BIOS boot mode. 48 BIOS Setup f Bootup NumLock State [On] Select the keyboard NumLock state upon bootup. f Boot Mode Select [LEGACY+UEFI] Sets the system boot mode from a SSD. This item appears when you set the Resume From S3/S4/S5 by BIOS when Windows 8.1/ 10 WHQL Support is the best way to Hot Key. f Full Screen Logo Display [Enabled] Enables or disables to wake the system. f Realtek ( R ) Ethernet Connection Shows driver information...
User Manual
Page 52
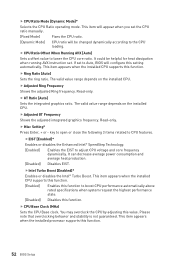
... the installed CPU supports this function. 52 BIOS Setup f GT Ratio [Auto] Sets the integrated graphics ratio. This item will appear when you set to CPU features. Read-only. If set the CPU ratio manually. [Fixed Mode] Fixes the CPU ratio. [Dynamic Mode] CPU ratio will configure this setting automatically. f CPU Ratio Offset When Running AVX [Auto] Sets a offset value to adjust CPU voltage and core frequency dynamically. f Ring Ratio [Auto] Sets the ring ratio. fEIST [Enabled]* Enables or disables the...
... the installed CPU supports this function. 52 BIOS Setup f GT Ratio [Auto] Sets the integrated graphics ratio. This item will appear when you set to CPU features. Read-only. If set the CPU ratio manually. [Fixed Mode] Fixes the CPU ratio. [Dynamic Mode] CPU ratio will configure this setting automatically. f CPU Ratio Offset When Running AVX [Auto] Sets a offset value to adjust CPU voltage and core frequency dynamically. f Ring Ratio [Auto] Sets the ring ratio. fEIST [Enabled]* Enables or disables the...
User Manual
Page 53
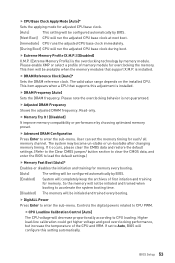
... installed CPU. f Adjusted DRAM Frequency Shows the adjusted DRAM frequency. f Advanced DRAM Configuration Press Enter to enter the sub-menu. User can set to accelerate the system booting time. [Disabled] The memory will completely keep the archives of first intiation and training for memory. If set the memory timing for overclocking the memory. BIOS Setup 53 Please note the overclocking behavior is installed. f Memory Try It ! [Disabled] It improve memory compatibility or performance by choosing optimized memory...
... installed CPU. f Adjusted DRAM Frequency Shows the adjusted DRAM frequency. f Advanced DRAM Configuration Press Enter to enter the sub-menu. User can set to accelerate the system booting time. [Disabled] The memory will completely keep the archives of first intiation and training for memory. If set the memory timing for overclocking the memory. BIOS Setup 53 Please note the overclocking behavior is installed. f Memory Try It ! [Disabled] It improve memory compatibility or performance by choosing optimized memory...

User Manual
Page 56
... adjust CPU voltage and core frequency dynamically. C-state is a processor power management technology defined by ACPI. [Auto] This setting will appear when OC Explore Mode is set to Normal. [Enabled] Enables the EIST to select a CPU C-state level for Normal mode and appears when a CPU that support Turbo Boost is installed. [Enabled] Enables this function to boost CPU performance automatically over the adaptive temperature. [Disabled] Disables this function. This item appears when Intel C-State is enabled. [Enabled] Enables...
... adjust CPU voltage and core frequency dynamically. C-state is a processor power management technology defined by ACPI. [Auto] This setting will appear when OC Explore Mode is set to Normal. [Enabled] Enables the EIST to select a CPU C-state level for Normal mode and appears when a CPU that support Turbo Boost is installed. [Enabled] Enables this function to boost CPU performance automatically over the adaptive temperature. [Disabled] Disables this function. This item appears when Intel C-State is enabled. [Enabled] Enables...
User Manual
Page 58
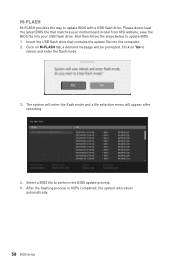
...-load the latest BIOS file that contains the update file into your motherboard model from MSI website, save the BIOS file into the computer. 2. Click on Yes to perform the BIOS update process. 5. After the flashing process is 100% completed, the system will be prompted. The system will enter the flash mode and a file selection menu will appear after rebooting. 4. And then follow the steps below to update BIOS with a USB flash drive...
...-load the latest BIOS file that contains the update file into your motherboard model from MSI website, save the BIOS file into the computer. 2. Click on Yes to perform the BIOS update process. 5. After the flashing process is 100% completed, the system will be prompted. The system will enter the flash mode and a file selection menu will appear after rebooting. 4. And then follow the steps below to update BIOS with a USB flash drive...

User Manual
Page 61
... DVD... message. 8. Follow the instructions on the computer case. 4. Start up your computer in your optical drive. Click Install button. 5. Click OK button to enabled, save changes and restart. Select the utilities you must complete drivers installation. 1. Click Install button. 6. Note: Due to chipset limitation, during the computer POST (Power-On Self Test) to get into your USB Keyboard/ USB Mouse to the USB 2.0 port when installing Windows® 7. 5. Press the Restart button on the screen to boot...
... DVD... message. 8. Follow the instructions on the computer case. 4. Start up your computer in your optical drive. Click Install button. 5. Click OK button to enabled, save changes and restart. Select the utilities you must complete drivers installation. 1. Click Install button. 6. Note: Due to chipset limitation, during the computer POST (Power-On Self Test) to get into your USB Keyboard/ USB Mouse to the USB 2.0 port when installing Windows® 7. 5. Press the Restart button on the screen to boot...
User Manual
Page 83
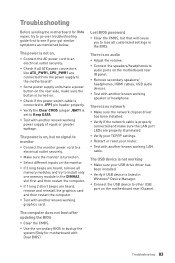
... BIOS password y Clear the CMOS, but no audio y Adjust the volume. y Test with another known working speaker or headphone. y Test with Dual BIOS) Troubleshooting 83 The computer does not boot after updating the BIOS y Clear the CMOS. y Use the secondary BIOS to audio ports on the monitor. y Connect the AC power cord to see if your USB drive driver has been installed. y Verify the Clear CMOS jumper JBAT1 is turned on . The power is not working graphics card. The power is no network y Make sure the network chipset driver...
... BIOS password y Clear the CMOS, but no audio y Adjust the volume. y Test with another known working speaker or headphone. y Test with Dual BIOS) Troubleshooting 83 The computer does not boot after updating the BIOS y Clear the CMOS. y Use the secondary BIOS to audio ports on the monitor. y Connect the AC power cord to see if your USB drive driver has been installed. y Verify the Clear CMOS jumper JBAT1 is turned on . The power is not working graphics card. The power is no network y Make sure the network chipset driver...


