

3850 Elite Series Manual
Page 7
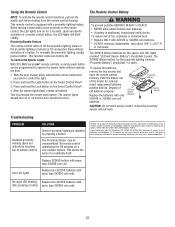
... and lubricated garage door. ALL repairs to the installation section. To avoid SERIOUS PERSONAL INJURY or DEATH from electrocution, disconnect ALL electric and battery power BEFORE performing ANY service or maintenance. 7 ASSEMBLY STEP 3 Attach the Belt Cap Retainer • Position the belt cap retainer over ... pulley so the three holes in cap align with the three holes in garage door or opener mechanisms. 9. Disable ALL locks and remove ALL ropes connected to garage door BEFORE installing opener to fingers from ALL moving garage door opener: • ALWAYS keep hand clear ...
... and lubricated garage door. ALL repairs to the installation section. To avoid SERIOUS PERSONAL INJURY or DEATH from electrocution, disconnect ALL electric and battery power BEFORE performing ANY service or maintenance. 7 ASSEMBLY STEP 3 Attach the Belt Cap Retainer • Position the belt cap retainer over ... pulley so the three holes in cap align with the three holes in garage door or opener mechanisms. 9. Disable ALL locks and remove ALL ropes connected to garage door BEFORE installing opener to fingers from ALL moving garage door opener: • ALWAYS keep hand clear ...

3850 Elite Series Manual
Page 14
...remain lit for replacement. ALWAYS wear protective gloves and eye protection when changing the battery or working around the battery compartment. Light bulb size should be A19, standard neck only. Do not remove the lens. • Install a 100 watt maximum light bulb in the fully ... Standby Power System (optional) • Make sure motor unit is unplugged. • Using a Phillips head screwdriver, remove the battery cover on the motor unit. • Partially insert battery into motor unit with terminals facing out. • Connect the red (+) and black (-) wires from motor unit to...
...remain lit for replacement. ALWAYS wear protective gloves and eye protection when changing the battery or working around the battery compartment. Light bulb size should be A19, standard neck only. Do not remove the lens. • Install a 100 watt maximum light bulb in the fully ... Standby Power System (optional) • Make sure motor unit is unplugged. • Using a Phillips head screwdriver, remove the battery cover on the motor unit. • Partially insert battery into motor unit with terminals facing out. • Connect the red (+) and black (-) wires from motor unit to...

3850 Elite Series Manual
Page 15
...8226; Thread the other end of the rope through the hole in the top of the motor unit: • Remove the motor unit cover screws and set the cover aside. • Remove the attached 3-prong cord. • Connect the black (line) wire to the green ground screw. the white ...grounded. To avoid installation difficulties, do not run the opener at least 1" (2.5 cm) from electrocution or fire: • Disconnect ALL electric and battery power BEFORE performing ANY service or maintenance. • Garage door installation and wiring MUST be grounded. • Reinstall the cover. and the ground ...
...8226; Thread the other end of the rope through the hole in the top of the motor unit: • Remove the motor unit cover screws and set the cover aside. • Remove the attached 3-prong cord. • Connect the black (line) wire to the green ground screw. the white ...grounded. To avoid installation difficulties, do not run the opener at least 1" (2.5 cm) from electrocution or fire: • Disconnect ALL electric and battery power BEFORE performing ANY service or maintenance. • Garage door installation and wiring MUST be grounded. • Reinstall the cover. and the ground ...
3850 Elite Series Manual
Page 28
... the remote control functions, pull out the plastic pull tab protruding from the remote control housing. Press and hold the Light button on for removal. To replace the batteries, remove the two screws and open the remote control housing. To re-enable the proximity lighting, simply press a button. This allows the sensor to...
... the remote control functions, pull out the plastic pull tab protruding from the remote control housing. Press and hold the Light button on for removal. To replace the batteries, remove the two screws and open the remote control housing. To re-enable the proximity lighting, simply press a button. This allows the sensor to...
3850 Elite Series Manual
Page 33
... wiring polarity (black/white wires reversed), replace/attach as needed. • Disconnect all wires from back of motor unit. • Remove safety reversing sensors from brackets and shorten sensor wires to 1-2 feet (30-60 cm) from door control do the following : •...ESPAÑOL Message MOTION SENSING ON MOTION SENSING OFF Message BATTERY BACKUP ENABLED Message BATTERY BACKUP ENABLED Message BATTERY LOW BATTERY BACKUP ENABLED Message BATTERY BAD REPLACE BATTERY NOW SEE OWNER'S MANUAL Message POWER RESTORED BATTERY CHARGING Meaning: This message will appear if the Safety Reversing ...
... wiring polarity (black/white wires reversed), replace/attach as needed. • Disconnect all wires from back of motor unit. • Remove safety reversing sensors from brackets and shorten sensor wires to 1-2 feet (30-60 cm) from door control do the following : •...ESPAÑOL Message MOTION SENSING ON MOTION SENSING OFF Message BATTERY BACKUP ENABLED Message BATTERY BACKUP ENABLED Message BATTERY LOW BATTERY BACKUP ENABLED Message BATTERY BAD REPLACE BATTERY NOW SEE OWNER'S MANUAL Message POWER RESTORED BATTERY CHARGING Meaning: This message will appear if the Safety Reversing ...


