
User's Guide
Page 5
... printer settings...74 Saving and deleting print settings...74 Using the Change Printer Default Settings submenu 74 Resetting printer software to factory default settings 75 Using the Change Print File Default Settings submenu 75 Resetting factory default settings ...76 Saving settings ...76 Working with photos 77 Retrieving and managing photos...77 Inserting...
... printer settings...74 Saving and deleting print settings...74 Using the Change Printer Default Settings submenu 74 Resetting printer software to factory default settings 75 Using the Change Print File Default Settings submenu 75 Resetting factory default settings ...76 Saving settings ...76 Working with photos 77 Retrieving and managing photos...77 Inserting...
User's Guide
Page 8
...135 Understanding the Maintenance menu 135 Installing print cartridges...135 Removing a used print cartridge...137 Refilling print cartridges...138 Using genuine Lexmark print cartridges 138 Aligning print cartridges...138 Cleaning the print cartridge nozzles 139 Wiping the print cartridge nozzles and contacts 139 ... Wi-Fi indicator light is orange ...152 Wireless printer is no longer working...153 Changing wireless settings after installation 154 Resetting an internal wireless print server to factory default settings 154 Network printer does not show up in the printer selection list during...
...135 Understanding the Maintenance menu 135 Installing print cartridges...135 Removing a used print cartridge...137 Refilling print cartridges...138 Using genuine Lexmark print cartridges 138 Aligning print cartridges...138 Cleaning the print cartridge nozzles 139 Wiping the print cartridge nozzles and contacts 139 ... Wi-Fi indicator light is orange ...152 Wireless printer is no longer working...153 Changing wireless settings after installation 154 Resetting an internal wireless print server to factory default settings 154 Network printer does not show up in the printer selection list during...
User's Guide
Page 75
... on the control panel to your system support person to block to enter a power saving mode at or after a certain time limit. Resetting printer software to save these values and exit this submenu. Using the Change Print File Default Settings submenu 1 From the Setup menu, press...Allow your country or region. In Windows 2000 and Windows XP, click Start ΠSettings ΠPrinters or Printers and Faxes. 2 Right-click the Lexmark 7500 Series icon. 3 Click Printing Preferences. 4 Click the Save Settings menu. 5 From the Restore section, select Factory Settings (Defaults). Use this To Paper...
... on the control panel to your system support person to block to enter a power saving mode at or after a certain time limit. Resetting printer software to save these values and exit this submenu. Using the Change Print File Default Settings submenu 1 From the Setup menu, press...Allow your country or region. In Windows 2000 and Windows XP, click Start ΠSettings ΠPrinters or Printers and Faxes. 2 Right-click the Lexmark 7500 Series icon. 3 Click Printing Preferences. 4 Click the Save Settings menu. 5 From the Restore section, select Factory Settings (Defaults). Use this To Paper...

User's Guide
Page 76
...Photo settings will not time out after two minutes of inactivity or turning off . 2 Press and hold down and , and then press Resetting only menu settings to reset the network settings, you , such as Phone Book or Speed Dial lists. 1 From the control panel, press or repeatedly until Maintenance is... Note: Items such as Phone Book or Speed Dial lists. 1 Turn the printer off the power but will not be reset. 5 Press . 6 The following message appears: Reset all temporary settings and return to select Yes. This method does not clear any information entered by you must go through the...
...Photo settings will not time out after two minutes of inactivity or turning off . 2 Press and hold down and , and then press Resetting only menu settings to reset the network settings, you , such as Phone Book or Speed Dial lists. 1 From the control panel, press or repeatedly until Maintenance is... Note: Items such as Phone Book or Speed Dial lists. 1 Turn the printer off the power but will not be reset. 5 Press . 6 The following message appears: Reset all temporary settings and return to select Yes. This method does not clear any information entered by you must go through the...

User's Guide
Page 135
...the printer is highlighted. 2 Press . Use this View Ink Levels Clean Cartridges Align Cartridges Change Print Cartridges Print Test Page Call Diagnostics Reset Defaults To See the current ink levels for both cartridges. Installing print cartridges 1 Open the printer. 135 See a short video on... the printer Understanding the Maintenance menu The Maintenance menu lets you check ink levels and handle various tasks related to see "Resetting factory default settings" on how to change print cartridges. The test page lists some information about the printer. All other user...
...the printer is highlighted. 2 Press . Use this View Ink Levels Clean Cartridges Align Cartridges Change Print Cartridges Print Test Page Call Diagnostics Reset Defaults To See the current ink levels for both cartridges. Installing print cartridges 1 Open the printer. 135 See a short video on... the printer Understanding the Maintenance menu The Maintenance menu lets you check ink levels and handle various tasks related to see "Resetting factory default settings" on how to change print cartridges. The test page lists some information about the printer. All other user...
User's Guide
Page 151
... (wireless router) does not respond, it , find the IP address of numbers separated by an Ethernet cable, the connection may have changed your having been reset to factory defaults. 151 Some reasons your network. Check MAC address If your network uses MAC address filtering, provide the MAC address for the printer...
... (wireless router) does not respond, it , find the IP address of numbers separated by an Ethernet cable, the connection may have changed your having been reset to factory defaults. 151 Some reasons your network. Check MAC address If your network uses MAC address filtering, provide the MAC address for the printer...
User's Guide
Page 152
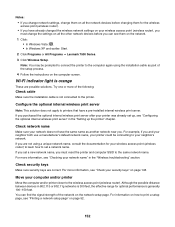
...on the network. 1 Click: • In Windows Vista: . • In Windows XP and earlier: Start. 2 Click Programs or All Programs Œ Lexmark 7500 Series. 3 Click Wireless Setup. Move your computer and/or printer Move the computer and/or printer closer to printers that have a pre-installed internal... network name Make sure your network does not have already changed the wireless network settings on your wireless access point (wireless router), you must reset the printer and computer SSID to the printer. If you set a network name. Notes: • If you change network settings, change ...
...on the network. 1 Click: • In Windows Vista: . • In Windows XP and earlier: Start. 2 Click Programs or All Programs Œ Lexmark 7500 Series. 3 Click Wireless Setup. Move your computer and/or printer Move the computer and/or printer closer to printers that have a pre-installed internal... network name Make sure your network does not have already changed the wireless network settings on your wireless access point (wireless router), you must reset the printer and computer SSID to the printer. If you set a network name. Notes: • If you change network settings, change ...

User's Guide
Page 154
... press or repeatedly until Setup appears. 2 Press . 3 Press or repeatedly until Network Setup appears. 4 Press . 5 Press or repeatedly until Reset Network Adapter Defaults appears. 6 Press . Notes: • If you change network settings, change them on all the network devices before changing them.... 154 Changing wireless settings after installation To change the settings on all the other wireless setting, rerun the wireless setup. Resetting an internal wireless print server to factory defaults. Network printer does not show up in the printer selection list during installation ...
... press or repeatedly until Setup appears. 2 Press . 3 Press or repeatedly until Network Setup appears. 4 Press . 5 Press or repeatedly until Reset Network Adapter Defaults appears. 6 Press . Notes: • If you change network settings, change them on all the network devices before changing them.... 154 Changing wireless settings after installation To change the settings on all the other wireless setting, rerun the wireless setup. Resetting an internal wireless print server to factory defaults. Network printer does not show up in the printer selection list during installation ...

User's Guide
Page 157
...(wireless router). c Press Enter. • The "Default Gateway" entry is marked with your computer. • To reset the printer name: 1 Click Programs or All Programs Œ Lexmark 7500 Series. 2 Click Wireless Setup Utility. 3 Follow the instructions on the computer screen to the same network name. ...• To reset the computer network name, see the documentation that came with the USB symbol. 3 Firmly...
...(wireless router). c Press Enter. • The "Default Gateway" entry is marked with your computer. • To reset the printer name: 1 Click Programs or All Programs Œ Lexmark 7500 Series. 2 Click Wireless Setup Utility. 3 Follow the instructions on the computer screen to the same network name. ...• To reset the computer network name, see the documentation that came with the USB symbol. 3 Firmly...

User's Guide
Page 194
... information, see "Using Caller ID from the control panel" on the country or region you live in and the telecommunications company you subscribe to, you reset the transmission speed. Lower the transmission speed 1 From the control panel, press or repeatedly until Fax is highlighted. 2 Press . 3 Press or repeatedly until the Fax...
... information, see "Using Caller ID from the control panel" on the country or region you live in and the telecommunications company you subscribe to, you reset the transmission speed. Lower the transmission speed 1 From the control panel, press or repeatedly until Fax is highlighted. 2 Press . 3 Press or repeatedly until the Fax...

User's Guide
Page 195
... or repeatedly until the setting you want appears. Try one or more of times the printer will reduce the speed for future faxes until you reset the transmission speed. c Press to save. You can change the number of the following: Change redial settings The printer automatically redials three times at successively...
... or repeatedly until the setting you want appears. Try one or more of times the printer will reduce the speed for future faxes until you reset the transmission speed. c Press to save. You can change the number of the following: Change redial settings The printer automatically redials three times at successively...

User's Guide
Page 221
... scan 109 custom-size paper, loading 60 custom-size paper, printing 71 D default settings saving 39 shown with asterisk 39 using 39 defaults resetting factory defaults 76 resetting printer software to factory defaults 75 descreening 91 Despeckle change setting 90 digital camera printing photos using the computer 91 distinctive ring patterns 132...
... scan 109 custom-size paper, loading 60 custom-size paper, printing 71 D default settings saving 39 shown with asterisk 39 using 39 defaults resetting factory defaults 76 resetting printer software to factory defaults 75 descreening 91 Despeckle change setting 90 digital camera printing photos using the computer 91 distinctive ring patterns 132...
User's Guide
Page 222
... 113 attaching files 113 E-mail button 43 e-mail screen preferences changing 114 e-mailing an image 113 F factory default settings resetting internal wireless print server 154 resetting printer software 75 factory default settings, resetting to 76 faded colors 165 failed to connect error message 196 fax activity reports 134 Change Fax Default Settings submenu...
... 113 attaching files 113 E-mail button 43 e-mail screen preferences changing 114 e-mailing an image 113 F factory default settings resetting internal wireless print server 154 resetting printer software 75 factory default settings, resetting to 76 faded colors 165 failed to connect error message 196 fax activity reports 134 Change Fax Default Settings submenu...

User's Guide
Page 223
... PictBridge-enabled digital camera 95 installing network printer 53 print cartridges 135 printer software 43, 147 internal wireless print server installing 47 resetting to factory default settings 154 IP address, assigning 53 iron-on transfers, loading 59 iron-on transfers, printing 71 J jams ...labels, loading 58 language changing 143 last page first 66 left cartridge error 200 left cartridge incorrect 200 left cartridge missing 201 Lexmark Productivity Studio creating and viewing slideshow 97 library preferences changing 86 loading banner paper 60 custom-size paper 60 documents into the ...
... PictBridge-enabled digital camera 95 installing network printer 53 print cartridges 135 printer software 43, 147 internal wireless print server installing 47 resetting to factory default settings 154 IP address, assigning 53 iron-on transfers, loading 59 iron-on transfers, printing 71 J jams ...labels, loading 58 language changing 143 last page first 66 left cartridge error 200 left cartridge incorrect 200 left cartridge missing 201 Lexmark Productivity Studio creating and viewing slideshow 97 library preferences changing 86 loading banner paper 60 custom-size paper 60 documents into the ...

User's Guide
Page 227
... photos 163 software Fax Solutions Software 131 Productivity Studio 43 removing and reinstalling 147 Solution Center 45 software does not install 144 software settings, printer resetting to factory defaults 75 Solution Center understanding 45 Solution Center buttons Advanced 45 How To 45 Maintenance 45 Troubleshooting 45 understanding 45 solving printer communication...
... photos 163 software Fax Solutions Software 131 Productivity Studio 43 removing and reinstalling 147 Solution Center 45 software does not install 144 software settings, printer resetting to factory defaults 75 Solution Center understanding 45 Solution Center buttons Advanced 45 How To 45 Maintenance 45 Troubleshooting 45 understanding 45 solving printer communication...

User's Guide (Mac)
Page 4
...quality...148 Cleaning the scanner glass...148 Cleaning the exterior of the printer 149 Refilling print cartridges...149 Using genuine Lexmark print cartridges 149 Ordering print cartridges...149 Ordering paper and other supplies 150 Finding information about the printer 151 ...Scan troubleshooting...183 Fax troubleshooting...186 Jams and misfeeds troubleshooting 191 Memory card and PictBridge troubleshooting 195 Error messages...197 Resetting factory default settings...206 Removing and reinstalling the software 207 Notices...208 Edition notice...208 Product information...209 European ...
...quality...148 Cleaning the scanner glass...148 Cleaning the exterior of the printer 149 Refilling print cartridges...149 Using genuine Lexmark print cartridges 149 Ordering print cartridges...149 Ordering paper and other supplies 150 Finding information about the printer 151 ...Scan troubleshooting...183 Fax troubleshooting...186 Jams and misfeeds troubleshooting 191 Memory card and PictBridge troubleshooting 195 Error messages...197 Resetting factory default settings...206 Removing and reinstalling the software 207 Notices...208 Edition notice...208 Product information...209 European ...

User's Guide (Mac)
Page 23
... control panel" on page 39 • "Using the Print dialog" on page 105 Resetting All-In-One software settings to defaults 1 From the Finder desktop, double-click the Lexmark 7500 Series folder. 2 Double-click the Lexmark 7500 Series Center icon. Choosing a print quality 1 With a document open, click File..."Enhancing photo print quality using the software" on page 134 Sharpening an image 1 From the Finder desktop, double-click the Lexmark 7500 Series folder. 2 Double-click the Lexmark 7500 Series Center icon. 3 Click Preview/Edit to open the Scan dialog. 4 From the Scan dialog, click to open...
... control panel" on page 39 • "Using the Print dialog" on page 105 Resetting All-In-One software settings to defaults 1 From the Finder desktop, double-click the Lexmark 7500 Series folder. 2 Double-click the Lexmark 7500 Series Center icon. Choosing a print quality 1 With a document open, click File..."Enhancing photo print quality using the software" on page 134 Sharpening an image 1 From the Finder desktop, double-click the Lexmark 7500 Series folder. 2 Double-click the Lexmark 7500 Series Center icon. 3 Click Preview/Edit to open the Scan dialog. 4 From the Scan dialog, click to open...

User's Guide (Mac)
Page 49
... scanned image. Enabling gamma lets you adjust the settings. Blur/Sharpen Adjust the level of sharpness of the image by inverting the RGB data. Defaults Reset the Adjustment controls to activate or deactivate auto-cropping. Invert Colors Reverse the colors of the scanned image. Auto-crop sensitivity Select or clear Auto...
... scanned image. Enabling gamma lets you adjust the settings. Blur/Sharpen Adjust the level of sharpness of the image by inverting the RGB data. Defaults Reset the Adjustment controls to activate or deactivate auto-cropping. Invert Colors Reverse the colors of the scanned image. Auto-crop sensitivity Select or clear Auto...

User's Guide (Mac)
Page 51
... the Scan dialog, and send the scanned document straight to defaults 1 From the Finder desktop, double-click the Lexmark 7500 Series folder. 2 Double-click the Lexmark 7500 Series Center icon. 3 Click Defaults. 5 Click the Adjustments tab. 6 From the Blur/Sharpen area, ...move the slider to your selected application when you press on the control panel. Related topics: • "Editing the Customize list" on page 46 • "Performing scanning and related tasks" on page 52 Resetting...
... the Scan dialog, and send the scanned document straight to defaults 1 From the Finder desktop, double-click the Lexmark 7500 Series folder. 2 Double-click the Lexmark 7500 Series Center icon. 3 Click Defaults. 5 Click the Adjustments tab. 6 From the Blur/Sharpen area, ...move the slider to your selected application when you press on the control panel. Related topics: • "Editing the Customize list" on page 46 • "Performing scanning and related tasks" on page 52 Resetting...

User's Guide (Mac)
Page 130
... Change PictBridge Default Settings submenu Use these menu items to select print settings for PictBridge printing if no camera selections for the photos. Use this Reset Network Adapter Defaults Print Network Setup Page Wireless Menu TCP/IP Network Time Menu To...
... Change PictBridge Default Settings submenu Use these menu items to select print settings for PictBridge printing if no camera selections for the photos. Use this Reset Network Adapter Defaults Print Network Setup Page Wireless Menu TCP/IP Network Time Menu To...


