User's Guide
Page 6
... over a network...92 Saving a scanned image on the computer...92 Changing the Productivity Studio scan settings...93 Adding a file to an e-mail message...93 Adding a new scanned image to an e-mail message 94 Scanning documents or images for e-mailing...94 Changing the Productivity Studio e-mail screen preferences 94 Faxing 96 Sending...
... over a network...92 Saving a scanned image on the computer...92 Changing the Productivity Studio scan settings...93 Adding a file to an e-mail message...93 Adding a new scanned image to an e-mail message 94 Scanning documents or images for e-mailing...94 Changing the Productivity Studio e-mail screen preferences 94 Faxing 96 Sending...
User's Guide
Page 40
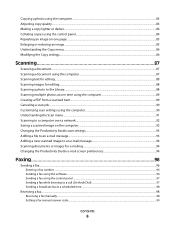
... . 3 To change one or more additional language control panels with the printer. 1 Lift and remove the control panel (if one or more temporary settings into new default settings: a Press . e Press . b Press or repeatedly until Tools appears.
... . 3 To change one or more additional language control panels with the printer. 1 Lift and remove the control panel (if one or more temporary settings into new default settings: a Press . e Press . b Press or repeatedly until Tools appears.

User's Guide
Page 43
...• Turn printing voice notification on the Solution Center icon. 2 Click Setup and diagnose printer. 1 Click Programs or All Programs Œ Lexmark 5300 Series. 2 Select Solution Center. Use basic features. - Setting up the printer 43 Method 1 Method 2 1 From the desktop, double... the Maintenance tab open the Solution Center, use the printer. • Obtain software version information. • View ink levels and order new print cartridges. Print, scan, copy, and fax. - Advanced • Change the appearance of the following methods. Troubleshooting • Learn...
...• Turn printing voice notification on the Solution Center icon. 2 Click Setup and diagnose printer. 1 Click Programs or All Programs Œ Lexmark 5300 Series. 2 Select Solution Center. Use basic features. - Setting up the printer 43 Method 1 Method 2 1 From the desktop, double... the Maintenance tab open the Solution Center, use the printer. • Obtain software version information. • View ink levels and order new print cartridges. Print, scan, copy, and fax. - Advanced • Change the appearance of the following methods. Troubleshooting • Learn...

User's Guide
Page 44
...of the following: • In Windows Vista, click . • In Windows XP and earlier, click Start. 2 Click Programs or All Programs Œ Lexmark 5300 Series. 3 Click Solution Center. 4 Click Advanced. 5 Click Printing Status. 6 Select or clear Play voice notification for printing events. 7 Click OK.... including anti-virus, security, and firewall programs may alert you when printing starts and when it is complete before installing a new print cartridge. • Order new print cartridges. • Print a test page. • Clean print cartridges to fix horizontal streaks. • Align print...
...of the following: • In Windows Vista, click . • In Windows XP and earlier, click Start. 2 Click Programs or All Programs Œ Lexmark 5300 Series. 3 Click Solution Center. 4 Click Advanced. 5 Click Printing Status. 6 Select or clear Play voice notification for printing events. 7 Click OK.... including anti-virus, security, and firewall programs may alert you when printing starts and when it is complete before installing a new print cartridge. • Order new print cartridges. • Print a test page. • Clean print cartridges to fix horizontal streaks. • Align print...

User's Guide
Page 46
... icon. c Click Sharing. b Right-click the Lexmark 5300 Series icon. f Enter the Universal Naming Convention (UNC) Port name which consists of the server name and the distinctive printer name that will print to the printer. i Make sure the new port is not attached to the printer. 2 Identify... Printers and Faxes. c Click Properties. Checking the port setting Windows Vista users only 1 Click Œ Control Panel Œ Printers. 2 Right-click the Lexmark 5300 Series icon. 3 From the sidebar menu, select Properties. 4 Click the Ports tab. 5 Make sure: • The port is set to share ...
... icon. c Click Sharing. b Right-click the Lexmark 5300 Series icon. f Enter the Universal Naming Convention (UNC) Port name which consists of the server name and the distinctive printer name that will print to the printer. i Make sure the new port is not attached to the printer. 2 Identify... Printers and Faxes. c Click Properties. Checking the port setting Windows Vista users only 1 Click Œ Control Panel Œ Printers. 2 Right-click the Lexmark 5300 Series icon. 3 From the sidebar menu, select Properties. 4 Click the Ports tab. 5 Make sure: • The port is set to share ...
User's Guide
Page 58
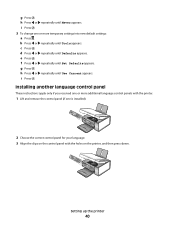
... the printer. • To prevent smudging, remove each page of the poster pages. b Click File Œ Add Photo from Scanner. 4 If you are not scanning a new item, open the folder that contains your photo. 5 Drag the photo to the Print a Multi-Page Poster preview area of the screen. 6 Click Next Step...
... the printer. • To prevent smudging, remove each page of the poster pages. b Click File Œ Add Photo from Scanner. 4 If you are not scanning a new item, open the folder that contains your photo. 5 Drag the photo to the Print a Multi-Page Poster preview area of the screen. 6 Click Next Step...
User's Guide
Page 76
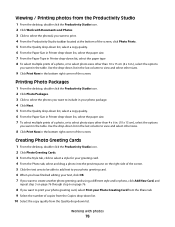
... you have finished editing your text, click OK. 7 If you want to create another photo greeting card using a different style and/or photo, click Add New Card, and repeat step 3 on page 76 through step 6 on page 76. 8 If you want to print your photo greeting card, select Print your photo...
... you have finished editing your text, click OK. 7 If you want to create another photo greeting card using a different style and/or photo, click Add New Card, and repeat step 3 on page 76 through step 6 on page 76. 8 If you want to print your photo greeting card, select Print your photo...
User's Guide
Page 88
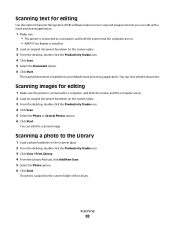
... facedown on the scanner glass. 2 From the desktop, double-click the Productivity Studio icon. 3 Click View / Print Library. 4 From the Library Add tab, click Add New Scan. 5 Select the Photo option. 6 Click Start. The photo is loaded into text you can edit with a word-processing application. 1 Make sure: • The printer...
... facedown on the scanner glass. 2 From the desktop, double-click the Productivity Studio icon. 3 Click View / Print Library. 4 From the Library Add tab, click Add New Scan. 5 Select the Photo option. 6 Click Start. The photo is loaded into text you can edit with a word-processing application. 1 Make sure: • The printer...
User's Guide
Page 89
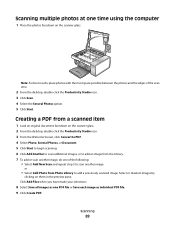
... Create PDF. Note: For best results, place photos with the most space possible between the photos and the edges of the following: • Select Add New Scan and repeat step 3 to add a previously scanned image. Scanning multiple photos at one time using the computer 1 Place the photos facedown on them in...
... Create PDF. Note: For best results, place photos with the most space possible between the photos and the edges of the following: • Select Add New Scan and repeat step 3 to add a previously scanned image. Scanning multiple photos at one time using the computer 1 Place the photos facedown on them in...
User's Guide
Page 94
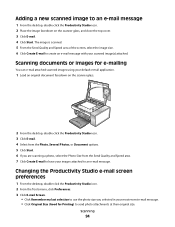
... images using your default e-mail application. 1 Load an original document facedown on the scanner glass, and close the top cover. 3 Click E-mail. 4 Click Start. Adding a new scanned image to an e-mail message 1 From the desktop, double-click the Productivity Studio icon. 2 Place the image facedown on the scanner glass. 2 From the...
... images using your default e-mail application. 1 Load an original document facedown on the scanner glass, and close the top cover. 3 Click E-mail. 4 Click Start. Adding a new scanned image to an e-mail message 1 From the desktop, double-click the Productivity Studio icon. 2 Place the image facedown on the scanner glass. 2 From the...
User's Guide
Page 102
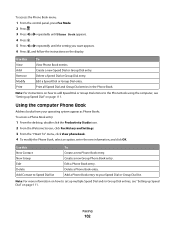
... Book using the computer, see "Setting up Speed Dial" on the display. Print all Speed Dial and Group Dial entries in the Phone Book. Create a new Group Phone Book entry. Faxing 102 Edit a Speed Dial or Group Dial entry. To access a Phone Book entry: 1 From the desktop, double-click the...Group Dial entries to set up multiple Speed Dial and/or Group Dial entries, see "Setting up Speed Dial" on page 111. Use this New Contact New Group Edit Delete Add Contact to your operating system appear as Phone Books. Using the computer Phone Book Address books from your Speed Dial or...
... Book using the computer, see "Setting up Speed Dial" on the display. Print all Speed Dial and Group Dial entries in the Phone Book. Create a new Group Phone Book entry. Faxing 102 Edit a Speed Dial or Group Dial entry. To access a Phone Book entry: 1 From the desktop, double-click the...Group Dial entries to set up multiple Speed Dial and/or Group Dial entries, see "Setting up Speed Dial" on page 111. Use this New Contact New Group Edit Delete Add Contact to your operating system appear as Phone Books. Using the computer Phone Book Address books from your Speed Dial or...
User's Guide
Page 108
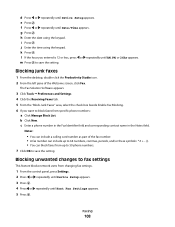
... field. m Press to fax settings This feature blocks network users from specific phone numbers: a Click Manage Block List. h Enter the date using the keypad. b Click New. Blocking unwanted changes to save the setting. Blocking junk faxes 1 From the desktop, double-click the Productivity Studio icon. 2 From the left pane of the...
... field. m Press to fax settings This feature blocks network users from specific phone numbers: a Click Manage Block List. h Enter the date using the keypad. b Click New. Blocking unwanted changes to save the setting. Blocking junk faxes 1 From the desktop, double-click the Productivity Studio icon. 2 From the left pane of the...

User's Guide
Page 109
..., they apply to adjust how faxes are sent and received. You can choose from. c Click Fax Solutions. b Click Programs or All Programs Œ Lexmark 5300 Series. c Click Productivity Studio. Faxing 109 When you send or receive. The Productivity Studio screen appears. 6 Press or until Block appears. 7 Press... Send a fax. • Adjust the Speed Dial list and other fax settings. • View and use the Phonebook, so you can add new contacts or groups, edit or delete contacts or groups, and add contacts or groups to Speed Dial lists. • View several sample cover pages...
..., they apply to adjust how faxes are sent and received. You can choose from. c Click Fax Solutions. b Click Programs or All Programs Œ Lexmark 5300 Series. c Click Productivity Studio. Faxing 109 When you send or receive. The Productivity Studio screen appears. 6 Press or until Block appears. 7 Press... Send a fax. • Adjust the Speed Dial list and other fax settings. • View and use the Phonebook, so you can add new contacts or groups, edit or delete contacts or groups, and add contacts or groups to Speed Dial lists. • View several sample cover pages...
User's Guide
Page 111
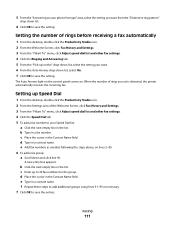
... phone line type" area, select the setting you want . 6 From the Auto Answer drop-down list. 6 Click OK to 30 fax numbers for the group. A new entry box appears. e Type in the list. b Click the next empty line in a contact name.
... phone line type" area, select the setting you want . 6 From the Auto Answer drop-down list. 6 Click OK to 30 fax numbers for the group. A new entry box appears. e Type in the list. b Click the next empty line in a contact name.
User's Guide
Page 113
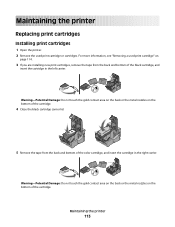
... cartridge. Maintaining the printer Replacing print cartridges Installing print cartridges 1 Open the printer. 2 Remove the used print cartridge" on page 114. 3 If you are installing new print cartridges, remove the tape from the back and bottom of the color cartridge, and insert the cartridge in the left carrier.
... cartridge. Maintaining the printer Replacing print cartridges Installing print cartridges 1 Open the printer. 2 Remove the used print cartridge" on page 114. 3 If you are installing new print cartridges, remove the tape from the back and bottom of the color cartridge, and insert the cartridge in the left carrier.
User's Guide
Page 114
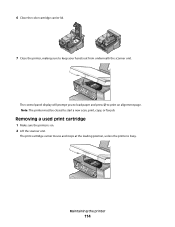
Note: The printer must be closed to keep your hands out from underneath the scanner unit. 6 Close the color cartridge carrier lid. 7 Close the printer, making sure to start a new scan, print, copy, or fax job. Maintaining the printer 114 The print cartridge carrier moves and stops at the loading position, unless the printer is on. 2 Lift the scanner unit. Removing a used print cartridge 1 Make sure the printer is busy. The control panel display will prompt you to load paper and press to print an alignment page.
Note: The printer must be closed to keep your hands out from underneath the scanner unit. 6 Close the color cartridge carrier lid. 7 Close the printer, making sure to start a new scan, print, copy, or fax job. Maintaining the printer 114 The print cartridge carrier moves and stops at the loading position, unless the printer is on. 2 Lift the scanner unit. Removing a used print cartridge 1 Make sure the printer is busy. The control panel display will prompt you to load paper and press to print an alignment page.

User's Guide
Page 115
.... To prevent the message from appearing again for the indicated cartridge(s): • Replace your cartridge(s) with new Lexmark print cartridge(s). • If you purchased a new, genuine Lexmark print cartridge, but the Out of failures or damage caused by non-Lexmark ink or print cartridges. Aligning print cartridges 1 Load plain or heavyweight matte paper. 2 From the...
.... To prevent the message from appearing again for the indicated cartridge(s): • Replace your cartridge(s) with new Lexmark print cartridge(s). • If you purchased a new, genuine Lexmark print cartridge, but the Out of failures or damage caused by non-Lexmark ink or print cartridges. Aligning print cartridges 1 Load plain or heavyweight matte paper. 2 From the...
User's Guide
Page 117
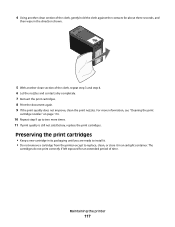
4 Using another clean section of time. Preserving the print cartridges • Keep a new cartridge in its packaging until you are ready to install it. • Do not remove a cartridge from the printer except to two more times. 11 ...
4 Using another clean section of time. Preserving the print cartridges • Keep a new cartridge in its packaging until you are ready to install it. • Do not remove a cartridge from the printer except to two more times. 11 ...

User's Guide
Page 118
... paper exit tray. • Keep the photo cartridge in its own storage unit when not in use. • When a photo cartridge is dry before beginning a new print job. Cleaning the scanner glass 1 Dampen a clean, lint-free cloth with water. Warning-Potential Damage: Do not use household cleaners or detergents, as they...
... paper exit tray. • Keep the photo cartridge in its own storage unit when not in use. • When a photo cartridge is dry before beginning a new print job. Cleaning the scanner glass 1 Dampen a clean, lint-free cloth with water. Warning-Potential Damage: Do not use household cleaners or detergents, as they...

User's Guide
Page 123
... of the following: CHECK MESSAGES If an error message is displayed, see "Power button is successfully installed. CHECK INK Check the ink levels, and install new print cartridges if necessary. 4 Reconnect the power supply to the printer. 5 Plug the power cord into the wall outlet. 6 Press to install the software. Note...
... of the following: CHECK MESSAGES If an error message is displayed, see "Power button is successfully installed. CHECK INK Check the ink levels, and install new print cartridges if necessary. 4 Reconnect the power supply to the printer. 5 Plug the power cord into the wall outlet. 6 Press to install the software. Note...


