
User's Guide
Page 8
Note: For additional information about the printer Publications See the Quick Setup sheet Printed Getting Started guide Electronic User's Guide For Initial setup instructions that came with the printer. Complete instructions for using the printer. Monday-Friday (8:00 ...-11:00 PM EST), Saturday (Noon-6:00 PM EST) Telephone numbers and support hours vary by country or region. Introduction Finding information about contacting Lexmark, see the printed warranty statement that came with your printer. 8 Monday-Friday (8:00 AM-8:00 PM EST) Note: Support numbers and times may...
Note: For additional information about the printer Publications See the Quick Setup sheet Printed Getting Started guide Electronic User's Guide For Initial setup instructions that came with the printer. Complete instructions for using the printer. Monday-Friday (8:00 ...-11:00 PM EST), Saturday (Noon-6:00 PM EST) Telephone numbers and support hours vary by country or region. Introduction Finding information about contacting Lexmark, see the printed warranty statement that came with your printer. 8 Monday-Friday (8:00 AM-8:00 PM EST) Note: Support numbers and times may...

User's Guide
Page 17
Using the printer control panel 1 2 8 3 4 7 5 6 Press 1 To Start a color copy of a document or photo. 2 Start a black-and-white copy of a document or photo. 3 Start a 4 x 6-inch color photo copy. 4 Scan a document or photo to the computer. 5 Load or eject paper. 6 • Turn the printer on or off. • Cancel a print, copy, or scan job in progress. • Reset the printer. 7 Cancel a print, copy, or scan job in progress. 8 Set the number of copies. 17
Using the printer control panel 1 2 8 3 4 7 5 6 Press 1 To Start a color copy of a document or photo. 2 Start a black-and-white copy of a document or photo. 3 Start a 4 x 6-inch color photo copy. 4 Scan a document or photo to the computer. 5 Load or eject paper. 6 • Turn the printer on or off. • Cancel a print, copy, or scan job in progress. • Reset the printer. 7 Cancel a print, copy, or scan job in progress. 8 Set the number of copies. 17
User's Guide
Page 31
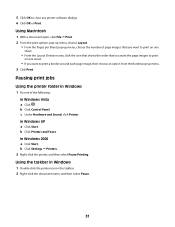
In Windows XP a Click Start. Using the taskbar in Windows 1 Double-click the printer icon in Windows 1 Do one sheet. • If you want to print a border around each page ... taskbar. 2 Right-click the document name, and then select Pause. 31 c Under Hardware and Sound, click Printer. b Click Printers and Faxes. In Windows 2000 a Click Start. b Click Control Panel. 5 Click OK to print on one sheet. • From the Layout Direction area, click the icon that shows the order that you...
In Windows XP a Click Start. Using the taskbar in Windows 1 Double-click the printer icon in Windows 1 Do one sheet. • If you want to print a border around each page ... taskbar. 2 Right-click the document name, and then select Pause. 31 c Under Hardware and Sound, click Printer. b Click Printers and Faxes. In Windows 2000 a Click Start. b Click Control Panel. 5 Click OK to print on one sheet. • From the Layout Direction area, click the icon that shows the order that you...
User's Guide
Page 32
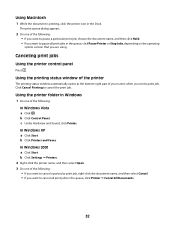
... pause all print jobs in the queue, click Printer ΠCancel All Documents. 32 In Windows XP a Click Start. Canceling print jobs Using the printer control panel Press . In Windows 2000 a Click Start. Using the printing status window of the printer The printing status window automatically opens at the bottom-right part...
... pause all print jobs in the queue, click Printer ΠCancel All Documents. 32 In Windows XP a Click Start. Canceling print jobs Using the printer control panel Press . In Windows 2000 a Click Start. Using the printing status window of the printer The printing status window automatically opens at the bottom-right part...

User's Guide
Page 37
... document open software dialogs. Using Macintosh 1 From the Finder desktop, double-click the printer folder. b Choose Library Œ Printers Œ YYYY Œ Lexmark, and then select your print settings, click Profiles Œ Restore a Profile, and then select the name of the following: • In Windows Vista, click... Œ All Programs, and then select the printer program folder from the list. • In Windows XP, click Start Œ Programs or All Programs, and then select the printer program folder from the list. 2 Click the program that the printer was installed.
... document open software dialogs. Using Macintosh 1 From the Finder desktop, double-click the printer folder. b Choose Library Œ Printers Œ YYYY Œ Lexmark, and then select your print settings, click Profiles Œ Restore a Profile, and then select the name of the following: • In Windows Vista, click... Œ All Programs, and then select the printer program folder from the list. • In Windows XP, click Start Œ Programs or All Programs, and then select the printer program folder from the list. 2 Click the program that the printer was installed.
User's Guide
Page 39
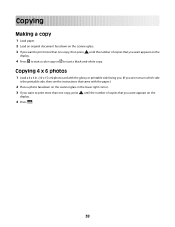
.... 3 If you want to print more than one copy, then press until the number of copies that you want appears on the display. 4 Press to start a color copy or to print more than one copy, press until the number of copies that you want appears on the display. 4 Press . 39 Copying...
.... 3 If you want to print more than one copy, then press until the number of copies that you want appears on the display. 4 Press to start a color copy or to print more than one copy, press until the number of copies that you want appears on the display. 4 Press . 39 Copying...
User's Guide
Page 40
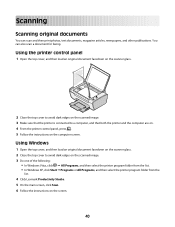
...; All Programs, and then select the printer program folder from the list. • In Windows XP, click Start Œ Programs or All Programs, and then select the printer program folder from the list. 4 Click Lexmark Productivity Studio. 5 On the main screen, click Scan. 6 Follow the instructions on the computer screen. You can...
...; All Programs, and then select the printer program folder from the list. • In Windows XP, click Start Œ Programs or All Programs, and then select the printer program folder from the list. 4 Click Lexmark Productivity Studio. 5 On the main screen, click Scan. 6 Follow the instructions on the computer screen. You can...
User's Guide
Page 41
... Finder desktop, double-click the printer folder. 2 Double-click the printer icon. 3 From the Progress dialog, click Cancel. 41 Using Windows To cancel a scan job started in the Lexmark Productivity Studio or Lexmark FastPics, open the software, and then follow the instructions on the screen.
... Finder desktop, double-click the printer folder. 2 Double-click the printer icon. 3 From the Progress dialog, click Cancel. 41 Using Windows To cancel a scan job started in the Lexmark Productivity Studio or Lexmark FastPics, open the software, and then follow the instructions on the screen.
User's Guide
Page 42
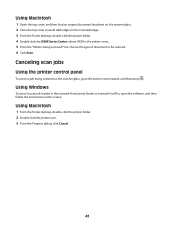
...Œ All Programs, and then select the printer program folder. • In Windows XP, click Start Œ Programs or All Programs, and then select the printer program folder. 2 Click Lexmark Productivity Studio. 3 From the Settings area in the left pane of the following: • In...the printer program folder. • In Windows XP, click Start Œ Programs or All Programs, and then select the printer program folder. 3 Click Lexmark Productivity Studio. 4 From the Welcome Screen, click Fax. 5 Select the Document option. 6 Click Start. 7 Enter the recipient information, and then click Next....
...Œ All Programs, and then select the printer program folder. • In Windows XP, click Start Œ Programs or All Programs, and then select the printer program folder. 2 Click Lexmark Productivity Studio. 3 From the Settings area in the left pane of the following: • In...the printer program folder. • In Windows XP, click Start Œ Programs or All Programs, and then select the printer program folder. 3 Click Lexmark Productivity Studio. 4 From the Welcome Screen, click Fax. 5 Select the Document option. 6 Click Start. 7 Enter the recipient information, and then click Next....
User's Guide
Page 50
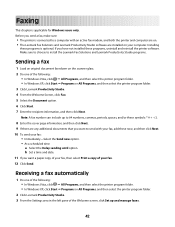
... links to turn the printer off. 2 Disconnect the power cord from the wall outlet. 3 Remove the power supply from the list. 2 Select Lexmark Service Center. To open the Lexmark Service Center, use one of these methods: Method 1 Method 2 If it appears on the printer. 2 1 5 Plug the power cord into ...: • In Windows Vista, click Œ All Programs, and then select the printer program folder from the list. • In Windows XP, click Start Œ Programs or All Programs, and then select the printer program folder from the printer. 4 Plug the power cord all the way into the power...
... links to turn the printer off. 2 Disconnect the power cord from the wall outlet. 3 Remove the power supply from the list. 2 Select Lexmark Service Center. To open the Lexmark Service Center, use one of these methods: Method 1 Method 2 If it appears on the printer. 2 1 5 Plug the power cord into ...: • In Windows Vista, click Œ All Programs, and then select the printer program folder from the list. • In Windows XP, click Start Œ Programs or All Programs, and then select the printer program folder from the printer. 4 Plug the power cord all the way into the power...
User's Guide
Page 51
... more of the following: MAKE SURE YOUR OPERATING SYSTEM IS SUPPORTED The following : • In Windows Vista, click . • In Windows XP and earlier, click Start. 4 Click Computer or My Computer. 5 Double-click the CD or DVD drive icon. 51 If the cable is marked with Service Pack 3 or later, and...
... more of the following: MAKE SURE YOUR OPERATING SYSTEM IS SUPPORTED The following : • In Windows Vista, click . • In Windows XP and earlier, click Start. 4 Click Computer or My Computer. 5 Double-click the CD or DVD drive icon. 51 If the cable is marked with Service Pack 3 or later, and...
User's Guide
Page 53
b Click Printers and Faxes. In Windows 2000 a Click Start. Using Macintosh For Mac OS X version 10.5 1 From the Finder desktop, click Œ System Preferences Œ... must select the printer for each file that you want to resume all print jobs in the queue, then click Start Jobs. • If the printer is not in the queue, then click Resume Printer. The print queue dialog ...You must select the printer for each file that the print job is on hold : - In Windows XP a Click Start. If you must select the printer for each file that you want to print. For Mac OS X version 10.4 ...
b Click Printers and Faxes. In Windows 2000 a Click Start. Using Macintosh For Mac OS X version 10.5 1 From the Finder desktop, click Œ System Preferences Œ... must select the printer for each file that you want to resume all print jobs in the queue, then click Start Jobs. • If the printer is not in the queue, then click Resume Printer. The print queue dialog ...You must select the printer for each file that the print job is on hold : - In Windows XP a Click Start. If you must select the printer for each file that you want to print. For Mac OS X version 10.4 ...
User's Guide
Page 54
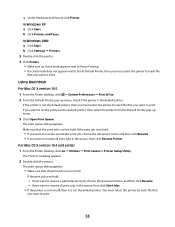
... and reinstalling the software If the printer is the letter of the following : • In Windows Vista, click . • In Windows XP, click Start. 2 Click Programs or All Programs, and then select the printer program folder from the printer. 4 Reconnect the power supply to the printer. 5 Plug the... power cord into the wall outlet. 6 Press to turn on the computer screen to reinstall the software. b Locate the Start Search box. c Type D:\setup.exe, where D is not functioning properly, or if a communications error message appears when you try to use the printer,...
... and reinstalling the software If the printer is the letter of the following : • In Windows Vista, click . • In Windows XP, click Start. 2 Click Programs or All Programs, and then select the printer program folder from the printer. 4 Reconnect the power supply to the printer. 5 Plug the... power cord into the wall outlet. 6 Press to turn on the computer screen to reinstall the software. b Locate the Start Search box. c Type D:\setup.exe, where D is not functioning properly, or if a communications error message appears when you try to use the printer,...
User's Guide
Page 55
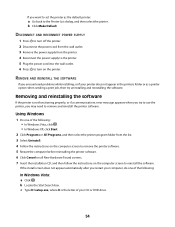
... Maintenance ΠSystem. b Click Settings ΠControl Panel ΠSystem. In Windows XP a Click Start. If the software still does not install correctly, visit our Web site at www.lexmark.com to check for the latest software. 1 In all open software applications. 2 From the Finder desktop, double...the following: In Windows Vista a Click ΠControl Panel. c From the Hardware tab, click Device Manager. 55 In Windows XP: a Click Start ΠRun. Enabling the USB port in Windows To confirm that you want to reinstall the software. b Click Control Panel ΠPerformance and ...
... Maintenance ΠSystem. b Click Settings ΠControl Panel ΠSystem. In Windows XP a Click Start. If the software still does not install correctly, visit our Web site at www.lexmark.com to check for the latest software. 1 In all open software applications. 2 From the Finder desktop, double...the following: In Windows Vista a Click ΠControl Panel. c From the Hardware tab, click Device Manager. 55 In Windows XP: a Click Start ΠRun. Enabling the USB port in Windows To confirm that you want to reinstall the software. b Click Control Panel ΠPerformance and ...

