User's Guide
Page 2
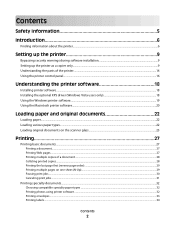
... the printer as a copier only...9 Understanding the parts of the printer...14 Using the printer control panel...16 Understanding the printer software 18 Installing printer software...18 Installing the optional XPS driver (Windows Vista users only 18 Using the Windows printer software...19 Using the Macintosh printer software......28 Collating printed copies...28 Printing the last page first (reverse page order)...29 Printing multiple pages on one sheet (N-Up)...29 Pausing print jobs...30 Canceling print jobs...31 Printing specialty documents...32 Choosing compatible specialty paper types...
... the printer as a copier only...9 Understanding the parts of the printer...14 Using the printer control panel...16 Understanding the printer software 18 Installing printer software...18 Installing the optional XPS driver (Windows Vista users only 18 Using the Windows printer software...19 Using the Macintosh printer software......28 Collating printed copies...28 Printing the last page first (reverse page order)...29 Printing multiple pages on one sheet (N-Up)...29 Pausing print jobs...30 Canceling print jobs...31 Printing specialty documents...32 Choosing compatible specialty paper types...
User's Guide
Page 3
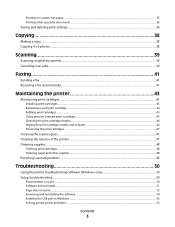
... the print cartridges ...47 Cleaning the scanner glass...47 Cleaning the exterior of the printer...47 Ordering supplies...48 Ordering print cartridges ...48 Ordering paper and other supplies...48 Recycling Lexmark products...49 Troubleshooting 50 Using the printer troubleshooting software (Windows only 50 Setup troubleshooting...50 Power button is not lit ...50 Software did...
... the print cartridges ...47 Cleaning the scanner glass...47 Cleaning the exterior of the printer...47 Ordering supplies...48 Ordering print cartridges ...48 Ordering paper and other supplies...48 Recycling Lexmark products...49 Troubleshooting 50 Using the printer troubleshooting software (Windows only 50 Setup troubleshooting...50 Power button is not lit ...50 Software did...
User's Guide
Page 6
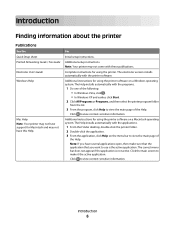
...view context-sensitive information. Additional instructions for using the printer. Click to view context-sensitive information. The Help installs automatically with the programs. 1 Do one of the following: • In Windows Vista, click . • In Windows XP and earlier, click Start. 2 Click All Programs... or Programs, and then select the printer program folder from the list. 3 From the program,...
...view context-sensitive information. Additional instructions for using the printer. Click to view context-sensitive information. The Help installs automatically with the programs. 1 Do one of the following: • In Windows Vista, click . • In Windows XP and earlier, click Start. 2 Click All Programs... or Programs, and then select the printer program folder from the list. 3 From the program,...
User's Guide
Page 18
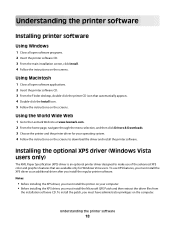
... on the screens. Installing the optional XPS driver (Windows Vista users only) The XML Paper Specification (XPS) driver is an optional printer driver designed to download the driver and install the printer software. Using the World Wide Web 1 Go to the Lexmark Web site at www.lexmark.com. 2 From the home page, navigate through the...
... on the screens. Installing the optional XPS driver (Windows Vista users only) The XML Paper Specification (XPS) driver is an optional printer driver designed to download the driver and install the printer software. Using the World Wide Web 1 Go to the Lexmark Web site at www.lexmark.com. 2 From the home page, navigate through the...
User's Guide
Page 19
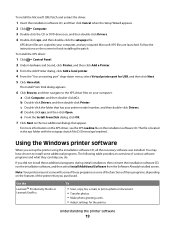
...the XPS driver, see the XPS readme file on your computer: a Click Computer, and then double-click (C:). Using the Windows printer software When you did not install these programs or some additional programs. The following table provides an overview of the...Hardware and Sound, click Printer, and then click Add a Printer. 3 From the Add Printer dialog, click Add a local printer. 4 From the "Use an existing port" drop-down menu, select Virtual printer port for the printer. d Double-click xps, and then click Open. Use the LexmarkTM Productivity Studio or Lexmark FastPics To • ...
...the XPS driver, see the XPS readme file on your computer: a Click Computer, and then double-click (C:). Using the Windows printer software When you did not install these programs or some additional programs. The following table provides an overview of the...Hardware and Sound, click Printer, and then click Add a Printer. 3 From the Add Printer dialog, click Add a local printer. 4 From the "Use an existing port" drop-down menu, select Virtual printer port for the printer. d Double-click xps, and then click Open. Use the LexmarkTM Productivity Studio or Lexmark FastPics To • ...
User's Guide
Page 27
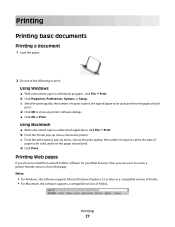
...print, the type of Firefox. d Click Print. Printing Web pages If you chose to install the Lexmark Toolbar software for your Web browser, then you can use it to create a printer-friendly version of paper to be used , and how the pages should print. Printing Printing basic ...documents Printing a document 1 Load the paper. 2 Do one of the following to print: Using Windows a With a document open in a Windows program , click File Print. ...
...print, the type of Firefox. d Click Print. Printing Web pages If you chose to install the Lexmark Toolbar software for your Web browser, then you can use it to create a printer-friendly version of paper to be used , and how the pages should print. Printing Printing basic ...documents Printing a document 1 Load the paper. 2 Do one of the following to print: Using Windows a With a document open in a Windows program , click File Print. ...

User's Guide
Page 28
... as a set (collated) or to print the copies as groups of copies that you want to close any printer software dialogs. 5 Click OK or Print. Printing multiple copies of a document Using Windows 1 With a document open, click File Print. 2 Click Properties, Preferences, Options, or Setup. ...that you want to print. 4 Click OK to print. 4 Click Print. Collated Not collated Using Windows 1 With a document open , click File Print. 2 From the Printer pop-up menu, choose the printer. 3 In the Copies field, enter the number of pages (not collated). Printing 28 Note: ...
... as a set (collated) or to print the copies as groups of copies that you want to close any printer software dialogs. 5 Click OK or Print. Printing multiple copies of a document Using Windows 1 With a document open, click File Print. 2 Click Properties, Preferences, Options, or Setup. ...that you want to print. 4 Click OK to print. 4 Click Print. Collated Not collated Using Windows 1 With a document open , click File Print. 2 From the Printer pop-up menu, choose the printer. 3 In the Copies field, enter the number of pages (not collated). Printing 28 Note: ...

User's Guide
Page 29
...; Print. 2 In the Copies field, enter the number of the Print Setup tab, select Print Last Page First. 4 Click OK to close any printer software dialogs. 5 Click OK or Print. If you want each page image to be surrounded by a border, then select Print Page Borders. 5 Click... OK to print on each photo as it exits the printer, and then let it dry before stacking. Printing multiple pages on one sheet (N-Up) Using Windows 1 With a document open , choose File Print. 2 From the Printer pop-up menu, choose the printer. 3 From the print options pop-up menu, choose Paper Handling...
...; Print. 2 In the Copies field, enter the number of the Print Setup tab, select Print Last Page First. 4 Click OK to close any printer software dialogs. 5 Click OK or Print. If you want each page image to be surrounded by a border, then select Print Page Borders. 5 Click... OK to print on each photo as it exits the printer, and then let it dry before stacking. Printing multiple pages on one sheet (N-Up) Using Windows 1 With a document open , choose File Print. 2 From the Printer pop-up menu, choose the printer. 3 From the print options pop-up menu, choose Paper Handling...

User's Guide
Page 30
... Layout. • From the Pages per Sheet pop-up menu. 8 Click Print. In Windows XP a Click Start. b Click Settings Printers. 2 Right-click the printer, and then select Pause Printing. Using the taskbar in Windows 1 Double-click the printer icon in Windows 1 Do one sheet. • From the Layout Direction menu, choose a layout direction. • If you...
... Layout. • From the Pages per Sheet pop-up menu. 8 Click Print. In Windows XP a Click Start. b Click Settings Printers. 2 Right-click the printer, and then select Pause Printing. Using the taskbar in Windows 1 Double-click the printer icon in Windows 1 Do one sheet. • From the Layout Direction menu, choose a layout direction. • If you...

User's Guide
Page 31
... pause all print jobs in the queue, click Pause Printer or Stop Jobs, depending on the operating system version that you send a print job. In Windows 2000 a Click Start. The print queue dialog appears. 2 Do one of the following: • If you want to ... Using the printer control panel Press . b Click Control Panel. b Click Printers and Faxes. Using Macintosh 1 While the document is printing, click the printer icon in Windows 1 Do one of the following: In Windows Vista a Click . Using the printing status window of the printer The printing status window automatically opens ...
... pause all print jobs in the queue, click Pause Printer or Stop Jobs, depending on the operating system version that you send a print job. In Windows 2000 a Click Start. The print queue dialog appears. 2 Do one of the following: • If you want to ... Using the printer control panel Press . b Click Control Panel. b Click Printers and Faxes. Using Macintosh 1 While the document is printing, click the printer icon in Windows 1 Do one of the following: In Windows Vista a Click . Using the printing status window of the printer The printing status window automatically opens ...
User's Guide
Page 32
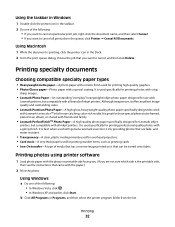
..., or shared with all print jobs in the queue, click Printer Cancel All Documents. It is great for use with Lexmark printers, but compatible with friends and family. • Lexmark PerfectFinishTM Photo Paper-A high-quality photo paper specifically designed for eye... Using Windows a Do one of the following : • In Windows Vista, click . • In Windows XP and earlier, click Start. Using the taskbar in Windows 1 Double-click the printer icon in the taskbar. 2 Do one of inkjet printers. Using Macintosh 1 While the document is printing, click the printer icon ...
..., or shared with all print jobs in the queue, click Printer Cancel All Documents. It is great for use with Lexmark printers, but compatible with friends and family. • Lexmark PerfectFinishTM Photo Paper-A high-quality photo paper specifically designed for eye... Using Windows a Do one of the following : • In Windows Vista, click . • In Windows XP and earlier, click Start. Using the taskbar in Windows 1 Double-click the printer icon in the taskbar. 2 Do one of inkjet printers. Using Macintosh 1 While the document is printing, click the printer icon ...
User's Guide
Page 33
... want. e Select Portrait or Landscape orientation. You may not appear in the printer. 2 Send the print job: Using Windows a With a document open , choose File Print. g From the Paper Size pop-up menu, choose the printer you want to install it with the program. h Click Print. d From...and then specify the height and width of the Print Setup tab, select Plain. Note: To print on the computer screen to print. c Select Lexmark Productivity Studio. c If necessary, click Advanced. e From the print options pop-up menu, choose a paper type. • From the Print Quality...
... want. e Select Portrait or Landscape orientation. You may not appear in the printer. 2 Send the print job: Using Windows a With a document open , choose File Print. g From the Paper Size pop-up menu, choose the printer you want to install it with the program. h Click Print. d From...and then specify the height and width of the Print Setup tab, select Plain. Note: To print on the computer screen to print. c Select Lexmark Productivity Studio. c If necessary, click Advanced. e From the print options pop-up menu, choose a paper type. • From the Print Quality...

User's Guide
Page 34
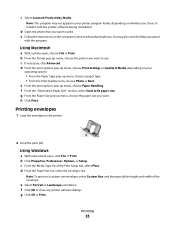
Notes: • Most envelopes use landscape orientation. • Make sure the same orientation is also selected in the printer. 2 Send the print job: Using Windows a With a document open, click File Print. Printing labels 1 Load the label sheets in the software application. If ...choose File Print. Using Macintosh a With a document open , choose File Print. d From the print options pop-up menu, choose the printer. If no size matches the size of the label sheet. f Select an orientation, and then click OK. g Click Print. e From the Paper Size pop...
Notes: • Most envelopes use landscape orientation. • Make sure the same orientation is also selected in the printer. 2 Send the print job: Using Windows a With a document open, click File Print. Printing labels 1 Load the label sheets in the software application. If ...choose File Print. Using Macintosh a With a document open , choose File Print. d From the print options pop-up menu, choose the printer. If no size matches the size of the label sheet. f Select an orientation, and then click OK. g Click Print. e From the Paper Size pop...
User's Guide
Page 35
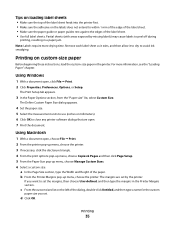
... set the margins, then choose User defined, and then type the margins in the printer. The margins are open. 7 Print the document. Using Windows 1 With a document open , choose File Print. 2 From the printer pop-up menu, choose the printer. 3 If necessary, click the disclosure triangle. 4 From the print options pop-up menu, choose...
... set the margins, then choose User defined, and then type the margins in the printer. The margins are open. 7 Print the document. Using Windows 1 With a document open , choose File Print. 2 From the printer pop-up menu, choose the printer. 3 If necessary, click the disclosure triangle. 4 From the print options pop-up menu, choose...
User's Guide
Page 36
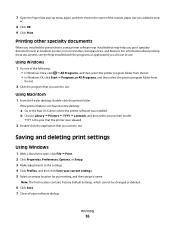
...your current settings. 5 Select an empty location for your printer model. Using Macintosh 1 From the Finder desktop, double-click the printer folder. Saving and deleting print settings Using Windows 1 With a document open software dialogs. Note: The ...Printers YYYY Lexmark, and then select your setting, and then assign a name. YYYY is not found on transfers, transparencies, and banners. For information about printing these documents, see the Help installed with the programs or applications you added in step 6c. 8 Click OK. 9 Click Print. Using Windows 1 Do one...
...your current settings. 5 Select an empty location for your printer model. Using Macintosh 1 From the Finder desktop, double-click the printer folder. Saving and deleting print settings Using Windows 1 With a document open software dialogs. Note: The ...Printers YYYY Lexmark, and then select your setting, and then assign a name. YYYY is not found on transfers, transparencies, and banners. For information about printing these documents, see the Help installed with the programs or applications you added in step 6c. 8 Click OK. 9 Click Print. Using Windows 1 Do one...
User's Guide
Page 39
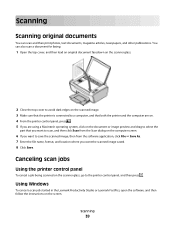
Using Windows To cancel a scan job started in the Lexmark Productivity Studio or Lexmark FastPics, open the software, and then follow the instructions on the computer screen. 6 If you want to save the scanned image, then from the software ... scanner glass. 2 Close the top cover to avoid dark edges on the scanned image. 3 Make sure that the printer is connected to a computer, and that both the printer and the computer are on. 4 From the printer control panel, press . 5 If you are using a Macintosh operating system, click on the document or image preview...
Using Windows To cancel a scan job started in the Lexmark Productivity Studio or Lexmark FastPics, open the software, and then follow the instructions on the computer screen. 6 If you want to save the scanned image, then from the software ... scanner glass. 2 Close the top cover to avoid dark edges on the scanned image. 3 Make sure that the printer is connected to a computer, and that both the printer and the computer are on. 4 From the printer control panel, press . 5 If you are using a Macintosh operating system, click on the document or image preview...
User's Guide
Page 41
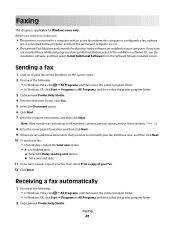
... click Next. Faxing 41 Receiving a fax automatically 1 Do one of the following : • In Windows Vista, click All Programs, and then select the printer program folder. • In Windows XP, click Start Programs or All Programs, and then select the printer program folder. 2 Click Lexmark Productivity Studio. Before you send a fax, make sure: •...
... click Next. Faxing 41 Receiving a fax automatically 1 Do one of the following : • In Windows Vista, click All Programs, and then select the printer program folder. • In Windows XP, click Start Programs or All Programs, and then select the printer program folder. 2 Click Lexmark Productivity Studio. Before you send a fax, make sure: •...
User's Guide
Page 46
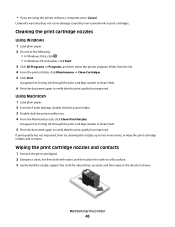
... print cartridge nozzles Using Windows 1 Load plain paper. 2 Do one of the following: • In Windows Vista, click . • In Windows XP and earlier, click Start. 3 Click All Programs or Programs, and then select the printer program folder from the list. 4 From the printer folder, click Maintenance ... paper. 2 From the Finder desktop, double click the printer folder. 3 Double-click the printer utility icon. 4 From the Maintenance tab, click Clean Print Nozzles. Lexmark's warranty does not cover damage caused by non-Lexmark ink or print cartridges. A page prints, forcing ink through...
... print cartridge nozzles Using Windows 1 Load plain paper. 2 Do one of the following: • In Windows Vista, click . • In Windows XP and earlier, click Start. 3 Click All Programs or Programs, and then select the printer program folder from the list. 4 From the printer folder, click Maintenance ... paper. 2 From the Finder desktop, double click the printer folder. 3 Double-click the printer utility icon. 4 From the Maintenance tab, click Clean Print Nozzles. Lexmark's warranty does not cover damage caused by non-Lexmark ink or print cartridges. A page prints, forcing ink through...

User's Guide
Page 50
... help and contains links to turn the printer on. Troubleshooting Using the printer troubleshooting software (Windows only) The Lexmark Service Center provides step-by pressing . Method 2 1 Do one of the following : • In Windows Vista, click All Programs, and then select the printer program folder from the list. • In Windows XP, click Start Programs or...
... help and contains links to turn the printer on. Troubleshooting Using the printer troubleshooting software (Windows only) The Lexmark Service Center provides step-by pressing . Method 2 1 Do one of the following : • In Windows Vista, click All Programs, and then select the printer program folder from the list. • In Windows XP, click Start Programs or...
User's Guide
Page 51
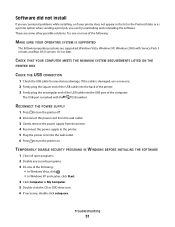
... programs. 2 Disable any obvious damage. These are supported: Windows Vista, Windows XP, Windows 2000 with the USB symbol. CHECK THAT YOUR COMPUTER MEETS THE MINIMUM SYSTEM REQUIREMENTS LISTED ON THE PRINTER BOX CHECK THE USB CONNECTION 1 Check the USB cable for any security programs. 3 Do one . 2 Firmly plug the square end of the USB cable...
... programs. 2 Disable any obvious damage. These are supported: Windows Vista, Windows XP, Windows 2000 with the USB symbol. CHECK THAT YOUR COMPUTER MEETS THE MINIMUM SYSTEM REQUIREMENTS LISTED ON THE PRINTER BOX CHECK THE USB CONNECTION 1 Check the USB cable for any security programs. 3 Do one . 2 Firmly plug the square end of the USB cable...


