
User's Guide
Page 8
... CD. Menu Paper Menu Reports Settings Paper Menu Default Source Paper Size/Type Configure MP Envelope Enhance Substitute Size Paper Texture Paper Weight Paper Loading Custom Types Universal Setup Bin Setup Reports Menu Settings Page Device Statistics Network Setup Page Network Setup Page Profiles List NetWare Setup Page Print Fonts Print Directory Settings Setup Menu Finishing Menu Quality Menu Utilities Menu PDF Menu PostScript Menu PCL Emul Menu HTML Menu Image Menu Network/Ports IPv6 TCP/IP Standard Network Network Standard USB USB Parallel Parallel Serial NetWare AppleTalk...
... CD. Menu Paper Menu Reports Settings Paper Menu Default Source Paper Size/Type Configure MP Envelope Enhance Substitute Size Paper Texture Paper Weight Paper Loading Custom Types Universal Setup Bin Setup Reports Menu Settings Page Device Statistics Network Setup Page Network Setup Page Profiles List NetWare Setup Page Print Fonts Print Directory Settings Setup Menu Finishing Menu Quality Menu Utilities Menu PDF Menu PostScript Menu PCL Emul Menu HTML Menu Image Menu Network/Ports IPv6 TCP/IP Standard Network Network Standard USB USB Parallel Parallel Serial NetWare AppleTalk...

User's Guide
Page 11
... Lexmark Web site at www.lexmark.com. The procedure to install drivers depends on the operating system used by the computer to be created and appear in downloadable software packages on the computer before connecting the USB cable. 1 Insert the drivers CD. For additional help, see the documentation that shipped with the printer to find driver installation instructions for local printing 11 Drivers are also available in the Printers folder. Using Windows Server 2003, Windows 2000, Windows...
... Lexmark Web site at www.lexmark.com. The procedure to install drivers depends on the operating system used by the computer to be created and appear in downloadable software packages on the computer before connecting the USB cable. 1 Insert the drivers CD. For additional help, see the documentation that shipped with the printer to find driver installation instructions for local printing 11 Drivers are also available in the Printers folder. Using Windows Server 2003, Windows 2000, Windows...
User's Guide
Page 12
...-ROM drive. 7 Click OK. The Plug and Play screen appears, and a printer object is the default installation for the drivers to the following: D:\Drivers\Print\Win_9xMe\ Where D is the letter of your computer. Note: Some Windows operating systems require administrative access to the Add Printer Wizard. 3 Click Start Æ Settings Æ Printers, and double-click Add Printer. Windows 12 Installing drivers for Windows NT. It may take some time for local and network-attached setup.
...-ROM drive. 7 Click OK. The Plug and Play screen appears, and a printer object is the default installation for the drivers to the following: D:\Drivers\Print\Win_9xMe\ Where D is the letter of your computer. Note: Some Windows operating systems require administrative access to the Add Printer Wizard. 3 Click Start Æ Settings Æ Printers, and double-click Add Printer. Windows 12 Installing drivers for Windows NT. It may take some time for local and network-attached setup.

User's Guide
Page 13
... the printer. 3 Press until Menu Settings Page appears, and then press . a Press on the operator panel. 2 Press until Reports appears, and then press . Note the following restrictions: • Maximum baud rate supported is 115,200. • Data Bits must be set to 7 or 8. • Parity must be set to 2. • Flow Control recommended protocol setting is installed) heading to Serial or Serial x. 10 Print a Menu Settings page, and verify the serial parameters...
... the printer. 3 Press until Menu Settings Page appears, and then press . a Press on the operator panel. 2 Press until Reports appears, and then press . Note the following restrictions: • Maximum baud rate supported is 115,200. • Data Bits must be set to 7 or 8. • Parity must be set to 2. • Flow Control recommended protocol setting is installed) heading to Serial or Serial x. 10 Print a Menu Settings page, and verify the serial parameters...
User's Guide
Page 14
... Print Test Page. Installing drivers for the printer settings under the Serial Standard (or Serial Option X) heading on the computer that is connected to the printer. b Select the newly added printer. Note: Windows 95 and Windows 98 (first edition) users should launch automatically. If the test page does not print, see your operating system Help. The serial parameters in the communications port must be installed on the previously printed Menu Settings page. 6 Click OK, and close all the windows. 7 Print a test page...
... Print Test Page. Installing drivers for the printer settings under the Serial Standard (or Serial Option X) heading on the computer that is connected to the printer. b Select the newly added printer. Note: Windows 95 and Windows 98 (first edition) users should launch automatically. If the test page does not print, see your operating system Help. The serial parameters in the communications port must be installed on the previously printed Menu Settings page. 6 Click OK, and close all the windows. 7 Print a test page...

User's Guide
Page 17
... the network cable may be malfunctioning. Installing drivers for a solution, and print another network setup page to verify the printer is connected to use the operator panel: 1 Press on the operator panel. 2 Press until Network/Ports appears, and then press . 3 Press until Netmask appears, and then press . 7 Using the numeric pad, enter the IP netmask. Note: If an optional MarkNet™ N8000 series internal print server is installed, Print Net1 Setup appears on the display. 5 Check...
... the network cable may be malfunctioning. Installing drivers for a solution, and print another network setup page to verify the printer is connected to use the operator panel: 1 Press on the operator panel. 2 Press until Network/Ports appears, and then press . 3 Press until Netmask appears, and then press . 7 Using the numeric pad, enter the IP netmask. Note: If an optional MarkNet™ N8000 series internal print server is installed, Print Net1 Setup appears on the display. 5 Check...
User's Guide
Page 18
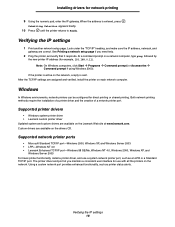
... settings 1 Print another network setup page. The printer driver and port let you need help. 2 Ping the printer, and verify that it responds. Windows In Windows environments, network printers can be configured for network printing 9 Using the numeric pad, enter the IP gateway. Supported network printer ports • Microsoft Standard TCP/IP port-Windows 2000, Windows XP, and Windows Server 2003 • LPR-Windows NT 4.0 • Lexmark Enhanced TCP/IP port-Windows 98 SE/Me, Windows NT 4.0, Windows 2000, Windows XP, and Windows Server 2003 For basic printer...
... settings 1 Print another network setup page. The printer driver and port let you need help. 2 Ping the printer, and verify that it responds. Windows In Windows environments, network printers can be configured for network printing 9 Using the numeric pad, enter the IP gateway. Supported network printer ports • Microsoft Standard TCP/IP port-Windows 2000, Windows XP, and Windows Server 2003 • LPR-Windows NT 4.0 • Lexmark Enhanced TCP/IP port-Windows 98 SE/Me, Windows NT 4.0, Windows 2000, Windows XP, and Windows Server 2003 For basic printer...

User's Guide
Page 20
... a server), follow the instructions on the network. Clients c Click Agree to verify printer installation. 2 Share the printer on the screen. Note: If files are missing, prompts may take some time for the drivers to configure the network printer for network printing Shared printing using Windows NT 4.0, Windows 2000, Windows XP, or Windows Server 2003 Note: Install the printer software before connecting the USB, parallel, or serial cable. Installing drivers for shared printing: Server Printer 1 Install a custom printer driver. a Launch the drivers CD. h Print a test page to...
... a server), follow the instructions on the network. Clients c Click Agree to verify printer installation. 2 Share the printer on the screen. Note: If files are missing, prompts may take some time for the drivers to configure the network printer for network printing Shared printing using Windows NT 4.0, Windows 2000, Windows XP, or Windows Server 2003 Note: Install the printer software before connecting the USB, parallel, or serial cable. Installing drivers for shared printing: Server Printer 1 Install a custom printer driver. a Launch the drivers CD. h Print a test page to...
User's Guide
Page 36
... dialog. Print settings selected from the driver override the default settings selected from the initial Print dialog to printing a held job. Printing a document from a USB flash memory device A USB Direct interface is similar to see our Lexmark Web site at http:// support.lexmark.com, and click KnowledgeBase to search for the specific job you want to print. 2 From the File menu, select Print. 3 Select the correct printer in the printer driver window, open the online Help for more information. Sending a job to print A printer driver is software that...
... dialog. Print settings selected from the driver override the default settings selected from the initial Print dialog to printing a held job. Printing a document from a USB flash memory device A USB Direct interface is similar to see our Lexmark Web site at http:// support.lexmark.com, and click KnowledgeBase to search for the specific job you want to print. 2 From the File menu, select Print. 3 Select the correct printer in the printer driver window, open the online Help for more information. Sending a job to print A printer driver is software that...
User's Guide
Page 39
.... 1 Make sure the printer is on. 2 Press on the operator panel. 3 Press until the appears next to Reports, and then press . 4 Press until the appears next to cancel. 4 Press Delete. The printer returns to Ready after the page prints. Printing the menu settings page You can print a menu settings page to review the default printer settings and to verify the printer options are printing to. 3 In the printer window, select the print job you send a job to Network Setup Page or Network Setup Page...
.... 1 Make sure the printer is on. 2 Press on the operator panel. 3 Press until the appears next to Reports, and then press . 4 Press until the appears next to cancel. 4 Press Delete. The printer returns to Ready after the page prints. Printing the menu settings page You can print a menu settings page to review the default printer settings and to verify the printer options are printing to. 3 In the printer window, select the print job you send a job to Network Setup Page or Network Setup Page...
User's Guide
Page 43
...; Page Setup. Select the size of the specialty media from the Paper pop-up menu, and then click OK. d Select the tray containing the specialty media. Click Print. See Loading standard trays and optional trays for help . 2 From the printer operator panel, set the paper type, size, and source according to the media you loaded. Select the size of the specialty media from the Paper pop-up menu, and then click OK. Printing on ) from the Paper Type list box. e f g Mac...
...; Page Setup. Select the size of the specialty media from the Paper pop-up menu, and then click OK. d Select the tray containing the specialty media. Click Print. See Loading standard trays and optional trays for help . 2 From the printer operator panel, set the paper type, size, and source according to the media you loaded. Select the size of the specialty media from the Paper pop-up menu, and then click OK. Printing on ) from the Paper Type list box. e f g Mac...
User's Guide
Page 71
... 1 mm (0.04 in the envelope feeder. • A combination of the most difficult print media for use label sheets with laser printers. All printer models require a special fuser cleaner for information on the leading and driver edge, and a non-oozing adhesive should be able to Heavy or set the Paper Size/Type from the printer operator panel, the printer driver, the Local Printer Setup Utility, or from MarkVision. • Feed vinyl labels from peeling inside...
... 1 mm (0.04 in the envelope feeder. • A combination of the most difficult print media for use label sheets with laser printers. All printer models require a special fuser cleaner for information on the leading and driver edge, and a non-oozing adhesive should be able to Heavy or set the Paper Size/Type from the printer operator panel, the printer driver, the Local Printer Setup Utility, or from MarkVision. • Feed vinyl labels from peeling inside...

User's Guide
Page 75
... page images on one sheet of paper (16 images on the front and 16 on one side of a sheet. Maintaining the printer Determining the status of supplies The printer operator panel alerts you once a supply item or maintenance is available when you install an optional duplex unit. You can also view the status of supplies in your application software or on a sheet of paper. Supply Toner Print media Menu selection item Toner Darkness in the Settings...
... page images on one sheet of paper (16 images on the front and 16 on one side of a sheet. Maintaining the printer Determining the status of supplies The printer operator panel alerts you once a supply item or maintenance is available when you install an optional duplex unit. You can also view the status of supplies in your application software or on a sheet of paper. Supply Toner Print media Menu selection item Toner Darkness in the Settings...
User's Guide
Page 78
... maintenance information, see When Staples Low or Staples Empty appears on printed pages. Use part number 11K3188 to optimize feeding reliability. Order Lexmark part number 40X0127. Ordering a label fuser cleaner A special label fuser cleaner should be performed by an authorized service technician. Ordering staple cartridges Staple cartridges hold 3,000 staples. If Staple Alarm is sounded, the printer stops printing, and the Load staples message appears. When ordering pick rollers, you need one set to Lexmark...
... maintenance information, see When Staples Low or Staples Empty appears on printed pages. Use part number 11K3188 to optimize feeding reliability. Order Lexmark part number 40X0127. Ordering a label fuser cleaner A special label fuser cleaner should be performed by an authorized service technician. Ordering staple cartridges Staple cartridges hold 3,000 staples. If Staple Alarm is sounded, the printer stops printing, and the Load staples message appears. When ordering pick rollers, you need one set to Lexmark...
User's Guide
Page 103
..., print server, option, or other network device. Region codes are non-recoverable. Once you receive the following message, see the Menus and Messages book on the publications CD. 10 Troubleshooting Understanding printer messages The printer displays three types of the printer. Status messages provide information about printer messages, see Ordering a print cartridge. However the printer will stop printing and the errors are : 0 = Worldwide 1 = Americas 2 = EMEA 3 = Asia 9 = Undefined Online technical support Technical support is securely attached to printer problems that...
..., print server, option, or other network device. Region codes are non-recoverable. Once you receive the following message, see the Menus and Messages book on the publications CD. 10 Troubleshooting Understanding printer messages The printer displays three types of the printer. Status messages provide information about printer messages, see Ordering a print cartridge. However the printer will stop printing and the errors are : 0 = Worldwide 1 = Americas 2 = EMEA 3 = Asia 9 = Undefined Online technical support Technical support is securely attached to printer problems that...

User's Guide
Page 104
... are using a USB device. Press to return the printer to receive data. The Print dialog appears. 3 Check the Print as image box. 4 Click OK. Jobs do not The documents contain print. Only specific USB flash memory devices are supported. Load paper in Adobe Acrobat. 2 Click the printer icon. Printing multi-language PDFs 104 Make sure Ready or Power Saver appears on KnowledgeBase to print. See the drivers CD or the Lexmark Web site for Direct USB printing. The specified output bin Remove the...
... are using a USB device. Press to return the printer to receive data. The Print dialog appears. 3 Check the Print as image box. 4 Click OK. Jobs do not The documents contain print. Only specific USB flash memory devices are supported. Load paper in Adobe Acrobat. 2 Click the printer icon. Printing multi-language PDFs 104 Make sure Ready or Power Saver appears on KnowledgeBase to print. See the drivers CD or the Lexmark Web site for Direct USB printing. The specified output bin Remove the...
User's Guide
Page 106
..., and turn the printer on the menu settings page, but print media jams when it enters or exits the duplex unit, the printer and duplex unit may not be properly aligned. • Make sure the duplex front access cover is securely installed. • Make sure the connection between the envelope feeder and the printer is secure. • Make sure the Paper Size setting is correct in both the Paper Menu and in the software application. • Make sure the envelopes are loaded correctly. Reinstall...
..., and turn the printer on the menu settings page, but print media jams when it enters or exits the duplex unit, the printer and duplex unit may not be properly aligned. • Make sure the duplex front access cover is securely installed. • Make sure the connection between the envelope feeder and the printer is secure. • Make sure the Paper Size setting is correct in both the Paper Menu and in the software application. • Make sure the envelopes are loaded correctly. Reinstall...

User's Guide
Page 121
... option with Lexmark user's guides, manuals, instructions or guidance. • Unsuitable physical or operating environment • Maintenance by a third party, supplies or parts • Products, supplies, parts, materials (such as shown on the World Wide Web at Lexmark's option). You are substantially consumed when the printer displays a "Life Warning" or "Scheduled Maintenance" message for warranty service, remove all print cartridges, programs, data, and removable storage media (unless directed otherwise by a Lexmark warranty, technical support may...
... option with Lexmark user's guides, manuals, instructions or guidance. • Unsuitable physical or operating environment • Maintenance by a third party, supplies or parts • Products, supplies, parts, materials (such as shown on the World Wide Web at Lexmark's option). You are substantially consumed when the printer displays a "Life Warning" or "Scheduled Maintenance" message for warranty service, remove all print cartridges, programs, data, and removable storage media (unless directed otherwise by a Lexmark warranty, technical support may...
User's Guide
Page 124
... printer 74 ordering a print cartridge 76 maintenance staple cartridge 78 maximum sheets for stapling 106 maximum stack height 50 Menu button 9 models 6 multipurpose feeder closing 52 guidelines 48 icons 48 print media loading 50 transparencies 49 N NetWare 24 network setup page 17 notice, edition 2 O operator panel 17 brightness 96 contrast 96 disabling menus 96 enabling menus 97 ordering, print cartridge 76 P paper characteristics 69 supported media 60 understanding 60 unsatisfactory 69 weight 69 paper tray adjustment 44, 45 paper...
... printer 74 ordering a print cartridge 76 maintenance staple cartridge 78 maximum sheets for stapling 106 maximum stack height 50 Menu button 9 models 6 multipurpose feeder closing 52 guidelines 48 icons 48 print media loading 50 transparencies 49 N NetWare 24 network setup page 17 notice, edition 2 O operator panel 17 brightness 96 contrast 96 disabling menus 96 enabling menus 97 ordering, print cartridge 76 P paper characteristics 69 supported media 60 understanding 60 unsatisfactory 69 weight 69 paper tray adjustment 44, 45 paper...

Quick Reference
Page 2
... of the media. 7 Set the Paper Size and Paper Type for Direct USB printing. 1 Make sure the printer is located on the operator panel so you want to printing a held job 1 With the file open, select File Print. 2 Click Properties. (If there is selected in the tray. • Load paper or transparencies with the left . Printing a document from a USB flash memory device is similar to print, and then press . Printing a confidential or held job. A list of copies). The end of the envelope with...
... of the media. 7 Set the Paper Size and Paper Type for Direct USB printing. 1 Make sure the printer is located on the operator panel so you want to printing a held job 1 With the file open, select File Print. 2 Click Properties. (If there is selected in the tray. • Load paper or transparencies with the left . Printing a document from a USB flash memory device is similar to print, and then press . Printing a confidential or held job. A list of copies). The end of the envelope with...


