Setup Guide
Page 4
... repairs, other than those described in conjunction with diamond design are periodically made at private expense. This means the printer recognizes PostScript 3 commands used instead. Federal Communications Commission (FCC) compliance information statement The Lexmark T430 complies with the PostScript 3 language. Operation is subject to the following paragraph does not apply to any existing...
... repairs, other than those described in conjunction with diamond design are periodically made at private expense. This means the printer recognizes PostScript 3 commands used instead. Federal Communications Commission (FCC) compliance information statement The Lexmark T430 complies with the PostScript 3 language. Operation is subject to the following paragraph does not apply to any existing...

Setup Guide
Page 5
Contents Introduction vi About the printer vi Other sources of information viii Step 1: Choose your setup (local or network printer) . . . . 1 Local printer 1 Network printer 1 Step 2: Install drivers for local printing 2 Windows 2 Macintosh 4 UNIX/Linux 7 Step 3: Unpack the printer 8 Step 4: Set up the printer and options 9 Positioning the optional drawer 9 Positioning the printer 11 Raising the paper rest 12 Attaching an operator panel overlay 12 Step 5: Install the print cartridge 13 Removing the packaging 13 Installing the print cartridge 15 Contents iii
Contents Introduction vi About the printer vi Other sources of information viii Step 1: Choose your setup (local or network printer) . . . . 1 Local printer 1 Network printer 1 Step 2: Install drivers for local printing 2 Windows 2 Macintosh 4 UNIX/Linux 7 Step 3: Unpack the printer 8 Step 4: Set up the printer and options 9 Positioning the optional drawer 9 Positioning the printer 11 Raising the paper rest 12 Attaching an operator panel overlay 12 Step 5: Install the print cartridge 13 Removing the packaging 13 Installing the print cartridge 15 Contents iii

Setup Guide
Page 6
...multipurpose feeder 26 Step 8: Attach cables 29 Attaching a local cable 29 Attaching a network cable 30 Attaching the power cord 31 Step 9: Verify printer setup 32 Printing a menu settings page 33 Printing a network setup page 33 Printing a local test page 34 Printing Quick Reference information 34 Step ...10: Configure for TCP/IP 35 Assigning a printer IP address 35 Verifying the IP settings 36 Step 11: Install drivers for network printing 37 Windows 37 Macintosh 42 UNIX/Linux 46 ...
...multipurpose feeder 26 Step 8: Attach cables 29 Attaching a local cable 29 Attaching a network cable 30 Attaching the power cord 31 Step 9: Verify printer setup 32 Printing a menu settings page 33 Printing a network setup page 33 Printing a local test page 34 Printing Quick Reference information 34 Step ...10: Configure for TCP/IP 35 Assigning a printer IP address 35 Verifying the IP settings 36 Step 11: Install drivers for network printing 37 Windows 37 Macintosh 42 UNIX/Linux 46 ...

Setup Guide
Page 8
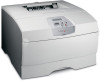
Introduction About the printer Your printer is available in two models: Standard memory Resolution Paper inputs Duplex capabilities Connectivity Lexmark™ T430d Lexmark T430dn 32MB 64MB Up to 1200 dpi One 250-sheet tray Yes (internal duplex unit) • USB • Parallel... • USB • Parallel • 10/100 Base-TX Ethernet You can purchase optional drawers and memory cards. (1) Printer 1 (2) ...
Introduction About the printer Your printer is available in two models: Standard memory Resolution Paper inputs Duplex capabilities Connectivity Lexmark™ T430d Lexmark T430dn 32MB 64MB Up to 1200 dpi One 250-sheet tray Yes (internal duplex unit) • USB • Parallel... • USB • Parallel • 10/100 Base-TX Ethernet You can purchase optional drawers and memory cards. (1) Printer 1 (2) ...

Setup Guide
Page 9
(1) Front paper support 1 6 (2) Upper front door (3) Operator panel 2 (4) Multipurpose feeder door (5) 250-sheet tray (Tray 1) 3 (6) Standard output bin (7) Power button 7 (8) Handhold (9) Rear output bin 4 The printer also has an internal duplex unit. 5 8 9 1 Menu 2 Select 3 Return 4 The operator panel has a 2-line by 16character liquid crystal display (LCD), five buttons, and one indicator light that flashes when the printer is processing a job indicated by the Busy message. Go 5 Stop 6 Introduction vii
(1) Front paper support 1 6 (2) Upper front door (3) Operator panel 2 (4) Multipurpose feeder door (5) 250-sheet tray (Tray 1) 3 (6) Standard output bin (7) Power button 7 (8) Handhold (9) Rear output bin 4 The printer also has an internal duplex unit. 5 8 9 1 Menu 2 Select 3 Return 4 The operator panel has a 2-line by 16character liquid crystal display (LCD), five buttons, and one indicator light that flashes when the printer is processing a job indicated by the Busy message. Go 5 Stop 6 Introduction vii
Setup Guide
Page 10
Other sources of information Lexmark T430 Publications CD Quick Reference card Quick Reference pages Drivers CD Lexmark Web site If you need more information after you have completed setup, refer to other printer documentation. It also provides general information for updated printer drivers, utilities, and other printer documentation. Introduction viii The publications CD provides information about loading...
Other sources of information Lexmark T430 Publications CD Quick Reference card Quick Reference pages Drivers CD Lexmark Web site If you need more information after you have completed setup, refer to other printer documentation. It also provides general information for updated printer drivers, utilities, and other printer documentation. Introduction viii The publications CD provides information about loading...
Setup Guide
Page 11
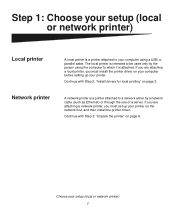
... or parallel cable. If you are attaching a local printer, you must install the printer driver on the network first, and then install the printer driver. Step 1: Choose your setup (local or network printer) Local printer Network printer A local printer is a printer attached to your setup (local or network printer) 1 The local printer is intended to which it is attached. Continue...
... or parallel cable. If you are attaching a local printer, you must install the printer driver on the network first, and then install the printer driver. Step 1: Choose your setup (local or network printer) Local printer Network printer A local printer is a printer attached to your setup (local or network printer) 1 The local printer is intended to which it is attached. Continue...
Setup Guide
Page 12
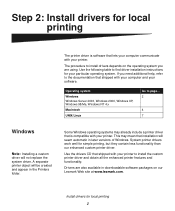
... your software. Use the drivers CD that installation will seem automatic in downloadable software packages on our Lexmark Web site at www.lexmark.com. The procedure to the documentation that lets your computer communicate with your printer. If you need additional help, refer to install drivers depends on the operating system you are...
... your software. Use the drivers CD that installation will seem automatic in downloadable software packages on our Lexmark Web site at www.lexmark.com. The procedure to the documentation that lets your computer communicate with your printer. If you need additional help, refer to install drivers depends on the operating system you are...

Setup Guide
Page 13
...CD does not auto launch, click Start Æ Run, and then type D:\Setup.exe in the Run dialog box. 2 Click Install Software. 3 Click Printer and Software. 4 Click Agree to page... What do I do next? If you need to install utilities, change settings, or customize device drivers, select ... instructions on your screen. 6 Select Local Attached, and then click Finish. 7 Select the port you 8 are using to connect the printer to set up the printer. Using Windows Server 2003, Windows 2000, Windows XP, and Windows 98/Me, and Windows NT Note: USB support is the default installation...
...CD does not auto launch, click Start Æ Run, and then type D:\Setup.exe in the Run dialog box. 2 Click Install Software. 3 Click Printer and Software. 4 Click Agree to page... What do I do next? If you need to install utilities, change settings, or customize device drivers, select ... instructions on your screen. 6 Select Local Attached, and then click Finish. 7 Select the port you 8 are using to connect the printer to set up the printer. Using Windows Server 2003, Windows 2000, Windows XP, and Windows 98/Me, and Windows NT Note: USB support is the default installation...
Setup Guide
Page 14
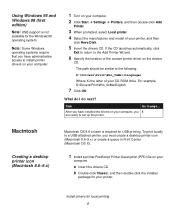
... example, D:\Drivers\Print\Win_9xMe\English. 7 Click OK. Note: Some Windows operating systems require that you 8 are ready to install printer drivers on your computer. 1 Turn on your CD-ROM drive. If the CD launches automatically, click Exit to return to the following...95 operating system. a Insert the drivers CD. Task Go to a USB-attached printer, you must create a desktop printer icon (Macintosh 8.6-9.x) or create a queue in Print Center (Macintosh OS X). 1 Install a printer PostScript Printer Description (PPD) file on the drivers CD. Install drivers for your computer. To...
... example, D:\Drivers\Print\Win_9xMe\English. 7 Click OK. Note: Some Windows operating systems require that you 8 are ready to install printer drivers on your computer. 1 Turn on your CD-ROM drive. If the CD launches automatically, click Exit to return to the following...95 operating system. a Insert the drivers CD. Task Go to a USB-attached printer, you must create a desktop printer icon (Macintosh 8.6-9.x) or create a queue in Print Center (Macintosh OS X). 1 Install a printer PostScript Printer Description (PPD) file on the drivers CD. Install drivers for your computer. To...

Setup Guide
Page 15
...and then click Utilities. 3 Double-click Desktop Printer Utility. 4 Select Printer (USB), and then click OK. 5 In the USB Printer Selection section, click Change. What do I ...printer is also available in the original Printer (USB) window. 7 In the PostScript Printer Description (PPD) File section, click Auto Setup. Your printer appears in a downloadable software package on your printer...printer to set up the printer. If your printer does not appear in the USB Printer Selection list, make sure the USB cable is properly connected and the printer is now saved as a desktop printer...
...and then click Utilities. 3 Double-click Desktop Printer Utility. 4 Select Printer (USB), and then click OK. 5 In the USB Printer Selection section, click Change. What do I ...printer is also available in the original Printer (USB) window. 7 In the PostScript Printer Description (PPD) File section, click Auto Setup. Your printer appears in a downloadable software package on your printer...printer to set up the printer. If your printer does not appear in the USB Printer Selection list, make sure the USB cable is properly connected and the printer is now saved as a desktop printer...

Setup Guide
Page 16
... 8 are installed on your Macintosh computer. h On the Easy Install screen, click Install. If your USB-attached printer does not appear in a downloadable software package on our Lexmark Web site at www.lexmark.com. 1 Install a printer PostScript Printer Description (PPD) file on your password, and then click OK. d Enter your computer. g Select a Destination, and then...
... 8 are installed on your Macintosh computer. h On the Easy Install screen, click Install. If your USB-attached printer does not appear in a downloadable software package on our Lexmark Web site at www.lexmark.com. 1 Install a printer PostScript Printer Description (PPD) file on your password, and then click OK. d Enter your computer. g Select a Destination, and then...

Setup Guide
Page 17
... Red Hat. Task Go to Sun Ray appliances and Sun workstations. Install drivers for installing and using a parallel connection. All the printer driver packages support local printing using Lexmark printers in UNIX and Linux environments. The Sun Solaris and Linux packages are ready to set up the... printer. The driver package for a complete list of supported UNIX and Linux platforms. What do I do next? UNIX/Linux Local printing is ...
... Red Hat. Task Go to Sun Ray appliances and Sun workstations. Install drivers for installing and using a parallel connection. All the printer driver packages support local printing using Lexmark printers in UNIX and Linux environments. The Sun Solaris and Linux packages are ready to set up the... printer. The driver package for a complete list of supported UNIX and Linux platforms. What do I do next? UNIX/Linux Local printing is ...

Setup Guide
Page 18
... the carton and packing material in .) clearance on the right side of the printer for the trays, cover, and doors. Step 3: Unpack the printer Warning: Allow at http://support.lexmark.com. Unpack the printer 8 Print cartridge (shipped inside printer, wrapped in packaging) (2) Power cord (3) Operator panel overlay (non-English only) (4) Setup Guide with a publications CD...
... the carton and packing material in .) clearance on the right side of the printer for the trays, cover, and doors. Step 3: Unpack the printer Warning: Allow at http://support.lexmark.com. Unpack the printer 8 Print cartridge (shipped inside printer, wrapped in packaging) (2) Power cord (3) Operator panel overlay (non-English only) (4) Setup Guide with a publications CD...

Setup Guide
Page 19
... not support the addition of two 500-sheet drawers. the 500-sheet drawer must be set up in the following configurations: (1) Base printer (2) One 250-sheet drawer (3) One 500-sheet drawer (4) Two 250-sheet drawers (5) One 250-sheet drawer and one 500-sheet drawer; Each optional ...of a support unit and a tray. Set up to turn the printer off, unplug the power cord, and disconnect all cables from the back of the printer before completing these tasks. 1 2 The printer supports up the printer and options 9 Note: The base printer's 250-sheet tray is an optional 250-sheet drawer and an ...
... not support the addition of two 500-sheet drawers. the 500-sheet drawer must be set up in the following configurations: (1) Base printer (2) One 250-sheet drawer (3) One 500-sheet drawer (4) Two 250-sheet drawers (5) One 250-sheet drawer and one 500-sheet drawer; Each optional ...of a support unit and a tray. Set up to turn the printer off, unplug the power cord, and disconnect all cables from the back of the printer before completing these tasks. 1 2 The printer supports up the printer and options 9 Note: The base printer's 250-sheet tray is an optional 250-sheet drawer and an ...

Setup Guide
Page 20
To add an optional drawer: 1 Remove all packing material and tape from the tray. 3 Grasp the support unit on each side at opposite corners and move it fully into the support unit. Set up the printer and options 10 Push it to the location selected for the printer. 4 Reinstall the tray. Remove any packing material and tape from the support unit. 2 Pull the tray out of the support unit.
To add an optional drawer: 1 Remove all packing material and tape from the tray. 3 Grasp the support unit on each side at opposite corners and move it fully into the support unit. Set up the printer and options 10 Push it to the location selected for the printer. 4 Reinstall the tray. Remove any packing material and tape from the support unit. 2 Pull the tray out of the support unit.

Setup Guide
Page 21
Make sure it on the left side of the printer. 2 Lower the printer into place. To position the printer on an optional drawer: 1 Align the tabs, slots, and connector on the drawer. Connector Slot Set up the printer and options 11 Tab Handhold Once you have selected a location and positioned an optional drawer ...(if you are ready to install, leave clearance on the table or optional drawer. Lift the printer by the recessed handholds on both sides, and place it is seated securely on the drawer with the underside of the...
Make sure it on the left side of the printer. 2 Lower the printer into place. To position the printer on an optional drawer: 1 Align the tabs, slots, and connector on the drawer. Connector Slot Set up the printer and options 11 Tab Handhold Once you have selected a location and positioned an optional drawer ...(if you are ready to install, leave clearance on the table or optional drawer. Lift the printer by the recessed handholds on both sides, and place it is seated securely on the drawer with the underside of the...

Setup Guide
Page 22
... paper rest towards the front of the output bin. Attaching an operator panel overlay Plastic cover If English is not your preferred language and your printer shipped with an operator panel overlay, attach the overlay with the lights and buttons on the operator panel, and then set the overlay in place.... 5 Align the holes in the new overlay with translated text: 1 Open the upper front door. 2 Remove the clear plastic cover from sliding out of the printer to raise it.
... paper rest towards the front of the output bin. Attaching an operator panel overlay Plastic cover If English is not your preferred language and your printer shipped with an operator panel overlay, attach the overlay with the lights and buttons on the operator panel, and then set the overlay in place.... 5 Align the holes in the new overlay with translated text: 1 Open the upper front door. 2 Remove the clear plastic cover from sliding out of the printer to raise it.

Setup Guide
Page 25
b Align the tabs on each side of the cartridge with the slots on both sides, or the printer will not function properly. c Slide the cartridge into the printer until it to distribute the toner. 2 Install the print cartridge: a Grasp the print cartridge by the handle and gently shake it snaps into place. 3 Close the upper front door. Make sure the door snaps closed on each side of the printer. Slots Install the print cartridge 15 Installing the print cartridge 1 Hold the print cartridge by the handle.
b Align the tabs on each side of the cartridge with the slots on both sides, or the printer will not function properly. c Slide the cartridge into the printer until it to distribute the toner. 2 Install the print cartridge: a Grasp the print cartridge by the handle and gently shake it snaps into place. 3 Close the upper front door. Make sure the door snaps closed on each side of the printer. Slots Install the print cartridge 15 Installing the print cartridge 1 Hold the print cartridge by the handle.

Setup Guide
Page 26
... support up to Step 7: "Load paper" on page 22. The system board has one printer memory connector and two firmware card connectors. The instructions in this step and go to 256MB of flash memory. If you do ... board shield. Additional functionality - Internet capabilities - Step 6: Install printer memory or firmware cards Note: Memory options designed for other Lexmark printers may not work with your printer. Note: You need a small Phillips screwdriver to 32MB of additional printer memory and up the printer, turn the printer off and unplug the power cord before continuing.
... support up to Step 7: "Load paper" on page 22. The system board has one printer memory connector and two firmware card connectors. The instructions in this step and go to 256MB of flash memory. If you do ... board shield. Additional functionality - Internet capabilities - Step 6: Install printer memory or firmware cards Note: Memory options designed for other Lexmark printers may not work with your printer. Note: You need a small Phillips screwdriver to 32MB of additional printer memory and up the printer, turn the printer off and unplug the power cord before continuing.


