User's Guide for Windows
Page 3
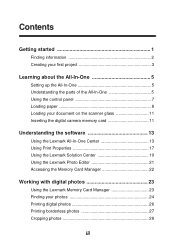
... the control panel 7 Loading paper 8 Loading your document on the scanner glass 11 Inserting the digital camera memory card 11 Understanding the software 13 Using the Lexmark All-In-One Center 13 Using Print Properties 17 Using the Lexmark Solution Center 19 Using the Lexmark Photo Editor 21 Accessing the Memory Card Manager 22 Working with...
... the control panel 7 Loading paper 8 Loading your document on the scanner glass 11 Inserting the digital camera memory card 11 Understanding the software 13 Using the Lexmark All-In-One Center 13 Using Print Properties 17 Using the Lexmark Solution Center 19 Using the Lexmark Photo Editor 21 Accessing the Memory Card Manager 22 Working with...
User's Guide for Windows
Page 39
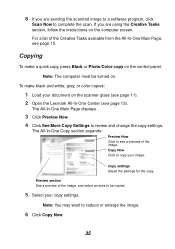
... change the copy settings. Copy Now Click to copy your copy settings. To make a quick copy, press Black or Photo/Color copy on the scanner glass (see page 11). 2 Open the Lexmark All-In-One Center (see a preview of the Creative Tasks available from the All-In-One Main Page, see page... or enlarge the image. 6 Click Copy Now. 35 Copy settings Adjust the settings for the copy. 8 If you are sending the scanned image to a software program, click Scan Now to complete the scan. Note: The computer must be copied. 5 Select your image. If you are using the Creative Tasks section...
... change the copy settings. Copy Now Click to copy your copy settings. To make a quick copy, press Black or Photo/Color copy on the scanner glass (see page 11). 2 Open the Lexmark All-In-One Center (see a preview of the Creative Tasks available from the All-In-One Main Page, see page... or enlarge the image. 6 Click Copy Now. 35 Copy settings Adjust the settings for the copy. 8 If you are sending the scanned image to a software program, click Scan Now to complete the scan. Note: The computer must be copied. 5 Select your image. If you are using the Creative Tasks section...


